Beef and onions

Slow cooker season

Cards on the table: I hate coming home from a busy day and knowing I have to walk into the kitchen at 7 pm, cook a full meal, and then clean up. Don’t get me wrong; I love cooking. It gives me joy to create a beautiful and healthy. After a 10-hour day at work, an hour commute home, and a heavy workout, cooking is not much joy; it is a chore. I’m usually borderline hangry at the end of a long day, and I want my food as fast as possible. 

This is where having a slow cooker comes into its own. I know that I can walk in and find a meal that is cooked, hot, and ready to serve. That means food is served as soon as I want it, not 30 to 60 minutes later.

Beef and onions on a bed of cauliflower rice
Beef and onions

Putting the slow cooker on the counter

It has been getting a bit cold in the mornings and evenings here in the southern hemisphere, and the cost of salad is going through the roof. Yes, it means winter is upon us. It also means that the slow cooker is coming out of the cupboard and taking up residence on the kitchen counter again. My slow cooker is my favourite kitchen appliance when the weather cools down. To celebrate the slow cooker taking its place on the countertop, I decided to make brisket and onions. 

A little bit of effort, a lot of reward

This slow-cooker meal isn’t a dump-and-go recipe; it requires some prep work, but it is worth the effort. Making a bed of caramelised onions for the brisket to sit on in the slow cooker gives the meat an extra level of flavour that kicks ass and takes names. The bone broth helps to make a rich sauce that can easily be turned into a gravy. If you want to kick things up on the comfort-food front, whisk a tablespoon of tapioca flour into a small amount of the bone broth, then return it to the slow cooker and mix well. I love combining my brisket and onions with cauliflower rice, but it also goes well with mashed sweet potatoes or cauliflower mash. 

Sear in the flavour

I spent some time experimenting with this recipe to create a deeper flavour; I finally landed on the seared meat to make this recipe extra special. The extra step of searing the meat adds a beautiful caramelised flavour to the meat and, more importantly, to the gravy. 

Brisket and onions Recipe

Ingredients

Beef and onions ingredients
  • 1 tbsp. olive oil
  • 4 onion, sliced
  • 1.5kg beef roast
  • 6 cloves garlic, minced
  • 2 cups beef bone broth
  • 2 tbsp. Worcestershire sauce
  • 1 tbsp. coconut aminos
  • Salt and pepper

Instructions

slice the onions
slice the onions

In a large frying pan, heat the olive oil over a medium heat.

In a large frying pan, heat the olive oil over a medium heat.
Add the sliced onions to the pan and let them cook for about 15 minutes
Be sure to stir the onion now and then
Be sure to stir the onion now and then.

Add the onions to the pan and let them cook for about 15 minutes, stirring them now and then.

When the onions are caramelised, spread them on the bottom of your slow cooker.

When the onions are caramelised, spread them out on the bottom of your slow cooker.

Return the frying pan to the heat.

Season the brisket before searing it in the pan where the onions were cooked.

Season the beef well.
Sear the beef in the pan the onions were cooked in.

When the meat is browned, place it on top of the onions in the slow cooker.

Sear the beef on all slides.
When the meat is browned all over, place it on top of the onions in the slow cooker.

Put half of the onions on top of the brisket.

Pour the Worcestershire sauce, coconut aminos and broth over the meat.

Pour the Worcestershire sauce, coconut aminos and broth over the meat.
Cook the beef on a low heat setting for 6 to 8 hours.

Cook the brisket on low heat for 6 to 8 hours. 

The meat should pull apart with a fork.

Let the meat rest for 20 minutes before serving.

Use two forks to pull the brisket apart and mix it well with the onions and cooking juices.

Serve on a bed of cauliflower rice.

Beef and onions

  • Servings: 10
  • Rating: ★★★★★
  • Print

This slow cooker meal is one of my favourites and delivers so much flavour.


Credit: Cath @ easycleaneats

Ingredients

  • 1 tbsp. olive oil
  • 4 onion, sliced
  • 1.5kg beef brisket
  • 6 cloves garlic, minced
  • 2 cups beef bone broth
  • 2 tbsp. Worcestershire sauce
  • 1 tbsp. coconut aminos
  • Salt and pepper

Directions

  1. In a large frying pan, heat the olive oil over medium heat.
  2. Add the onions to the pan and let them cook for about 15 minutes, stirring them now and then.
  3. When the onions are caramelised, spread them on the bottom of your slow cooker.
  4. Return the frying pan to the heat.
  5. Season the brisket before searing it in the pan where the onions were cooked.
  6. When the meat is browned, place it on top of the onions in the slow cooker.
  7. Put half of the onions on top of the brisket.
  8. Pour the Worcestershire sauce, coconut aminos and broth over the meat.
  9. Cook the brisket on low heat for 6 to 8 hours.
  10. The meat should pull apart with a fork.
  11. Let the meat rest for 20 minutes before serving.
  12. Use two forks to pull the brisket apart and mix it well with the onions and cooking juices.
  13. Serve on a bed of cauliflower rice.

Nutrition

Per Serving: 259 calories; 8 g fat; 6 g carbohydrates; 38 g protein

Equipment

  • Knife
  • Chopping board
  • Measuring jug
  • Measuring spoons
  • Frying pan
  • Wooden spoon
  • Tongs
  • Whisk

Nutritional disclaimer

Nutrition information is provided as an estimate based on the ingredients used and available in my area (New Zealand). The nutritional information is here to help you understand the recipe; I use MyFitnessPal to generate my estimates. For more accurate nutritional information, please use a nutritional calculator with the ingredients in your area.

Italian roast chicken

Something fancy

It’s been a busy few weeks; I’ve been keeping my meals simple and relying on freezer staples while operating in survival mode. I have a little bit of breathing room now and an intense craving for something fancier for dinner.

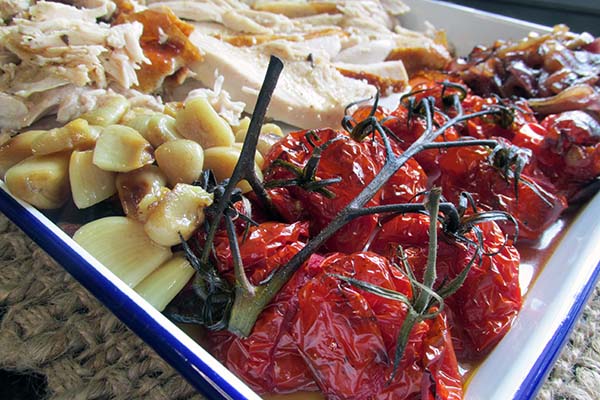
Italian roast chicken tray

Fancy but easily

In my book, fancy doesn’t have to mean spending hours in the kitchen boiling to death over a hot stove. This recipe delivers a very fancy meal with minimal effort; it is all cooked on a single tray, which makes it perfect.

The roasted garlic is the star of this meal for me. The bed of garlic under the chicken means you get great flavour throughout the meat, while the roast garlic cloves have a deep, rich flavour that complements the rest of the dish.

The quick prep and hands-off cooking mean you can get on with other things and come back to a perfectly roasted chicken that can satisfy any desire for a fancy dinner. 

Dinner ready without effort

While living in survival mode, I try to make life easier for myself by multitasking so that life admin and essential tasks don’t take away from much-needed rest and relaxation. In the spirit of multitasking, I combined a trip home from the office with a pit stop at the supermarket to get everything I needed for my fancy dinner and did the prep (putting everything on a tray) while I waited for the kettle to boil. Knowing I would be ready for dinner after my workout, I smashed dinner in the oven before heading downstairs to throw around some weights. By the time I finished my workout, the chicken was ready for the foil and baking paper to be removed, and there was plenty of time for me to shower before sitting down to a flavourful, filling and fancy dinner.

Italian roast chicken recipe

Italian roast chicken ingredients

Ingredients 

  • 2 large tomatoes thickly sliced
  • 250g cherry tomatoes
  • 1 red onion thinly sliced
  • 1 garlic bulb peeled and bruised
  • 1/3 cup flat-leaf parsley chopped
  • 1/3 cup red wine vinegar
  • 1/4 cup olive oil
  • 3 sprigs rosemary
  • 1.6 kg chicken
Large chicken

Take a large baking tray.

Take a large baking tray.

Place one garlic bulb on the baking tray.

Place one garlic bulb on the baking tray.

Lay the chicken on top of the garlic.

Lay the chicken on top of the garlic.

Spread out the onion next to the chicken.

Spread out the onion next to the chicken.

Add the remaining garlic bulbs on top of the onions.

Add the remaining garlic bulbs on top of the onions.

Add the tomatoes on top of the garlic.

Add the tomatoes on top of the garlic.

Drizzle the vinegar and olive oil over the chicken and vegetables.

Drizzle the vinegar and olive oil over the chicken and vegetables.

Place the rosemary sprigs on top of the chicken and the vegetables.

Cover the baking tray with baking paper.

Cover the baking tray with baking paper.

Cover the baking paper with foil.

Cover the baking paper with foil.

Bake for 1 hour.

Check the chicken to make sure the meat is cooked and the juices are running clear before removing the baking paper and foil, this will depend on the size of the chicken.

Check the chicken to make sure the meat is cooked and the juices are running clear

Return the chicken to the oven uncovered for another 20 minutes or until the skin is golden brown.

Return the chicken to the oven uncovered for another 20 minutes

Slice the chicken, squeeze out the garlic and serve while hot.

Slice the chicken, squeeze out the garlic and serve while hot.

Italian roast chicken

  • Servings: 6
  • Rating: ★★★★★
  • Print

This one tray meal a great option for busy week nights or an action packed weekend.


Credit: Cath @ easycleaneats

Ingredients

  • 2 tomatoes thickly sliced
  • 250g cherry tomatoes
  • 1 red onion thinly sliced
  • 1 garlic bulb peeled and bruised
  • 1/3 cup flat leaf parsley chopped
  • 1/3 cup red wine vinegar
  • 1/4 cup olive oil
  • 3 sprigs rosemary
  • 1.6 kg chicken

Directions

  1. Preheat the oven to 200 degrees C/ 400 degrees F.  
  2. Take a large baking tray.
  3. Place one garlic bulb on the baking tray.
  4. Lay the chicken on top of the garlic.
  5. Spread out the onion next to the chicken.
  6. Add the remaining garlic bulbs on top of the onions.
  7. Add the tomatoes on top of the garlic.
  8. Drizzle the vinegar and olive oil over the chicken and vegetables.
  9. Place the rosemary sprigs on top of the chicken and the vegetables.
  10. Cover the baking tray with baking paper.
  11. Cover the baking paper with foil.
  12. Bake for 1 hour.
  13. Check the chicken to make sure the meat is cooked and the juices are running clear before removing the baking paper and foil, this will depend on the size of the chicken.
  14. Return the chicken to the oven uncovered for another 20 minutes or until the skin is golden brown.
  15. Slice the chicken, squeeze out the garlic and serve while hot.

Nutrition

Per Serving: 349 calories; 14 g fat; 9 g carbohydrates; 53 g protein

Equipment

  • Roasting tin
  • Baking paper 
  • Aluminium foil
  • Measuring cups
  • Scales 

Nutritional disclaimer

Nutrition information is provided as an estimate based on the ingredients used and available in my area (New Zealand). The nutritional information is here to help you understand the recipe; I use MyFitnessPal to generate my estimates. For more accurate nutritional information, please use a nutritional calculator with the ingredients in your area.


Chicken Caesar salad

Master the basics

Eating clean gets a lot easier once you have mastered a few essential recipes. This recipe is basic; not like basic unicorn basic, more like beard and flannel basic. Back to the point (which isn’t Unstable unicorns), having basic skills and recipes in your arsenal means you will never be left with only Uber Eats as your weeknight options. Once you master this recipe, the possibilities are endless.

Always make friends with salad

In my book, salad is something to get excited about; it is an amazingly fresh meal full of endless possibilities, not limp lettuce, sad dressing and soggy tomatoes. I’m one of those strange people who could happily eat salad for every meal. There was a time when proposing a salad for dinner would lead to groans, but not anymore. I can eat salad as much as I like and make it a star attraction on my plate.

Protein maxed classic

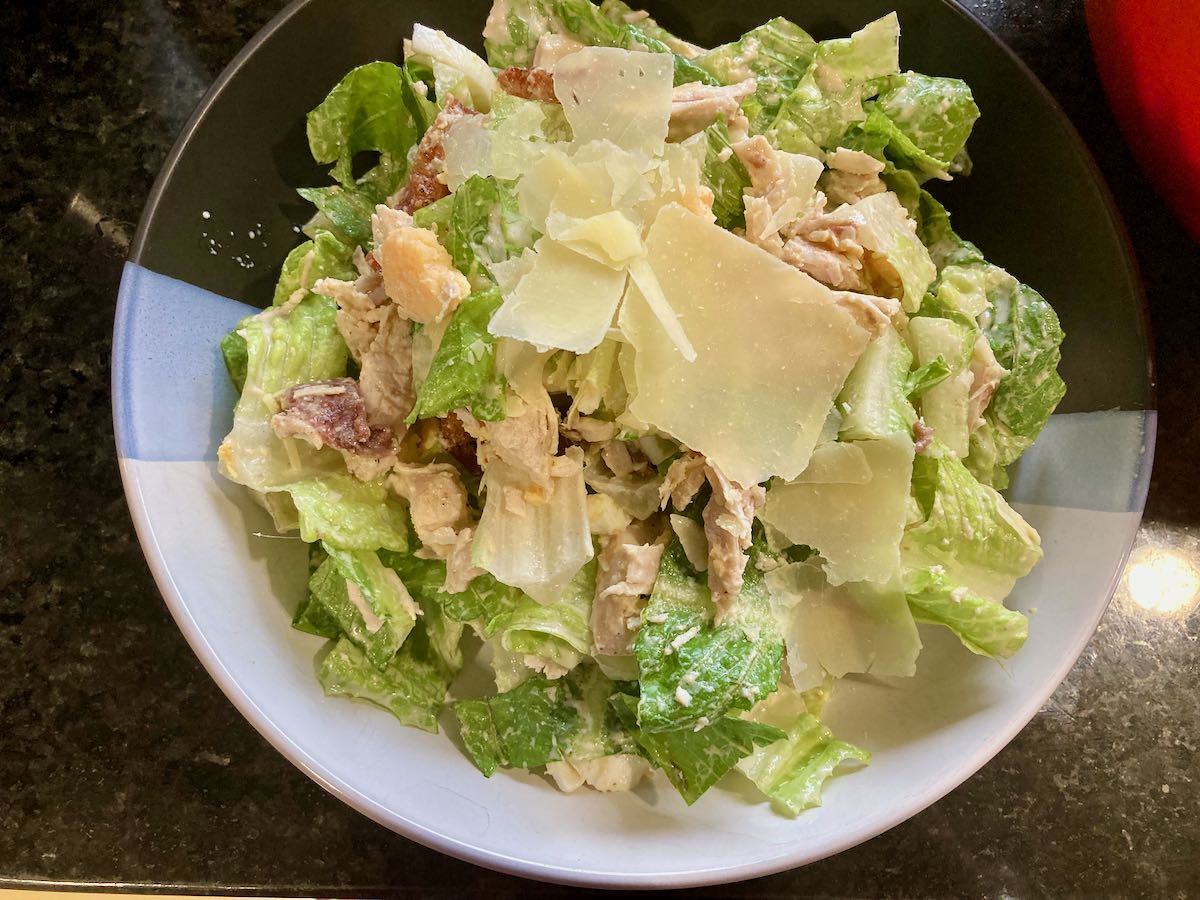
I try my best to pack in protein at every meal, which isn’t always easy with a salad. I love a good Caesar and think adding some chicken is a great way to boost protein without taking away from the salad’s flavour. This is my take on the classic Caesar salad. It is portioned for one person, but can easily be increased to feed more people. If you are using this recipe for meal prep, make the salad and keep the dressing on the side to add just before eating. This will prevent the salad from becoming soggy.

Chicken Caesar salad recipe

Ingredients

  • 200g chicken breast, cooked
  • 1 egg, hard-boiled
  • 2 pieces streaky bacon, cooked
  • 100g cos lettuce leaves, chopped into 4 pieces
  • Shaved parmesan cheese
  • 2 tbsp. Caesar salad dressing
  • Rating: ★★★★★
  • Print


Credit: Cath @ easycleaneats

Ingredients

  • 200g chicken breast, cooked
  • 1 egg, hard-boiled
  • 2 pieces streaky bacon, cooked
  • 100g cos lettuce leaves, chopped into 4 pieces
  • Shaved parmesan cheese
  • 2 tbsp. Caesar salad dressing
  • 2 anchovy fillets – optional

Directions

  1. Place the cos lettuce into a bowl or onto a platter.
  2. Slice the egg, chicken and bacon and layer them on top of the lettuce.
  3. Drizzle the Caesar dressing over the top.
  4. Mix gently to cover the cos
  5. Add the shaved parmesan cheese and anchovies before serving.

Nutrition

Per Serving: 244 calories; 10.5 g fat; 3.3 g carbohydrates; 30.3 g protein

Equipment

  • Knife
  • Chopping board
  • Mixing bowl or platter 
  • Scales

Nutritional disclaimer

Nutrition information is provided as an estimate based on the ingredients used and available in my area (New Zealand). The nutritional information is here to help you understand the recipe; I use MyFitnessPal to generate my estimates. For more accurate nutritional information, please use a nutritional calculator with the ingredients in your area.


Broccoli chicken salad

Trying to meet everyone’s needs

For years, I spent a lot of time trying to make everyone happy with the meals I put on the table, but it was never easy. For many years, I had to work around a very limited list of foods that everyone would eat, and then there were the silly requirements, like not wanting cold food unless it had a sauce on it, or anything with any spice at all. For a long time, I would spend hours in the kitchen making multiple meals to keep everyone happy; it was exhausting. 

Broccoli breakthrough

After many years of trial and error, there was a breakthrough in broccoli. When my youngest stepson finally decided that he liked broccoli (or baby trees, as he called them) and would eat it without making faces or complaining, I took full advantage. How many recipes can you develop with broccoli, you may ask? The answer is a lot. This salad was one of the first recipes I managed to get everyone to eat and enjoy so much that they asked for it again. I know, right? Hard to believe.

Making things I love

While this recipe was born from trying to make everyone else happy, it is actually one that makes me happy. Now that I am making meals for one, I try to make ones I can happily eat for a few days without getting bored. I’ve been spending my Saturday mornings doing meal prep, and this recipe has been in my rotation over the last few weeks. I can make a big bowl, and it does me for lunch and dinners for a few days and never gets old.

Broccoli chicken salad recipe

Ingredients

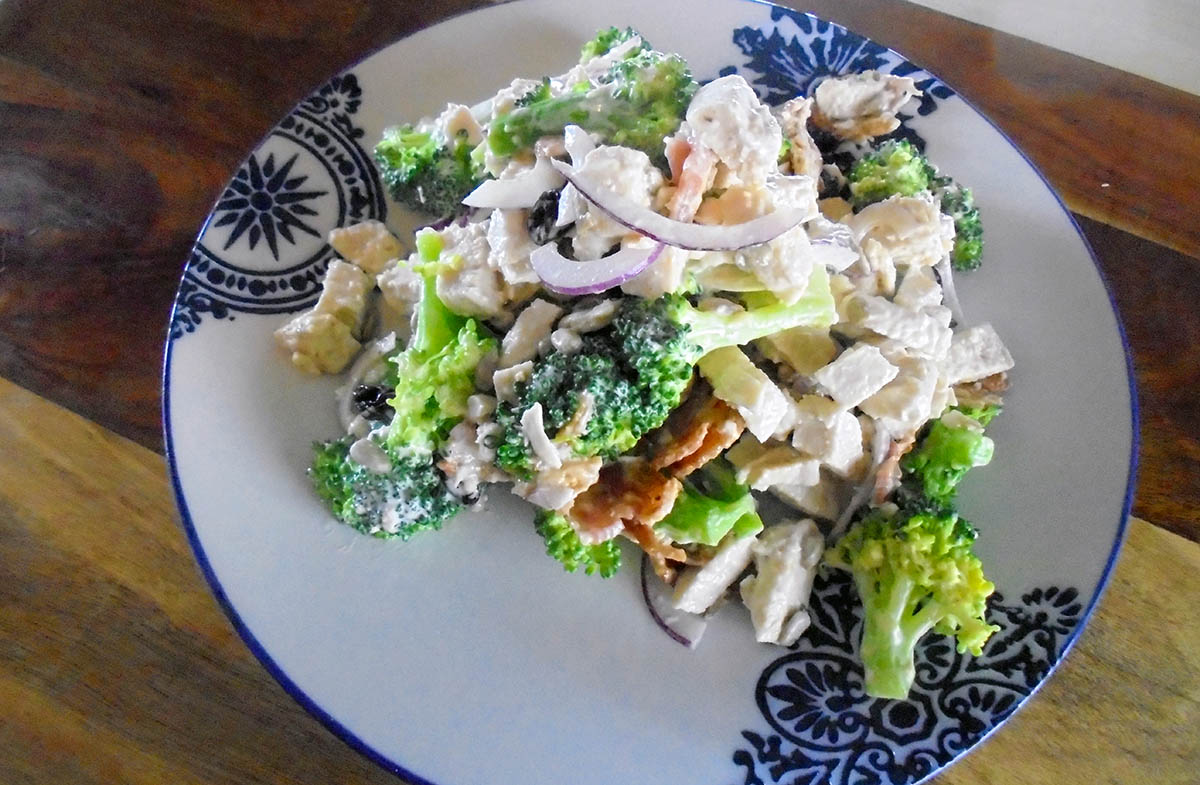
Broccoli chicken salad ingredients - chicken breast, broccoli, red onion, bacon, sunflower seeds, raisins, easy mayo and coconut vinegar
Broccoli chicken salad ingredients
  • 1 1/2 cups chicken breast, cooked and cubed
  • 1 1/2 cups broccoli florets, steamed
  • 1/4 cup red onion, chopped
  • 2 tbsp. sunflower seeds
  • 2 tbsp. raisins
  • 2 rashers bacon, cooked and crumbled
  • 1/3 cup easy mayo
  • 1 tbsp. coconut vinegar
Broccoli chicken salad

Broccoli chicken salad 

  • Servings: 8
  • Rating: ★★★★★
  • Print

A fresh salad that is full of flavour and texture


Credit: Cath @ easycleaneats

Ingredients

  • 1 1/2 cups chicken breast, cooked and cubed
  • 1 1/2 cups broccoli florets, steamed
  • 1/4 cup red onion, chopped
  • 2 tbsp. sunflower seeds
  • 2 tbsp. raisins
  • 2 rashers bacon, cooked and crumbled
  • 1/3 cup easy mayo
  • 1 tbsp. coconut vinegar

Directions

  1. Instructions
  2. In a bowl, combine all of the ingredients and make sure that everything is well coated.

Nutrition

Per Serving: 375 calories; 18 g fat; 7 g carbohydrates; 43 g protein

Equipment

  • Knife
  • Chopping board
  • Mixing bowl
  • Spoon
  • Measuring cups
  • Measuring spoons

Nutritional disclaimer

Nutrition information is provided as an estimate based on the ingredients used and available in my area (New Zealand). The nutritional information is here to help you understand the recipe; I use MyFitnessPal to generate my estimates. For more accurate nutritional information, please use a nutritional calculator with the ingredients in your area.


BLT salad in a jar

Awesome in a jar

I live for easy meals, and this salad is one of the easiest things to make. It’s so tasty that it’s ridiculous.

Bacon, lettuce and tomato in a jar with a simple dressing. I love this salad as a take-to-work lunch option. On the rare occasion I have bacon left over from breakfast, I use it for this. Bonus points for a plastic-free meal when you use a big glass jar. 

I bought a larger-than-normal pack of bacon at the supermarket last week and wanted to use as much as possible before I had to think about putting it in the freezer. This is how I decided to use it. 

Bacon makes everything better

I firmly believe that bacon can make anything better, and having it for lunch can turn a bad day around. I made the most of my large pack of bacon by making this salad to see me through what promised to be a challenging week at work that would require something to perk me up at lunchtime. Suddenly, my horror week at work now has small breaks that include bacon-based happiness and a weekend with the promise of eggs fried in bacon fat. Seriously, what more can a girl ask for? 

While I would like to live on bacon alone, my macros require more protein than bacon can provide in a single sitting. For an extra protein portion, I like to add half a chicken breast to my salad. This recipe is portioned for two servings, so you can enjoy bacon two days in a row.

BLT salad in a jar recipe

Ingredients

BLT salad in a jar ingredients
  • 4 slices bacon, cooked and crumbled
  • 2 tomatoes, diced
  • 2 cups cos lettuce
  • 2 cups iceberg lettuce
  • 1/4 cup easy mayo
  • 2 tbsp. milk
  • 2 tbsp. sour cream
  • Salt and pepper
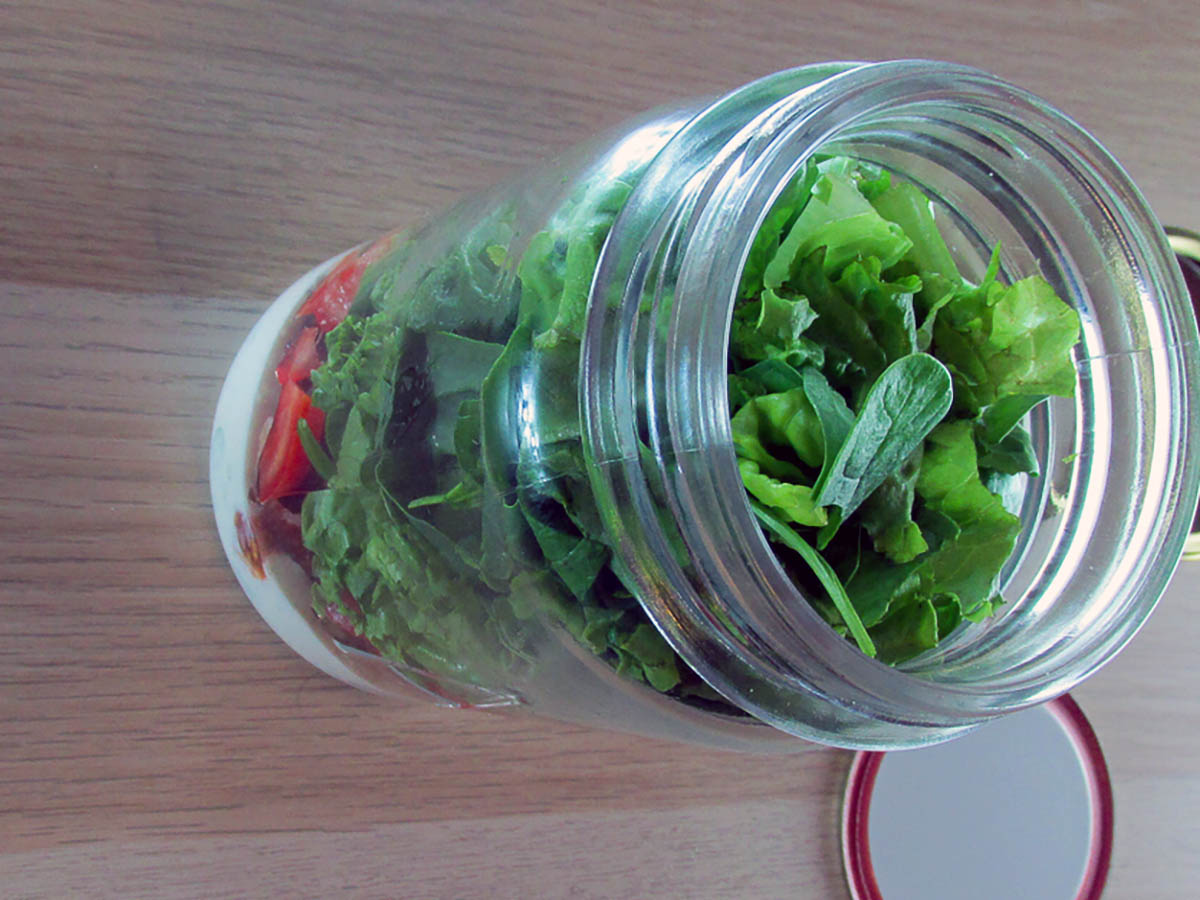
Make the dressing and put some at the bottom of the jar
Make the dressing and put some in the bottom of the jar
Add the bacon to the jar
Add the tomato to the jar
Next add the tomato
Finally add the lettuce to the jar
Shake and serve salad.
Salad ready for a shake and serve

BLT salad in a jar 

  • Servings: 2
  • Rating: ★★★★★
  • Print

This easy salad is a great lunchtime and simple to make ahead


Credit: Cath @ easycleaneats

Ingredients

Directions

  1. At the bottom of a jar, mix the mayo, milk, sour cream, salt, and pepper.
  2. Add the bacon to the jar, followed by the spring onions, tomatoes, iceberg lettuce, and cos lettuce.
  3. Close the jar and store it in the fridge.
  4. Before opening it to eat, shake the jar to coat all the ingredients in the dressing.
  5. If you are fancier than I am, you can tip the jar into a bowl; you may need to scrape the dressing.

Nutrition

Per Serving: 239 calories; 20 g fat; 11 g carbohydrates; 8 g protein

Equipment

  • Mason jar
  • Fork or whisk
  • Knife
  • Chopping board
  • Measuring cups
  • Measuring spoons

Nutritional disclaimer

Nutrition information is provided as an estimate based on the ingredients used and available in my area (New Zealand). The nutritional information is here to help you understand the recipe; I use MyFitnessPal to generate my estimates. For more accurate nutritional information, please use a nutritional calculator with the ingredients in your area.


Cauliflower rice

Alternative to rice 

A huge challenge I faced when transitioning away from pasta and rice was finding something to pair with yummy sauces and curries. Paleo gave us the grateness, sorry, I meant the greatness of cauliflower rice. 

I’ve found some cool things to do with it over the years, but the base recipe is the starting point for inventions.  

Cauliflower rice

Easy to make with the right tools 

Cauliflower rice is simple to make when the ingredients are prepared, but the preparation can take some time. I spent a year grating all of my cauliflowers by hand before moving over to a food processor and away from the weekly skin grafts to my fingers. I was becoming concerned that my family would develop a liking for long pig in their food. A food processor with a grating attachment is a must if you plan to switch from real rice. You can process four cauliflower heads in the time it takes to grate one by hand. To make rice, I like to use the smaller grating attachment to get a fine texture.

Buy in bulk 

If you’re transitioning away from rice and pasta, consider keeping cauliflower rice on hand. You can freeze cauliflower if it is raw or cooked. That means you can make the most of cauliflower when it is in season and cheap. I like to buy in bulk, grate, portion and freeze. That way, you can pull a bag or tub of cauliflower rice from the freezer and cook it up when you need it. 

Cauliflower rice recipe 

Cauliflower rice ingredients

Ingredients

  • 1 head cauliflower finely grated 
  • 1/2 onion finely minced 
  • 2 garlic cloves finely minced 
  • 1 tbsp. coconut oil 

Instructions

Break the cauliflower into large florets.

Use a food processor with a fine grating attachment to grate cauliflower.

If you don’t have a food processor, you can grate the cauliflower by hand.

Finely chop the onion.

When all of the cauliflower is grated, transfer it to a mixing bowl.

Take a large frying pan and place it over medium heat, then melt some coconut oil.

Add some oil to a frying pan.

Add the onion to the frying pan.

Cook the onion until it is softened.

Add the cauliflower to the frying pan.

Add the cauliflower rice
Cook the cauliflower for 5 minutes

Cook the cauliflower and onion for 5 minutes.

Keep the rice moving in the pan.

Keep the cauliflower moving in the pan; you don’t want it to colour.

When the cauliflower has softened, it is ready to serve.

Serve hot or cold.

Cauliflower rice ready to eat

You can freeze the cauliflower rice to use anytime you need it.

Put the extra cauliflower rice in the freezer

Cauliflower rice

  • Servings: 4
  • Rating: ★★★★★
  • Print

This easy to make alternative to rice is a must know recipe for clean eating, paleo, primal and keto diets.


Credit: Cath @ easycleaneats

Ingredients

  • 1 head cauliflower grated
  • 1/2 onion, finely minced
  • 1 tbsp. coconut oil
  • 1 garlic clove minced (optional)

Directions

  1. Break the cauliflower into large florets.
  2. Use a food processor with a fine grating attachment to grate cauliflower.
  3. If you don’t have a food processor you can grate the cauliflower by hand.
  4. Finely chop the onion.
  5. When all of the cauliflower is grated transfer it to a mixing bowl.
  6. Take a large frying pan over a medium heat and melt some coconut oil.
  7. Add the onion to the frying pan.
  8. Cook the onion until it is softened.
  9. Add the cauliflower to the frying pan.
  10. Cook the cauliflower and onion for 5 minutes.
  11. Keep the cauliflower moving in the pan, you don’t want it to colour.
  12. When the cauliflower has softened it is ready to serve.
  13. Serve hot or cold.
  14. You can freeze the cauliflower rice to use anytime you need it.

Nutrition

Per Serving: 54 calories; 0 g fat; 12 g carbohydrates; 3 g protein

Equipment

  • Knife 
  • Chopping board 
  • Food processor with the grating attachment 
  • Or grater 
  • Mixing bowl
  • Frying pan 
  • Wooden spoon 
  • Measuring spoons

Nutritional disclaimer

Nutrition information is provided as an estimate based on the ingredients used and available in my area (New Zealand). The nutritional information is here to help you understand the recipe; I use MyFitnessPal to generate my estimates. For more accurate nutritional information, please use a nutritional calculator with the ingredients in your area.


Mexican corn salad

Hot and humid

It has been super warm here in Auckland this week, add the humidity, and I’m left with zero desire to do anything but hang out in front of the fan or the cold plunge pool. When it comes to meals, I spend most of the week eating my meal prep from the freezer and come the weekend, I want something a bit different. Not bagging my meal prep, but I want something more exciting when I have time. It is time for something fresh and tasty.

Seasonal treats

Good ole Northland corn is cheap as chips right now, so I picked up a bunch with grand plans to make Mexican-style corn. Corn on the cob, I discovered years ago, can be as divisive as Vegemite. Some love the experience of chowing down on a hot buttery cob and don’t mind the bits of corn that always get stuck between their teeth, while others hate it. I’m in the first camp, but for a long time had to work around people in the second camp. The first time I made this recipe, I had a stack of fresh corn and three people who refused to eat it from the cob. I wondered how I could use the corn and pack in my much-loved Mexican flavours without the whinging that would come with a cob on a plate. The grilled corn salad was just born.

Mexican style street corn salad with steak recipe

Ingredients

  • 1 tbsp. butter
  • 6 corn ears
  • Salt and pepper
  • 2 tbsp. mayo 
  • 3 tbsp. sour cream
  • 1/2 tsp. chilli powder
  • 3 tbsp. lime juice
  • 1 jalapeño, seeded and sliced
  • 1/2 red onion, finely sliced
  • 3 tbsp. coriander, chopped
  • 1/2 cup feta cheese, crumbled
  • 500g steak, cooked and sliced

Instructions

Cook your steak to your preference. I like to sous vide mine to perfection.

Fold back the husks from the corn and cut them off.

Brush the corn with the butter and season the corn.

Over high heat on a BBQ or in a griddle pan, place the corn on the grill or in the pan. 

When the corn starts to char, turn it over, repeat until the corn is slightly charred all over.

Remove the corn from the pan or grill.

On a steady surface stand the corn on its end and with a very sharp knife slice the corn off the cob.

Put the corn into a large mixing bowl to cool.

In another bowl, whisk together the mayo, sour cream, lime juice, chilli powder, salt and pepper to make the dressing.

Add the dressing to the called corn and mix well.

Add the coriander, jalapeño and red onion to the corn and toss to mix.

To serve, plate up the corn salad and serve with the steak and crumbled feta on top.

Mexican style street corn salad with steak

  • Rating: ★★★★★
  • Print

“A


Credit: Cath @ easycleaneats

Ingredients

  • 1 tbsp. butter
  • 6 corn ears
  • Salt and pepper
  • 2 tbsp. mayo
  • 3 tbsp. sour cream
  • 1/2 tsp. chilli powder
  • 3 tbsp. lime juice
  • 1 jalapeño, seeded and sliced
  • 1/2 red onion, finely sliced
  • 3 tbsp. coriander, chopped
  • 1/2 cup feta cheese, crumbled
  • 500g steak, cooked and sliced

Directions

  1. Fold back the husks from the corn and cut them off.
  2. Brush the corn with the butter and season the corn.
  3. Over high heat on a BBQ or in a griddle pan, place the corn on the grill or in the pan.
  4. When the corn starts to char, turn it over, repeat until the corn is slightly charred all over.
  5. Remove the corn from the pan or grill.
  6. On a steady surface stand the corn on its end and with a very sharp knife slice the corn off the cob.
  7. Put the corn into a large mixing bowl to cool.
  8. In another bowl, whisk together the mayo, sour cream, lime juice, chilli powder, salt and pepper to make the dressing.
  9. Add the dressing to the called corn and mix well.
  10. Add the coriander, jalapeño and red onion to the corn and toss to mix.
  11. 11.To serve, plate up the corn salad and serve with the steak and crumbled feta on top.

Nutrition

Per Serving: 254 calories; 17g fat; 12g carbohydrates; 15g protein

Equipment

  • Measuring spoons
  • Kitchen scale
  • Chopping board
  • Knife
  • Tongs
  • Fork
  • Large mixing bowl
  • Small mixing bowl

Nutritional disclaimer

Nutrition information is provided as an estimate based on the ingredients used and available in my area (New Zealand). The nutritional information is here to help you understand the recipe; I use MyFitnessPal to generate my estimates. For more accurate nutritional information, please use a nutritional calculator with the ingredients in your area.


Teriyaki burger

Summer means BBQ, which means lots of burgers. You will never catch me complaining about burgers. A recent trip to the supermarket scored a pineapple for cheap, and I knew exactly what I wanted to do with it: grill it on the BBQ, then smash it on a burger! I love grilled pineapple on burgers, and I don’t think it should be saved for chicken burgers. I know that might sound like I’ve lost my mind (maybe I have, but stick with me a moment), grilled pineapple can work with beef burgers as long as you bring a little something special to the party, teriyaki sauce. 

Make your own

If you are like me and you try to avoid mass-produced processed foods, the best option is to make your own. When you make your own, you control which ingredients you use and how much or how sweet you want it to be. Once you have a go at making your own and realise how easy it is, you will never go back to store-bought again. I try my best to stay away from soy and sugar, but it’s hard to avoid when it comes to teriyaki sauce, which is why I make my own. As a bonus to these kick-ass burgers, here is my teriyaki sauce recipe, which is super easy to make.

Back to the burgers

A long time ago, I had to get creative to get two small boys to eat vegetables without it turning into a war of wills. Very finely chopped vegetables are easy to sneak into burgers, and even when discovered, there is very little chance the burger will go uneaten. Nowadays, I don’t need to hide vegetables; I can openly include them and enjoy every bite. For this recipe, the carrot and spring onion not only add some flavour and texture but also a nice pop of colour and help balance the sweetness of the pineapple. 

Teriyaki burger recipe

Ingredients

  • 900g minced beef
  • 1 carrot, grated
  • 3 spring onions, chopped
  • 1 tsp. ginger
  • 1 tsp. coconut aminos
  • 1 tsp. garlic powder
  • 1/4 cup teriyaki sauce
  • 8 pineapple slices

Instructions

In a large bowl, combine the beef mince, carrot, spring onions, ginger, garlic powder and coconut aminos.

Try not to overwork the meat, mix it enough to bring it all together and spread the flavours.

Divide the meat into eight portions and shape them into burger patties.

Place the burgers on a lined baking tray.

Spread a little of the teriyaki sauce over each burger.

Cover the burgers and refrigerate for about 30 minutes.

Cook your burgers over high heat, either on a BBQ or in a griddle pan.

Add a little of the teriyaki sauce to each side while cooking. 

Depending on the thickness of your burgers, it should take about 5 minutes per side.

While the burgers are cooking, start grilling the pineapple; it should take 3 minutes on each side, or until it begins to caramelise. If you are cooking on a BBQ, the pineapple may cook more quickly. Keep it away from direct heat so it doesn’t burn.

Serve the burgers on a lettuce bun with a grilled pineapple slice.

“Teriyaki

  • Rating: ★★★★★
  • Print

“These


Credit: Cath @ easycleaneats

Ingredients

  • 900g minced beef
  • 1 carrot, grated
  • 3 spring onions, chopped
  • 1 tsp. ginger
  • 1 tsp. coconut aminos
  • 1 tsp. garlic powder
  • 1/4 cup teriyaki sauce
  • 8 pineapple slices

Directions

  1. In a large bowl, combine the beef mince, carrot, spring onions, ginger, garlic powder and coconut aminos.
  2. Try not to overwork the meat, mix it enough to bring it all together and spread the flavours.
  3. Divide the meat into eight portions and shape them into burger patties.
  4. Place the burgers on a lined baking tray.
  5. Spread a little of the teriyaki sauce over each burger.
  6. Cover the burgers and refrigerate for about 30 minutes.
  7. Cook your burgers over high heat, either on a BBQ or in a griddle pan.
  8. Add a little of the teriyaki sauce to each side while cooking.
  9. Depending on the thickness of your burgers, it should take about 5 minutes per side.
  10. While the burgers are cooking, start grilling the pineapple; it should take 3 minutes on each side, or until it begins to caramelise. If you are cooking on a BBQ, the pineapple may cook more quickly. Keep it away from direct heat so it doesn’t burn.
  11. Serve the burgers on a lettuce bun with a grilled pineapple slice.

Nutrition

Per Serving:187 calories; 4.6g fat; 15.2g carbohydrates; 22.5g protein

Equipment

  • Large mixing bowl
  • Baking tray
  • Beeswax wrap
  • BBQ or Griddle pan
  • Sauce brush
  • Spatula
  • Tongs 

Nutritional disclaimer

Nutrition information is provided as an estimate based on the ingredients used and available in my area (New Zealand). The nutritional information is here to help you understand the recipe; I use MyFitnessPal to generate my estimates. For more accurate nutritional information, please use a nutritional calculator with the ingredients in your area.


Salad roll-ups

Salad roll-ups

Madness or genius

It’s another one of those moments; it could be madness or genius, turning the salad roll inside out and removing the need for an actual wrap, no wheat or extra carbs. Stick with me; I promise it not only works, but it’s also a fantastic little lunch that will make everyone happy.

No cooking required

I do love a lunch that doesn’t need any cooking. This recipe doesn’t need any cooking at all; just a little bit of time to cut your veggies into sticks and then roll them. They are so easy to make that it is ridiculous. The beauty of this recipe is the flexibility around the fillings. If you want to add something different, you can; take something out, of course, you can. If the mood strikes, you can even dress the salad leaves before you use them. 

Salad roll-ups

Salad roll-up ingredients

Ingredients 

  • 450g sliced meats – prosciutto or salami or ham
  • 3 cups salad leaves
  • 4 cheese slices, cut into sticks
  • ¼ cucumber, cut into sticks
  • 1 carrot, cut into sticks, 
  • ½ avocado, cut into slices, 
  • ½ pepper, cut into sticks
Slice the vegetables.
Lay the meat on a chopping board.
Add the lettuce to the meat.
Add the sliced vegetables.
Add the cheese.
Fold the end of the meat over the vegetables.
Roll the meat up.
Enjoy

Salad roll-ups

  • Servings: 4
  • Rating: ★★★★★
  • Print

I do love a lunch that doesn't need any cooking. This recipe doesn't need any cooking at all, just a little bit of time to cut your veggies into sticks and then the rolling. They are so easy to make it is ridiculous.


Credit: Cath @ easycleaneats

Ingredients

  • 450g sliced meats prosciutto or salami or ham
  • 3 cups salad leaves
  • 4 cheese slices, cut into sticks
  • 1/4 cucumber, cut into sticks
  • 1 carrot, cut into sticks,
  • 1/2 avocado, cut into slices,
  • 1/2 pepper, cut into sticks

Directions

  1. Take a clean chopping board and lay out a few slices of meat.
  2. At one end place some of the salad leaves, pepper sticks, cucumber sticks, carrot sticks, cheese sticks and avocado slices.
  3. Starting at the end with the salad roll the meat up to create a roll.
  4. Some meats will hold together; others may need a toothpick to hold the roll together.
  5. Serve.

Nutrition

Per Serving: 186 calories; 10 g fat; 14 g carbohydrates; 9 g protein.

Nutritional disclaimer

Nutrition information is provided as an estimate based on the ingredients used and available in my area (New Zealand). The nutritional information is here to help you understand the recipe; I use MyFitnessPal to generate my estimates. For more accurate nutritional information, please use a nutritional calculator with the ingredients in your area.


Steak wraps

Updating as we go

Early in 2021, I relocated and started updating my website; I’ve been making changes and improving everything as I go. This recipe is one of the many things I’ve tried to improve.

A meaty treat for dinner 

I love any food wrapped in meat, and steak wraps are definitely the best way to go. I am turning the traditional wrap inside out with this recipe. Who needs a grain-based wrap when you can use meat as the wrap? 

These steak wraps are delicious and so easy to make. You can make these wraps ahead of time and just cook them minutes before you serve them

Tender is best 

When making steak wraps, remember that you need a tender cut of meat. I like to use sirloin, but if you can’t get sirloin, it isn’t the end of the world. If you find yourself with a tougher cut, break out the meat hammer to give the meat a good bash to tenderise it. The key to getting these wraps right is having the meat thinly sliced so that it cooks quickly without becoming chewy. I like to cut my steak a little thicker and then use the meat tenderiser on the flat side to thin the meat out a little. 

Steak wraps recipe

Ingredients

  • 8 sirloin or flank steaks thin slices
  • Olive oil
  • Salt and pepper
  • 2 peppers, sliced into thin strips
  • 1 courgette, sliced into thin strips
  • 1 onion, halved and then thinly
  • 1 tbsp. rosemary

Instructions

Rub each side of the steaks with some olive oil and season.

Heat a frying pan over a medium heat with a little oil.

Fry off the vegetables and rosemary until they are tender.

Place the steak pieces on a chopping board.

In the centre of each steak place a few vegetables vertically.

Roll the vegetables up in the steak.

Take a toothpick and use it to secure the end of the steak.

Repeat with the remaining steak and vegetables.

Preheat a grill pan or BBQ on high heat.

Cook each wrap for 2 minutes per side, less if you prefer your steak rear.

Serve hot

  • Rating: ★★★★★
  • Print


Credit: Cath @ easycleaneats

Ingredients

  • 8 sirloin or flank steaks thin slices
  • Olive oil
  • Salt and pepper
  • 2 peppers, sliced into thin strips
  • 1 courgette, sliced into thin strips
  • 1 onion, halved and thin sliced
  • 1 tbsp. rosemary

Directions

  1. Rub each side of the steaks with some olive oil and season.
  2. Heat a frying pan over a medium heat with a little oil.
  3. Fry off the vegetables and rosemary until they are tender.
  4. Place the steak pieces on a chopping board.
  5. In the centre of each steak place a few vegetables vertically.
  6. Roll the vegetables up in the steak.
  7. Take a toothpick and use it to secure the end of the steak.
  8. Repeat with the remaining steak and vegetables.
  9. Preheat a grill pan or BBQ on high heat.
  10. Cook each wrap for 2 minutes per side, less if you prefer your steak rear.
  11. Serve hot.

Nutrition

Per Serving: 226 calories; 13g fat; 6g carbohydrates; 21g protein

Equipment 

  • Knife  
  • Chopping board 
  • Frying pan/cast iron pan/bbq 
  • Tongs
  • Toothpick

Nutritional disclaimer

Nutrition information is provided as an estimate based on the ingredients used and available in my area (New Zealand). The nutritional information is here to help you understand the recipe; I use MyFitnessPal to generate my estimates. For more accurate nutritional information, please use a nutritional calculator with the ingredients in your area.