One tray maple sausage roast

Updating as I go

Early in 2021, I relocated and started updating my website; I’ve been making changes and improving everything as I go. This recipe is one of the many things I’ve tried to improve. This recipe is one of the first one-tray meals I came up with back in 2015. It has remained a regular meal that I crack out when I get some good-quality sausages from Pokeno.

One tray of awesomeness

This recipe is one of the very first one-tray meals I made back when we started eating clean. I was big on throwing dinner in the slow cooker before heading off for a busy day at work, but it was always nice to have something a bit different on the weekends. The combination of tasty sausages and fresh vegetables always won on a Saturday afternoon after a day with the kids. I don’t spend my weekends running around playgrounds with the kids anymore, but I still love a one-tray maple sausage roast after a busy Saturday drinking coffee and talking sh*t with friends. This is one of my winter staples as it keeps me fed for days and feels like a real winter warmer after a long, chilly day at work.

Simple meals don’t have to be boring

I have been on a mission to make simple but tasty meals. I wanted to create recipes that can be prepared and cooked quickly on a busy weeknight.

We all struggle to make healthy and tasty meals while keeping on top of everything else in life.

This recipe is healthy, delicious, and easy to make. It can be cooked on a single tray in the oven. The preparation takes no more than 20 minutes, including slicing, dicing, and mixing.

Each meal is portioned to feed four adults.

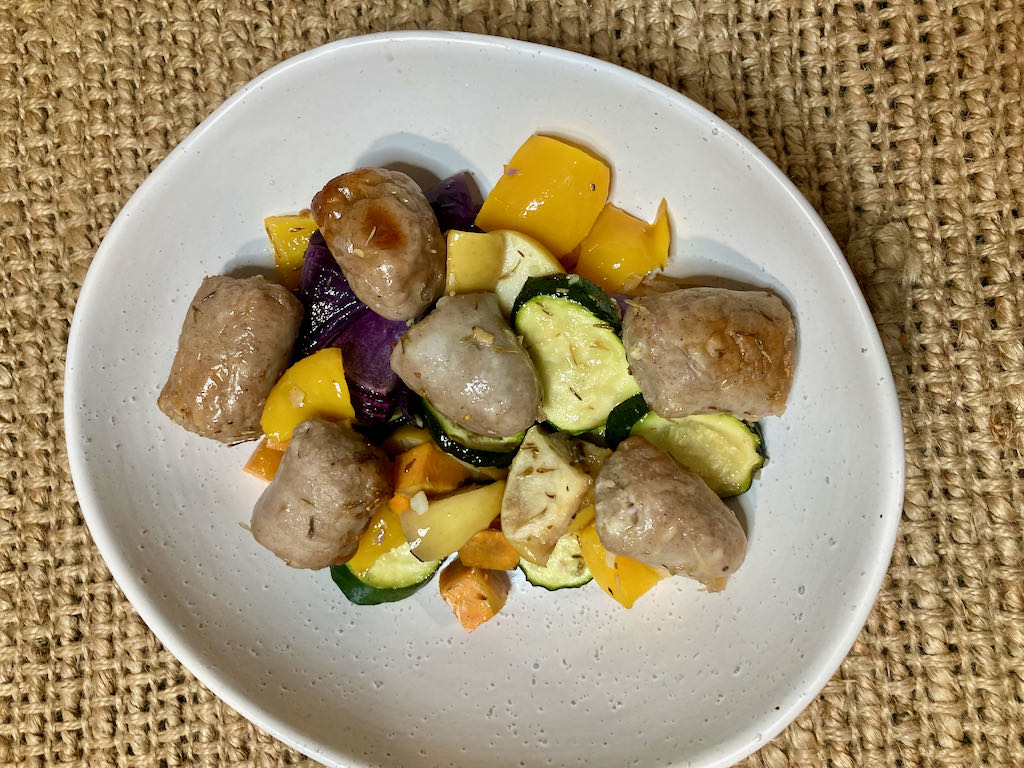
One tray maple sausage roast

Ingredients

  • 8 pork sausages cut into 3rds
  • 1 red onion cut into 8th
  • 2 red apples, cut into chunks
  • 2 red peppers, cut into chunks
  • 2 courgettes, cut into chunks
  • 2 sweet potatoes, cut into chunks
  • 2 garlic cloves, minced
  • 2 tbsp. thyme
  • 1/4 cup maple syrup

Instructions

Preheat oven to 210 °C/ 410 °F. 

Line a roasting tray with baking paper or a silicone liner.

In the roasting tray, mix together all ingredients but keep the maple syrup to one side. 

Bake for 20 minutes.

Remove the roasting tray from the oven.

Stir everything up and pour the maple syrup on top of everything.

Bake for another 10 minutes.

If your sausages are thick, you may need to cook them longer.

One tray maple sausage roast

  • Rating: ★★★★★
  • Print

“A


Credit: Cath @ easycleaneats 

Ingredients

  • 8 pork sausages cut into 3rds
  • 1 red onion cut into 8th
  • 2 red apples cut into chunks
  • 2 red peppers cut into chunks
  • 2 courgettes cut into chunks
  • 2 sweet potatoes cut into chunks
  • 2 garlic cloves minced
  • 2 tbsp. thyme
  • 1/4 cup maple syrup

Directions

  1. Preheat oven to 210 °C/ 410 °F. 
  2. Line a roasting tray with baking paper or a silicone liner.
  3. In the roasting tray, mix together all ingredients but keep the maple syrup to one side. 
  4. Bake for 20 minutes.
  5. Remove the roasting tray from the oven.
  6. Stir everything up and pour the maple syrup on top of everything.
  7. Bake for another 10 minutes.
  8. If your sausages are thick, you may need to cook them longer.

Nutrition

Per Serving: 292 calories; 13g fat; 26g carbohydrates; 18g protein

Equipment 

  • Chopping board
  • Knife
  • Baking tray
  • Baking paper or silicone liner
  • Measuring cups
  • Measuring spoons
  • Tongs
  • Spatula 

Nutritional disclaimer

Nutrition information is provided as an estimate based on the ingredients used and available in my area (New Zealand). The nutritional information is here to help you understand the recipe; I use MyFitnessPal to generate my estimates. For more accurate nutritional information, please use a nutritional calculator with the ingredients in your area.


Bolognese

Master the basics

Eating clean gets a lot easier once you have mastered a few essential recipes. This recipe is basic; not like basic unicorn basic, more like beard and flannel basic. Back to the point (which isn’t Unstable unicorns), having basic skills and recipes in your arsenal means you will never be left with only Uber Eats as your weeknight option. Once you master this recipe, the possibilities are endless.

New take on a classic

Bolognese is one of those dishes that everyone knows and probably has their version of. While traditionally, Bolognese is used to dress pasta, this meaty sauce is a perfect centrepiece to a meal instead of dressing.

This dish is full of flavour and tastes better the day after you make it.

Bolognese is an easy recipe; it is cheap and makes the perfect weeknight dinner.

Bolognese recipe

Ingredients

  • 500g beef mince
  • 2 tins chopped tomatoes
  • 2 onions, finely diced
  • 2 garlic cloves, minced
  • 2 tbsp. tomato puree
  • 2 tbsp. olive oil
  • a handful of basil, plus extra for garnish.
  • 1 tsp. dried oregano.

Instructions

Put a large stock pot over medium heat.

Add the olive oil to the pan. 

When the oil is hot, add the onions and stir them.

Reduce the heat when the onions start to colour.

Add the garlic, basil and oregano.

Add the beef mince to the pan with the onions.

Cook the meat off until it is browned.

Use a spoon to break the meat up as it cooks.

Stir in the chopped tomatoes and puree into the meat.

Turn up the heat to bring the liquids up to a boil.

When you have rolling bubbles reduce the heat and keep stirring everything.

When you get to a gentle simmer, put the lid on your pan and let everything cook down for a least an hour.

Stir the sauce now and then to make sure it doesn’t stick or catch on the bottom.

Serve over some coodles with some grated parmesan cheese.

The flavour will develop and be better the day after you have made it, so it will be great for leftovers.

Bolognese

  • Servings: 8
  • Print


Credit: Cath @ easycleaneats 

Ingredients

  • 500g beef mince
  • 2 tins chopped tomatoes
  • 2 onions, finely diced
  • 2 garlic cloves, minced
  • 2 tbsp. tomato puree
  • 2 tbsp. olive oil
  • a handful of basil, plus extra for garnish.
  • 1 tsp. dried oregano.

Directions

  1. Put a large stock pot over medium heat.
  2. Add the olive oil to the pan. 
  3. When the oil is hot, add the onions and stir them.
  4. Reduce the heat when the onions start to colour.
  5. Add the garlic, basil and oregano.
  6. Add the beef mince to the pan with the onions.
  7. Cook the meat off until it is browned.
  8. Use a spoon to break the meat up as it cooks.
  9. Stir in the chopped tomatoes and puree into the meat.
  10. Turn up the heat to bring the liquids up to a boil.
  11. When you have rolling bubbles reduce the heat and keep stirring everything.
  12. When you get to a gentle simmer, put the lid on your pan and let everything cook down for a least an hour.
  13. Stir the sauce now and then to make sure it doesn’t stick or catch on the bottom.
  14. Serve over some coodles with some grated parmesan cheese.

Nutrition

Per Serving: 186 calories; 10.7g fat; 9.3g carbohydrates; 12g protein

Equipment

  • Knife
  • Chopping board
  • Stockpot 
  • Wooden spoon 
  • Measuring spoons

Nutritional disclaimer

Nutrition information is provided as an estimate based on the ingredients used and available in my area (New Zealand). The nutritional information is here to help you understand the recipe; I use MyFitnessPal to generate my estimates. For more accurate nutritional information, please use a nutritional calculator with the ingredients in your area.


Taco cupcakes

Are you ok with tacos? 

Possibly the most stupid question I can ask. The answer is always the same: YES!!!! While the traditional build-your-taco approach to dinner never disappoints, sometimes a little more structural integrity is needed to ensure dinner doesn’t distract from those blink-and-you-will-miss-it sporting moments. I had a friend over to watch some UFC recently and needed an easy-to-eat dinner that would allow for uninterrupted viewing of some great fights. This is how I solved the problem. 

What could be better 

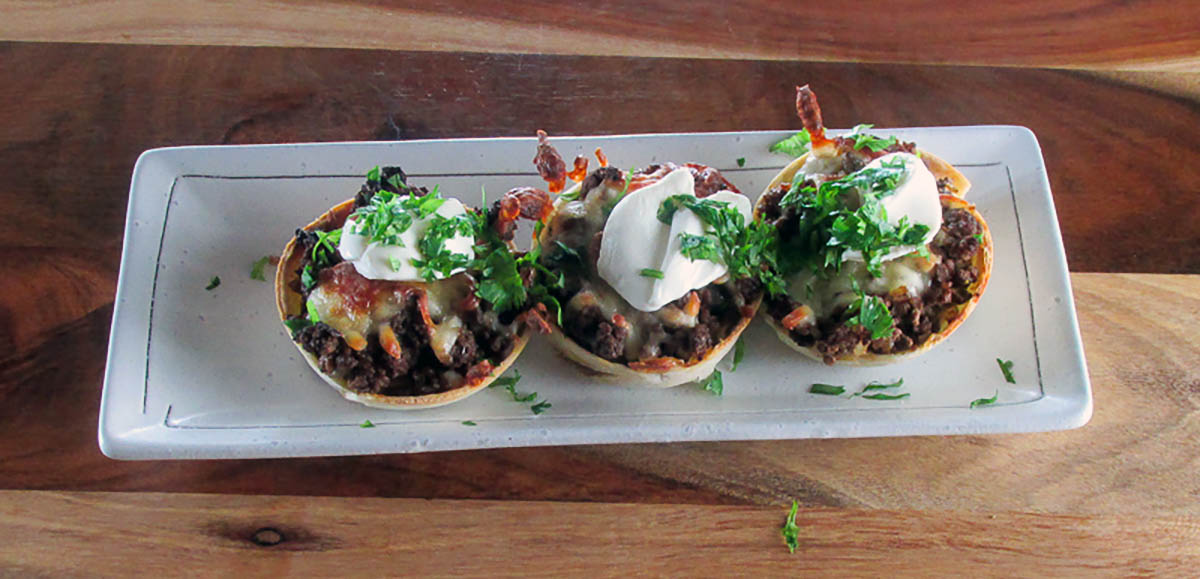
Everyone loves cupcakes, and everyone loves tacos. What could be better than combining the two? It isn’t as crazy as it sounds, I promise. These little cupcakes are perfectly portioned, with a crispy case and tasty fillings, and they have the bonus of not having to worry about losing half the filling while you are trying to eat them.

Gluten-free wraps 

I like to use the traditional corn tortilla wraps for my tacos, but this recipe works well with wheat-based wraps and even egg wraps. Egg wraps don’t get crispy, but they do taste amazing. The corn tortillas are less flexible, so you have to be careful when placing them in the cupcake pan. I find slightly warming the wraps before use makes them easier to shape. 

These taco cupcakes are an excellent option for dinner parties, shared lunch at work or just because you want something a little different on the weekend. 

Taco cupcakes recipe 

Taco cupcake ingredients

Ingredients

  • 500g minced beef 
  • 1 onion, finely diced 
  • 2 tbsp. taco seasoning 
  • 12 large corn tortilla discs 
  • 12 small corn tortilla discs 
  • 400g can refried beans 
  • 2 cups cheese, grated  
  • Sour cream 
  • Fresh coriander, chopped

Instructions

Preheat the oven to 160 degrees C/ 375 degrees F. 

In a large, heavy-bottomed frying pan, fry the onion until translucent. 

When the onion has cooked for a few minutes, add the beef to the pan and cook until browned. 

Add the taco seasoning to the meat just before it is completely cooked. 

Remove the pan from the heat and set it aside. 

Take a medium-sized 12-cup muffin pan. In each cup, place one large tortilla disc and press it into shape to create a cup. 

Taco cupcakes filled

In the centre of each tortilla cup, add one teaspoon of refried beans. 

On top of the beans, add a small tortilla disc.  

On top of the small disc, add two tablespoons of the cooked beef. 

Sprinkle each cup with cheese.  

Taco cupcakes topped

Bake for 15 minutes or until the cheese is golden brown. 

Taco cupcakes fresh from the oven

Remove the cupcakes from the oven and top them with a teaspoon of sour cream and chopped fresh coriander.

Taco cupcakes topped with sour cream and coriander

Serve while they are hot.

Taco cupcakes

  • Servings: 12
  • Rating: ★★★★★
  • Print

These little cupcakes are perfectly portioned, have a little crispy case and tasty fillings,


Credit: Cath @ easycleaneats

Ingredients

  • 500g minced beef 
  • 1 onion, finely diced 
  • 2 tbsp. taco seasoning 
  • 12 large corn tortilla discs 
  • 12 small corn tortilla discs 
  • 400g can refried beans 
  • 2 cups cheese, grated  
  • Sour cream 
  • Fresh coriander, chopped. 

Directions

  1. Preheat the oven to 160 degrees C/ 375 degrees F. 
  2. In a large, heavy-bottomed frying pan, fry the onion until translucent. 
  3. When the onion has cooked for a few minutes, add the beef to the pan and cook until browned. 
  4. Add the taco seasoning to the meat just before it is completely cooked. 
  5. Remove the pan from the heat and set it aside. 
  6. Take a medium-sized 12-cup muffin pan. In each cup, place one large tortilla disc and press it into shape to create a cup. 
  7. In the centre of each tortilla cup, add one teaspoon of refried beans. 
  8. On top of the beans, add a small tortilla disc. 
  9. On top of the small disc, add two tablespoons of the cooked beef. 
  10. Sprinkle each cup with cheese.  
  11. Bake for 15 minutes or until the cheese is golden brown. 
  12. Remove the cupcakes from the oven and top them with a teaspoon of sour cream and chopped fresh coriander.
  13. Serve while they are hot.

Nutrition

Per Serving: 276 calories; 10 g fat; 25 g carbohydrates; 20 g protein

Equipment

  • Scales
  • Measuring cups
  • Measuring spoons
  • Frying pan
  • Wooden spoon
  • Knife
  • Chopping board
  • Large round cookie cutter
  • Medium round cookie cutter
  • Muffin pan/ cupcake pan
  • Teaspoon

Nutritional disclaimer

Nutrition information is provided as an estimate based on the ingredients used and available in my area (New Zealand). The nutritional information is here to help you understand the recipe; I use MyFitnessPal to generate my estimates. For more accurate nutritional information, please use a nutritional calculator with the ingredients in your area.


Beef and onions

Slow cooker season

Cards on the table: I hate coming home from a busy day and knowing I have to walk into the kitchen at 7 pm, cook a full meal, and then clean up. Don’t get me wrong; I love cooking. It gives me joy to create a beautiful and healthy. After a 10-hour day at work, an hour commute home, and a heavy workout, cooking is not much joy; it is a chore. I’m usually borderline hangry at the end of a long day, and I want my food as fast as possible. 

This is where having a slow cooker comes into its own. I know that I can walk in and find a meal that is cooked, hot, and ready to serve. That means food is served as soon as I want it, not 30 to 60 minutes later.

Beef and onions on a bed of cauliflower rice
Beef and onions

Putting the slow cooker on the counter

It has been getting a bit cold in the mornings and evenings here in the southern hemisphere, and the cost of salad is going through the roof. Yes, it means winter is upon us. It also means that the slow cooker is coming out of the cupboard and taking up residence on the kitchen counter again. My slow cooker is my favourite kitchen appliance when the weather cools down. To celebrate the slow cooker taking its place on the countertop, I decided to make brisket and onions. 

A little bit of effort, a lot of reward

This slow-cooker meal isn’t a dump-and-go recipe; it requires some prep work, but it is worth the effort. Making a bed of caramelised onions for the brisket to sit on in the slow cooker gives the meat an extra level of flavour that kicks ass and takes names. The bone broth helps to make a rich sauce that can easily be turned into a gravy. If you want to kick things up on the comfort-food front, whisk a tablespoon of tapioca flour into a small amount of the bone broth, then return it to the slow cooker and mix well. I love combining my brisket and onions with cauliflower rice, but it also goes well with mashed sweet potatoes or cauliflower mash. 

Sear in the flavour

I spent some time experimenting with this recipe to create a deeper flavour; I finally landed on the seared meat to make this recipe extra special. The extra step of searing the meat adds a beautiful caramelised flavour to the meat and, more importantly, to the gravy. 

Brisket and onions Recipe

Ingredients

Beef and onions ingredients
  • 1 tbsp. olive oil
  • 4 onion, sliced
  • 1.5kg beef roast
  • 6 cloves garlic, minced
  • 2 cups beef bone broth
  • 2 tbsp. Worcestershire sauce
  • 1 tbsp. coconut aminos
  • Salt and pepper

Instructions

slice the onions
slice the onions

In a large frying pan, heat the olive oil over a medium heat.

In a large frying pan, heat the olive oil over a medium heat.
Add the sliced onions to the pan and let them cook for about 15 minutes
Be sure to stir the onion now and then
Be sure to stir the onion now and then.

Add the onions to the pan and let them cook for about 15 minutes, stirring them now and then.

When the onions are caramelised, spread them on the bottom of your slow cooker.

When the onions are caramelised, spread them out on the bottom of your slow cooker.

Return the frying pan to the heat.

Season the brisket before searing it in the pan where the onions were cooked.

Season the beef well.
Sear the beef in the pan the onions were cooked in.

When the meat is browned, place it on top of the onions in the slow cooker.

Sear the beef on all slides.
When the meat is browned all over, place it on top of the onions in the slow cooker.

Put half of the onions on top of the brisket.

Pour the Worcestershire sauce, coconut aminos and broth over the meat.

Pour the Worcestershire sauce, coconut aminos and broth over the meat.
Cook the beef on a low heat setting for 6 to 8 hours.

Cook the brisket on low heat for 6 to 8 hours. 

The meat should pull apart with a fork.

Let the meat rest for 20 minutes before serving.

Use two forks to pull the brisket apart and mix it well with the onions and cooking juices.

Serve on a bed of cauliflower rice.

Beef and onions

  • Servings: 10
  • Rating: ★★★★★
  • Print

This slow cooker meal is one of my favourites and delivers so much flavour.


Credit: Cath @ easycleaneats

Ingredients

  • 1 tbsp. olive oil
  • 4 onion, sliced
  • 1.5kg beef brisket
  • 6 cloves garlic, minced
  • 2 cups beef bone broth
  • 2 tbsp. Worcestershire sauce
  • 1 tbsp. coconut aminos
  • Salt and pepper

Directions

  1. In a large frying pan, heat the olive oil over medium heat.
  2. Add the onions to the pan and let them cook for about 15 minutes, stirring them now and then.
  3. When the onions are caramelised, spread them on the bottom of your slow cooker.
  4. Return the frying pan to the heat.
  5. Season the brisket before searing it in the pan where the onions were cooked.
  6. When the meat is browned, place it on top of the onions in the slow cooker.
  7. Put half of the onions on top of the brisket.
  8. Pour the Worcestershire sauce, coconut aminos and broth over the meat.
  9. Cook the brisket on low heat for 6 to 8 hours.
  10. The meat should pull apart with a fork.
  11. Let the meat rest for 20 minutes before serving.
  12. Use two forks to pull the brisket apart and mix it well with the onions and cooking juices.
  13. Serve on a bed of cauliflower rice.

Nutrition

Per Serving: 259 calories; 8 g fat; 6 g carbohydrates; 38 g protein

Equipment

  • Knife
  • Chopping board
  • Measuring jug
  • Measuring spoons
  • Frying pan
  • Wooden spoon
  • Tongs
  • Whisk

Nutritional disclaimer

Nutrition information is provided as an estimate based on the ingredients used and available in my area (New Zealand). The nutritional information is here to help you understand the recipe; I use MyFitnessPal to generate my estimates. For more accurate nutritional information, please use a nutritional calculator with the ingredients in your area.


Salmon cakes

Freezer meal

Hands up if you are busy. Who is way too tired to get in the kitchen to cook at the end of the day? Definitely me.

My days are filled with meetings, to-do lists, emails and telling people what to do; by the time I finish work, the last thing I want to do is get stuck into cooking a meal and cleaning up afterwards. I want to work out and do something fun before I crash. That is why freezer meals are my favourite solution to the challenge of a busy life. A few hours on the weekend, and you find yourself with a stack of options for dinner that can be thawed and cooked for a healthy, delicious meal that is good for you.

Meal prep on the weekend

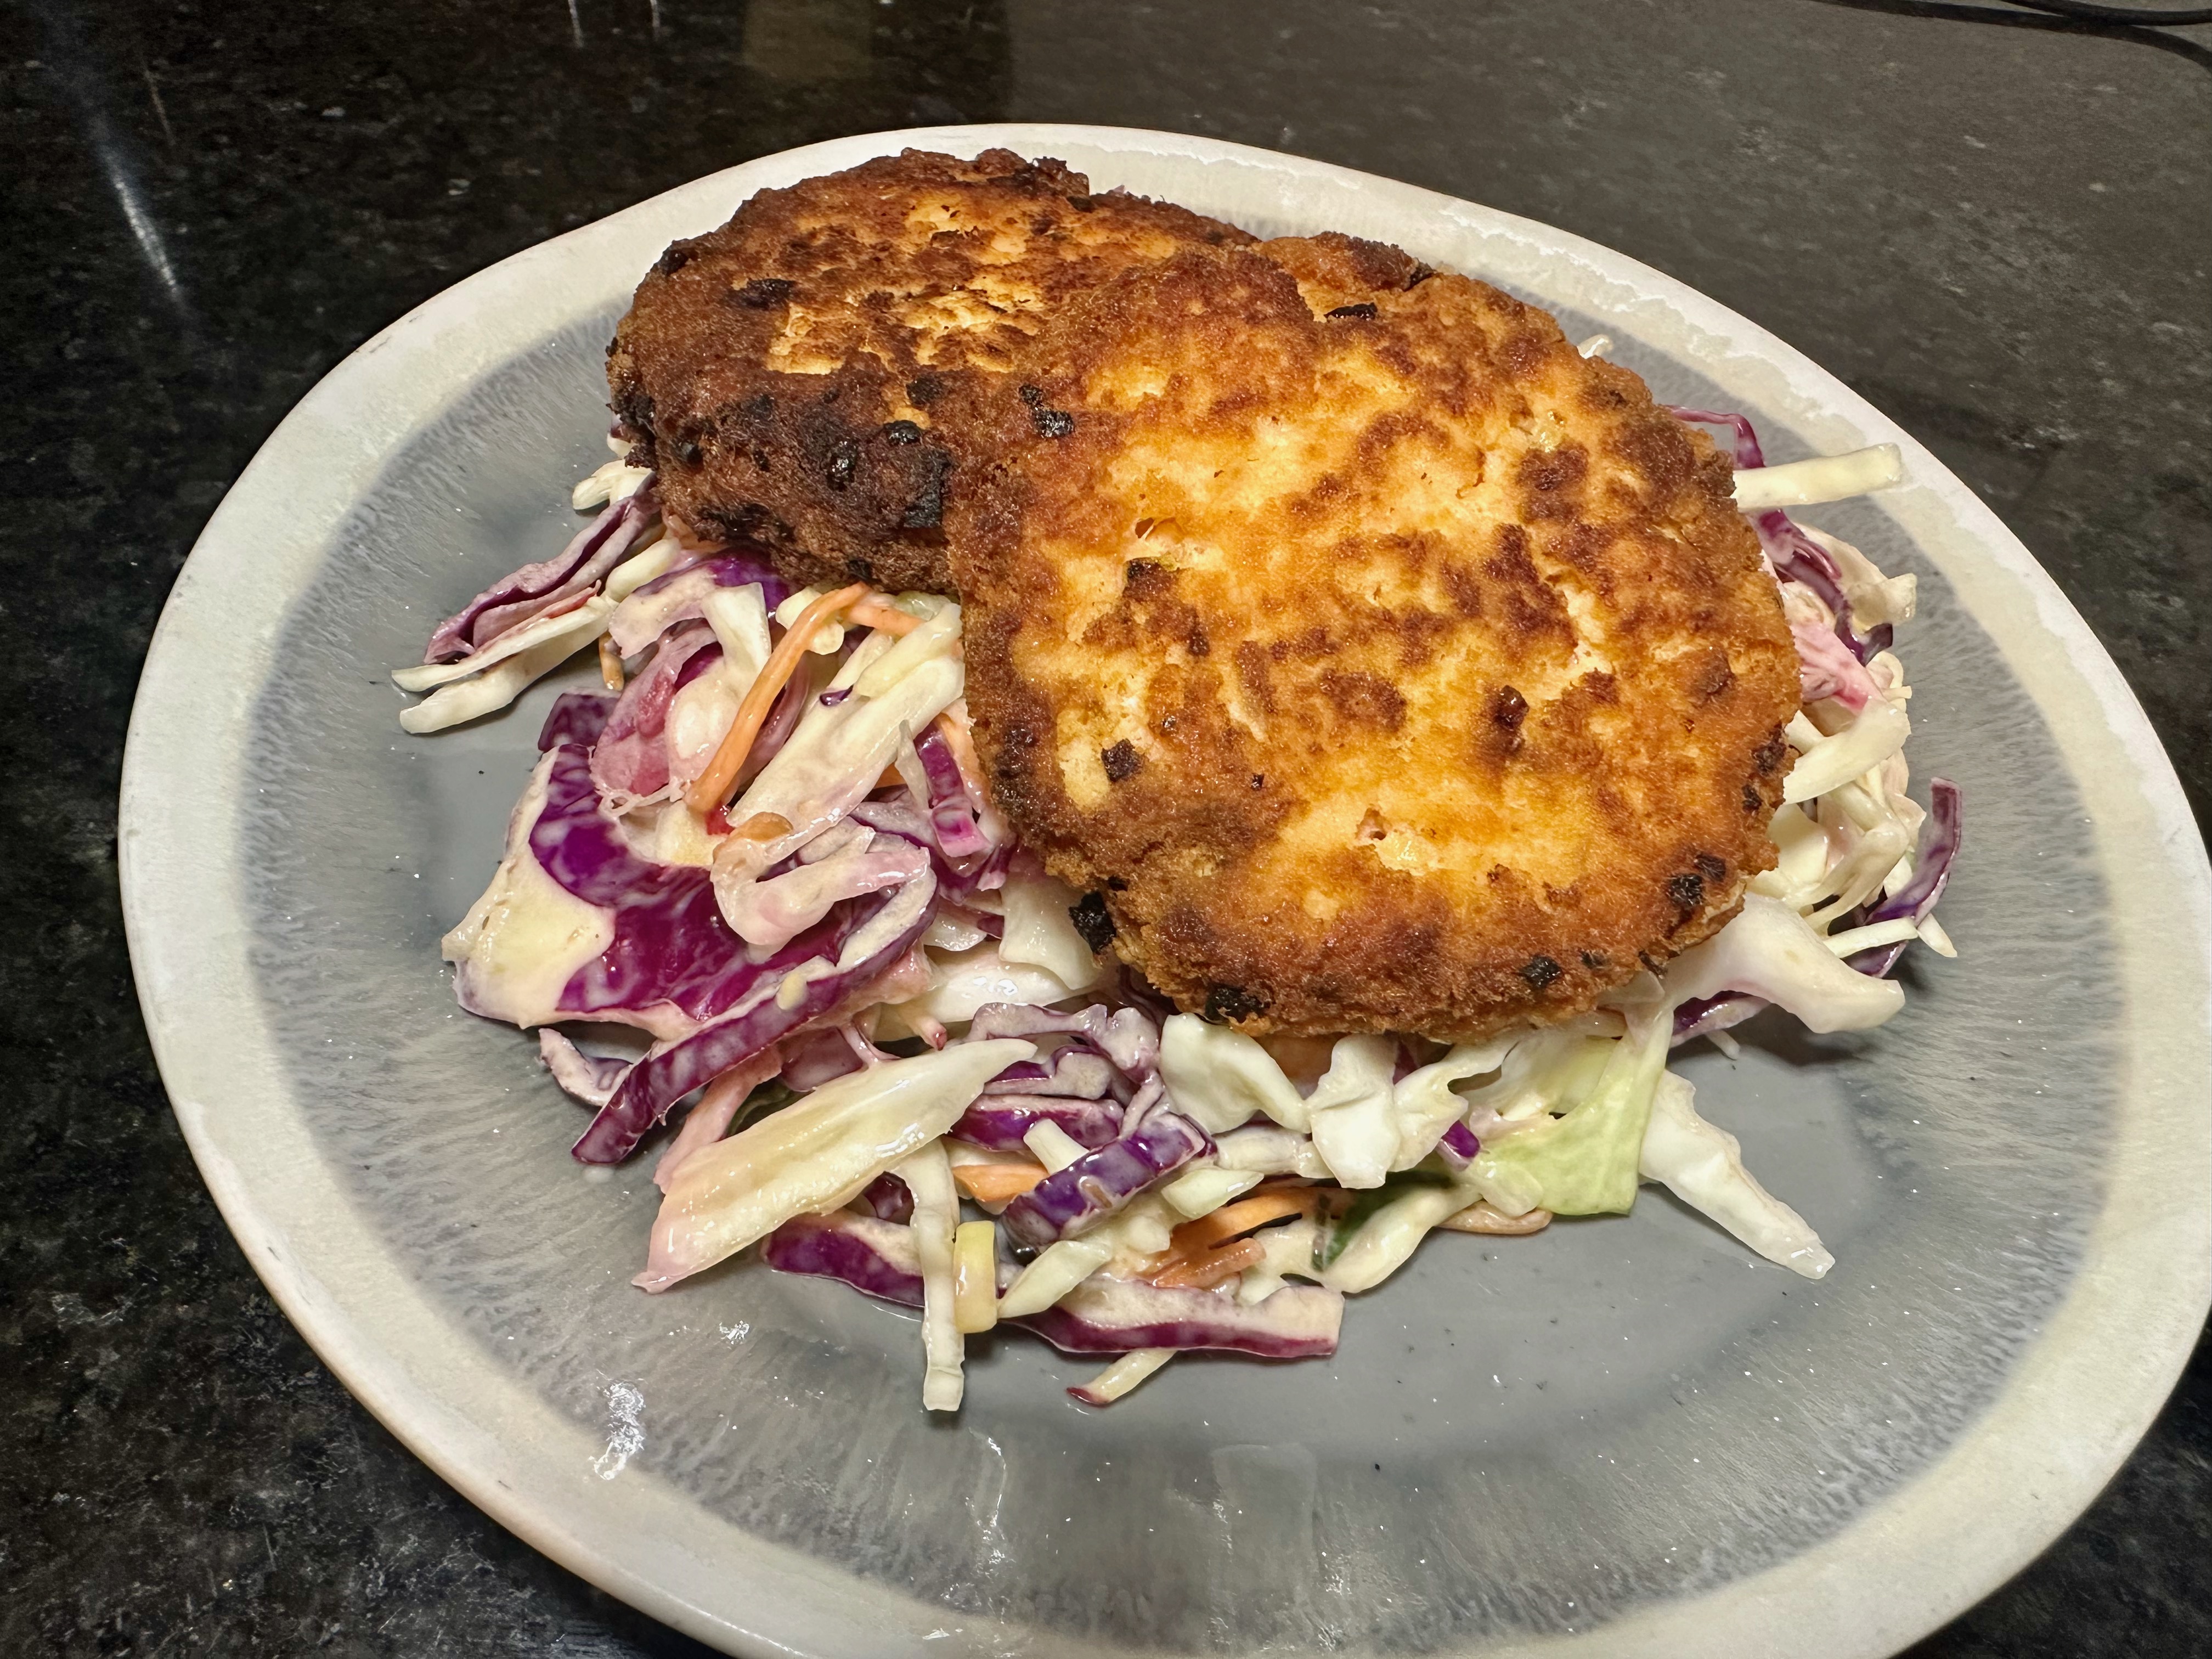
Last weekend, I restocked my freezer and added a few easy meals to make life easier on those very busy days. Salmon was on special offer at my bulk store, so I picked up a side and decided that salmon cakes would be my easy-added protein option for salads over the next few weeks. I like a bit of variety when preparing meals, and these salmon cakes give me an easy option that doesn’t need to be reheated before eating and tastes fantastic. If you can get your hands on a lot of salmon at a price that doesn’t require you to sell a kidney, you can easily make a large batch and package them up for the freezer.

Salmon cakes recipe

Ingredients

  • 600g salmon fillets, cooked
  • 4 eggs
  • 1 onion, finely sliced
  • 1/4 cup coconut flour

Instructions

In a large bowl, combine all ingredients and ensure everything is well mixed. 

Take a small handful of the mixture and shape it into a patty; repeat with the remaining mixture. 

Fry the patties in some oil over medium heat until the cakes are crisp on the outside.

“Salmon

  • Rating: ★★★★★
  • Print

“Simple


Credit: Cath @ easycleaneats

Ingredients

  • 600g salmon fillets, cooked
  • 4 eggs
  • 1 onion, finely sliced
  • 1/4 cup coconut flour

Directions

  1. In a large bowl, combine all ingredients and ensure everything is well mixed.
  2. Take a small handful of the mixture and shape it into a pattie; repeat with the remaining mixture.
  3. Fry the patties in some oil over medium heat until the cakes are crisp on the outside.

Nutrition

Per Serving: 192 calories; 8g fat; 5g carbohydrates; 18g protein

Equipment

  • Knife
  • Chopping board
  • Large mixing bowl
  • Frying pan 
  • Spatula 

Nutritional disclaimer

Nutrition information is provided as an estimate based on the ingredients used and available in my area (New Zealand). The nutritional information is here to help you understand the recipe; I use MyFitnessPal to generate my estimates. For more accurate nutritional information, please use a nutritional calculator with the ingredients in your area.


BLT salad in a jar

Awesome in a jar

I live for easy meals, and this salad is one of the easiest things to make. It’s so tasty that it’s ridiculous.

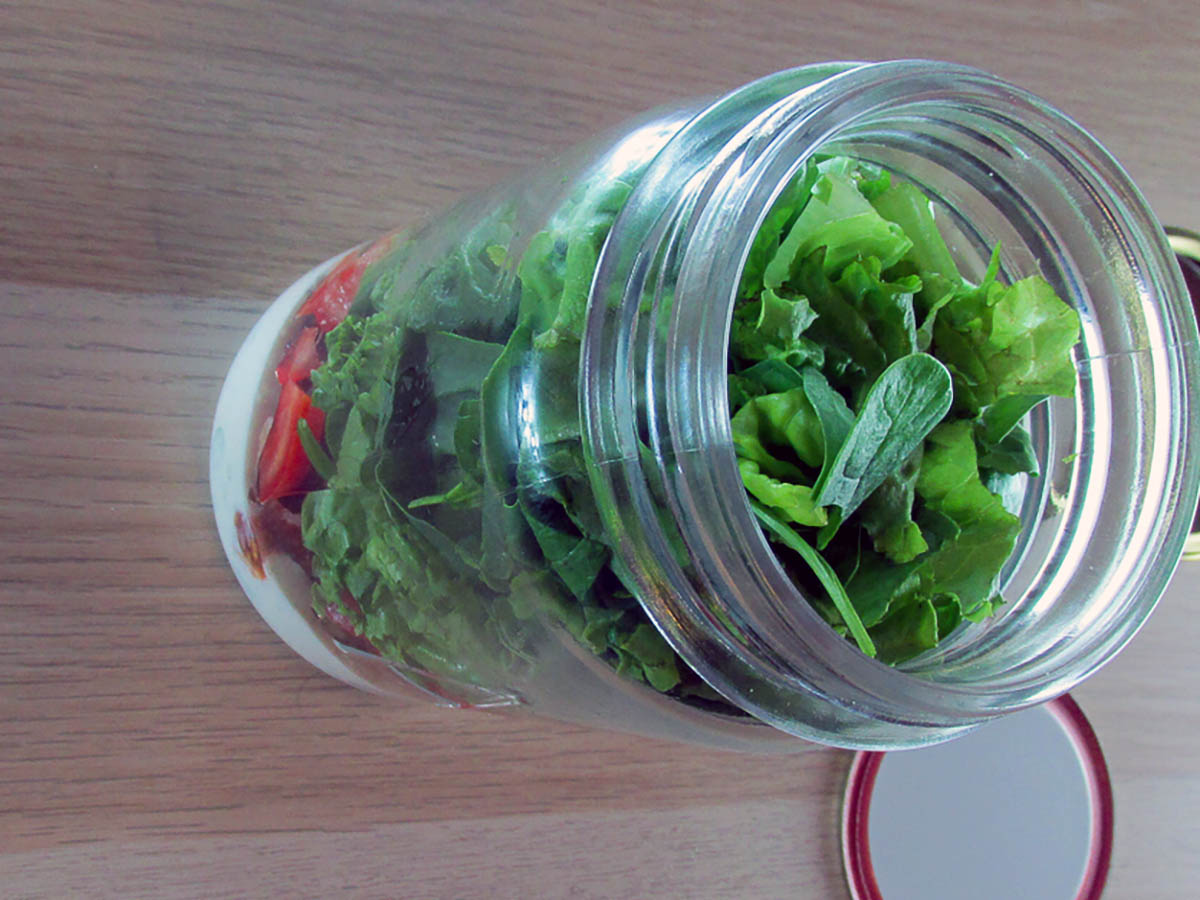
Bacon, lettuce and tomato in a jar with a simple dressing. I love this salad as a take-to-work lunch option. On the rare occasion I have bacon left over from breakfast, I use it for this. Bonus points for a plastic-free meal when you use a big glass jar. 

I bought a larger-than-normal pack of bacon at the supermarket last week and wanted to use as much as possible before I had to think about putting it in the freezer. This is how I decided to use it. 

Bacon makes everything better

I firmly believe that bacon can make anything better, and having it for lunch can turn a bad day around. I made the most of my large pack of bacon by making this salad to see me through what promised to be a challenging week at work that would require something to perk me up at lunchtime. Suddenly, my horror week at work now has small breaks that include bacon-based happiness and a weekend with the promise of eggs fried in bacon fat. Seriously, what more can a girl ask for? 

While I would like to live on bacon alone, my macros require more protein than bacon can provide in a single sitting. For an extra protein portion, I like to add half a chicken breast to my salad. This recipe is portioned for two servings, so you can enjoy bacon two days in a row.

BLT salad in a jar recipe

Ingredients

BLT salad in a jar ingredients
  • 4 slices bacon, cooked and crumbled
  • 2 tomatoes, diced
  • 2 cups cos lettuce
  • 2 cups iceberg lettuce
  • 1/4 cup easy mayo
  • 2 tbsp. milk
  • 2 tbsp. sour cream
  • Salt and pepper
Make the dressing and put some at the bottom of the jar
Make the dressing and put some in the bottom of the jar
Add the bacon to the jar
Add the tomato to the jar
Next add the tomato
Finally add the lettuce to the jar
Shake and serve salad.
Salad ready for a shake and serve

BLT salad in a jar 

  • Servings: 2
  • Rating: ★★★★★
  • Print

This easy salad is a great lunchtime and simple to make ahead


Credit: Cath @ easycleaneats

Ingredients

Directions

  1. At the bottom of a jar, mix the mayo, milk, sour cream, salt, and pepper.
  2. Add the bacon to the jar, followed by the spring onions, tomatoes, iceberg lettuce, and cos lettuce.
  3. Close the jar and store it in the fridge.
  4. Before opening it to eat, shake the jar to coat all the ingredients in the dressing.
  5. If you are fancier than I am, you can tip the jar into a bowl; you may need to scrape the dressing.

Nutrition

Per Serving: 239 calories; 20 g fat; 11 g carbohydrates; 8 g protein

Equipment

  • Mason jar
  • Fork or whisk
  • Knife
  • Chopping board
  • Measuring cups
  • Measuring spoons

Nutritional disclaimer

Nutrition information is provided as an estimate based on the ingredients used and available in my area (New Zealand). The nutritional information is here to help you understand the recipe; I use MyFitnessPal to generate my estimates. For more accurate nutritional information, please use a nutritional calculator with the ingredients in your area.


Cauliflower rice

Alternative to rice 

A huge challenge I faced when transitioning away from pasta and rice was finding something to pair with yummy sauces and curries. Paleo gave us the grateness, sorry, I meant the greatness of cauliflower rice. 

I’ve found some cool things to do with it over the years, but the base recipe is the starting point for inventions.  

Cauliflower rice

Easy to make with the right tools 

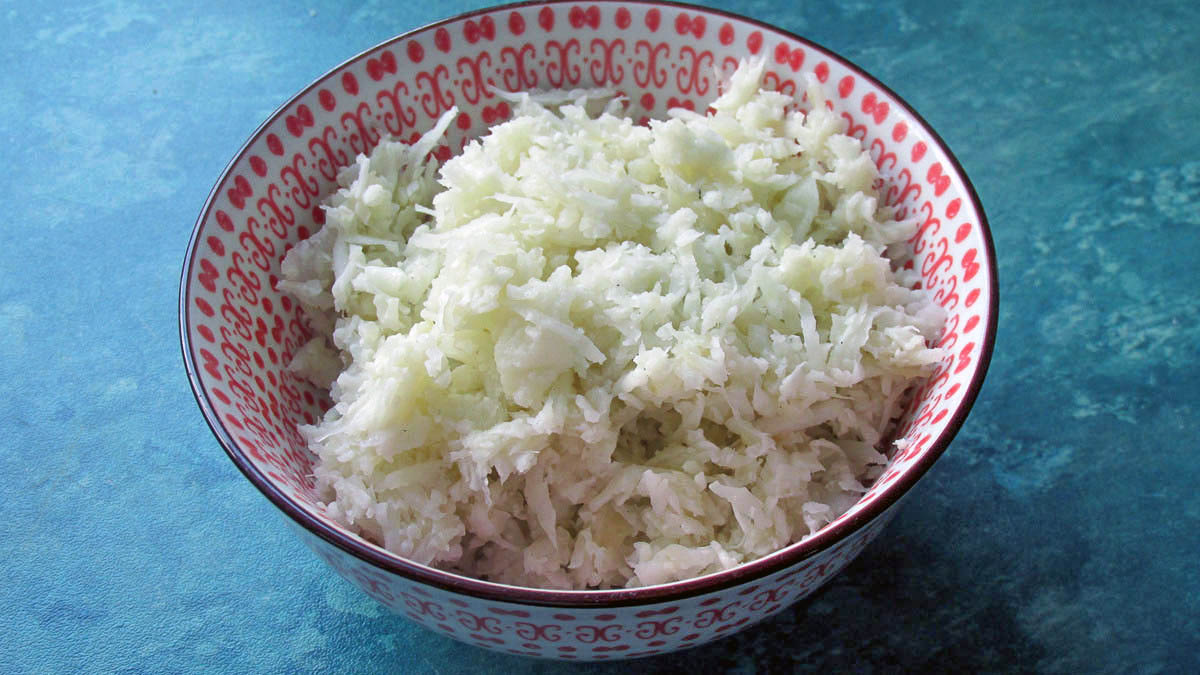
Cauliflower rice is simple to make when the ingredients are prepared, but the preparation can take some time. I spent a year grating all of my cauliflowers by hand before moving over to a food processor and away from the weekly skin grafts to my fingers. I was becoming concerned that my family would develop a liking for long pig in their food. A food processor with a grating attachment is a must if you plan to switch from real rice. You can process four cauliflower heads in the time it takes to grate one by hand. To make rice, I like to use the smaller grating attachment to get a fine texture.

Buy in bulk 

If you’re transitioning away from rice and pasta, consider keeping cauliflower rice on hand. You can freeze cauliflower if it is raw or cooked. That means you can make the most of cauliflower when it is in season and cheap. I like to buy in bulk, grate, portion and freeze. That way, you can pull a bag or tub of cauliflower rice from the freezer and cook it up when you need it. 

Cauliflower rice recipe 

Cauliflower rice ingredients

Ingredients

  • 1 head cauliflower finely grated 
  • 1/2 onion finely minced 
  • 2 garlic cloves finely minced 
  • 1 tbsp. coconut oil 

Instructions

Break the cauliflower into large florets.

Use a food processor with a fine grating attachment to grate cauliflower.

If you don’t have a food processor, you can grate the cauliflower by hand.

Finely chop the onion.

When all of the cauliflower is grated, transfer it to a mixing bowl.

Take a large frying pan and place it over medium heat, then melt some coconut oil.

Add some oil to a frying pan.

Add the onion to the frying pan.

Cook the onion until it is softened.

Add the cauliflower to the frying pan.

Add the cauliflower rice
Cook the cauliflower for 5 minutes

Cook the cauliflower and onion for 5 minutes.

Keep the rice moving in the pan.

Keep the cauliflower moving in the pan; you don’t want it to colour.

When the cauliflower has softened, it is ready to serve.

Serve hot or cold.

Cauliflower rice ready to eat

You can freeze the cauliflower rice to use anytime you need it.

Put the extra cauliflower rice in the freezer

Cauliflower rice

  • Servings: 4
  • Rating: ★★★★★
  • Print

This easy to make alternative to rice is a must know recipe for clean eating, paleo, primal and keto diets.


Credit: Cath @ easycleaneats

Ingredients

  • 1 head cauliflower grated
  • 1/2 onion, finely minced
  • 1 tbsp. coconut oil
  • 1 garlic clove minced (optional)

Directions

  1. Break the cauliflower into large florets.
  2. Use a food processor with a fine grating attachment to grate cauliflower.
  3. If you don’t have a food processor you can grate the cauliflower by hand.
  4. Finely chop the onion.
  5. When all of the cauliflower is grated transfer it to a mixing bowl.
  6. Take a large frying pan over a medium heat and melt some coconut oil.
  7. Add the onion to the frying pan.
  8. Cook the onion until it is softened.
  9. Add the cauliflower to the frying pan.
  10. Cook the cauliflower and onion for 5 minutes.
  11. Keep the cauliflower moving in the pan, you don’t want it to colour.
  12. When the cauliflower has softened it is ready to serve.
  13. Serve hot or cold.
  14. You can freeze the cauliflower rice to use anytime you need it.

Nutrition

Per Serving: 54 calories; 0 g fat; 12 g carbohydrates; 3 g protein

Equipment

  • Knife 
  • Chopping board 
  • Food processor with the grating attachment 
  • Or grater 
  • Mixing bowl
  • Frying pan 
  • Wooden spoon 
  • Measuring spoons

Nutritional disclaimer

Nutrition information is provided as an estimate based on the ingredients used and available in my area (New Zealand). The nutritional information is here to help you understand the recipe; I use MyFitnessPal to generate my estimates. For more accurate nutritional information, please use a nutritional calculator with the ingredients in your area.


Mexican corn salad

Hot and humid

It has been super warm here in Auckland this week, add the humidity, and I’m left with zero desire to do anything but hang out in front of the fan or the cold plunge pool. When it comes to meals, I spend most of the week eating my meal prep from the freezer and come the weekend, I want something a bit different. Not bagging my meal prep, but I want something more exciting when I have time. It is time for something fresh and tasty.

Seasonal treats

Good ole Northland corn is cheap as chips right now, so I picked up a bunch with grand plans to make Mexican-style corn. Corn on the cob, I discovered years ago, can be as divisive as Vegemite. Some love the experience of chowing down on a hot buttery cob and don’t mind the bits of corn that always get stuck between their teeth, while others hate it. I’m in the first camp, but for a long time had to work around people in the second camp. The first time I made this recipe, I had a stack of fresh corn and three people who refused to eat it from the cob. I wondered how I could use the corn and pack in my much-loved Mexican flavours without the whinging that would come with a cob on a plate. The grilled corn salad was just born.

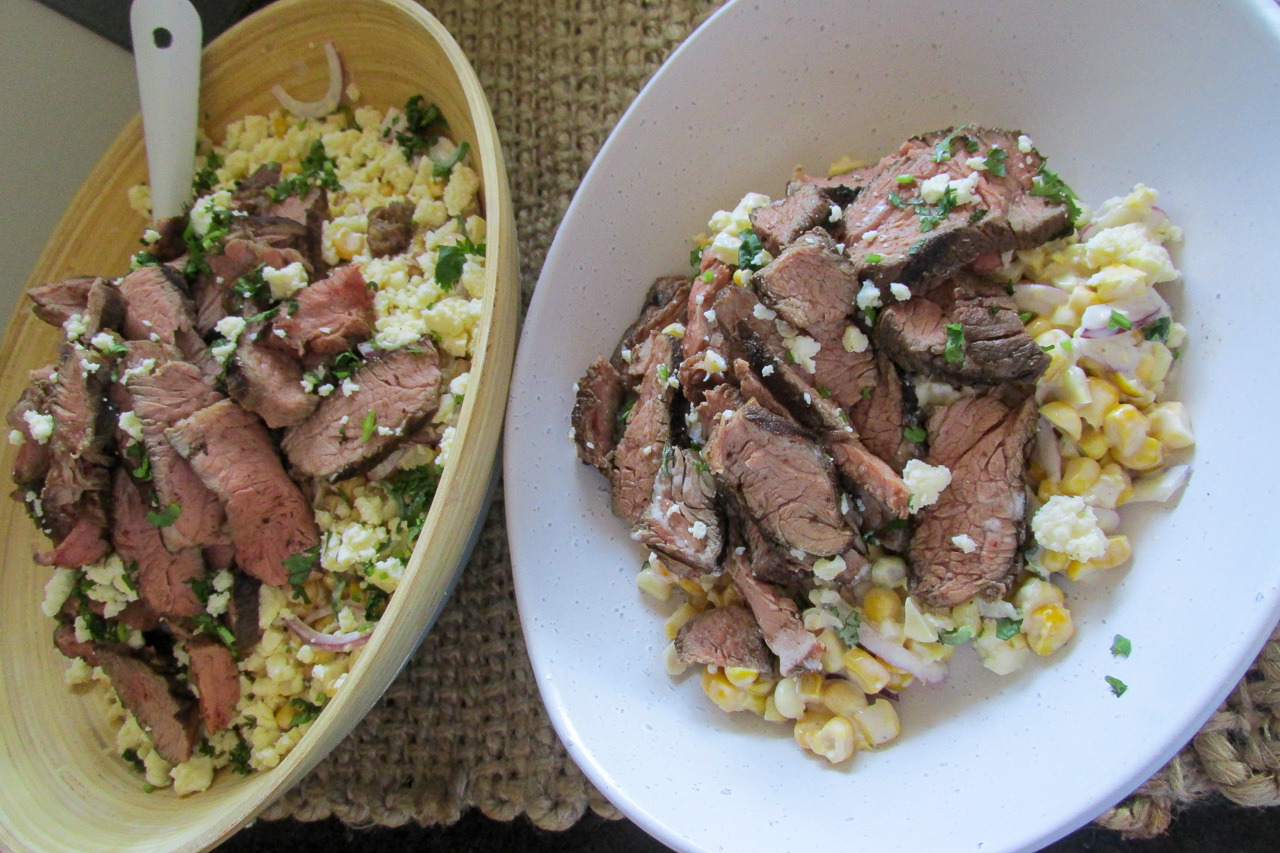
Mexican style street corn salad with steak recipe

Ingredients

  • 1 tbsp. butter
  • 6 corn ears
  • Salt and pepper
  • 2 tbsp. mayo 
  • 3 tbsp. sour cream
  • 1/2 tsp. chilli powder
  • 3 tbsp. lime juice
  • 1 jalapeño, seeded and sliced
  • 1/2 red onion, finely sliced
  • 3 tbsp. coriander, chopped
  • 1/2 cup feta cheese, crumbled
  • 500g steak, cooked and sliced

Instructions

Cook your steak to your preference. I like to sous vide mine to perfection.

Fold back the husks from the corn and cut them off.

Brush the corn with the butter and season the corn.

Over high heat on a BBQ or in a griddle pan, place the corn on the grill or in the pan. 

When the corn starts to char, turn it over, repeat until the corn is slightly charred all over.

Remove the corn from the pan or grill.

On a steady surface stand the corn on its end and with a very sharp knife slice the corn off the cob.

Put the corn into a large mixing bowl to cool.

In another bowl, whisk together the mayo, sour cream, lime juice, chilli powder, salt and pepper to make the dressing.

Add the dressing to the called corn and mix well.

Add the coriander, jalapeño and red onion to the corn and toss to mix.

To serve, plate up the corn salad and serve with the steak and crumbled feta on top.

Mexican style street corn salad with steak

  • Rating: ★★★★★
  • Print

“A


Credit: Cath @ easycleaneats

Ingredients

  • 1 tbsp. butter
  • 6 corn ears
  • Salt and pepper
  • 2 tbsp. mayo
  • 3 tbsp. sour cream
  • 1/2 tsp. chilli powder
  • 3 tbsp. lime juice
  • 1 jalapeño, seeded and sliced
  • 1/2 red onion, finely sliced
  • 3 tbsp. coriander, chopped
  • 1/2 cup feta cheese, crumbled
  • 500g steak, cooked and sliced

Directions

  1. Fold back the husks from the corn and cut them off.
  2. Brush the corn with the butter and season the corn.
  3. Over high heat on a BBQ or in a griddle pan, place the corn on the grill or in the pan.
  4. When the corn starts to char, turn it over, repeat until the corn is slightly charred all over.
  5. Remove the corn from the pan or grill.
  6. On a steady surface stand the corn on its end and with a very sharp knife slice the corn off the cob.
  7. Put the corn into a large mixing bowl to cool.
  8. In another bowl, whisk together the mayo, sour cream, lime juice, chilli powder, salt and pepper to make the dressing.
  9. Add the dressing to the called corn and mix well.
  10. Add the coriander, jalapeño and red onion to the corn and toss to mix.
  11. 11.To serve, plate up the corn salad and serve with the steak and crumbled feta on top.

Nutrition

Per Serving: 254 calories; 17g fat; 12g carbohydrates; 15g protein

Equipment

  • Measuring spoons
  • Kitchen scale
  • Chopping board
  • Knife
  • Tongs
  • Fork
  • Large mixing bowl
  • Small mixing bowl

Nutritional disclaimer

Nutrition information is provided as an estimate based on the ingredients used and available in my area (New Zealand). The nutritional information is here to help you understand the recipe; I use MyFitnessPal to generate my estimates. For more accurate nutritional information, please use a nutritional calculator with the ingredients in your area.


Teriyaki burger

Summer means BBQ, which means lots of burgers. You will never catch me complaining about burgers. A recent trip to the supermarket scored a pineapple for cheap, and I knew exactly what I wanted to do with it: grill it on the BBQ, then smash it on a burger! I love grilled pineapple on burgers, and I don’t think it should be saved for chicken burgers. I know that might sound like I’ve lost my mind (maybe I have, but stick with me a moment), grilled pineapple can work with beef burgers as long as you bring a little something special to the party, teriyaki sauce. 

Make your own

If you are like me and you try to avoid mass-produced processed foods, the best option is to make your own. When you make your own, you control which ingredients you use and how much or how sweet you want it to be. Once you have a go at making your own and realise how easy it is, you will never go back to store-bought again. I try my best to stay away from soy and sugar, but it’s hard to avoid when it comes to teriyaki sauce, which is why I make my own. As a bonus to these kick-ass burgers, here is my teriyaki sauce recipe, which is super easy to make.

Back to the burgers

A long time ago, I had to get creative to get two small boys to eat vegetables without it turning into a war of wills. Very finely chopped vegetables are easy to sneak into burgers, and even when discovered, there is very little chance the burger will go uneaten. Nowadays, I don’t need to hide vegetables; I can openly include them and enjoy every bite. For this recipe, the carrot and spring onion not only add some flavour and texture but also a nice pop of colour and help balance the sweetness of the pineapple. 

Teriyaki burger recipe

Ingredients

  • 900g minced beef
  • 1 carrot, grated
  • 3 spring onions, chopped
  • 1 tsp. ginger
  • 1 tsp. coconut aminos
  • 1 tsp. garlic powder
  • 1/4 cup teriyaki sauce
  • 8 pineapple slices

Instructions

In a large bowl, combine the beef mince, carrot, spring onions, ginger, garlic powder and coconut aminos.

Try not to overwork the meat, mix it enough to bring it all together and spread the flavours.

Divide the meat into eight portions and shape them into burger patties.

Place the burgers on a lined baking tray.

Spread a little of the teriyaki sauce over each burger.

Cover the burgers and refrigerate for about 30 minutes.

Cook your burgers over high heat, either on a BBQ or in a griddle pan.

Add a little of the teriyaki sauce to each side while cooking. 

Depending on the thickness of your burgers, it should take about 5 minutes per side.

While the burgers are cooking, start grilling the pineapple; it should take 3 minutes on each side, or until it begins to caramelise. If you are cooking on a BBQ, the pineapple may cook more quickly. Keep it away from direct heat so it doesn’t burn.

Serve the burgers on a lettuce bun with a grilled pineapple slice.

“Teriyaki

  • Rating: ★★★★★
  • Print

“These


Credit: Cath @ easycleaneats

Ingredients

  • 900g minced beef
  • 1 carrot, grated
  • 3 spring onions, chopped
  • 1 tsp. ginger
  • 1 tsp. coconut aminos
  • 1 tsp. garlic powder
  • 1/4 cup teriyaki sauce
  • 8 pineapple slices

Directions

  1. In a large bowl, combine the beef mince, carrot, spring onions, ginger, garlic powder and coconut aminos.
  2. Try not to overwork the meat, mix it enough to bring it all together and spread the flavours.
  3. Divide the meat into eight portions and shape them into burger patties.
  4. Place the burgers on a lined baking tray.
  5. Spread a little of the teriyaki sauce over each burger.
  6. Cover the burgers and refrigerate for about 30 minutes.
  7. Cook your burgers over high heat, either on a BBQ or in a griddle pan.
  8. Add a little of the teriyaki sauce to each side while cooking.
  9. Depending on the thickness of your burgers, it should take about 5 minutes per side.
  10. While the burgers are cooking, start grilling the pineapple; it should take 3 minutes on each side, or until it begins to caramelise. If you are cooking on a BBQ, the pineapple may cook more quickly. Keep it away from direct heat so it doesn’t burn.
  11. Serve the burgers on a lettuce bun with a grilled pineapple slice.

Nutrition

Per Serving:187 calories; 4.6g fat; 15.2g carbohydrates; 22.5g protein

Equipment

  • Large mixing bowl
  • Baking tray
  • Beeswax wrap
  • BBQ or Griddle pan
  • Sauce brush
  • Spatula
  • Tongs 

Nutritional disclaimer

Nutrition information is provided as an estimate based on the ingredients used and available in my area (New Zealand). The nutritional information is here to help you understand the recipe; I use MyFitnessPal to generate my estimates. For more accurate nutritional information, please use a nutritional calculator with the ingredients in your area.


Instant Pot Pho

Enjoying the outside world

This summer has been a mixed bag so far, with more rain than I personally appreciate, even though my herbs like it. So whenever possible, I’ve been getting out and about as much as I can and using my fast-growing herbs when I get home from my adventures. After some adventuring, I never have much energy for cooking, so my Instant Pot is a lifesaver, and the pressure cooking setting means something like a tasty soup that should take hours to make can be ready to eat in less than an hour. 

Loving soup right now

As much as I love a good BBQ in the summer, this year I’ve been loving sitting down to a bowl of soup for dinner over the last few weeks, and this Pho has been my go-to. I’ve been making a pot and grabbing a bowl post-workout for a high-protein meal that doesn’t make me feel overfull or climbing the walls for a snack an hour later. If you are looking for an easy meal that is full of flavour and helps you hit your protein goals, I can highly recommend it.

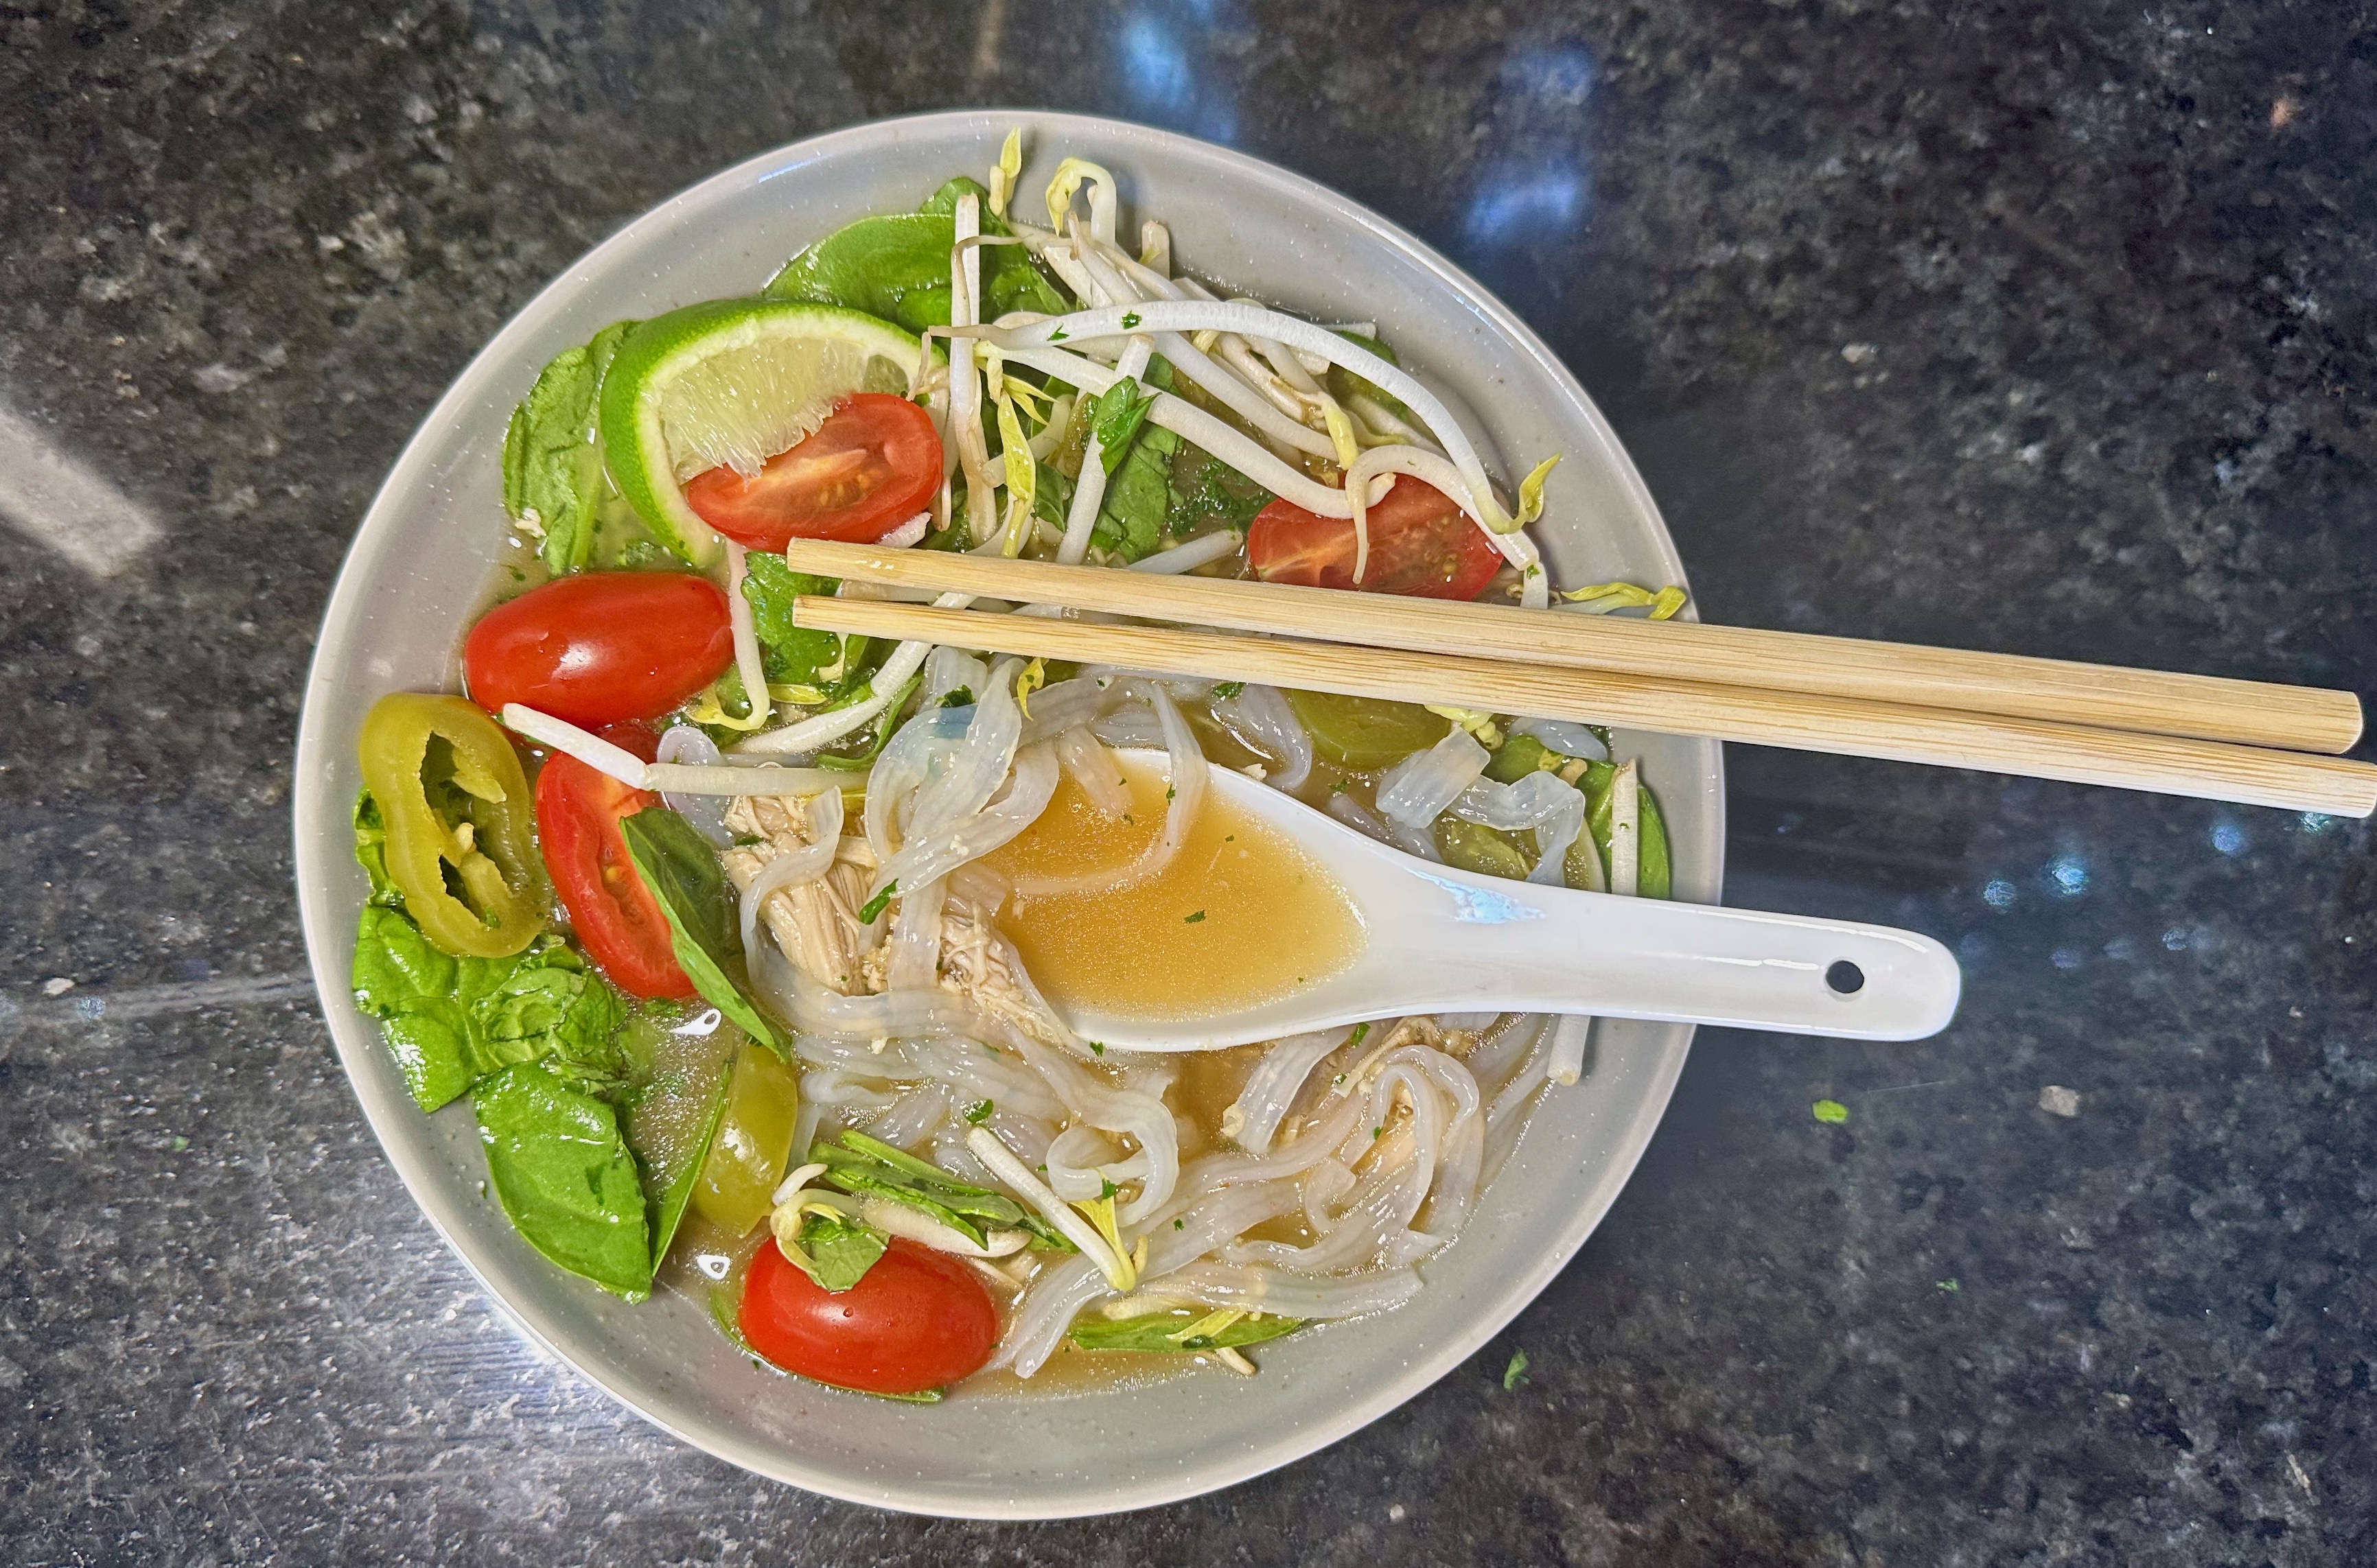
Instant Pot Pho Soup

Ingredients

  • 500g Chicken thighs 
  • 1 1/2 tsp ground coriander
  • 2 tbsp ginger peeled and minced
  • 2 tsp garlic crushed
  • 1 stem Basil 
  • 1 tsp cloves whole 
  • 1/2 tbsp pepper
  • 1/4 tsp salt
  • 1 cup spring onions 
  • 1.5 ltr chicken bone broth 
  • 1 tbsp Sriracha 
  • 1 tbsp fish sauce, or more to taste 
  • 250g konjac noodles
  • 2 1/2 cups baby spinach
  • 1 1/2 cups cherry tomatoes, halved
  • 1 cup bean sprouts
  • Garnish
  • 1/4 cup fresh coriander, coarsely chopped 
  • 2 tbsp mint leaves, chopped
  • 4 Lime wedges to taste
  • 1/4 cup Jalapeno slices

Instructions

Place the chicken thighs, coriander, ginger, garlic, basil, cloves, pepper, salt, spring onions, and broth into the instant pot and cook for 35 minutes on high pressure.

While it is cooking, rinse the noodles and prepare the vegetables and toppings for the soup.

Let the pressure out using the quick release at the end of 35 minutes. 

Remove the chicken and shred it with a fork.

Strain the broth into a large bowl or container. For clear broth, use cheesecloth when you strain it.

Add the chicken back to the broth.

Mix the sriracha and fish sauce into the broth and mix well. You can add more sriracha to the broth if you like your soup hot.

To serve the soup, dish it into a bowl, then add noodles, spinach, tomatoes, bean sprouts, and garnish with the chopped coriander and mint leaves, sliced jalapeño and a lime wedge.

“Instant

  • Rating: ★★★★★
  • Print

“This


Credit: Cath @ easycleaneats

Ingredients

  • 500g Chicken thighs 
  • 1 1/2 tsp ground coriander
  • 2 tbsp ginger peeled and minced
  • 2 tsp garlic crushed
  • 1 stem Basil 
  • 1 tsp cloves whole 
  • 1/2 tbsp pepper
  • 1/4 tsp salt
  • 1 cup spring onions 
  • 1.5 ltr chicken bone broth 
  • 1 tbsp Sriracha 
  • 1 tbsp fish sauce, or more to taste 
  • 250g konjac noodles
  • 2 1/2 cups baby spinach
  • 1 1/2 cups cherry tomatoes, halved
  • 1 cup bean sprouts
  • 1/4 cup fresh coriander, coarsely chopped 
  • 2 tbsp mint leaves, chopped
  • 4 Lime wedges to taste
  • 1/4 cup Jalapeno slices

Directions

  1. Place the chicken thighs, coriander, ginger, garlic, basil, cloves, pepper, salt, spring onions, and broth into the instant pot and cook for 35 minutes on high pressure.
  2. While it is cooking, rinse the noodles and prepare the vegetables and toppings for the soup.
  3. Let the pressure out using the quick release at the end of 35 minutes.
  4. Remove the chicken and shred it with a fork.
  5. Strain the broth into a large bowl or container. For clear broth, use cheesecloth when you strain it.
  6. Add the chicken back to the broth.
  7. Mix the sriracha and fish sauce into the broth and mix well. You can add more sriracha to the broth if you like your soup hot.
  8. To serve the soup, dish it into a bowl, then add noodles, spinach, tomatoes, bean sprouts, and garnish with the chopped coriander and mint leaves, sliced jalapeño and a lime wedge.

Nutrition

Per Serving: 201 calories; 11.1g fat; 5g carbohydrates; 21.6g protein

Equipment

  • Knife
  • Chopping board
  • Instant Pot or Pressure Cooker
  • Large mixing bowls
  • Forks
  • Cheesecloth
  • Strainer

Nutritional disclaimer

Nutrition information is provided as an estimate based on the ingredients used and available in my area (New Zealand). The nutritional information is here to help you understand the recipe; I use MyFitnessPal to generate my estimates. For more accurate nutritional information, please use a nutritional calculator with the ingredients in your area.