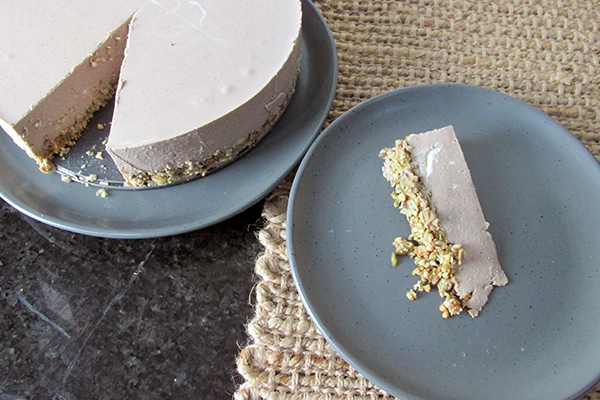
Italian roast chicken

Something fancy

It’s been a busy few weeks; I’ve been keeping my meals simple and relying on freezer staples while operating in survival mode. I have a little bit of breathing room now and an intense craving for something fancier for dinner.

Italian roast chicken tray

Fancy but easily

In my book, fancy doesn’t have to mean spending hours in the kitchen boiling to death over a hot stove. This recipe delivers a very fancy meal with minimal effort; it is all cooked on a single tray, which makes it perfect.

The roasted garlic is the star of this meal for me. The bed of garlic under the chicken means you get great flavour throughout the meat, while the roast garlic cloves have a deep, rich flavour that complements the rest of the dish.

The quick prep and hands-off cooking mean you can get on with other things and come back to a perfectly roasted chicken that can satisfy any desire for a fancy dinner. 

Dinner ready without effort

While living in survival mode, I try to make life easier for myself by multitasking so that life admin and essential tasks don’t take away from much-needed rest and relaxation. In the spirit of multitasking, I combined a trip home from the office with a pit stop at the supermarket to get everything I needed for my fancy dinner and did the prep (putting everything on a tray) while I waited for the kettle to boil. Knowing I would be ready for dinner after my workout, I smashed dinner in the oven before heading downstairs to throw around some weights. By the time I finished my workout, the chicken was ready for the foil and baking paper to be removed, and there was plenty of time for me to shower before sitting down to a flavourful, filling and fancy dinner.

Italian roast chicken recipe

Italian roast chicken ingredients

Ingredients 

  • 2 large tomatoes thickly sliced
  • 250g cherry tomatoes
  • 1 red onion thinly sliced
  • 1 garlic bulb peeled and bruised
  • 1/3 cup flat-leaf parsley chopped
  • 1/3 cup red wine vinegar
  • 1/4 cup olive oil
  • 3 sprigs rosemary
  • 1.6 kg chicken
Large chicken

Take a large baking tray.

Take a large baking tray.

Place one garlic bulb on the baking tray.

Place one garlic bulb on the baking tray.

Lay the chicken on top of the garlic.

Lay the chicken on top of the garlic.

Spread out the onion next to the chicken.

Spread out the onion next to the chicken.

Add the remaining garlic bulbs on top of the onions.

Add the remaining garlic bulbs on top of the onions.

Add the tomatoes on top of the garlic.

Add the tomatoes on top of the garlic.

Drizzle the vinegar and olive oil over the chicken and vegetables.

Drizzle the vinegar and olive oil over the chicken and vegetables.

Place the rosemary sprigs on top of the chicken and the vegetables.

Cover the baking tray with baking paper.

Cover the baking tray with baking paper.

Cover the baking paper with foil.

Cover the baking paper with foil.

Bake for 1 hour.

Check the chicken to make sure the meat is cooked and the juices are running clear before removing the baking paper and foil, this will depend on the size of the chicken.

Check the chicken to make sure the meat is cooked and the juices are running clear

Return the chicken to the oven uncovered for another 20 minutes or until the skin is golden brown.

Return the chicken to the oven uncovered for another 20 minutes

Slice the chicken, squeeze out the garlic and serve while hot.

Slice the chicken, squeeze out the garlic and serve while hot.

Italian roast chicken

  • Servings: 6
  • Rating: ★★★★★
  • Print

This one tray meal a great option for busy week nights or an action packed weekend.


Credit: Cath @ easycleaneats

Ingredients

  • 2 tomatoes thickly sliced
  • 250g cherry tomatoes
  • 1 red onion thinly sliced
  • 1 garlic bulb peeled and bruised
  • 1/3 cup flat leaf parsley chopped
  • 1/3 cup red wine vinegar
  • 1/4 cup olive oil
  • 3 sprigs rosemary
  • 1.6 kg chicken

Directions

  1. Preheat the oven to 200 degrees C/ 400 degrees F.  
  2. Take a large baking tray.
  3. Place one garlic bulb on the baking tray.
  4. Lay the chicken on top of the garlic.
  5. Spread out the onion next to the chicken.
  6. Add the remaining garlic bulbs on top of the onions.
  7. Add the tomatoes on top of the garlic.
  8. Drizzle the vinegar and olive oil over the chicken and vegetables.
  9. Place the rosemary sprigs on top of the chicken and the vegetables.
  10. Cover the baking tray with baking paper.
  11. Cover the baking paper with foil.
  12. Bake for 1 hour.
  13. Check the chicken to make sure the meat is cooked and the juices are running clear before removing the baking paper and foil, this will depend on the size of the chicken.
  14. Return the chicken to the oven uncovered for another 20 minutes or until the skin is golden brown.
  15. Slice the chicken, squeeze out the garlic and serve while hot.

Nutrition

Per Serving: 349 calories; 14 g fat; 9 g carbohydrates; 53 g protein

Equipment

  • Roasting tin
  • Baking paper 
  • Aluminium foil
  • Measuring cups
  • Scales 

Nutritional disclaimer

Nutrition information is provided as an estimate based on the ingredients used and available in my area (New Zealand). The nutritional information is here to help you understand the recipe; I use MyFitnessPal to generate my estimates. For more accurate nutritional information, please use a nutritional calculator with the ingredients in your area.
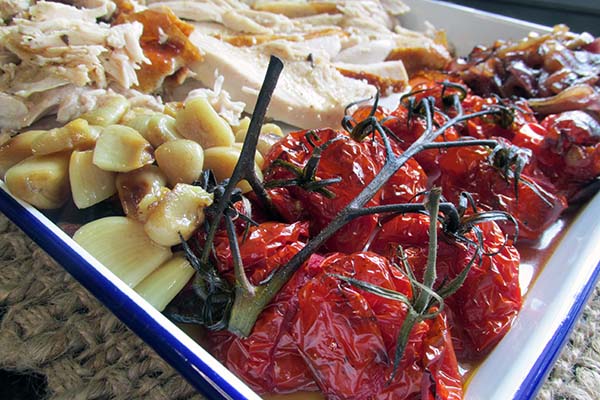

Caesar salad dressing

Caesar salad is one of my favourites, this dressing is easy to make and will finish off your Caesar salad just right.

Make your own

If you are like me and try to avoid mass-produced processed foods, the best option is to make your own. When you make your own, you control which ingredients you use and how much or how sweet you want it to be. Once you have a go at making your own and realise how easy it is, you will never go back to store-bought again.

Sauce without sh*t

It is a sad fact that you can find sugar in pretty much every mass-produced food item. If you stop and read the back of the bottles of sauce and salad dressing, you will find a scary amount of sugar in sauces and dressings that you don’t need it in. The first dressing I learned to make at home without any sugar was the classic Caesar salad dressing. The dressing can be created in just a few minutes using easy mayo and some simple pantry ingredients. Learning to make your own dressings means you won’t get caught out by shit-filled dressings or stung for extra cash to buy ‘clean’ versions at your local health food store.

Give it a go and enjoy the fresh dressing that will keep in the fridge for up to a week (if you don’t use it all first).

Caesar salad dressing recipe

Ingredients

  • 1/2 cup olive oil
  • 2 tbsp. easy mayo
  • 1 tbsp. Dijon mustard
  • 3 garlic cloves, minced
  • 1/4 cup parmesan cheese, freshly grated
  • 3 anchovy fillets
  • 2 tbsp. lemon juice
  • 2 tsp. Worcestershire sauce

Instructions

For a food processor

Set aside the olive oil.

Put all of the other ingredients into a food processor.

Turn on and pulse the ingredients until everything is smooth and creamy.

While the food processor runs, slowly drizzle the oil through the chute. Take your time pouring the oil so that it emulsifies properly.

Store the dressing in the fridge; it should keep for about a week.

For a stick blender

Place all of the ingredients into a jar or container with the oil as the last ingredient.

Put the blender stick all the way to the bottom of the jar.

Pulse to break up the anchovy fillets, then blend until everything is smooth and creamy.

Caesar salad dressing

  • Servings: 10
  • Rating: ★★★★★
  • Print

Caesar salad is one of my favourites, this dressing is easy to make and will finish off your Caesar salad just right.


Credit: Cath @ easycleaneats

Ingredients

  • 1/2 cup olive oil
  • 2 tbsp. easy mayo
  • 1 tbsp. Dijon mustard
  • 3 garlic cloves, minced
  • 1/4 cup parmesan cheese, freshly grated
  • 3 anchovy fillets
  • 2 tbsp. lemon juice
  • 2 tsp. Worcestershire sauce

Directions

  1. For a food process
  2. Set aside the olive oil.
  3. Put all of the other ingredients into a food processor.
  4. Turn on and pulse the ingredients until everything is smooth and creamy.
  5. While the food processor runs, slowly drizzle the oil through the chute. Take your time pouring the oil so that it emulsifies properly.
  6. Store the dressing in the fridge; it should keep for about a week.
  7. For a stick blender
  8. Place all of the ingredients into a jar or container with the oil as the last ingredient.
  9. Put the blender stick all the way to the bottom of the jar.
  10. Pulse to break up the anchovy fillets, then blend until everything is smooth and creamy.

Nutrition

Per Serving: 121 calories; 13 g fat; 1 g carbohydrates; 1 g protein

Equipment

  • Food processor or stick blender
  • Spatula 

Nutritional disclaimer

Nutrition information is provided as an estimate based on the ingredients used and available in my area (New Zealand). The nutritional information is here to help you understand the recipe; I use MyFitnessPal to generate my estimates. For more accurate nutritional information, please use a nutritional calculator with the ingredients in your area.


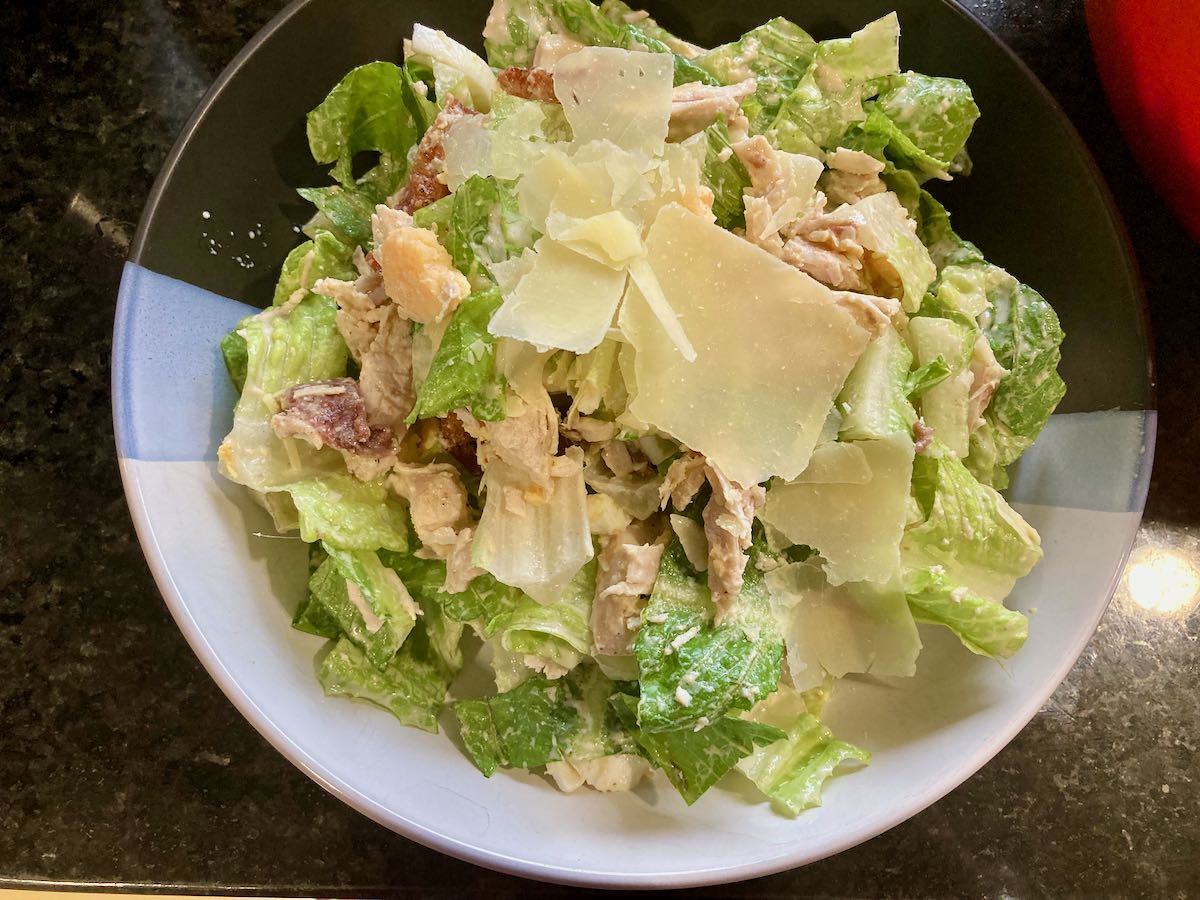
Chicken Caesar salad

Master the basics

Eating clean gets a lot easier once you have mastered a few essential recipes. This recipe is basic; not like basic unicorn basic, more like beard and flannel basic. Back to the point (which isn’t Unstable unicorns), having basic skills and recipes in your arsenal means you will never be left with only Uber Eats as your weeknight options. Once you master this recipe, the possibilities are endless.

Always make friends with salad

In my book, salad is something to get excited about; it is an amazingly fresh meal full of endless possibilities, not limp lettuce, sad dressing and soggy tomatoes. I’m one of those strange people who could happily eat salad for every meal. There was a time when proposing a salad for dinner would lead to groans, but not anymore. I can eat salad as much as I like and make it a star attraction on my plate.

Protein maxed classic

I try my best to pack in protein at every meal, which isn’t always easy with a salad. I love a good Caesar and think adding some chicken is a great way to boost protein without taking away from the salad’s flavour. This is my take on the classic Caesar salad. It is portioned for one person, but can easily be increased to feed more people. If you are using this recipe for meal prep, make the salad and keep the dressing on the side to add just before eating. This will prevent the salad from becoming soggy.

Chicken Caesar salad recipe

Ingredients

  • 200g chicken breast, cooked
  • 1 egg, hard-boiled
  • 2 pieces streaky bacon, cooked
  • 100g cos lettuce leaves, chopped into 4 pieces
  • Shaved parmesan cheese
  • 2 tbsp. Caesar salad dressing
  • Rating: ★★★★★
  • Print


Credit: Cath @ easycleaneats

Ingredients

  • 200g chicken breast, cooked
  • 1 egg, hard-boiled
  • 2 pieces streaky bacon, cooked
  • 100g cos lettuce leaves, chopped into 4 pieces
  • Shaved parmesan cheese
  • 2 tbsp. Caesar salad dressing
  • 2 anchovy fillets – optional

Directions

  1. Place the cos lettuce into a bowl or onto a platter.
  2. Slice the egg, chicken and bacon and layer them on top of the lettuce.
  3. Drizzle the Caesar dressing over the top.
  4. Mix gently to cover the cos
  5. Add the shaved parmesan cheese and anchovies before serving.

Nutrition

Per Serving: 244 calories; 10.5 g fat; 3.3 g carbohydrates; 30.3 g protein

Equipment

  • Knife
  • Chopping board
  • Mixing bowl or platter 
  • Scales

Nutritional disclaimer

Nutrition information is provided as an estimate based on the ingredients used and available in my area (New Zealand). The nutritional information is here to help you understand the recipe; I use MyFitnessPal to generate my estimates. For more accurate nutritional information, please use a nutritional calculator with the ingredients in your area.


Caprese Skewers

Updating as we go

Early in 2021, I relocated and started updating my website; I’ve been making changes and improving everything as I go. This recipe is one of the many things I’ve tried to improve.

Simple and fancy looking

Who doesn’t love something that looks fancy, tastes delicious, and is so simple to make that you could leave the kids to make it? I know that I do. These caprese skewers are one of the easiest recipes ever, and they always gather compliments when I make them. No cooking is needed; you need some chopping and skewers, and you are good to go. Did I mention how cool they look on the plate? 

Ideal for company

I first made these skewers for a UFC pay-per-view event when I was hanging out with friends. Making food for fights isn’t as easy as you might think. You spend half the day with your eyes glued to the action and afraid to look at what you are eating because you know you will miss that knockout shot. The main appeal of these skewers is that they are finger food, and you don’t need to take your eyes off the fights while you eat them. Grab, munch and repeat. The first time I made them, the plate was cleared in a single round, which usually means they are a hit. They have been on the menu for pay-per-view parties ever since.

Caprese skewer recipe

Ingredients

  • 1/4 cup balsamic glaze
  • 10 cherry tomatoes
  • 5 mini mozzarella balls
  • 10 fresh basil leaves
  • mini skewers

Instructions

Cut the cherry tomatoes in half.

Cut in half any of the large basil leaves.

Cut in half the mozzarella balls.

Take a mini skewer and thread on a piece of mozzarella, then a basil leaf and a piece of tomato, repeat to fill up the skewer.

Repeat with the remaining ingredients.

Lay out the skewers and drizzle them with the balsamic glaze before serving.

Caprese skewers

  • Rating: ★★★★★
  • Print

“Simple


Credit: Cath @ easycleaneats 

Ingredients

  • 1/4 cup balsamic glaze
  • 10 cherry tomatoes
  • 5 mini mozzarella balls
  • 10 fresh basil leaves
  • mini skewers

Directions

  1. Cut the cherry tomatoes in half.
  2. Cut in half any of the large basil leaves.
  3. Cut in half the mozzarella balls.
  4. Take a mini skewer and thread on a piece of mozzarella, then a basil leaf and a piece of tomato, repeat to fill up the skewer.
  5. Repeat with the remaining ingredients.
  6. Lay out the skewers and drizzle them with the balsamic glaze before serving.

Nutrition

Per Serving: 50 calories; 2.6g fat; 3.2g carbohydrates; 3g protein

Equipment

  • Knife
  • Chopping board
  • Skewers
  • Plate 

Nutritional disclaimer

Nutrition information is provided as an estimate based on the ingredients used and available in my area (New Zealand). The nutritional information is here to help you understand the recipe; I use MyFitnessPal to generate my estimates. For more accurate nutritional information, please use a nutritional calculator with the ingredients in your area.


Avocado tuna melts

Do we have tuna? 

For a long time on a weekend, when I asked the question, ‘What do you want for lunch?’ The answer was ‘Do we have any tuna?’. I won’t go into how much I dislike it when people answer a question with a question. Let’s focus on the recurring request for tuna every weekend. Every week, the same request is made for a tuna cheese melt. I don’t have any issues providing tuna for lunch; I get bored with the leftover tuna in the fridge and don’t want to eat it. Life is too short to eat that much tuna. 

How to make tuna interesting 

I find tinned tuna very difficult to eat on its own. I know it is good for me, but it is so boring! I looked for an alternative to the standard tuna melt to make tuna more interesting. I came up with these avocado tuna melts. 

Two birds with one grill 

I figured that if I had the grill on to make tuna melts on bread for kids, there would be no downside to having a different kind of tuna melt myself. A quick rummage in the fridge later, and the avocado tuna melt was born. Avocado is the perfect ingredient that makes the tuna less dull and adds a creamy texture that stands up to the grill’s heat. 

If you want to use up those uneaten bits of tuna or that can in the pantry, give these melts a go. 

Avocado tuna melt recipe 

Avocado tuna melts ingredients

Ingredients 

  • 1 avocado 
  • 2 cans of tuna 
  • 2 tbsp. Parsley, chopped 
  • 1 tbsp. Lemon juice 
  • 1/2 tsp. smoked paprika 
  • 1/4 tsp. salt 
  • 1/4 tsp. black pepper 
  • 1/4 cup gruyere cheese, grated 
  • 2 tbsp. Chives, chopped 

Instructions

Preheat the grill on the highest setting. 

Cut the avocado in half lengthwise and remove the pit. 

Cut the avocado in half lengthwise
Cut the avocado in half lengthwise 
Cut the avocado in half lengthwise
Cut the avocado in half lengthwise 
Remove the pit
Remove the pit

Scoop out the avocado flesh into a large mixing bowl.

Scoop out the avocado flesh
Scoop out the avocado flesh into a large mixing bowl.

Put the avocado skins on a lined baking tray.

Put the avocado skins on a lined baking tray.

Mash the avocado with a fork.

Mash the avocado with a fork.

Add the tuna to the avocado and mix.

Add the tuna to the avocado and mix.

In a bowl, add the parsley, lemon juice, paprika, salt, and pepper. 

In a the bowl add the  parsley, lemon juice, paprika, salt, and pepper.
In a the bowl add the  parsley, lemon juice, paprika, salt, and pepper. 

Mix well.

Mix well
Mix well

Add the tuna avocado mix back into the avocado skin. 

Add the tuna avocado mix back into the avocado skin.
Add the tuna avocado mix back into the avocado skin then bake

Grill for 5 minutes so that the tuna and avocado start to colour. 

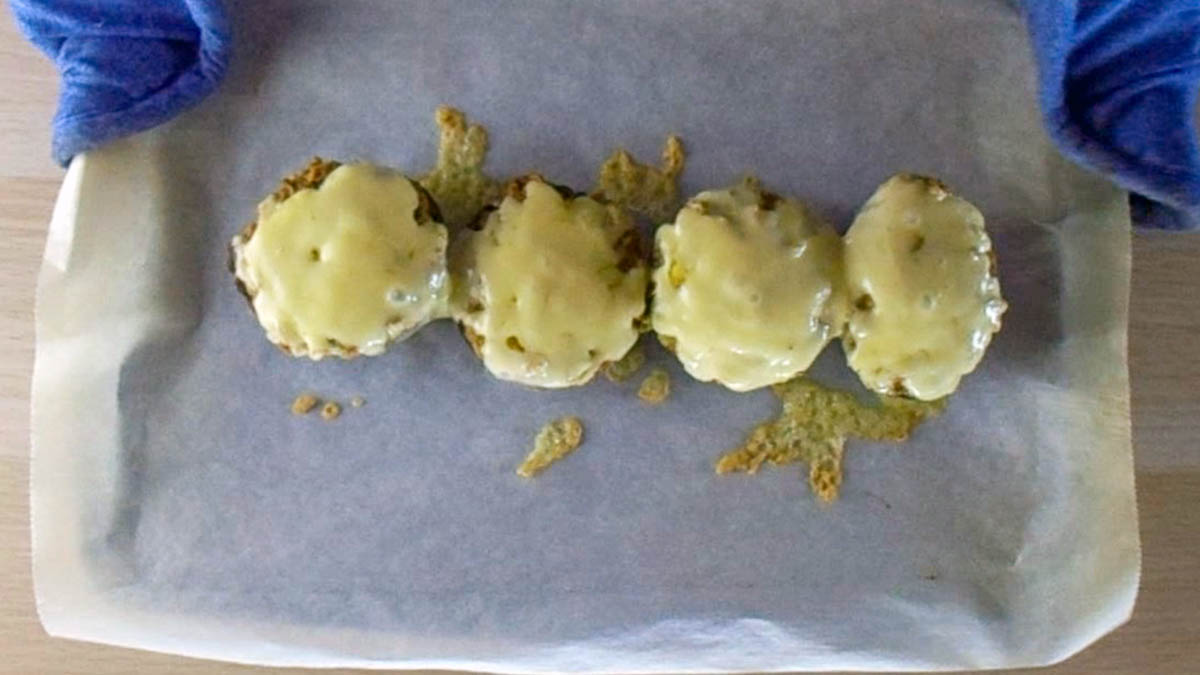
Top the tuna mix with the cheese and grill again to melt the cheese. 

Top the tuna mix with the cheese and grill again to melt the cheese. 
Melt the cheese.
Melt the cheese. 

Garnish with chopped chives and serve. 

Garnish with chopped chives and serve. 

Avocado tuna melt

  • Servings: 4
  • Rating: ★★★★★
  • Print

Avocado is the perfect ingredient that makes the tuna boring, adds a creamy texture that stands up to the heat of the grill.


Credit: Cath @ easycleaneats

Ingredients

  • 1 avocado
  • 2 cans of tuna
  • 2 tbsp. Parsley, chopped
  • 1 tbsp. Lemon juice
  • 1/2 tsp. smoked paprika
  • 1/4 tsp. salt
  • 1/4 tsp. black pepper
  • 1/4 cup gruyere cheese, grated
  • 2 tbsp. Chives, chopped

Directions

  1. Preheat the grill on the highest setting.
  2. Cut the avocado in half lengthwise and remove the pit.
  3. Scoop out the avocado flesh and coarsely chop it.
  4. In a bowl, mix together the avocado, tuna, parsley, lemon juice, paprika, salt, and pepper.
  5. Add the tuna avocado mix back into the avocado skin.
  6. Grill for 5 minutes so that the tuna and avocado start to colour.
  7. Top the tuna mix with the cheese and grill again to melt the cheese.
  8. Garnish with chopped chives and serve.

Nutrition

Per Serving: 240 calories; 17 g fat; 8 g carbohydrates; 17 g protein

Equipment  

  • Knife  
  • Chopping board  
  • Mixing bowl  
  • Spoon  
  • Fork  
  • Baking tray   
  • Measuring cups
  • Measuring spoons

Nutritional disclaimer

Nutrition information is provided as an estimate based on the ingredients used and available in my area (New Zealand). The nutritional information is here to help you understand the recipe; I use MyFitnessPal to generate my estimates. For more accurate nutritional information, please use a nutritional calculator with the ingredients in your area.


Corned beef

I never had any interest in corned beef when I was younger. I thought of corned beef as something nasty that came in a can and smelled a bit gross. While I still think that the corned beef in a can is gross, I do like a nice chunk of corned beef cooked just right. As with all things, learning how to do something right is a key to success; cooking the meat right is no exception.

A good crust

The first few times I made corned beef, I simply plopped the meat in the pan with some water and boiled it. Boring, I know. I decided to see what would happen if I seared the meat before boiling. The difference in flavour was amazing. I could not believe how much better the corned beef was. I know I shouldn’t be surprised that searing meat makes such a difference, but I was. The simple step adds a depth of flavour to any dish and brings out the best in your meal. 

Instant Pot vs Cooker top

A few years ago, I decided to buy an Instant Pot when my old slow cooker died. It was a game-changer for slow cooking, but it changed my life thanks to the pressure cooker function. I remember the 1980s pressure cooker in my Nan’s kitchen with the valve that sounded like a jackhammer when it was time to release the pressure, and it scared the crap out of me. Thankfully, the Instant Pot pressure cooker setting is easy to use and has a beep to let you know when it is ready to release the pressure, not a jackhammer. When it comes to making corned beef now, I always break out the Instant Pot, mainly because it is so easy to use and I get perfectly cooked meat every time. On the rare occasions when my Instant Pot is in use and my corned beef is cooking on the stove, I have found that the cast iron pot is the best for simmering the meat. Whatever option you are going with, just make sure that you have enough water to completely cover the meat to make sure it ends up tender and juicy.

Corned beef

Ingredients 

  • 2kg Corned beef
  • 2 bag leaves
  • 12 peppercorns
  • 2 tbsp coconut aminos

Instruction

Preheat a heavy-bottomed or cast-iron frying pan.

Sear all sides of the beef to create a golden crust.

If using an Instant Pot, place all the ingredients in the pot with water up to the minimum water line.

Set the Instant Pot to cook on the pressure cooking setting, on high for 90 minutes. 

Allow the pressure to release naturally.

Alternatively

Place the peppercorns, bay leaves, coconut aminos and seared meat in a large stockpot.

Cover the meat with boiling water.

Bring the water to a rolling boil.

Reduce the heat to allow the meat to simmer, and cover the pan gently.

Simmer the meat for 40 minutes per 500g of meat.

Once the meat is cooked, remove it from the pan.

Let it rest for 15 minutes before shredding.

Corned beef

  • Servings: 12
  • Rating: ★★★★★
  • Print

“Easy


Credit: Cath @ easycleaneats 

Ingredients

  • 2kg Corned beef
  • 2 bay leaves
  • 12 peppercorns
  • 2 tbsp coconut aminos

Directions

  1. Preheat a heavy bottom or cast won frying pan.
  2. Sear all sides of the beef to create a golden crust.
  3. If using an Instant pot place all of the ingredients in the pot with water up to the no higher than the minimum water line.
  4. Set the Instant pot to cook on the pressure cooking setting, on high for 90 minutes.
  5. Allow the pressure to release naturally.
  6. Alternatively
  7. Place the peppercorns, bay leaves, coconut aminos and seared meat in a large stockpot.
  8. Cover the meat with boiling water.
  9. Bring the water to a rolling boil.
  10. Reduce the heat to allow the meat to gently simmer, cover the pan.
  11. Simmer the meat for 40 mins per 500g of meat.
  12. Once the meat is cooked, remove it from the pan.
  13. Let it rest for 15 minutes before shredding.

Nutrition

Per Serving:196 calories;5 g fat; 2 g carbohydrates; 35 g protein

Equipment 

  • Cast iron frying pan
  • Tongs
  • Stockpot with a lid

Nutritional disclaimer

Nutrition information is provided as an estimate based on the ingredients used and available in my area (New Zealand). The nutritional information is here to help you understand the recipe; I use MyFitnessPal to generate my estimates. For more accurate nutritional information, please use a nutritional calculator with the ingredients in your area.


Pasta free lasagne

Revisiting family favourites

I’ve been revisiting recipes that have been some of my old-school recipes and favourites that were staples when I got started eating clean. I first posted this recipe in 2015; at that time, my step kids were fussy, vegetables had to be hidden and disguised, and there was no potential for intense flavours or spice. 

As the kids grew, my recipes changed organically to meet their palates and preferences. I’ve updated this recipe because of that, but fear not; the original recipe suitable for kids and less developed palates is at the bottom of the post.

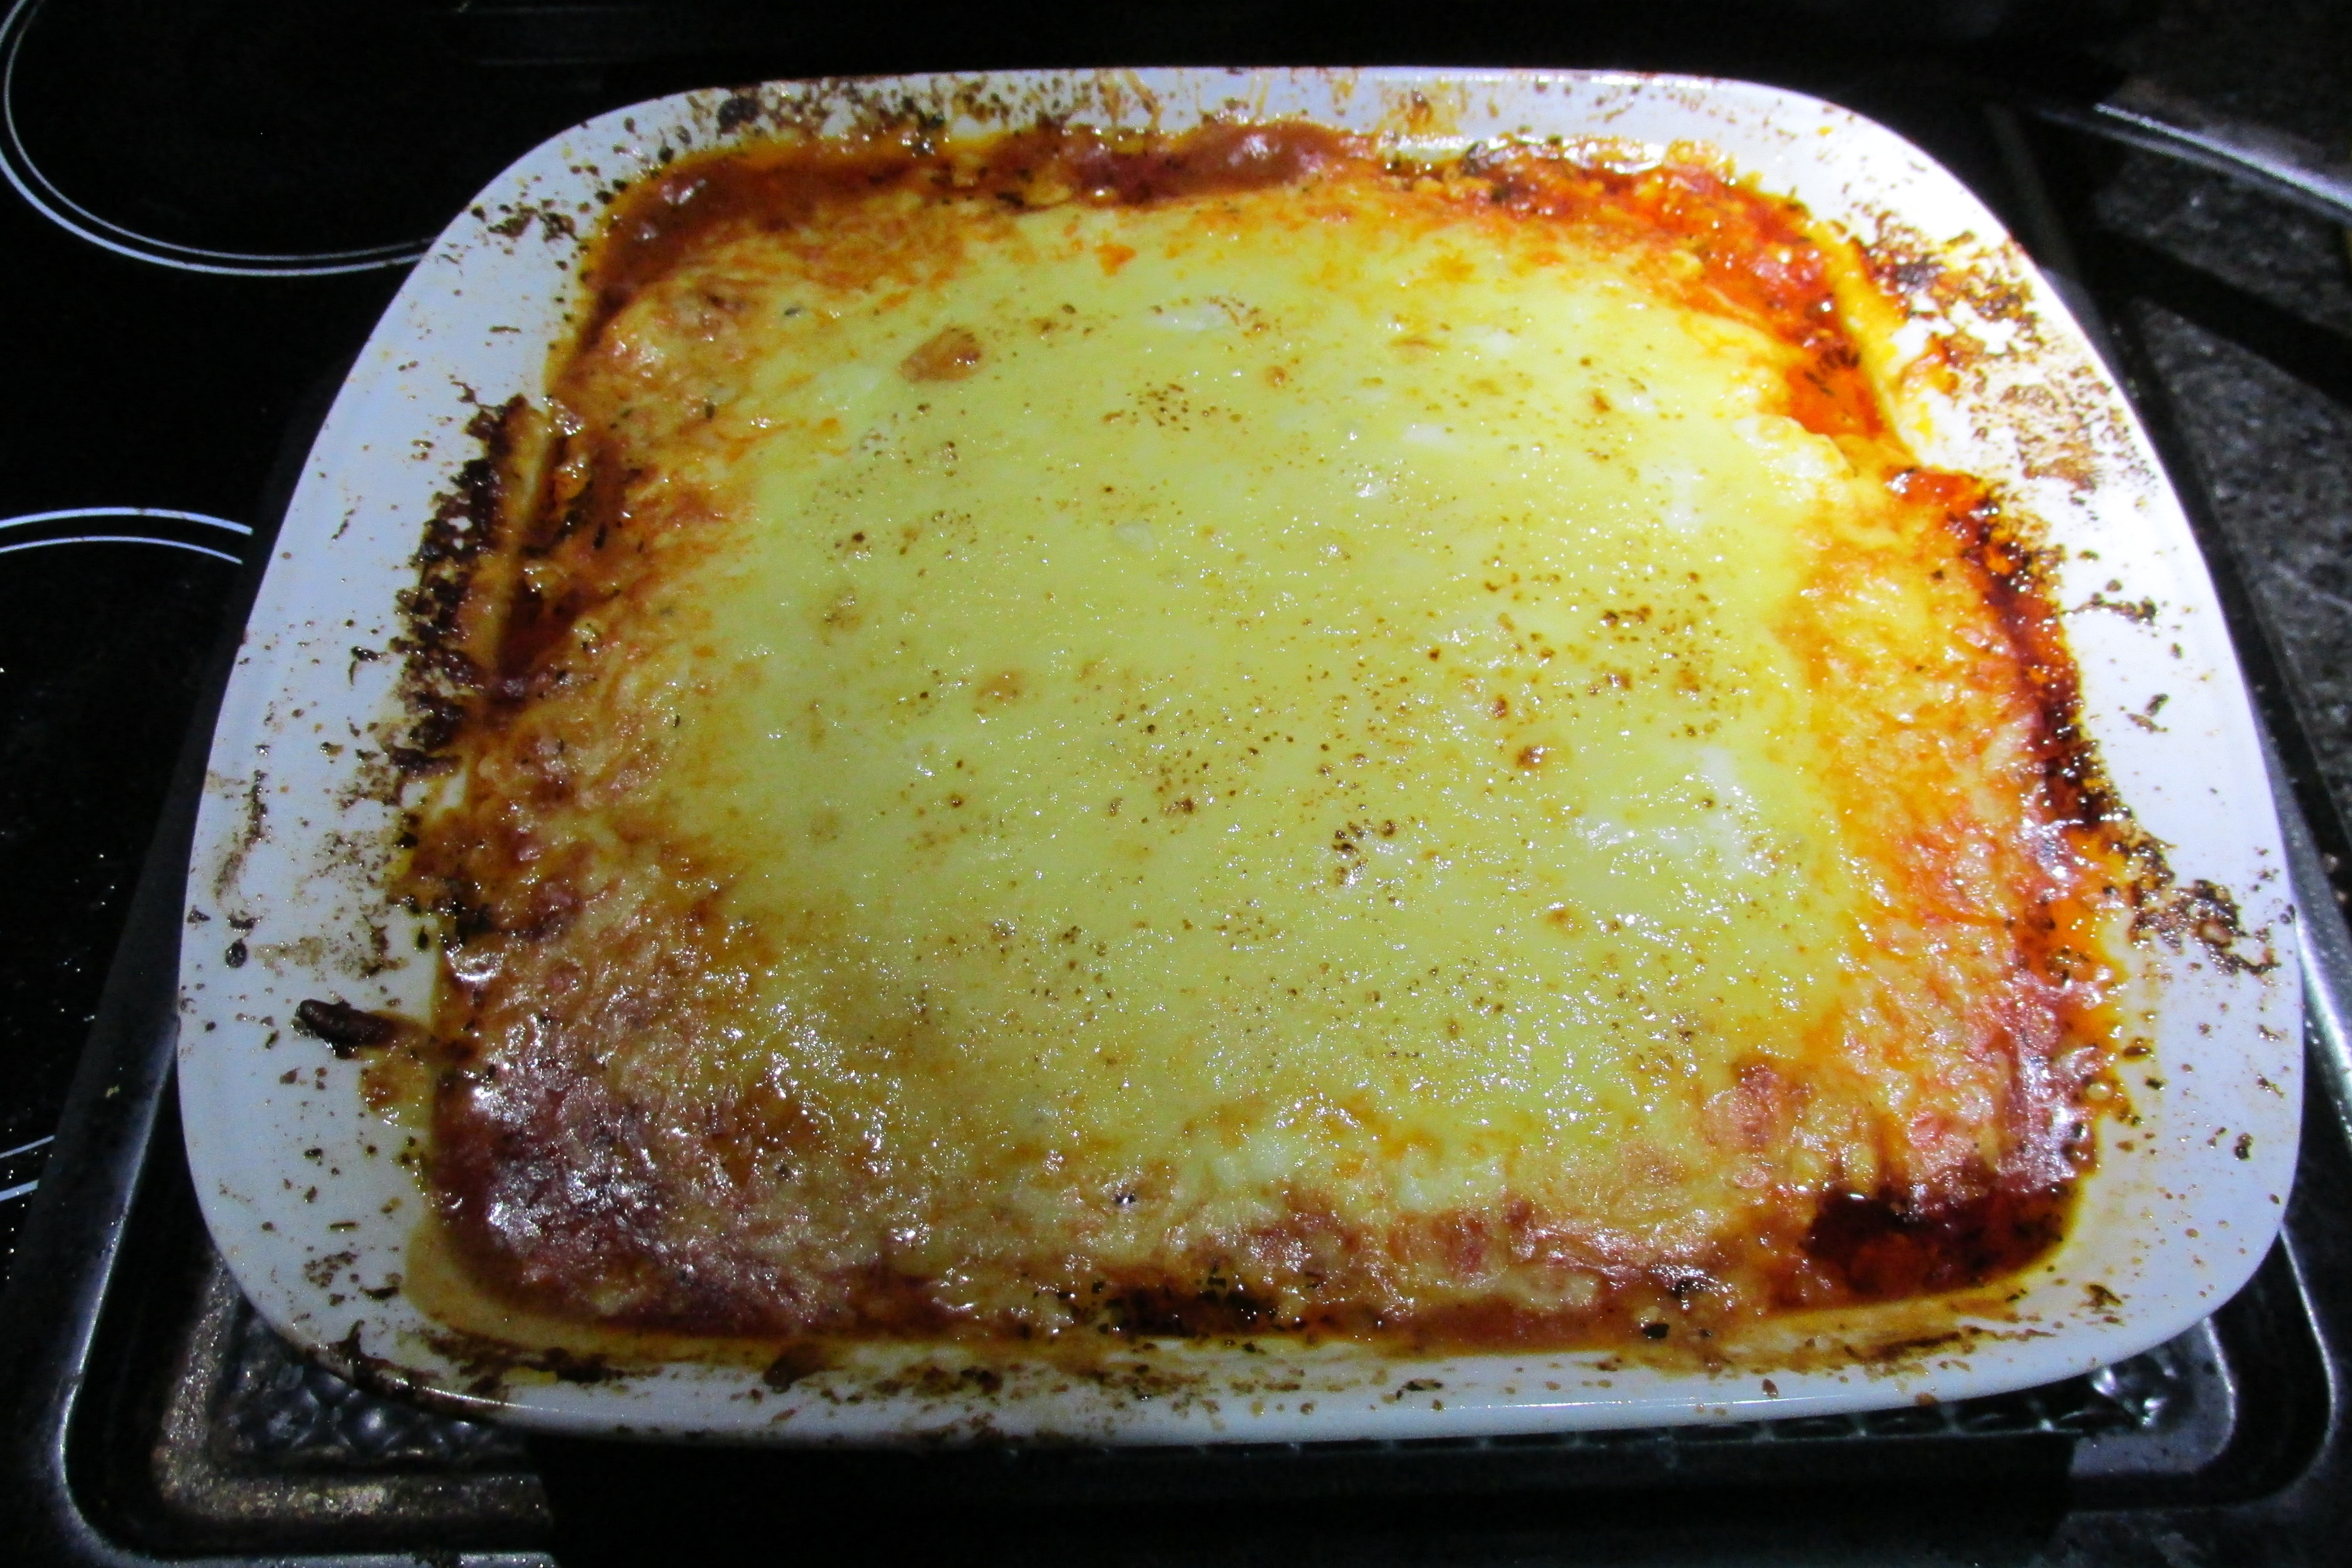
Hot lasagne fresh from the oven

Clean eating take of a classic

This was one of the first meals I made with a pasta alternative; much like replacing pasta with zoodles/coodles. I was always game to sneak some extra vegetables into the family meals, but this is one of the few meals I don’t need to hide the vegetables at all. The popular opinion of the kids back then was that this lasagne was better than one made with traditional pasta. I can’t say I disagree. As times have changed and this lasagne recipe is no longer entirely consumed in one sitting, it has become one of my favourite freezer meals. I can either make it in bulk and portion it out to enjoy some comfort food when needed or have a tray in the freezer for when I have company over. 

Secret to success

The secret to a good lasagna is the depth of flavour. Flavour isn’t instant; it takes time and some effort. When I’m making lasagna, I tend to make the meat sauce the day before to let the herbs get to know the meat and sauce, mingle, and start the flavour party. The longer you leave the meat and herbs to party, the better your lasagna will taste. 

Pasta free lasagne recipe

Lasagne ingredients
Lasagne ingredients

Ingredients

  • 500g minced beef
  • 1 onion finely diced
  • 2 celery sticks, finely chopped
  • 1 can tomatoes, chopped
  • 2 garlic cloves minced
  • 1 tsp. basil
  • 1 tsp. oregano
  • 1 tbsp. red chilli flakes
  • 1 tbsp. coconut oil
  • 4 carrots cut into ribbons
  • 2 cups cheese, grated 
  • 250g cottage cheese

Instructions

Add the coconut oil to a stockpot over medium heat.

Add the onion and cook until the onion starts to soften.

Add the onion to a stockpot and cook until the onion starts to soften

Add the garlic, basil, chilli and oregano to the pan.

Add the garlic, basil and oregano to the pan
Cook until the onion is softening

Add the beef mince to the pan and cook the beef until it browns.

Add the beef mince to the pan
Cook the beef until it browns

Add the chopped tomatoes to the pan along with the chopped celery.

Add the celery
Add the celery
Add the chopped tomatoes to the pan
Add the chopped tomatoes to the pan 

Simmer the mixture for 10 minutes, then turn off the heat.

Simmer the mixture for 10 minutes then turn off the heat

While the meat and sauce are simmering, take a baking dish and ensure you have enough carrot ribbons to build your lasagne layers.

When the meat simmers, you can start to layer the lasagne.

Start with a carrot ribbons layer at the baking dish’s bottom.

Start with a layer of carrot ribbons at the bottom of the baking dish.

Next, add half the meat and sauce to create a layer in the baking dish.

Next add a half of the meat and sauce to create a layer in the baking dish.
Create a layer in the baking dish.

Add another layer of carrot ribbons on top of the meat.

Add another layer of carrot ribbons on top of the meat.

Next, add half of the cottage cheese and spread it across the dish, then top it with half the grated cheese.

Next add half of the cottage cheese
Top with half the cheese
Top with half the cheese 

Top with half the cheese, and another layer of carrot ribbons.

Repeat the layers with meat, carrot ribbons, cottage cheese and grated cheese.

Repeat the layers with meat, carrot ribbons, cottage cheese and grated cheese.

If you can leave the lasagna overnight before baking it, the longer you leave it, the better it will taste.

Bake the lasagne at 180 degrees C/ 350 degrees F for 30 minutes.

Remove the lasagne from the oven when the cheese is brown and bubbly.

Bake the lasagne at 180 degrees C/ 350 degrees F for 30 minutes

Let the lasagne rest for 5 minutes before slicing and serving.

Let the lasagne rest for 5 minutes before slicing and serving

Pasta free lasagne

  • Servings: 8
  • Rating: ★★★★★
  • Print


Credit: Cath @ easycleaneats

Ingredients

  • 500g minced beef
  • 1 courgette diced
  • 1 onion finely diced
  • 1 red pepper diced
  • 1 can tomatoes
  • 2 garlic cloves minced
  • 1 tsp. basil
  • 1 tsp. oregano
  • 1 tbsp. Red chilli flakes
  • 1 tbsp. coconut oil
  • 2 courgettes cut into ribbons
  • 2 carrots cut into ribbons
  • 2 cups cheese, grated

Directions

  1. Add the coconut oil to a stockpot over medium heat.
  2. Add the onion and cook until the onion starts to soften.
  3. Add the garlic, basil, chilli and oregano to the pan.
  4. Add the beef mince to the pan and cook the beef until it browns.
  5. Add the chopped tomatoes to the pan along with the chopped celery.
  6. Simmer the mixture for 10 minutes, then turn off the heat.
  7. While the meat and sauce are simmering, take a baking dish and ensure you have enough carrot ribbons to build your lasagne layers.
  8. When the meat simmers, you can start to layer the lasagne.
  9. Start with a carrot ribbons layer at the baking dish’s bottom.
  10. Next, add half the meat and sauce to create a layer in the baking dish.
  11. Add another layer of carrot ribbons on top of the meat.
  12. Next, add half of the cottage cheese and spread it across the dish, then top it with half the grated cheese.
  13. Top with half the cheese, and another layer of carrot ribbons.
  14. Repeat the layers with meat, carrot ribbons, cottage cheese and grated cheese.
  15. If you can leave the lasagna overnight before baking it, the longer you leave it, the better it will taste.
  16. Bake the lasagne at 180 degrees C/ 350 degrees F for 30 minutes.
  17. Remove the lasagne from the oven when the cheese is brown and bubbly.
  18. Let the lasagne rest for 5 minutes before slicing and serving.

Nutrition

Per Serving: 350 calories; 25.7 g fat; 8.2 g carbohydrates; 21.7 g protein

Equipment

  • Stockpot
  • Wooden spoon
  • Vegetable peeler
  • Knife
  • Grater
  • Chopping board
  • Baking dish

Nutritional disclaimer

Nutrition information is provided as an estimate based on the ingredients used and available in my area (New Zealand). The nutritional information is here to help you understand the recipe; I use MyFitnessPal to generate my estimates. For more accurate nutritional information, please use a nutritional calculator with the ingredients in your area.

Pasta free lasagne – kid friendly recipe

Ingredients

  • 500g minced beef
  • 1 courgette diced
  • 1 onion finely diced
  • 1 red pepper diced
  • 1 can tomatoes 
  • 2 garlic cloves minced
  • 1 tsp. basil
  • 1 tsp. oregano
  • 1 tbsp. coconut oil
  • 2 courgettes cut into ribbons
  • 2 carrots cut into ribbons
  • 2 cups cheese, grated 

Instructions

  1. In a stockpot heat the coconut oil, garlic, onion basil and oregano over a medium heat, cook until the onion is soft.
  2. Add the beef mince and cook off until browned. 
  3. Pour in the tomatoes along with the diced vegetables to the meat and cook for 10 minutes. 
  4. In a baking dish create a layer of carrot ribbons to cover the bottom add a layer of meat then cover with a layer of courgette ribbons, top with cheese. 
  5. Repeat until you reach the top of the baking dish, top the final layer with cheese.
  6. If you can leave the lasagne overnight before you bake it, the longer you leave it the better it will taste.
  7. Bake the lasagne at 180 degrees C/ 350 degrees F for 30 minutes.
  8. When the cheese is brown and bubbly remove the lasagne from the oven.
  9. Let the lasagne rest for 5 minutes before slicing and serving.

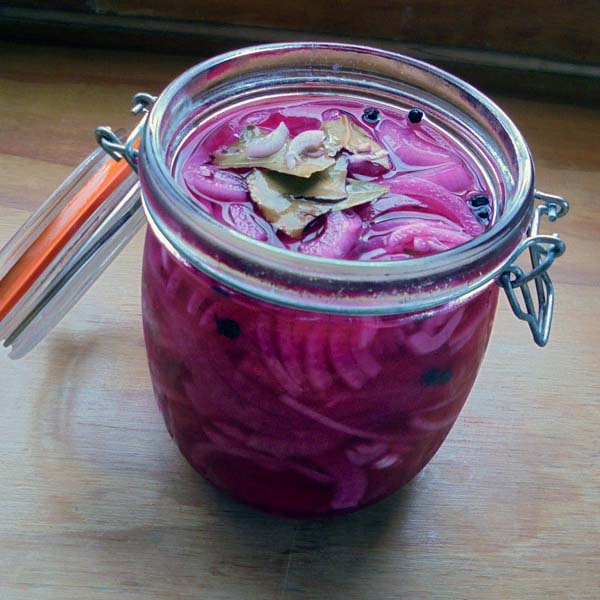
Quick pickle pink onions

Quick pickle pink onions

Small addiction

I think I have a problem. No, I am not talking about my addiction to buying workout clothing or Post-its. I am talking about my addiction to all of the Mexican food. 

It could be the spicy and fresh flavour combinations, the colours, or the avocados. It is most likely all of the above.

I adore topping my salads (enchiladas and tacos) with pink pickled onions. Full disclosure, I also love adding jalapeños to the top of all those things (and other things, too). I digress. Pink pickled onions are the best; the colour and crunch are amazing. They add a little sharp dimension to a meal. 

As with everything, I search for a way to have the things I want without them being bad for me. 

Traditionally, pickling requires a combination of vinegar, sugar, and water. I try to avoid sugar whenever possible, so I set about making a sugar-free pickle solution without compromising on flavour. 

Bro science warning

I’m going to attempt to explain what the pickle solution does. 

What is pickling? Pickling is the process of soaking foods in solutions to prevent spoilage. 

There are two basic types of pickling.  

Type one pickling uses an acidic solution that kills bacteria, often vinegar. Sugar and spices are often added to a vinegar solution to add more flavour. Some examples of type one pickling are pickled cucumbers and onions. 

Type two uses salt or brine (saltwater) to encourage fermentation, which means that good bacteria grow and beat out the harmful bacteria that make food spoil. Some examples of type two pickling are sauerkraut and kimchi. 

Bro science completed

So, the challenge was to find a replacement for the sugar usually added to a pickling solution without having a negative impact. I found a way to preserve the onions like a traditional pickle solution, but I replaced the sugar with something else. 

Test 1 coconut sugar

coconut sugar

The first attempt used three tablespoons of coconut sugar as a replacement. I used apple cider vinegar, which has its own slight sweetness while still acting as a preservative.  

The result was onions that were far too sweet for me, the mixture worked well, and the pickles were good to eat for four weeks, but I didn’t enjoy the flavour.   

Test 2 maple syrup

maple syrup
maple syrup

For this test, I decided to use two tablespoons of maple syrup to see if it would give the right flavour. I stuck with the apple cider vinegar, as I do like the flavour. 

The result, while this batch was much better than the coconut sugar version, I still didn’t really like it.

Test 3 honey

Honey
Honey

For this test, I used two tablespoons of honey to see if it would give the right flavour I was looking for.  

The result is that we have a winner! The honey gave the onions the perfect amount of sweetness without changing the vinegar’s flavours. The bonus was that honey also gave me onions that were good to eat for about 6 weeks.

Quick pickle pink onions

Quick pickle pink onions ingredients

Ingredients

  • 1 red onion, thinly sliced
  • 3/4 cup apple cider vinegar
  • 1 tsp. Salt
  • 2 tbsp. Honey
  • 1 bay leaf
  • 6 peppercorns
Quick pickle pink onions

Instructions 

In a pan, combine the vinegar, salt, honey, bay leaf and peppercorns over a medium heat. 

Remove the pan from the heat when the honey and salt have dissolved. 

Add the sliced onions to the jar. 

Pour the mix into a sterilised jar. 

Seal the jar and put it in the fridge for at least one hour before using. 

The onions will keep in the fridge for four weeks. 

Quick pickle pink onions

Quick pickle pink onions

  • Servings: 10
  • Rating: ★★★★★
  • Print

I topping my salads (enchiladas and tacos) with pink pickled onions. Pink pickled onions are the best, the colour and crunch are amazing. They add a little sharp dimension to a meal. As with all things, I search for a way to have the things I want without them being bad for me.


Credit: Cath @ easycleaneats

Ingredients

  • 1 red onion, thinly sliced
  • 3/4 cup apple cider vinegar
  • 1 tsp. Salt
  • 2 tbsp. Honey
  • 1 bay leaf
  • 6 peppercorns

Directions

  1. In a pan combine the vinegar, salt, honey bay leaf and peppercorns over a medium heat.
  2. When the honey and salt has dissolved remove the pan from the heat.
  3. Pour the mix into a sterilised jar.
  4. Add the sliced onions to the jar.
  5. Seal the jar and put in the fridge for at least one hour before using.
  6. The onions will keep in the fridge for four weeks.

Nutrition

Per Serving: 21 calories; 0 g fat; 6 g carbohydrates; 0 g protein.

Equipment 

  • Saucepan 
  • Wooden spoon 
  • Measuring  cup 
  • Measuring spoons
  • Mason jar/ preserve jar 

Nutritional disclaimer

Nutrition information is provided as an estimate based on the ingredients used and available in my area (New Zealand). The nutritional information is here to help you understand the recipe; I use MyFitnessPal to generate my estimates. For more accurate nutritional information, please use a nutritional calculator with the ingredients in your area.


Protein cheesecake

Just because I love a challenge

I love looking at recipe books and figuring out if they can be changed and if I could make a clean-eating version. This recipe was initially given to me from the Ross Edgley The World’s Fittest book, and I asked if it could be adapted. As I love a challenge, I decided to give it a go.

Easy Swaps

Sometimes, I can look at a recipe and know what ingredients are easy to swap out for alternative ingredients. Other recipes require some trial and error before you have something close to what the recipe would give you. Thankfully, this was one of the easy swap recipes that ended up giving me a finished cheesecake that didn’t last very long (3 days). 

The original recipe called for quark, cocoa, muesli, blueberries, and strawberries. I swapped out the quark for crème fraiche and sour cream to increase the fat content, changed the cocoa for cacao powder, and ditched the fruit. While some may not have an issue with muesli, I swapped it out for my nut-free breakfast crunch for more texture in the base. 

Protein cheesecake

Protein cheesecake ingredients

Ingredients

  • 250g creme fraiche
  • 250g sour cream
  • 250g yoghurt
  • 60g protein powder
  • 3 tsp. cacao powder
  • 1/2 tsp vanilla powder
  • 2 egg whites
  • 2 tbsp. gelatine
  • 200ml coconut milk
  • 200g nut-free breakfast crunch
  • 2 tsp honey
  • 1 tsp coconut oil, melted

Instructions  

Mix the breakfast crunch with the honey and the melted coconut oil in a bowl, ensuring it is fully coated. I like to use a food processor for this step.

Mix the nut-free breakfast crunch with the honey and the melted coconut oil together

Spread the crunch mixture out in the bottom of a springform cake tin and press it gently into the tin.

Spread the crunch mixture out in the bottom of a spring form cake tin
Spread the crunch mixture out
press it gently into the tin
Press it gently into the tin

Put the tin in the fridge to get the coconut oil to firm up the mixture.

In a small bowl, bloom the gelatine as the packet instructs.

Bloom the gelatine as the packet instructs

In a large bowl, mix the crème fraiche, sour cream, and yoghurt with the protein powder, making sure there are no lumps.

Whisk in the protein powder.
Mix well.
Mix well.

Gently heat the coconut milk and whisk in the cacao powder, followed by the gelatine.

Heat the milk and chocolate with the gelatine.

Set the milk and gelatine mix to one side.

In another bowl, whisk the egg whites until they form stiff peaks.

Take a stand mixer.
Take a stand mixer.
Whisk the egg white.
In another bowl whisk the creme fraiche, sour cream and yoghurt.

Slowly fold the egg whites into the protein and yoghurt mixture.

Fold the egg whites into the cheese mix

Be careful not to overwork the egg whites; you want to keep as much air in the mixture as possible.

Whisk the gelatine and milk into the protein and yoghurt mixture.

Fold in the chocolate mixture.

Take the cake tin with the base out of the fridge.

Pour the cheesecake mix into the cake pan.

Pour the protein mixture into the spring form tin and smooth the top with the back of a spoon.

Put the cheesecake in the fridge to set up.

Put the cheesecake in the fridge for 4 to 8 hours to set. 

Once the cheesecake has set, cut it into 12 pieces.

Cheesecake set in the fridge.
Slice the cheesecake
Protein cheesecake ready to eat. Enjoy

Protein cheesecake

  • Servings: 12
  • Rating: ★★★★★
  • Print

I love looking at recipe books and figuring out if they can be changed and if I could make a clean-eating version.


Credit: Cath @ easycleaneats

Ingredients

  • 250g crème fraiche
  • 250g sour cream
  • 250g yoghurt
  • 60g protein powder
  • 3 tsp. Cacao powder
  • 1/2 tsp. vanilla bean powder
  • 2 egg whites
  • 2 tbsp. Gelatine
  • 200ml coconut milk
  • 200g breakfast crunch
  • 2 tsp. honey
  • 1 tsp. coconut oil, melted

Directions

  1. Mix the breakfast crunch with the honey and the melted coconut oil in a bowl, ensuring it is fully coated.
  2. Spread the crunch mixture out in the bottom of a springform cake tin and press it gently into the tin.
  3. Put the tin in the fridge to get the coconut oil to firm up the mixture.
  4. In a small bowl, bloom the gelatine as the packet instructs.
  5. In a large bowl, mix the crème fraiche, sour cream, and yoghurt with the protein powder, making sure there are no lumps.
  6. Gently heat the coconut milk and whisk in the cacao powder, followed by the gelatine.
  7. Set the milk and gelatine mix to one side.
  8. In another bowl, whisk the egg whites until they form stiff peaks.
  9. Slowly fold the egg whites into the protein and yoghurt mixture.
  10. Be careful not to overwork the egg whites; you want to keep as much air in the mixture as possible.
  11. Whisk the gelatine and milk into the protein and yoghurt mixture.
  12. Take the cake tin with the base out of the fridge.
  13. Pour the protein mixture into the spring form tin and smooth the top with the back of a spoon.
  14. Put the cheesecake in the fridge for 4 8 hours to set.
  15. Once the cheesecake has set, cut it into 12 pieces.

Nutrition

Per Serving: 177 calories; 12.2 g fat; 7.3 g carbohydrates; 6.8 g protein.

Equipment  

  • Bowl x2  
  • Spatula x2  
  • Whisk  
  • Spring form cake tin  
  • Saucepan  
  • Measuring spoons
  • Scales
  • Measuring jug
  • Spoon

Nutritional disclaimer

Nutrition information is provided as an estimate based on the ingredients used and available in my area (New Zealand). The nutritional information is here to help you understand the recipe; I use MyFitnessPal to generate my estimates. For more accurate nutritional information, please use a nutritional calculator with the ingredients in your area.


Alfredo sauce

Make your own

If you are like me and you try to avoid mass-produced processed foods, the best option is to make your own. When you make your own, you control which ingredients you use and how much or how sweet you want it to be. Once you have a go at making your own and realise how easy it is, you will never go back to store-bought again.
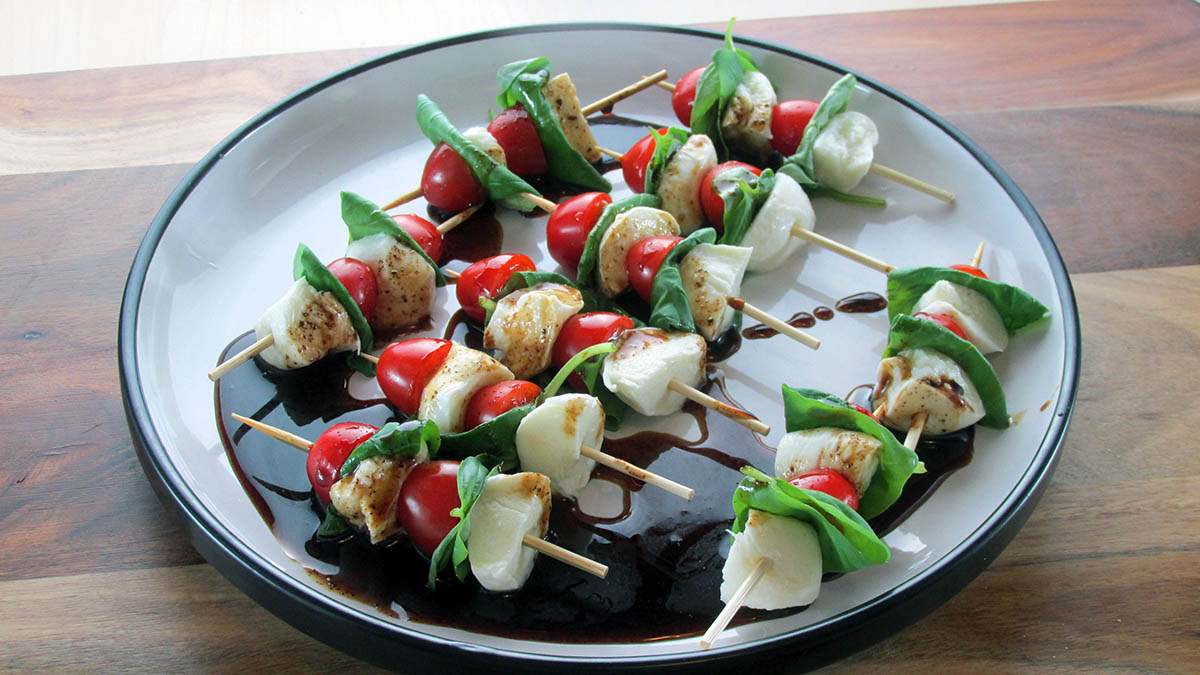
Updating as we go

Early in 2021, I relocated and started updating my website; I’ve been making changes and improving everything as I go. This recipe is one of the many things I’ve tried to improve.

Fancy a fakeaway

We all love a naughty takeaway, but we can all live without the extra calories and the expanding waistlines. You don’t need to live without your takeaway; swap it out for a delicious, healthier fakeaway. Fettuccine Alfredo was one of my favourite takeaway pasta dishes back in the day. As much as I would love the carb-filled dinner after a long day and a hard workout, it is never worth the carb coma afterwards. A while ago, I started experimenting to perfect my Alfredo sauce, which I could quickly whip up to pour over a bowl of coodles and generous chicken. It is ideal as a healthier takeaway option and keeps in the fridge for a few days.

Alfredo sauce recipe

Ingredients

  • 1/4 cup butter
  • 1 cup heavy cream
  • 1 garlic clove, crushed
  • 1 1/2 cups Parmesan cheese, grated
  • 1/4 cup parsley, chopped

Instructions

Melt butter in a medium saucepan over medium-low heat.

Add cream and simmer for 5 minutes.

Add the garlic and cheese and whisk quickly, heating through.

Stir in parsley and serve.

“Alfredo

  • Rating: ★★★★★
  • Print


Credit: Cath @ easycleaneats

Ingredients

  • 1/4 cup butter
  • 1 cup heavy cream
  • 1 garlic clove, crushed
  • 1 1/2 cups Parmesan cheese, grated
  • 1/4 cup parsley, chopped

Directions

  1. Melt butter in a medium saucepan over medium-low heat.
  2. Add cream and simmer for 5 minutes.
  3. Add the garlic and cheese and whisk quickly, heating through.
  4. Stir in parsley and serve.

Nutrition

Per Serving: 230 calories; 21 g fat; 3.5 g carbohydrates; 5.4 g protein

Equipment

  • Measuring cups
  • Knife
  • Chopping board
  • Saucepan
  • Spatula
  • Grater 

Nutritional disclaimer

Nutrition information is provided as an estimate based on the ingredients used and available in my area (New Zealand). The nutritional information is here to help you understand the recipe; I use MyFitnessPal to generate my estimates. For more accurate nutritional information, please use a nutritional calculator with the ingredients in your area.