Quick and Easy Lemon Garlic Salmon Recipe

Quick and easy meals don’t have to be boring

I have been on a mission this year to make simple, tasty meals that are quick and easy to make. The aim was to create recipes that can be prepared and cooked quickly on a busy weeknight.

We all struggle to make healthy and tasty meals while keeping on top of everything else in life.

This recipe is healthy, delicious, quick and easy to make; you can cook on a single tray in the oven. The preparation takes no more than 20 minutes, that is all of the slicing, dicing and mixing.

Each meal is portioned to feed four adults.

A reminder of the past

For many years, I would make regular trips to Northland and had access to a lemon tree that produced more lemons than anyone could eat. For a while, I would bring home the abundance of lemons and make lemon curd. On one trip, there was an abundance of lemons at the end of the season, and I wanted to do something a bit different with them. I would share salmon as a treat with my former mother-in-law and thought combining the homegrown lemons with a slab of salmon was a match made in heaven. 

More goodies

When I first came up with this recipe, I could have taken the boring route and just sliced the lemons and baked them together, but I wanted to try something new. With herbs from the garden and a well-stocked pantry, I grabbed some parsley and garlic to mash with the lemons. Adding butter created a rich paste that spread easily over each salmon steak, giving it great flavour and a built-in dressing. While the memories of Northland lemons now are more bitter than sweet, I still love this recipe and the flavours it brings to the plate.

Lemon garlic herb crusted salmon recipe

Quick and easy lemon herb salmon ingredients. Salmon fillets, dill, chives, basil, garlic, lemon zest, butter, salt and pepper.

Ingredients

  • 4 Salmon fillets
  • 1 tbsp. dill
  • 1 tbsp. chives
  • 1 tbsp. basil
  • 1 garlic clove
  • Zest of a lemon
  • Salt and pepper
  • 85g Butter

Instructions

Line a baking tray with some baking paper or a silicone liner; and place the salmon fillets on the tray.

Salmon fillet
Salmon fillets on a lined baking sheet

Take the remaining ingredients and place them in a small saucepan or the microwave safe bowl.

Gently heat the ingredients in the saucepan over a low heat, stir everything together as the butter melts.

Or melt the butter in the microwave and add the herbs, lemon and garlic to the butter.

Melted butter
Minced fresh dill
Finely chopped fresh chives
Finely chopped fresh basil
Fresh herbs in a bowl with melted butter

When the herb butter is melted, mix it all together.

Minced fresh garlic was added to the herb and butter mix
Fresh lemon zest added to the garlic and herb butter
Well mixed herb butter

Spread the herb butter quickly over the top of each fillet evenly.

Herb butter on top of salmon fillets waiting to be spread
Salmon fillets with herb butter coating
Salmon fillets wrapped in baking paper ready for the oven

Bake the salmon at 200 degrees C/ 400 degrees F for 10 to 20 minutes, this will depend on the size of the fillets.

Serve with a fresh salad or greens.

Herb butter crusted salmon fresh from the oven ready to be served
Herb crusted salmon plated with fresh salad, cucumber and slaw

Lemon garlic herb crusted salmon

  • Servings: 4
  • Rating: ★★★★★
  • Print

This simple meal is quick and easy to make and is a great way to make the most of seasonal lemons


Credit: Cath @ easycleaneats

Ingredients

  • 4 Salmon fillets
  • 1 tbsp. dill
  • 1 tbsp. chives
  • 1 tbsp. basil
  • 1 garlic clove
  • Zest of a lemon
  • Salt and pepper
  • 85g Butter

Directions

  1. Line a baking tray with some baking paper or a silicone liner.  and place the salmon fillets on the tray.
  2. Take the remaining ingredients and place them in a small saucepan or the microwave safe bowl.
  3. Gently heat the ingredients in the saucepan over a low heat, stir everything together as the butter melts.
  4. Or melt the butter in the microwave and add the herbs, lemon and garlic to the butter.
  5. When the herb butter is melted, mix it all together.
  6. Spread the herb butter over the top of each fillet evenly.
  7. Bake the salmon at 200 degrees C/ 400 degrees F for 10 to 20 minutes, this will depend on the size of the fillets.
  8. Serve with a fresh salad or greens.

Nutrition

Per Serving: 402 calories; 31 g fat; 4 g carbohydrates; 29 g protein

Equipment

  • Zester 
  • Bowl
  • Fork
  • Knife
  • Chopping board
  • Baking tray
  • Baking paper or a silicone liner
  • Spoon
  • Measuring spoons

Try this with

If you want something to dish alongside this recipe why not try:

Coodles

Cauliflower rice

Crunch salad

Courgette fries

If you love salmon you can find more recipes like this here

Nutritional disclaimer

Nutrition information is provided as an estimate based on the ingredients used and available in my area (New Zealand). The nutritional information is here to help you understand the recipe; I use MyFitnessPal to generate my estimates. For more accurate nutritional information, please use a nutritional calculator with the ingredients in your area.


Asian fish cakes

Freezer meal

Hands up if you are busy. Who is way too tired to get in the kitchen to cook at the end of the day? Definitely me.

My days are filled with meetings, to-do lists, emails and telling people what to do; by the time I finish work, the last thing I want to do is get stuck into cooking a meal and cleaning up afterwards. I want to work out and do something fun before I crash. That is why freezer meals are my favourite solution to the challenge of a busy life. A few hours on the weekend, and you find yourself with a stack of options for dinner that can be thawed and cooked for a healthy, delicious meal that is good for you.

Not so blah now

My previous experience with fish cakes was never good; they were always bland white burger-shaped food, mushy in the middle and blah on the outside. I like white fish, but I get bored quickly when baked or pan-fried, so I wanted to try something different with the fillets I picked up this week. I remembered a recipe from a food magazine for fish cakes and decided to experiment by swapping some ingredients and making it a little spicy. 

With some leftover cauliflower rice in my fridge, I smashed these tasty little cakes together. 

Cook once, eat many times

As I can’t eat 12 fish cakes in one sitting (I’m sure some people can), I packed my leftovers with baking paper to separate the cakes and put them in the freezer. The cakes can be pulled out of the freezer to thaw and reheated in a frying pan over medium heat until they are heated through. You can reheat them in the microwave, but be warned you will disgust anyone else in the building for an extended period.

Asian style fish cakes recipe

Ingredients

Asian style fish cake
  • 500g raw white fish
  • 1 cup cauliflower rice 
  • 2 tsp. coriander
  • 1 tbsp. Thai green curry paste

Instructions

In a food processor, mix together the fish, coriander and curry paste.

Add the fish, coriander and curry paste to a food processor.

When you have a smooth consistency stir in the cauliflower rice.

Stir in the cauliflower rice

Shape the mix into 12 patties.

Portion out the mixture
Shape the mix into patties.

Place them on a baking tray lined with baking paper or a silicone liner.

Bake in a preheated oven at 180 degrees C/ 350 degrees F for 15 minutes.

Cooked fish cakes ready to eat.

Asian fish cakes

  • Servings: 12
  • Rating: ★★★★★
  • Print

These spicy fish cakes are a great way to use up some left over cauliflower rice.


Credit: Cath @ easycleaneats

Ingredients

  • 500g raw white fish
  • 1 cup cauliflower rice
  • 2 tsp. coriander
  • 1 tbsp. Thai green curry paste

Directions

  1. In a food processor mix together fish, coriander and curry paste.
  2. 1 cup cauliflower rice
  3. Shape the mix into patties.
  4. Place them on a baking tray lined with baking paper or a silicone liner.
  5. Bake in a preheated oven at 180 degrees C/ 350 degrees F for 15 minutes.

Nutrition

Per Serving: 51 calories; 0.6 g fat; 0.4 g carbohydrates; 7.5 g protein

Equipment

  • Food processor 
  • Measuring cups
  • Measuring spoons
  • Spatula
  • Baking tray
  • Baking paper or silicone liner

Nutritional disclaimer

Nutrition information is provided as an estimate based on the ingredients used and available in my area (New Zealand). The nutritional information is here to help you understand the recipe; I use MyFitnessPal to generate my estimates. For more accurate nutritional information, please use a nutritional calculator with the ingredients in your area.


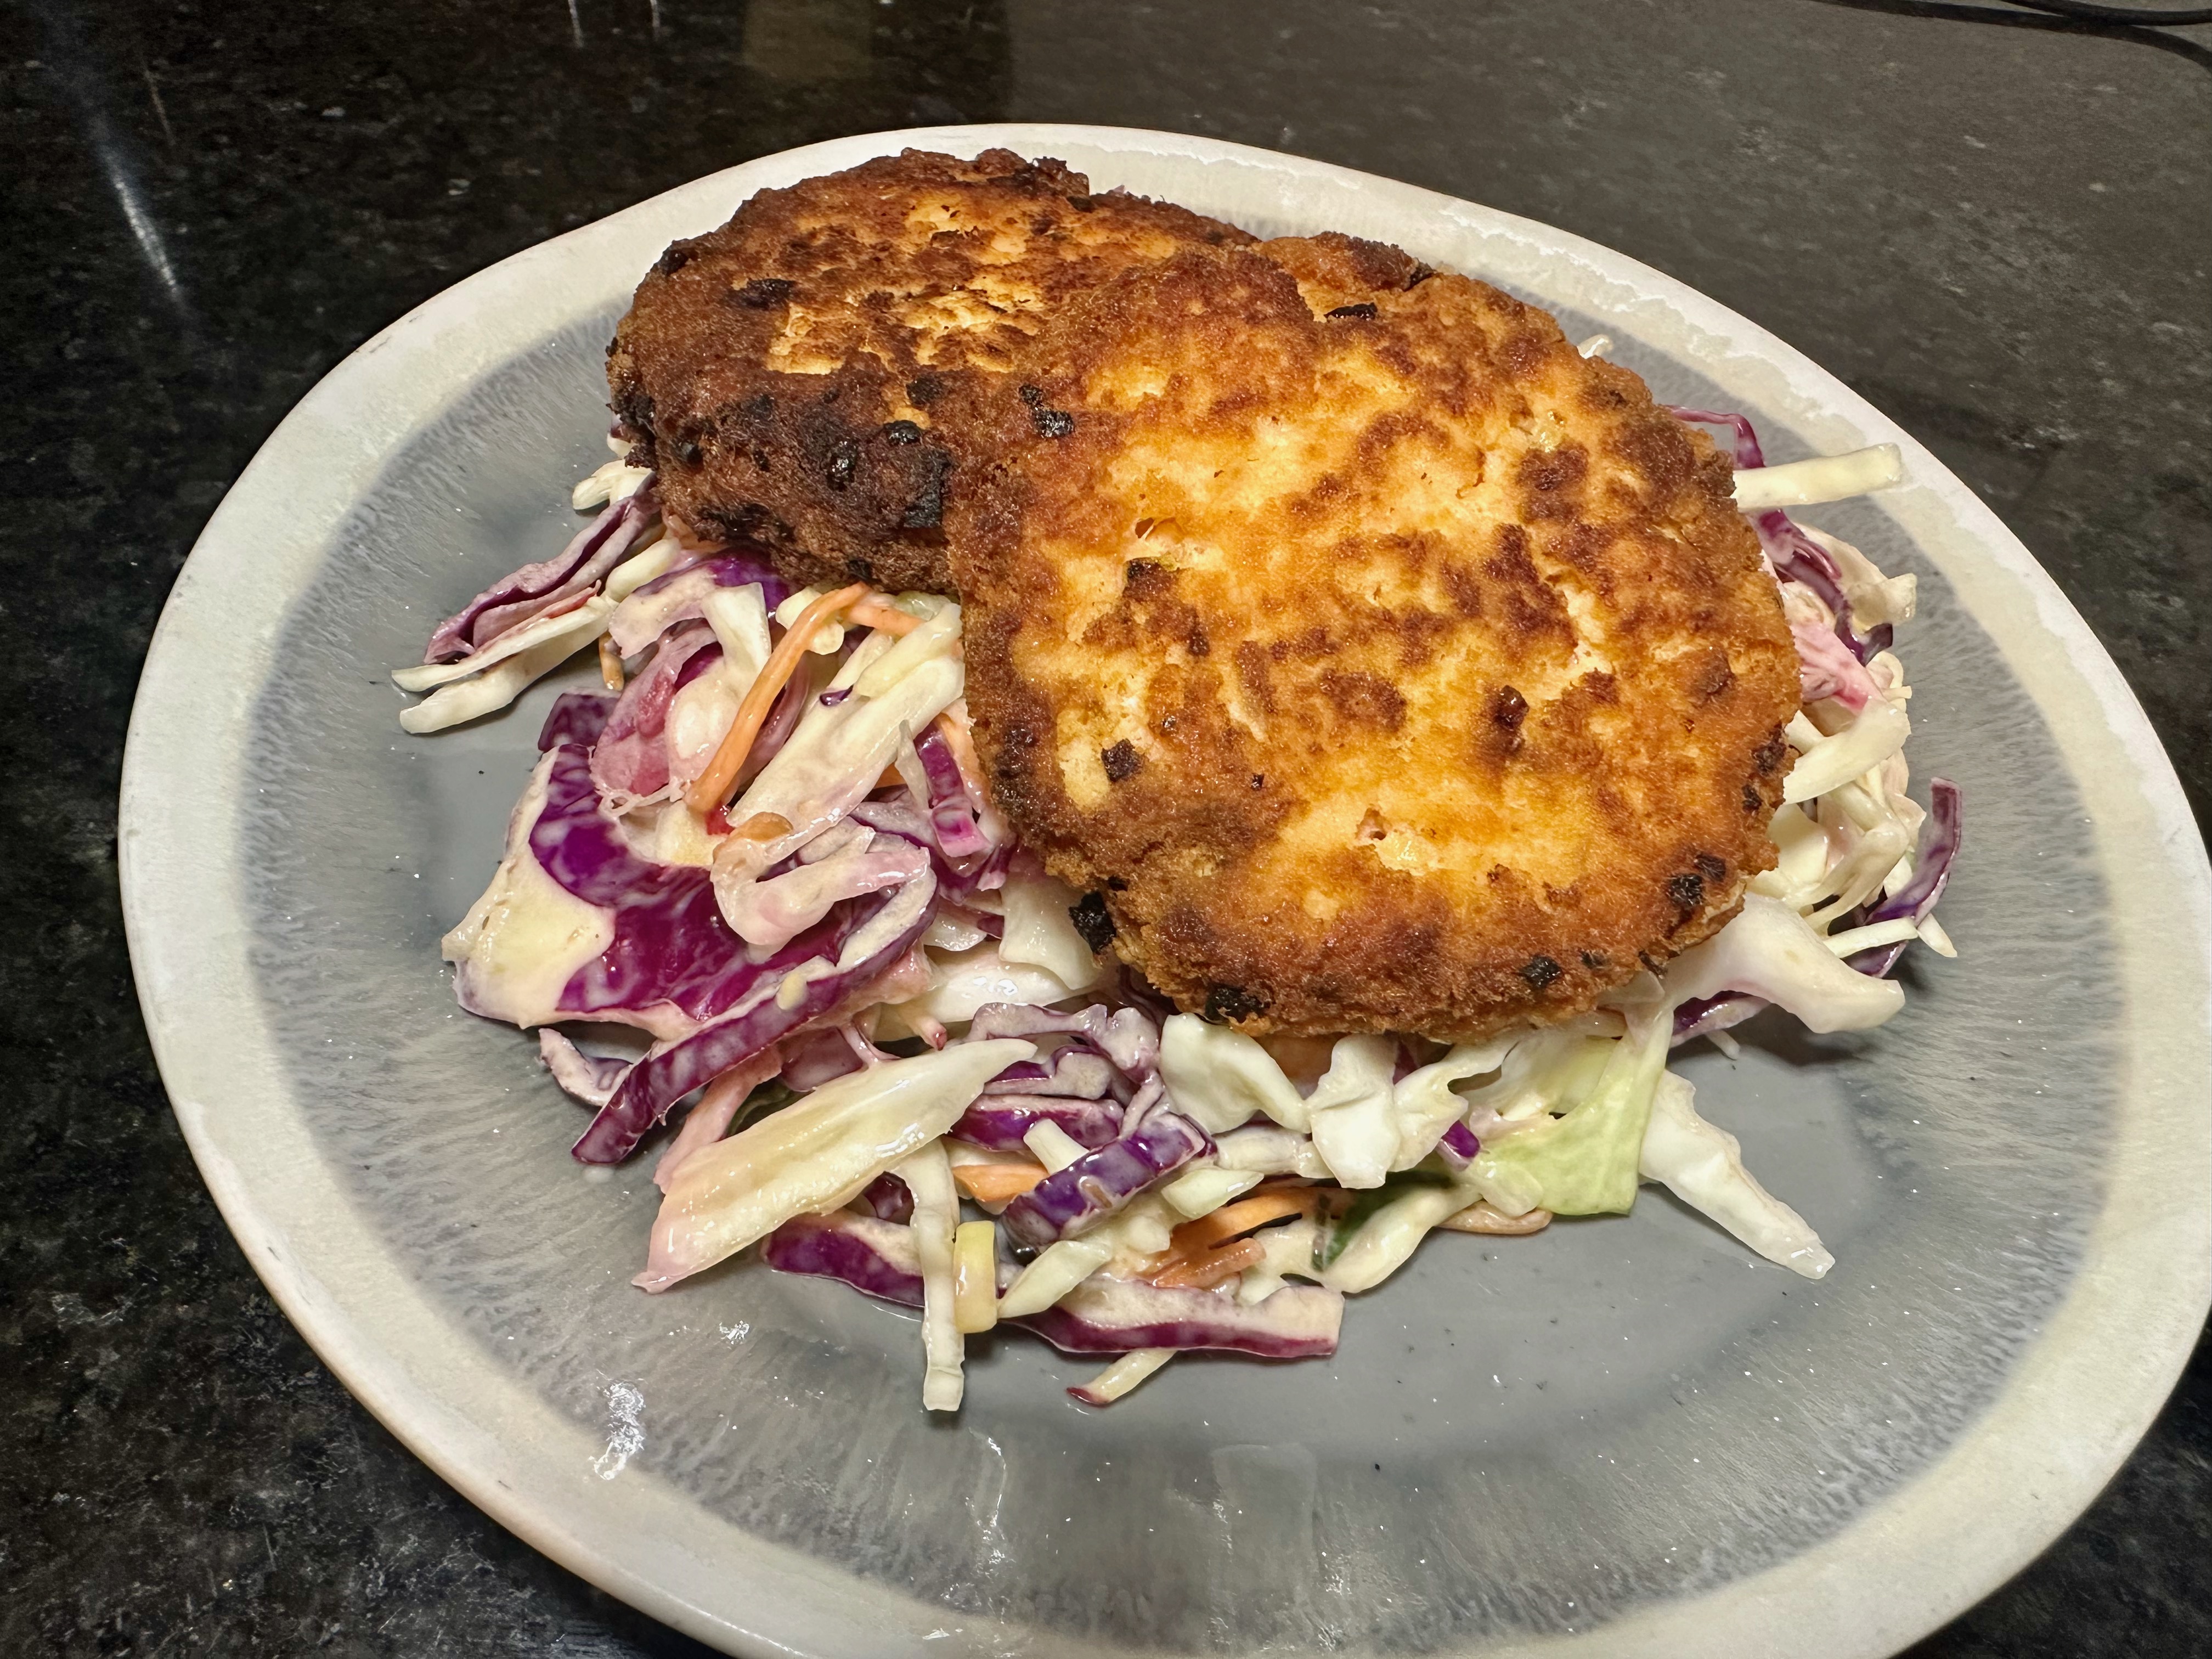
Salmon cakes

Freezer meal

Hands up if you are busy. Who is way too tired to get in the kitchen to cook at the end of the day? Definitely me.

My days are filled with meetings, to-do lists, emails and telling people what to do; by the time I finish work, the last thing I want to do is get stuck into cooking a meal and cleaning up afterwards. I want to work out and do something fun before I crash. That is why freezer meals are my favourite solution to the challenge of a busy life. A few hours on the weekend, and you find yourself with a stack of options for dinner that can be thawed and cooked for a healthy, delicious meal that is good for you.

Meal prep on the weekend

Last weekend, I restocked my freezer and added a few easy meals to make life easier on those very busy days. Salmon was on special offer at my bulk store, so I picked up a side and decided that salmon cakes would be my easy-added protein option for salads over the next few weeks. I like a bit of variety when preparing meals, and these salmon cakes give me an easy option that doesn’t need to be reheated before eating and tastes fantastic. If you can get your hands on a lot of salmon at a price that doesn’t require you to sell a kidney, you can easily make a large batch and package them up for the freezer.

Salmon cakes recipe

Ingredients

  • 600g salmon fillets, cooked
  • 4 eggs
  • 1 onion, finely sliced
  • 1/4 cup coconut flour

Instructions

In a large bowl, combine all ingredients and ensure everything is well mixed. 

Take a small handful of the mixture and shape it into a patty; repeat with the remaining mixture. 

Fry the patties in some oil over medium heat until the cakes are crisp on the outside.

“Salmon

  • Rating: ★★★★★
  • Print

“Simple


Credit: Cath @ easycleaneats

Ingredients

  • 600g salmon fillets, cooked
  • 4 eggs
  • 1 onion, finely sliced
  • 1/4 cup coconut flour

Directions

  1. In a large bowl, combine all ingredients and ensure everything is well mixed.
  2. Take a small handful of the mixture and shape it into a pattie; repeat with the remaining mixture.
  3. Fry the patties in some oil over medium heat until the cakes are crisp on the outside.

Nutrition

Per Serving: 192 calories; 8g fat; 5g carbohydrates; 18g protein

Equipment

  • Knife
  • Chopping board
  • Large mixing bowl
  • Frying pan 
  • Spatula 

Nutritional disclaimer

Nutrition information is provided as an estimate based on the ingredients used and available in my area (New Zealand). The nutritional information is here to help you understand the recipe; I use MyFitnessPal to generate my estimates. For more accurate nutritional information, please use a nutritional calculator with the ingredients in your area.


Avocado tuna melts

Do we have tuna? 

For a long time on a weekend, when I asked the question, ‘What do you want for lunch?’ The answer was ‘Do we have any tuna?’. I won’t go into how much I dislike it when people answer a question with a question. Let’s focus on the recurring request for tuna every weekend. Every week, the same request is made for a tuna cheese melt. I don’t have any issues providing tuna for lunch; I get bored with the leftover tuna in the fridge and don’t want to eat it. Life is too short to eat that much tuna. 

How to make tuna interesting 

I find tinned tuna very difficult to eat on its own. I know it is good for me, but it is so boring! I looked for an alternative to the standard tuna melt to make tuna more interesting. I came up with these avocado tuna melts. 

Two birds with one grill 

I figured that if I had the grill on to make tuna melts on bread for kids, there would be no downside to having a different kind of tuna melt myself. A quick rummage in the fridge later, and the avocado tuna melt was born. Avocado is the perfect ingredient that makes the tuna less dull and adds a creamy texture that stands up to the grill’s heat. 

If you want to use up those uneaten bits of tuna or that can in the pantry, give these melts a go. 

Avocado tuna melt recipe 

Avocado tuna melts ingredients

Ingredients 

  • 1 avocado 
  • 2 cans of tuna 
  • 2 tbsp. Parsley, chopped 
  • 1 tbsp. Lemon juice 
  • 1/2 tsp. smoked paprika 
  • 1/4 tsp. salt 
  • 1/4 tsp. black pepper 
  • 1/4 cup gruyere cheese, grated 
  • 2 tbsp. Chives, chopped 

Instructions

Preheat the grill on the highest setting. 

Cut the avocado in half lengthwise and remove the pit. 

Cut the avocado in half lengthwise
Cut the avocado in half lengthwise 
Cut the avocado in half lengthwise
Cut the avocado in half lengthwise 
Remove the pit
Remove the pit

Scoop out the avocado flesh into a large mixing bowl.

Scoop out the avocado flesh
Scoop out the avocado flesh into a large mixing bowl.

Put the avocado skins on a lined baking tray.

Put the avocado skins on a lined baking tray.

Mash the avocado with a fork.

Mash the avocado with a fork.

Add the tuna to the avocado and mix.

Add the tuna to the avocado and mix.

In a bowl, add the parsley, lemon juice, paprika, salt, and pepper. 

In a the bowl add the  parsley, lemon juice, paprika, salt, and pepper.
In a the bowl add the  parsley, lemon juice, paprika, salt, and pepper. 

Mix well.

Mix well
Mix well

Add the tuna avocado mix back into the avocado skin. 

Add the tuna avocado mix back into the avocado skin.
Add the tuna avocado mix back into the avocado skin then bake

Grill for 5 minutes so that the tuna and avocado start to colour. 

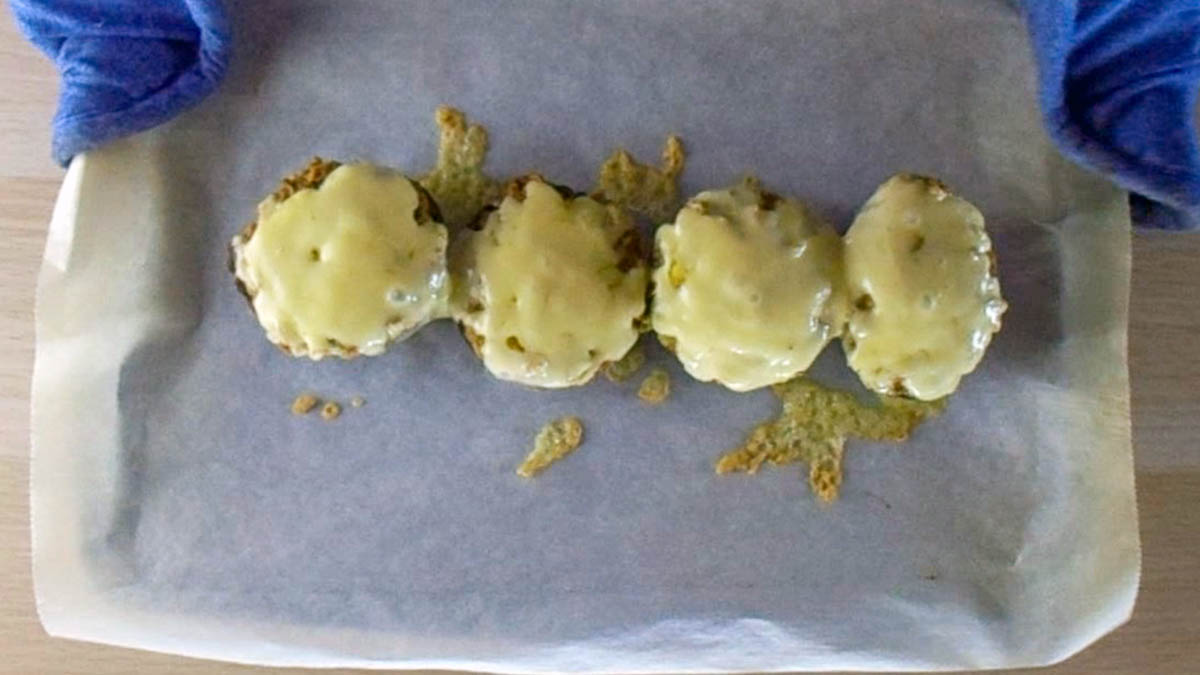
Top the tuna mix with the cheese and grill again to melt the cheese. 

Top the tuna mix with the cheese and grill again to melt the cheese. 
Melt the cheese.
Melt the cheese. 

Garnish with chopped chives and serve. 

Garnish with chopped chives and serve. 

Avocado tuna melt

  • Servings: 4
  • Rating: ★★★★★
  • Print

Avocado is the perfect ingredient that makes the tuna boring, adds a creamy texture that stands up to the heat of the grill.


Credit: Cath @ easycleaneats

Ingredients

  • 1 avocado
  • 2 cans of tuna
  • 2 tbsp. Parsley, chopped
  • 1 tbsp. Lemon juice
  • 1/2 tsp. smoked paprika
  • 1/4 tsp. salt
  • 1/4 tsp. black pepper
  • 1/4 cup gruyere cheese, grated
  • 2 tbsp. Chives, chopped

Directions

  1. Preheat the grill on the highest setting.
  2. Cut the avocado in half lengthwise and remove the pit.
  3. Scoop out the avocado flesh and coarsely chop it.
  4. In a bowl, mix together the avocado, tuna, parsley, lemon juice, paprika, salt, and pepper.
  5. Add the tuna avocado mix back into the avocado skin.
  6. Grill for 5 minutes so that the tuna and avocado start to colour.
  7. Top the tuna mix with the cheese and grill again to melt the cheese.
  8. Garnish with chopped chives and serve.

Nutrition

Per Serving: 240 calories; 17 g fat; 8 g carbohydrates; 17 g protein

Equipment  

  • Knife  
  • Chopping board  
  • Mixing bowl  
  • Spoon  
  • Fork  
  • Baking tray   
  • Measuring cups
  • Measuring spoons

Nutritional disclaimer

Nutrition information is provided as an estimate based on the ingredients used and available in my area (New Zealand). The nutritional information is here to help you understand the recipe; I use MyFitnessPal to generate my estimates. For more accurate nutritional information, please use a nutritional calculator with the ingredients in your area.


Tuna lettuce wrap

For a long time, tuna was a staple of a weekend lunch menu; tuna cheese melts were all I could make to satisfy hungry children. While I was happy to provide a high-protein lunch to the kids, I quickly got over eating leftover tuna or munching on tuna melts each week.

Mixing things up

In an effort to make tuna more interesting and easier to eat (every weekend), I came up with these tasty wraps. Anyone who knows me knows I love salad, so what could be better than mixing tuna and salad? Introducing fresh vegetables adds much-needed texture and new flavours to some boring tuna, while the avocado dressing is a great replacement for mayo. A simple solution to a repetitive problem. Now I get to choose when to eat tuna (and it isn’t every weekend), these tuna wraps are always my go-to option.

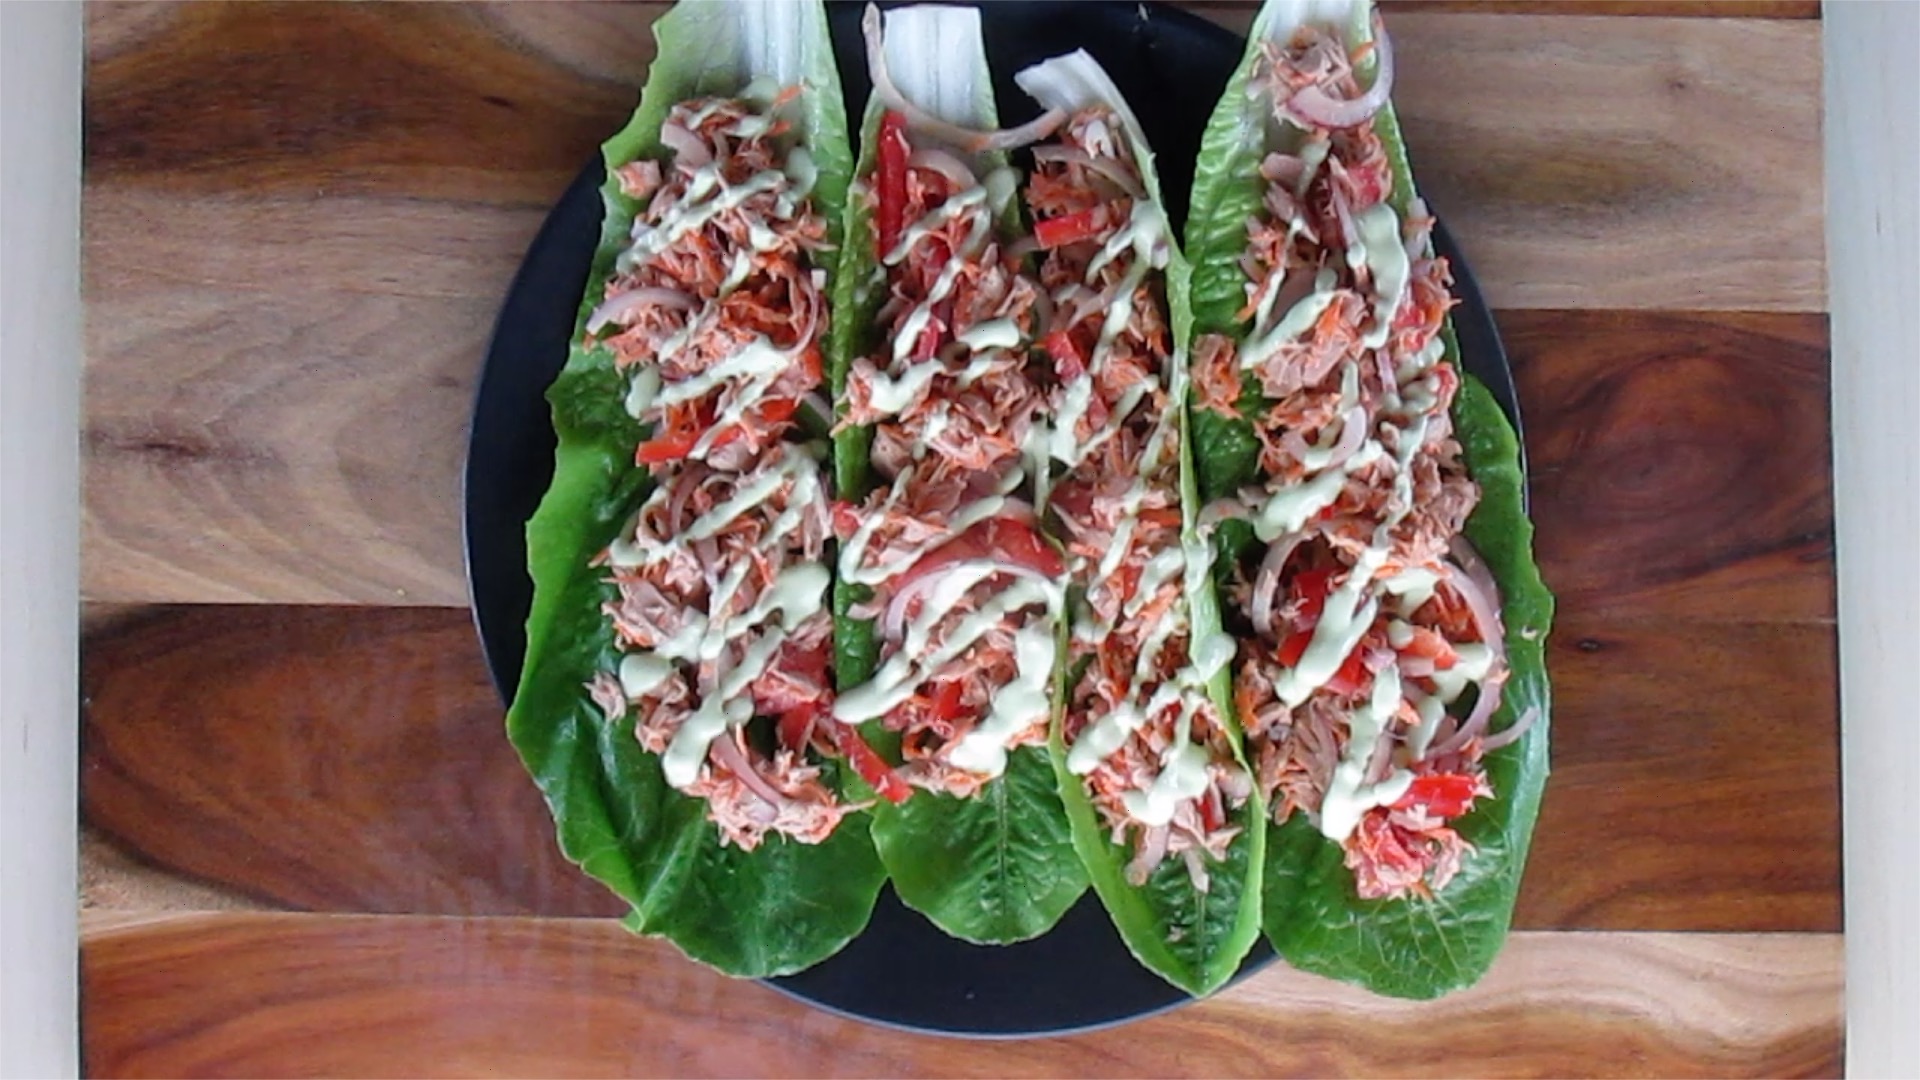
These lettuce wraps are the best way to eat tuna if you ask me. 

Tasty tuna lettuce wraps ready to eat

Tuna lettuce wrap recipe

Tuna lettuce wrap ingredients

Ingredients

  • 4 lettuce leaves
  • 120g tinned tuna, drained
  • 1 red pepper, thinly sliced
  • 1/4 cup cherry tomatoes, quartered
  • 1/4 cup carrot, grated
  • 1/2 red onion thinly sliced
  • 2 tbsp. Avocado Dressing

Instructions

Take a large mixing bowl.

Take a large mixing bowl.

Mix the tuna, peppers, carrots, tomatoes, and red onion in the bowl.

Add the tuna.
Add the tuna.
Add the tomatoes.
Add the tomatoes.
Add the peppers.
Add the peppers.
Add the carrots.
Add the carrots.
Add the onions.
Add the onions.
Mix everything together
Mixing everything together.
Mixed tuna and vegetables.

Place lettuce leaves on a plate.

Add the avocado dressing.

Add two tablespoons of avocado dressing.
Mix well.
Mix well.
Tuna mix ready to plate up.

Mix well.

Divide the mixture between the lettuce leaves.

Place the lettuce leaves on a plate.
Divide the tuna mixture between the leaves.
Lettuce wraps ready for dressing.

You can drizzle each wrap with a bit more avocado dressing before serving.

Drizzle some dressing over each wrap.

Serve and enjoy!

Lettuce wraps ready to eat.

Tuna Lettuce Wrap

  • Servings: 2
  • Rating: ★★★★★
  • Print

“These


Credit: Cath @ easycleaneats

Ingredients

  • 4 lettuce leaves
  • 120g tinned tuna, drained
  • 1 red pepper, thinly sliced
  • 1/4 cup cherry tomatoes, quartered
  • 1/4 cup carrot, grated
  • 1/2 red onion, thinly sliced
  • 2 tbsp. Avocado Dressing

Directions

  1. Take a large mixing bowl.
  2. Mix the tuna, peppers, carrots, tomatoes, and red onion in the bowl.
  3. Add the avocado dressing.
  4. Mix well.
  5. Place lettuce leaves on a plate.
  6. Divide the mixture between the lettuce leaves.
  7. You can drizzle each wrap with a bit more avocado dressing before serving.

Nutrition

Per Serving: 111 calories; 2 g fat; 9 g carbohydrates; 17 g protein

Equipment

  • Grater
  • Knife
  • Chopping board
  • Fork
  • Spoon
  • Mixing bowl
  • Measuring cups
  • Measuring spoons

Nutritional disclaimer

Nutrition information is provided as an estimate based on the ingredients used and available in my area (New Zealand). The nutritional information is here to help you understand the recipe; I use MyFitnessPal to generate my estimates. For more accurate nutritional information, please use a nutritional calculator with the ingredients in your area.

Tuna lettuce wraps

Primal Fish

Primal fish

Are you looking for a way to make that white fish fillet more interesting? What if you could have a creamy fillet with a crunchy crust that takes 15 minutes to cook? Would you be game? This take on a crusted fish fillet is easy to make, tasty and a great weeknight option.

More nut challenges

I am one of those unfortunate people who are allergic to not only peanuts but also tree nuts. When it comes to food options, not having nuts on the menu can be challenging at times and frustrating at others. There are so many foods I would love to try or eat regularly, but I will never get the chance, thanks to nuts. Not eating nuts doesn’t have to be the end of the world; there are always replacements and alternatives that mean you can have a nut-free option. This recipe is my attempt to create a nut-free version of a usually nut-packed recipe.

No almond crust, thanks

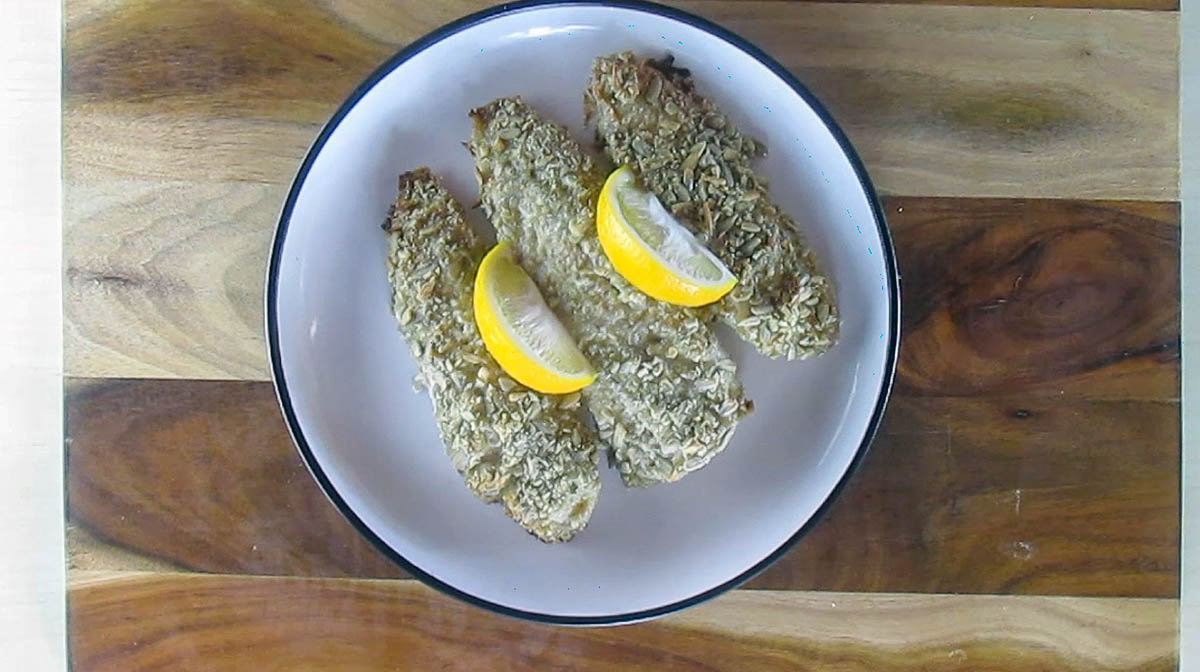
At a restaurant many years ago, I saw almond-crusted fish that looked and sounded delicious, but there was no way I would get to find out how delicious it was. Thankfully, I love the challenge of making something I’ve seen but never tasted. I set about making a crust full of flavour and with a great crunch, without risking a trip to the hospital after some EpiPen action. This is what I came up with: sunflower seed crusting. The sunflower seeds give the fish a great crunch; toasting them adds an extra layer of flavour and makes them a great alternative to nuts. 

Primal fish recipe

Ingredients

  • 1 tbsp. Avocado oil 
  • Salt and pepper 
  • 300g halibut fillets
  • 1/2 cup easy mayo
  • 1 1/2 cups toasted sunflower seeds, finely chopped

Instructions

Preheat the oven to 190 degrees C/ 375 degrees F. 

Line a baking tray with baking paper or a silicone liner.

Lightly grease the liner or paper with the avocado oil. 

Take a large frying pan and place it over medium heat.

Add half the sunflower seeds to the pan when the pan is warm.

Move the seeds around, so they don’t burn, but so they can get some colour. 

When the seeds are golden, transfer them to a plate to cool slightly.

Repeat with the remaining seeds.

Place the seeds in a food pressor and blitz to break up the seeds. 

Take care not to over-process them; you don’t want sunflower seed meal.

Place the seeds on a plate and put them to one side.

Place the fish fillets on a flat surface and season them.

Once seasoned, brush the fish with a coating of mayo; you can do this with a knife or a brush.

Roll each of the fish fillets in the seeds, and be sure to coat them all over.

Place the coated fillets on the baking tray.

Bake the fish for 15 minutes or until the fish flakes easily with a fork. 

When the fish is cooked, remove it from the oven and squeeze the lemon over the fish. 

Serve with a salad or roasted vegetables.

Primal fish

  • Rating: ★★★★★
  • Print

“This


Credit: Cath @ easycleaneats 

Ingredients

  • 1 tbsp. Avocado oil 
  • Salt and pepper 
  • 300g halibut fillets
  • 1/2 cup easy mayo 
  • 1 1/2 cups toasted sunflower seeds, finely chopped

Directions

  1. Preheat the oven to 190 degrees C/ 375 degrees F. 
  2. Line a baking tray with baking paper or a silicone liner.
  3. Lightly grease the liner or paper with the avocado oil. 
  4. Take a large frying pan and place it over medium heat.
  5. Add half the sunflower seeds to the pan when the pan is warm.
  6. Move the seeds around, so they don’t burn, but so they can get some colour. 
  7. When the seeds are golden, transfer them to a plate to cool slightly.
  8. Repeat with the remaining seeds.
  9. Place the seeds in a food pressor and blitz to break up the seeds. 
  10. Take care not to over-process them; you don’t want sunflower seed meal.
  11. Place the seeds on a plate and put them to one side.
  12. Place the fish fillets on a flat surface and season them.
  13. Once seasoned, brush the fish with a coating of mayo; you can do this with a knife or a brush.
  14. Roll each of the fish fillets in the seeds, and be sure to coat them all over.
  15. Place the coated fillets on the baking tray.
  16. Bake the fish for 15 minutes or until the fish flakes easily with a fork. 
  17. When the fish is cooked, remove it from the oven and squeeze the lemon over the fish.
  18. Serve with a salad or roasted vegetables.

Nutrition

Per Serving: 471 calories; 37.7g fat; 14g carbohydrates; 25.2g protein

Equipment

  • Measuring cup
  • Measuring spoons
  • Knife
  • Chopping board
  • Baking tray
  • Baking paper or a silicone liner 
  • Fork 
  • Frying pan
  • Spatula
  • Food processor

Nutritional disclaimer

Nutrition information is provided as an estimate based on the ingredients used and available in my area (New Zealand). The nutritional information is here to help you understand the recipe; I use MyFitnessPal to generate my estimates. For more accurate nutritional information, please use a nutritional calculator with the ingredients in your area.


Prawn and Avocado Salad

What to do with extra avo

I have an abundance of avocados at that moment; they are in season here in New Zealand, which means I can’t resist picking up a bag every time I head to the supermarket. The warmer weather means I get a few ripe avocados at a time and need to do something with it. While I love guacamole and never say no to smashed avo on toast, I have to put a meal on the table that is more of a balanced meal.

Quick and easy meal

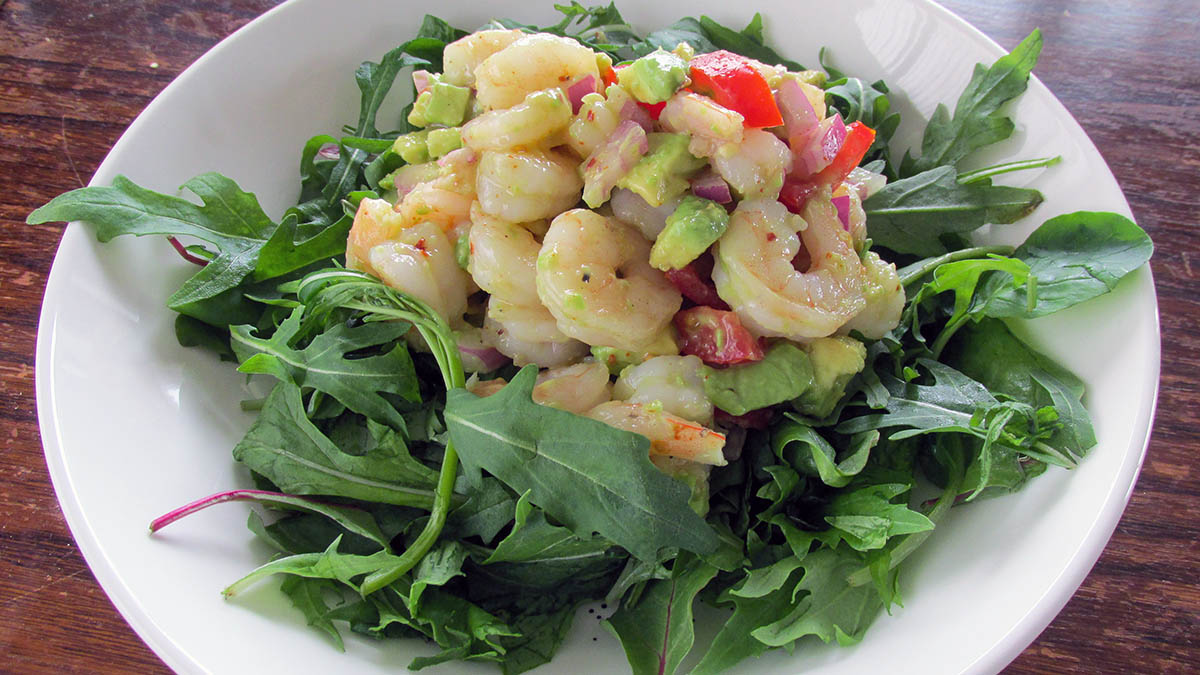
I cooked up a batch of garlic prawns the other day and had a large enough portion left to feed the family. I grabbed my perfectly ripe avocado and threw together this tasty salad in less than 20 minutes. No cooking, just chopping and mixing; if you want to save on washing up, you can even use your salad bowl to put it all together.

Prawn and avocado salad recipe

Ingredients

  • 1/4 cup red onion, chopped
  • 2 limes, juice of
  • 1 tsp. olive oil
  • salt and black pepper to taste
  • 450g jumbo prawns, cooked, peeled prawns and chopped
  • 1 tomato, diced
  • 1 avocado, diced
  • 1 jalapeño, diced fine
  • 1 tbsp. coriander chopped

Combine the red onion, lime juice, olive oil, salt and pepper in a small bowl.

Let them marinate at least 5 minutes.

While they marinade, put together the rest of the salad.

In a large bowl, combine chopped prawns, avocado, tomato, jalapeño.

Add the marinaded onions along with the marinade to the large bowl.

Gently toss to mix everything evenly.

Season to taste, then add the coriander before serving.

Prawn and avocado salad

  • Rating: ★★★★★
  • Print

“No


Credit: Cath @ easycleaneats

Ingredients

  • 1/4 cup red onion, chopped
  • 2 limes, juice of
  • 1 tsp. olive oil
  • salt and black pepper to taste
  • 450g jumbo prawns, cooked, peeled prawns and chopped
  • 1 tomato, diced
  • 1 avocado, diced
  • 1 jalapeño, diced fine
  • 1 tbsp. coriander chopped

Directions

  1. Combine the red onion, lime juice, olive oil, salt and pepper in a small bowl.
  2. Let them marinate at least 5 minutes.
  3. While they marinade, put together the rest of the salad.
  4. In a large bowl, combine chopped prawns, avocado, tomato, jalapeño.
  5. Add the marinaded onions along with the marinade to the large bowl.
  6. Gently toss to mix everything evenly.
  7. Season to taste, then add the coriander before serving.

Nutrition

Per Serving: 129 calories; 5.1g fat; 5g carbohydrates; 16.5g protein

Equipment

  • Measuring cups
  • Measuring spoons
  • Fork/citrus juicer
  • Knife
  • Chopping board
  • Large mixing bowl
  • Small mixing bowl
  • Wooden spoon or spatula

Nutritional disclaimer

Nutrition information is provided as an estimate based on the ingredients used and available in my area (New Zealand). The nutritional information is here to help you understand the recipe; I use MyFitnessPal to generate my estimates. For more accurate nutritional information, please use a nutritional calculator with the ingredients in your area.

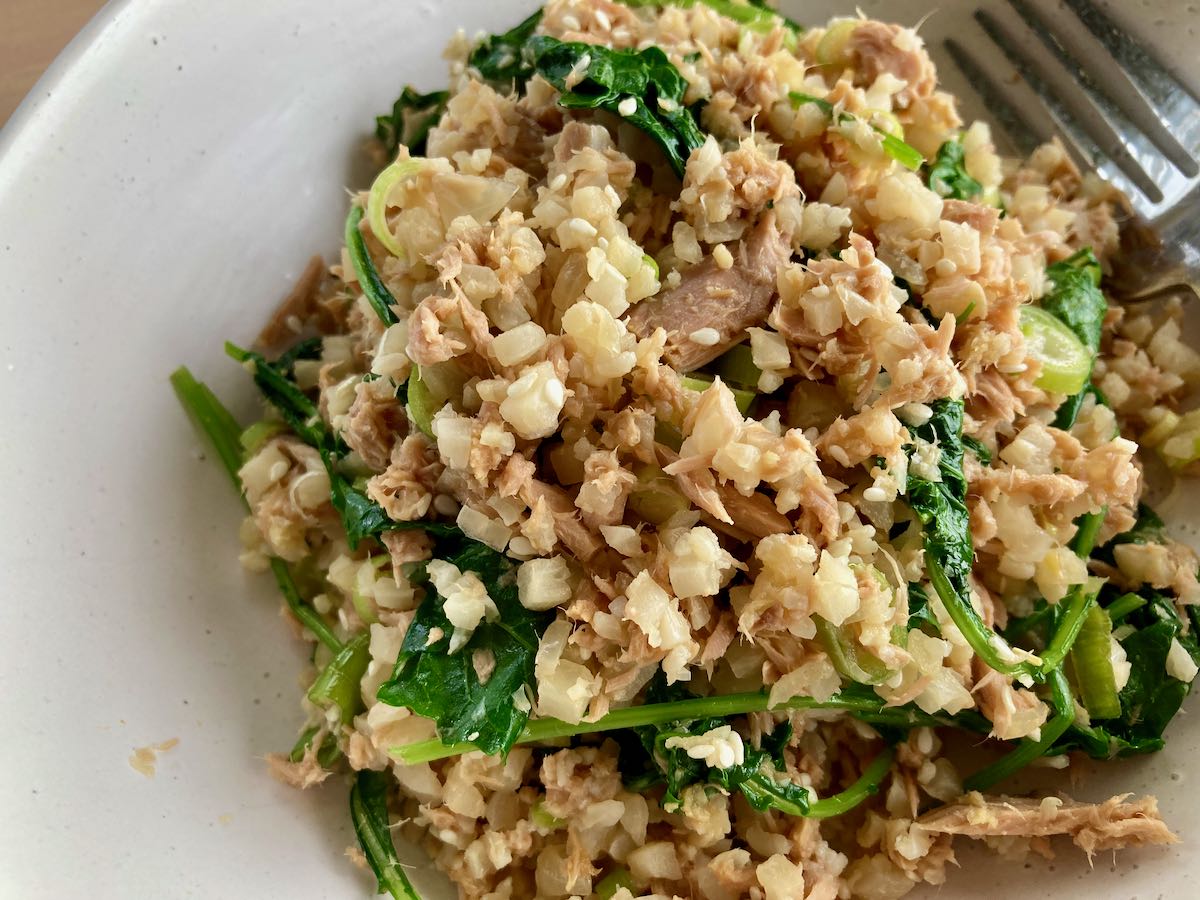
Tuna and Kale Salad

What do you do?

When setting off on a journey to remove processed foods from your diet, you may stop and ask yourself the question What can I eat instead of rice/couscous/pasta/bread? 

The answer is to find a suitable replacement.

The options are limitless; you can find gluten-free, sugar-free, grain-free, I could go on. An easy way to eat clean and simple is to switch out the standard meal padding of rice/couscous/pasta/bread with a vegetable alternative or something you can make yourself. 

This recipe is an excellent alternative that can be easily added to your meal. 

Making the most of leftovers

Leftovers are not something that I am used to having, usually everything that gets cooked gets eaten right away, cauliflower rice is probably the exception to the rule. With a few pantry staples and leftovers, you can have this fresh, crunchy and very filling salad that is perfect for lunch

Tuna and kale salad recipe

Ingredients

  • 1 bunch kale
  • 425g tinned tuna in spring water
  • 1 tbsp. ginger, grated
  • 1/4 cup herbs, chopped
  • 3 spring onions
  • 2 cups cauliflower rice
  • 2 tbsp. coconut aminos
  • 2 tbsp. lime juice
  • Sprinkle of sesame seeds – optional

Instructions

Remove the stems from the kale.

Add some water to the bottom of a saucepan and put a steaming basket on the top of the saucepan.

Let the water come to boil and steam started to come up through the basket.

Add the kale to the steaming basket and let it wilt, it should take about 5 minutes.

Remove the wilted kale from the basket and chop it roughly.

Add the kale to a large mixing bowl and let it cool slightly.

Add the remaining ingredients to the mixing bowl and mix well.

Serve or put in the fridge until you are ready to eat it.

  • Rating: ★★★★★
  • Print

“This


Credit: Cath @ easycleaneats

Ingredients

  • 1 bunch kale
  • 425g tinned tuna in spring water
  • 1 tbsp. ginger, grated
  • 1/4 cup herbs, chopped
  • 3 spring onions
  • 2 cups cauliflower rice
  • 2 tbsp. coconut aminos
  • 2 tbsp. lime juice

Directions

  1. Remove the stems from the kale.
  2. Add some water to the bottom of a saucepan and put a steaming basket on the top of the saucepan.
  3. Let the water come to boil and steam started to come up through the basket.
  4. Add the kale to the steaming basket and let it wilt, it should take about 5 minutes.
  5. Remove the wilted kale from the basket and chop it roughly.
  6. Add the kale to a large mixing bowl and let it cool slightly.
  7. Add the remaining ingredients to the mixing bowl and mix well.
  8. Serve or put in the fridge until you are ready to eat it.

Nutrition

Per Serving: 186 calories; 2.1 g fat; 10.2 g carbohydrates; 31 g protein

Equipment

  • Knife
  • Chopping board
  • Saucepan
  • Steaming basket
  • Mixing bowl
  • Tongs  

Nutritional disclaimer

Nutrition information is provided as an estimate based on the ingredients used and available in my area (New Zealand). The nutritional information is here to help you understand the recipe; I use MyFitnessPal to generate my estimates. For more accurate nutritional information, please use a nutritional calculator with the ingredients in your area.


One tray Thai salmon

Simple meals don’t have to be boring

I have been on a mission to make simple and tasty meals. I aim to create recipes that can be prepared and cooked quickly on a busy weeknight. We all struggle to make healthy and delicious meals while keeping on top of everything else in life. So this recipe is designed to be healthy, delicious and easy to make. You can cook this meal on a single tray in the oven. The preparation takes no more than 20 minutes and is portioned to feed four adults.  

Salmon and chilli = winning

I love all things spicy, the more chilli, the better if you ask me, this salmon has a beautiful balance of spice and sweetness. The vegetables add a perfect crunch and freshness to the salmon.

I like to add an extra pinch of red pepper flakes to the glaze for some extra heat, but this is optional. If you have to share your food with small people you can leave the extra chilli out.

One tray Thai glazed salmon recipe

One tray Thai glazed salmon ingredients

Ingredients

  • 4 salmon fillets
  • 1 red pepper, sliced
  • 1 green pepper, sliced
  • 1 onion, sliced
  • 1 cup snow peas
  • 2 Carrots, thinly sliced
  • ½ cup Thai sweet chilli sauce
  • ¼ cup coconut aminos
  • 1 tbsp. ground ginger
  • 1 tbsp. lime juice
  • Pinch of red pepper flakes
In a small bowl add the Thai sweet chilli sauce, coconut aminos and lime juice.
Add the ginger and chilli flakes.
Whisk well.
Line a baking tray.
Lay the salmon on the tray skin side down.
Add the carrots.
Add the onions.
Add the green and red peppers.
Add the snow peas
Add the sauce to the salmon but hold back 1/4 cup for later.
Add the remaining sauce to the salmon before serving.

One tray Thai glazed salmon

  • Servings: 4
  • Rating: ★★★★★
  • Print

This one tray meal a great option for busy week nights or an action packed weekend.


Credit: Cath @ easycleaneats

Ingredients

  • 4 salmon fillets
  • 1 red pepper, sliced
  • 1 green pepper, sliced
  • 1 onion, sliced
  • 1 cup snow peas
  • 2 Carrots, thinly sliced
  • 1/2 cup Thai sweet chilli sauce
  • 1/4 cup coconut aminos
  • 1 tbsp. ground ginger
  • 1 tbsp. lime juice
  • Pinch of red pepper flakes

Directions

  1. Preheat the oven to 190 degrees C/ 375 degrees F and line a baking tray with baking paper or a silicone liner.
  2. Lay the salmon skin side down surrounded by sliced vegetables.
  3. In a small bowl, whisk together Thai sweet chilli sauce, coconut aminos, ginger, lime juice, and red pepper flakes.
  4. Drizzle the sauce over the salmon, keeping a 1/4 cup of the sauce back.
  5. Cover the baking tray with foil and bake for 15 minutes.
  6. Remove foil and bake for another 5 minutes.
  7. Spread the rest of the sauce over the salmon and vegetables and serve.

Nutrition

Per Serving: 346 calories; 21 g fat; 24 g carbohydrates; 29 g protein

Equipment

  • Knife
  • Chopping board
  • Spoon
  • Small bowl
  • Whisk/fork
  • Baking tray
  • Spatula

Nutritional disclaimer

Nutrition information is provided as an estimate based on the ingredients used and available in my area (New Zealand). The nutritional information is here to help you understand the recipe; I use MyFitnessPal to generate my estimates. For more accurate nutritional information, please use a nutritional calculator with the ingredients in your area.


One tray Cajun prawns

Simple meals don’t have to be boring  

I have been on a mission to make simple and tasty meals. I aim to create recipes that can be prepared and cooked quickly on a busy weeknight. We all struggle to make healthy and delicious meals while keeping on top of everything else in life. So this recipe is designed to be healthy, delicious and easy to make. You can cook this meal on a single tray in the oven. The preparation takes no more than 20 minutes and is portioned to feed four adults.  

Cajun inspiration 

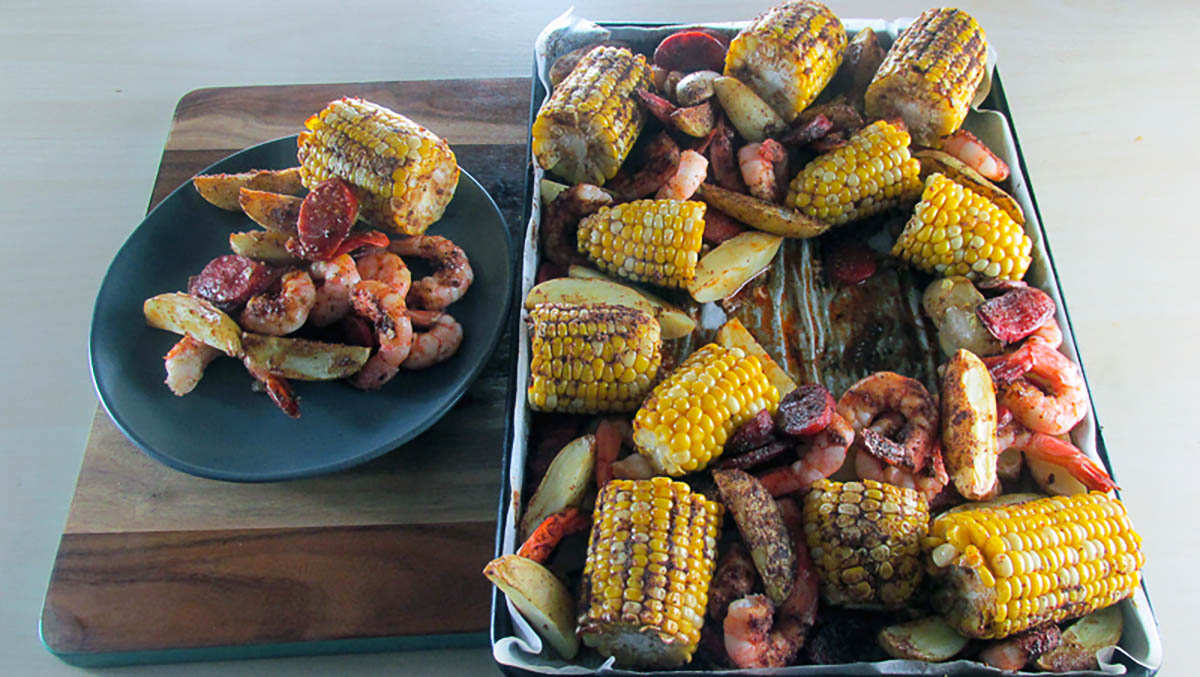
Shrimp and prawns don’t just make me think about BBQ; they make me think about Cajun food. This recipe brings together the spice of the chorizo sausage with the fresh flavours of the pawns and sweetness of the corn. The one tray meal makes it ideal for a busy night or something fancy for the weekend.

One tray Cajun prawn and sausage bake recipe 

One tray Cajun prawn and sausage bake ingredients

Ingredients

  • 450g baby potatoes, quartered 
  • 4 ears corn, cut into three 
  • 450g hot chorizo sausage 
  • 450g prawns, peeled 
  • 1/3 cup olive oil 
  • 3 tbsp. Cajun seasoning 
One tray Cajun prawn and sausage bake

One tray Cajun prawn 

  • Servings: 6
  • Rating: ★★★★★
  • Print

This one tray meal is easy to make and an excellent options for a weeknight meal


Credit: Cath @ easycleaneats

Ingredients

  • 450g baby potatoes, quartered 
  • 4 ears corn, cut into three 
  • 450g hot chorizo sausage 
  • 450g prawns, peeled 
  • 1/3 cup olive oil 
  • 3 tbsp. Cajun seasoning 

Directions

  1. Preheat the oven to 200 degrees C/ 400 degrees F. 
  2. Line a large baking tray with baking paper or a silicone liner. 
  3. Place the pieces of corn on the baking tray. 
  4. Place the potatoes around the corn, followed by the chorizo and then the prawns. 
  5. When everything is on the sheet mix together the Cajun seasoning and olive oil. 
  6. Spread the Cajun seasoning mix over the corn, potatoes, prawns and chorizo. 
  7. Bake for 20 30 minutes, the corn should be cooked and the potatoes soft. 
  8. Serve hot with a dash of hot sauce. 

Nutrition

Per Serving: 414 calories; 21 g fat; 26 g carbohydrates; 26 g protein

Equipment

  • Baking tray 
  • Baking paper or a silicone liner.
  • Scales
  • Measuring cups
  • Measuring spoons

Nutritional disclaimer

Nutrition information is provided as an estimate based on the ingredients used and available in my area (New Zealand). The nutritional information is here to help you understand the recipe; I use MyFitnessPal to generate my estimates. For more accurate nutritional information, please use a nutritional calculator with the ingredients in your area.