Gingernut cookies

Flashback

Back in another lifetime, there was a weekend tradition. On Sunday mornings, a small person would stumble out of bed into the living room, still half asleep and plonk on the sofa. I would always offer a cup of tea to help him wake up. The offer of tea always sparked the same question, ‘Are there ginger nuts?’. Because what more could you ask for when you have just woken up, a brew and a ginger nut to dunk in your tea?

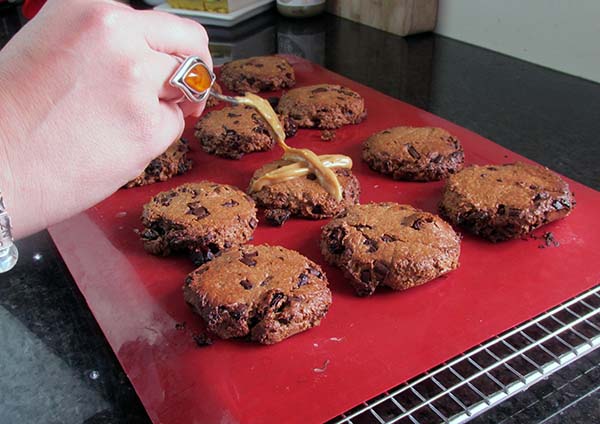
Gingernut cookies ready to eat
Gingernut cookies

Try to clean up the ginger nut

My inspiration for coming up with a grain-free ginger nut cookie was in an effort to reduce the amount of crap the small people in my life were eating. While my efforts to provide healthier alternatives didn’t always go down well, this is one of the few times my baked goods beat the store-bought version.

Crunchy, not teeth-breaking.

As these things go, this recipe was pretty easy to develop. I knew the challenge would be getting the right amount of crunch. Too much crunch and we could be looking for replacement teeth, not enough crunch and you have a terrible cookie with no structural integrity for dunking. The key to a good ginger nut is how long you bake it for. The trick with this recipe is to remove the cookies from the oven on time and let them sit on the hot baking tray to crisp up and develop the right amount of crunch. If you leave them in the oven too long, you will be looking for new teeth, and no amount of dunking will help you. 

While I no longer have to bake ginger nut cookies weekly to keep a child happy, they are still my go-to treat for road trips. If I know I am heading off on any kind of adventure, I make sure I have a few ginger nut cookies in my car for those coffee pit stops. Having my ginger nuts on hand means I get a fuel-up when I make a stop for coffee and a leg stretch without having to run the gauntlet of grain and sugar-filled offerings at coffee shops and petrol stations.

Gingernut cookies

Gingernut cookies ingredients

Ingredients

  • 200g seed butter
  • 3 tsp. Ground ginger
  • 1 egg
  • 100g coconut sugar

Instructions

Preheat oven to 200 degrees c/ 392 degrees f 

Have a baking tray ready with baking paper on it 

Into a food processor, place the coconut sugar and ginger blend until thoroughly combined. 

Into a food processor place, the coconut sugar and ginger.
Blend until thoroughly combined.

Add the seed or nut butter and mix until thoroughly combined; it will start to clump together. 

 Add the seed or nut butter
Add the seed or nut butter
mix until thoroughly combined, it will start to clump together.
Mix until thoroughly combined, it will start to clump together.

Add the egg and mix again until the mixture starts to form a ball. If it doesn’t form a ball straight away, don’t worry. 

Add the egg.
Add the egg.

When everything is thoroughly combined and sticking together, stop the processor. 

Mix again until the mixture starts to form a ball

Use an ice cream scoop to portion out the cookie dough, place each portion onto the lined baking tray, and make sure there is space between each portion so that the cookies have space to spread. 

Use an ice cream scoop to portion out the cookie dough.
Place each portion onto the lined baking tray.
Make sure there is space between each portion so that the cookies have space to spread.

Use the back of a spoon to press down the pieces slightly. 

Use the back of a spoon to press down the pieces slightly.

Bake the cookies for 15 minutes or until they are golden brown. 

Remove the cookies from the oven, let them cool on the baking tray; this will let them crisp up. 

When the cookies are hard, move them to a container; they will keep for about a week. 

Fresh and crunchy cookies

Gingernut cookies

  • Servings: 10
  • Rating: ★★★★★
  • Print

This recipe is my take on the traditional gingernut, it is gluten-free but still has all the flavour and crunch.


Credit: Cath @ easycleaneats

Ingredients

  • 200g seed butter
  • 3 tsp. Ground ginger
  • 1 egg
  • 100g coconut sugar

Directions

  1. Pre-heat oven to 200 degrees c 392 degrees f
  2. Have a baking tray ready with baking paper on it
  3. Into a food processor place, the coconut sugar and ginger blend until thoroughly combined
  4. Add the seed or nut butter and mix until thoroughly combined, it will start to clump together.
  5. Add the egg and mix again until the mixture starts to form a ball if it doesn’t form a ball don’t worry when everything is thoroughly combined stop the processor.
  6. Use an ice cream scoop to portion out the cookie dough, place each portion onto the lined baking tray, and make sure there is space between each portion so that the cookies have space to spread.
  7. Use the back of a spoon to press down the pieces slightly.
  8. Bake the cookies for 15 minutes or until they are golden brown.
  9. Remove the cookies from the oven, let them cool, and crisp up.
  10. When the cookies are hard, move the cookies to a container, they will keep for about a week.

Nutrition

Per Serving: 161 calories; 10 g fat; 15 g carbohydrates; 4 g protein.

Equipment 

  • Food processor 
  • Ice cream scoop 
  • Baking tray
  • Baking paper/ silicone liner
  • Spoon 
  • Measuring spoons
  • Scales

Nutritional disclaimer

Nutrition information is provided as an estimate based on the ingredients used and available in my area (New Zealand). The nutritional information is here to help you understand the recipe; I use MyFitnessPal to generate my estimates. For more accurate nutritional information, please use a nutritional calculator with the ingredients in your area.


Delicious Gluten-Free Oreo Crepes Recipe

Lockdown inspiration

These delicious gluten-free crepes are a COVID-inspired recipe.
2020 was a rough year, but it wasn’t all bad. I managed to get out of Auckland and made it to Wellington for a mini-adventure. While I wasn’t a fan of the cold, surprisingly, I got a few non-windy days! I love mooching around, seeing the sights and getting out and about in a new place; if I don’t end up with sore legs from walking around a city, I’ve done adventure wrong. Discovering new places to eat is always a highlight of any trip away. While in Wellington, I came across a great little place that had all of the crepes, seriously, all of the fillings, and they do buckwheat crepes. On a recent work trip back to Welly, I went to see if the little place was still open; it seems they didn’t survive the bumps left by COVID, but I haven’t been able to stop thinking about crepes since then. There was only one solution: make my own.

Grain-free crepes

Taking inspiration from that little crepe shop, I experimented to come up with my own buckwheat-flour batter for crepes that could be made more exciting by adding anything. As with all of my experiments, I had to eat a few mistakes before I came up with a base batter that was smooth and the crepes don’t fall apart when you try to flip them over.

Make it like an Oreo

What can I say? If you find something that works, stick with it. While I’m not a fan of chocolate, I do like Oreos. I refuse to buy them, but I will try to recreate the flavours when I want a sweet treat. 

For me, these Oreo crepes are the perfect balance of sweet filling and dark chocolate wrapping.

Oreo crepes

Ingredients

  • 3 eggs
  • 1/4 cup cream
  • 1/4 cup water
  • 1/4 cup buckwheat flour
  • 2 tbsp. cacao powder
  • 1/2 tsp. vanilla powder
  • Filling
  • 190g cream cheese
  • 2 tbsp. monk fruit sweetener
  • 1/4 tsp. vanilla powder
  • 2 tbsp.buckwheat flour

Instructions

To make the filling, take a mixing bowl, beat together the cream cheese, sweetener, vanilla powder and flour. I recommend using a stand mixer for this to achieve a smooth, fluffy mixture. 

Beat until the mixture is light and fluffy.

Put this mixture to one side.

Put the cream cheese mixture aside for later.

In a bowl, whisk together the cream, sweetener, vanilla and two tablespoons of buckwheat flour for the base crepe batter. 

In another bowl, beat the eggs and water together.

Add the eggs to the base crepe batter and whisk. 

Whisk in the cacao and buckwheat flour, beat until you have a smooth batter.

Heat a crepe or frying pan and lightly oil the pan.

Put a quarter cup of the batter in the pan and swirl it around to create a thin, even layer.

Cook over low heat for about 1 minute, or until the edges are set, before turning.

Cook for a minute on the other side.

Set the cooked crepe aside and repeat the process with the remaining batter.

To plate the crepes, place one crepe on a plate, add a heaped tablespoon of the cream filling in the centre, then spread it out evenly.

Fold the crepe in half and then in half again.

Sprinkle with a bit of cacao powder to serve.

“Oreo

  • Print

“Perfect


Credit: Cath @ easycleaneats

Ingredients

  • 3 eggs
  • 1/4 cup cream
  • 1/4 cup water
  • 1/4 cup buckwheat flour
  • 2 tbsp. cacao powder
  • 1/2 tsp. vanilla powder
  • 190g cream cheese
  • 2 tbsp. monk fruit sweetener
  • 1/4 tsp. vanilla powder
  • 2 tbsp.buckwheat flour

Directions

  1. In a bowl, whisk together the cream, sweetener, vanilla and two tablespoons of buckwheat flour for the base crepe batter.
  2. Beat until the mixture is light and fluffy.
  3. Put this mixture to one side.
  4. To make the filling, take a mixing bowl, beat together the cream cheese, sweetener, vanilla powder and flour. I recommend using a stand mixer for this to achieve a smooth, fluffy mixture.
  5. Put the cream cheese mixture aside for later.
  6. In another bowl, beat the eggs and water together.
  7. Add the eggs to the base crepe batter and whisk.
  8. Whisk in the cacao and buckwheat flour, beat until you have a smooth batter.
  9. Heat a crepe or frying pan and lightly oil the pan.
  10. Put a quarter cup of the batter in the pan and swirl it around to create a thin, even layer.
  11. Cook over low heat for about 1 minute, or until the edges are set, before turning.
  12. Cook for a minute on the other side.
  13. Set the cooked crepe aside and repeat the process with the remaining batter.
  14. To plate the crepes, place one crepe on a plate, add a heaped tablespoon of the cream filling in the centre, then spread it out evenly.
  15. Fold the crepe in half and then in half again.
  16. Sprinkle with a bit of cacao powder to serve.

Nutrition

Per Serving: calories; g fat; g carbohydrates; g protein

Equipment

  • Mixing bowls (3)
  • Whisk
  • Measuring cups and spoons
  • Kitchen scales
  • Frying pan/Crepe pan
  • Spatula
  • Tablespoon

Nutritional disclaimer

Nutrition information is provided as an estimate based on the ingredients used and available in my area (New Zealand). The nutritional information is here to help you understand the recipe; I use MyFitnessPal to generate my estimates. For more accurate nutritional information, please use a nutritional calculator with the ingredients in your area.


Cookie dough yoghurt

Buy local

I am a big fan of The Collective dairy products; their Straight Up Yoghurt is one of my favourites. It is probiotic and completely free of added chemicals and additives. 
I like yoghurt as a dessert when I want a treat, and this cookie dough yogurt is one of my favourite easy-to-make, tasty treats.

Sweet treat

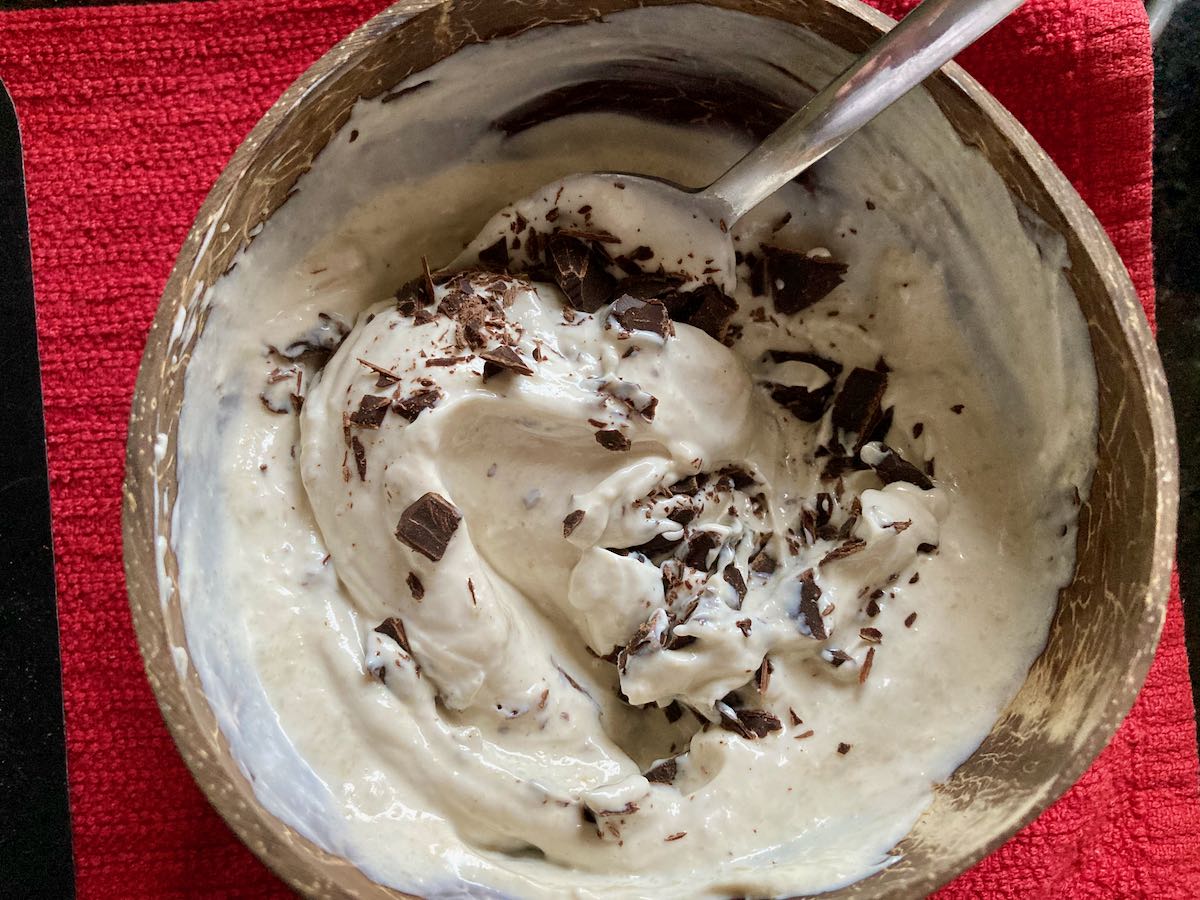
There are times when we all want something sweet without eating a sugar-filled craps snack or something swimming in chemicals. When I find myself craving something sweet, I head to the fridge and make myself a bowl of cookie dough yoghurt. The combination of sun butter, yoghurt and chocolate chips is easy to put together and has just enough sweetness to satisfy my cravings and fill me up.

Flexible treat

This treat is highly flexible; it can be adapted to suit your dietary requirements. If you don’t like to eat dairy products, this recipe can be made using coconut yoghurt without too much change to the flavours. If you are fortunate enough to be able to eat nuts, you can easily swap out the sun butter for almond, cashew or peanut butter. I use my homemade chocolate chips because they are low in sugar and high in fat. If you don’t want to make your own chocolate chips, you can use any chocolate chips you like.

Ingredients

  • 250g plain yoghurt
  • 1 tbsp. seed or nut butter
  • 1 tsp. maple syrup
  • 1/4 tsp. vanilla paste
  • 1 tbsp. 70% cocoa chocolate chips

Instructions

Put all of the ingredients except the chocolate chips into a large bowl, mix well until thoroughly combined and smooth.

Sprinkle the chocolate chips on top and serve

Cookie dough yoghurt

  • Servings: “1
  • Rating: ★★★★★
  • Print


Credit: Cath @ easycleaneats

Ingredients

  • 250g plain yoghurt
  • 1 tbsp. seed or nut butter
  • 1 tsp. maple syrup
  • 1/4 tsp. vanilla paste
  • 1 tbsp. 70% cocoa chocolate chips

Directions

  1. Put all of the ingredients except the chocolate chips into a large bowl, mix well until completely combined and smooth.
  2. Sprinkle the chocolate chips on top and serve

Nutrition

Per Serving:143 calories; 6.1 g fat; 13.6 g carbohydrates; 8.5 g protein

Equipment

  • Spoon
  • Bowl

Nutritional disclaimer

Nutrition information is provided as an estimate based on the ingredients used and available in my area (New Zealand). The nutritional information is here to help you understand the recipe; I use MyFitnessPal to generate my estimates. For more accurate nutritional information, please use a nutritional calculator with the ingredients in your area.


Christmas fruit cake

Do people like fruit cake? 

Fruitcake always makes me think of Christmas. 

Back in the UK, I remember there being a lot of fruitcakes at Christmas. I also remember that most of them came topped with marzipan, so I never got to eat them. 

Stupid almonds. 

Stupid nut allergy. 

I didn’t get a lot of Christmas fruitcake when I was younger, so I’ve made the most of it as an adult with full control of a kitchen. 

Christmas fruit cake

So nommy 

My former mother-in-law used to make kick-ass Christmas cake (maybe she still does, I don’t know). It is a fruitcake that comes with fondant icing and royal icing; there are berries and holly along with a Merry Christmas sign on it. Totes amazing. I love the cake, but the sugar crash afterwards is not so lovable. I’m not overly happy about how it fills up my carb pockets either. 

Christmas without the carb coma 

Anyway. Rather than pass on the chance to eat fruitcake, I decided to adapt a recipe so that I can drop the sugar and flour to make them more guilt-free (and sugar crash-free). 

Taking the sugar-filled Christmas fruitcake recipe as the base, I set about making changes and eating some mistakes. After a bit of experimentation, I landed on the perfect recipe that was moist, dense, but not stodgy. To minimise the impact on my carb pockets, I decided not to add icing to my cake, but if you are happy to make the trade, feel free to add whatever icing makes you happy.  

A sweet treat to enjoy

In years gone by, any baking I did would barely last a day before it was completely consumed, and often I would be lucky to get any piece of my creation. Thankfully, that is no longer the case. I actually have the opposite problem now, my baked goods need to go in the freezer so they don’t start growing a furry coat before I can finish them.

We have a winner 

I swapped out the wheat flour and regular sugar; I like using a mix of dried fruit soaked in a bit of rum to make sure the cake stays nice and moist. You can leave out the booze if your little people like fruit cake, or leave it in if you want them to take a nap.  If you want his sweet treat to last, it can be portioned and stored in the freezer for a taste of Christmas anytime you need it. 

Gluten-Free Christmas fruit cake recipe

Christmas fruit cake ingredients

Ingredients

  • 3 egg whites
  • 2 eggs
  • 1/4 cup coconut cream
  • 1/3 cup maple syrup
  • 1/2 tsp. baking soda
  • 1/2 cup coconut flour
  • 2 tsp. vanilla bean paste
  • 1/2 cup butter, melted
  • 1 1/2 cups fruit cake mix
  • optional – 1/4 cup rum

Instructions

Preheat the oven to 180 degrees C/ 350 degrees F

Shift the flour and baking soda together in a bowl.

Shift the flour and baking soda together in a bowl

In another bowl, whisk together the two eggs, melted butter, coconut cream, vanilla, and maple syrup until the mixture is foamy.

In another bowl, mix together the two eggs
In another bowl, mix together the melted butter, coconut cream, vanilla and maple syrup until it is foamy.

Mix the wet and dry ingredients, then set the fruit cake mix aside.

Mix together the wet and dry ingredients

In a bowl, whisk the egg whites until they form soft peaks.

In a bowl, whisk the egg whites until they are soft peaks.

Mix the fruit cake mix into the batter.

Mix in the fruit cake mix to the batter.

Fold the egg whites into the batter.

Fold the egg whites into the batter.

Pour the batter into a lined cake tin.

Fold the egg whites into the batter.
Mini fruit cakes ready for the oven

Bake for 30 minutes at 180 degrees C/ 350 degrees F.

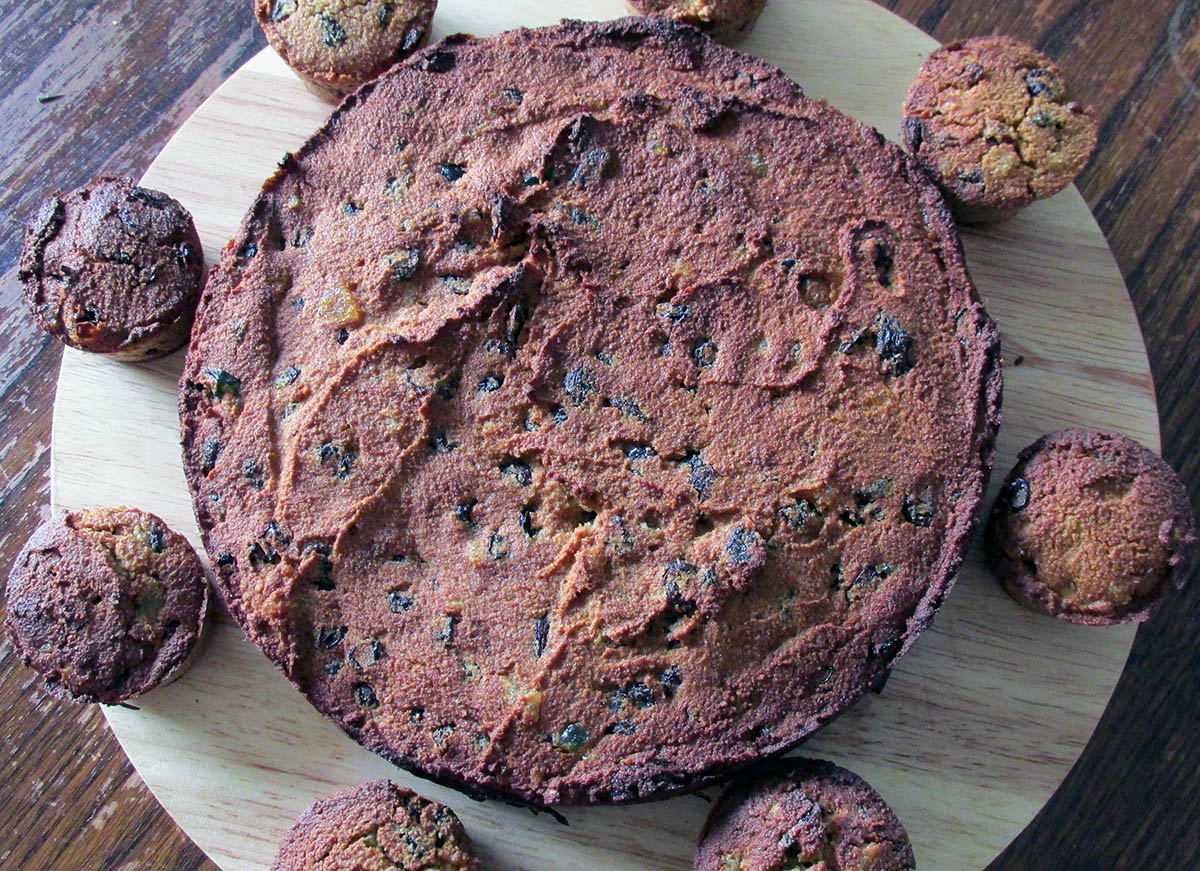
Christmas cake fresh from the oven
Full cake and mini cakes

Gluten-free Christmas fruit cake

  • Servings: 12
  • Rating: ★★★★★
  • Print

What would Christmas be without some fruit cake. This fruit cake is moist and full of fruit (and a little rum).


Credit: Cath @ easycleaneats

Ingredients

  • 3 egg whites
  • 2 eggs
  • 1/4 cup coconut cream
  • 1/3 cup maple syrup
  • 1/2 tsp. baking soda
  • 1/2 cup coconut flour
  • 2 tsp. vanilla bean paste
  • 1/2 cup butter, melted
  • 1 1/2 cups fruit cake mix
  • 1/4 cup rum (optional)

Directions

  1. Preheat the oven to 180 degrees C/ 350 degrees F
  2. Shift the flour and baking soda together in a bowl.
  3. In another bowl, mix together the two eggs, melted butter, coconut cream, vanilla and maple syrup until it is foamy.
  4. Mix together the wet and dry ingredients leave the fruit cake mix to one side.
  5. In a bowl, whisk the egg whites until they are soft peaks.
  6. Mix in the fruit cake mix to the batter.
  7. Fold the egg whites into the batter.
  8. Pour the batter into a lined cake tin.Pour the batter into a lined cake tin.
  9. Bake for 30 minutes at 180 degrees C/ 350 degrees F.

Nutrition

Per Serving: 236 calories; 10 g fat; 32 g carbohydrates; 3 g protein

Equipment 

  • Electric whisk 
  • Large mixing bowls x2
  • Wooden spoon or spatula 
  • Cake tin 
  • Cooling rack 
  • Measuring cups
  • Measuring spoons

Nutritional disclaimer

Nutrition information is provided as an estimate based on the ingredients used and available in my area (New Zealand). The nutritional information is here to help you understand the recipe; I use MyFitnessPal to generate my estimates. For more accurate nutritional information, please use a nutritional calculator with the ingredients in your area.


Protein cheesecake

Just because I love a challenge

I love looking at recipe books and figuring out if they can be changed and if I could make a clean-eating version. This recipe was initially given to me from the Ross Edgley The World’s Fittest book, and I asked if it could be adapted. As I love a challenge, I decided to give it a go.

Easy Swaps

Sometimes, I can look at a recipe and know what ingredients are easy to swap out for alternative ingredients. Other recipes require some trial and error before you have something close to what the recipe would give you. Thankfully, this was one of the easy swap recipes that ended up giving me a finished cheesecake that didn’t last very long (3 days). 

The original recipe called for quark, cocoa, muesli, blueberries, and strawberries. I swapped out the quark for crème fraiche and sour cream to increase the fat content, changed the cocoa for cacao powder, and ditched the fruit. While some may not have an issue with muesli, I swapped it out for my nut-free breakfast crunch for more texture in the base. 

Protein cheesecake

Protein cheesecake ingredients

Ingredients

  • 250g creme fraiche
  • 250g sour cream
  • 250g yoghurt
  • 60g protein powder
  • 3 tsp. cacao powder
  • 1/2 tsp vanilla powder
  • 2 egg whites
  • 2 tbsp. gelatine
  • 200ml coconut milk
  • 200g nut-free breakfast crunch
  • 2 tsp honey
  • 1 tsp coconut oil, melted

Instructions  

Mix the breakfast crunch with the honey and the melted coconut oil in a bowl, ensuring it is fully coated. I like to use a food processor for this step.

Mix the nut-free breakfast crunch with the honey and the melted coconut oil together

Spread the crunch mixture out in the bottom of a springform cake tin and press it gently into the tin.

Spread the crunch mixture out in the bottom of a spring form cake tin
Spread the crunch mixture out
press it gently into the tin
Press it gently into the tin

Put the tin in the fridge to get the coconut oil to firm up the mixture.

In a small bowl, bloom the gelatine as the packet instructs.

Bloom the gelatine as the packet instructs

In a large bowl, mix the crème fraiche, sour cream, and yoghurt with the protein powder, making sure there are no lumps.

Whisk in the protein powder.
Mix well.
Mix well.

Gently heat the coconut milk and whisk in the cacao powder, followed by the gelatine.

Heat the milk and chocolate with the gelatine.

Set the milk and gelatine mix to one side.

In another bowl, whisk the egg whites until they form stiff peaks.

Take a stand mixer.
Take a stand mixer.
Whisk the egg white.
In another bowl whisk the creme fraiche, sour cream and yoghurt.

Slowly fold the egg whites into the protein and yoghurt mixture.

Fold the egg whites into the cheese mix

Be careful not to overwork the egg whites; you want to keep as much air in the mixture as possible.

Whisk the gelatine and milk into the protein and yoghurt mixture.

Fold in the chocolate mixture.

Take the cake tin with the base out of the fridge.

Pour the cheesecake mix into the cake pan.

Pour the protein mixture into the spring form tin and smooth the top with the back of a spoon.

Put the cheesecake in the fridge to set up.

Put the cheesecake in the fridge for 4 to 8 hours to set. 

Once the cheesecake has set, cut it into 12 pieces.

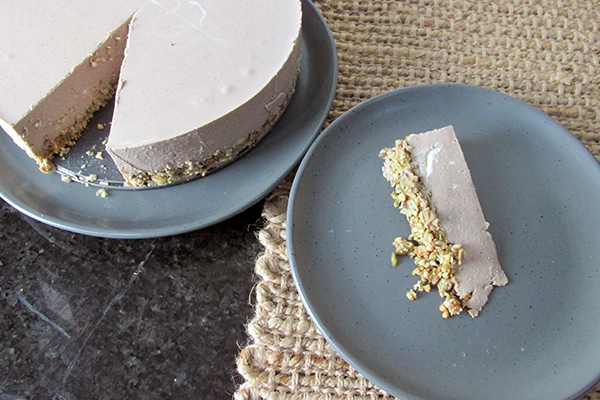
Cheesecake set in the fridge.
Slice the cheesecake
Protein cheesecake ready to eat. Enjoy

Protein cheesecake

  • Servings: 12
  • Rating: ★★★★★
  • Print

I love looking at recipe books and figuring out if they can be changed and if I could make a clean-eating version.


Credit: Cath @ easycleaneats

Ingredients

  • 250g crème fraiche
  • 250g sour cream
  • 250g yoghurt
  • 60g protein powder
  • 3 tsp. Cacao powder
  • 1/2 tsp. vanilla bean powder
  • 2 egg whites
  • 2 tbsp. Gelatine
  • 200ml coconut milk
  • 200g breakfast crunch
  • 2 tsp. honey
  • 1 tsp. coconut oil, melted

Directions

  1. Mix the breakfast crunch with the honey and the melted coconut oil in a bowl, ensuring it is fully coated.
  2. Spread the crunch mixture out in the bottom of a springform cake tin and press it gently into the tin.
  3. Put the tin in the fridge to get the coconut oil to firm up the mixture.
  4. In a small bowl, bloom the gelatine as the packet instructs.
  5. In a large bowl, mix the crème fraiche, sour cream, and yoghurt with the protein powder, making sure there are no lumps.
  6. Gently heat the coconut milk and whisk in the cacao powder, followed by the gelatine.
  7. Set the milk and gelatine mix to one side.
  8. In another bowl, whisk the egg whites until they form stiff peaks.
  9. Slowly fold the egg whites into the protein and yoghurt mixture.
  10. Be careful not to overwork the egg whites; you want to keep as much air in the mixture as possible.
  11. Whisk the gelatine and milk into the protein and yoghurt mixture.
  12. Take the cake tin with the base out of the fridge.
  13. Pour the protein mixture into the spring form tin and smooth the top with the back of a spoon.
  14. Put the cheesecake in the fridge for 4 8 hours to set.
  15. Once the cheesecake has set, cut it into 12 pieces.

Nutrition

Per Serving: 177 calories; 12.2 g fat; 7.3 g carbohydrates; 6.8 g protein.

Equipment  

  • Bowl x2  
  • Spatula x2  
  • Whisk  
  • Spring form cake tin  
  • Saucepan  
  • Measuring spoons
  • Scales
  • Measuring jug
  • Spoon

Nutritional disclaimer

Nutrition information is provided as an estimate based on the ingredients used and available in my area (New Zealand). The nutritional information is here to help you understand the recipe; I use MyFitnessPal to generate my estimates. For more accurate nutritional information, please use a nutritional calculator with the ingredients in your area.


Cross bun cookies

Easter treats  

Yep, it really is Easter already; I know that the supermarket had the Easter eggs out at the end of January, but it is actually Easter now. I feel like Easter is not complete without hot cross buns. You can keep your chocolate eggs and your cream eggs; I miss the smell and taste of toasted hot cross buns smothered with butter. I have tried (and failed) many times to come up with a grain-free, sugar-free alternative for the hot cross bun. I’m convinced that it can’t be done; they just aren’t the same. That realisation set me free to try making hot cross other things like cookies!  

Same but different  

These cross-bun cookies have all of the fruity, spicy flavours of the traditional hot cross bun but in a gluten-free, sugar-free compact form. I make no claims about these cookies being healthy or good for you; they are just an alternative if you don’t want the pain and suffering that will come from those toasted hot cross buns.

I’ve used dark chocolate chips in this recipe to help the cookies retain some moisture; you can swap these out for any kind of chocolate that you prefer. As with all my recipes, these cookies are nut-free, thanks to sunflower seed butter. If you are happy to include nuts, you can swap out the sunflower butter for either cashew or almond butter without having to adjust the quantities.

Cross bun cookies recipe 

Ingredients  

  • 1 1/4 cup rolled oats  
  • 1/2 tsp. baking powder  
  • 1/2 tsp. baking soda  
  • 2 tbsp. coconut sugar  
  • 1 tbsp. mixed spice  
  • 1 tsp. ground cinnamon  
  • 1/4 tsp. cloves  
  • 1/2 cup sun butter  
  • 2 tbsp. maple syrup  
  • 3 tbsp. coconut milk  
  • 1/4 tsp. vanilla bean powder  
  • 1/4 tsp. salt  
  • 1/4 cup dark chocolate chips  
  • 1/4 cup raisins 

Instructions

Preheat your oven to 180°c /360°f.  

Line a baking tray with baking paper or a silicone liner.  

Blend your oats into flour or use a coffee grinder.  

In a bowl add the oat flour and mix in the baking soda, baking powder, coconut sugar, mixed spice, ground cinnamon and cloves.  

In a separate bowl, mix your sun butter, maple syrup, coconut milk, vanilla bean powder and salt.  

Add your wet and dry ingredients together and mix until combined and you have a sticky but not too sticky cookie dough.  

Fold in your sultanas or choc chips.

Divide the dough into cookies and place evenly on your lined trays.  

Press lightly on each to flatten and bake for 15 minutes.  

Cool and top with crosses.  

“Lemon

  • Servings: 15
  • Rating: ★★★★★
  • Print

“These


Credit: Cath @ easycleaneats 

Ingredients

  • 1 1/4 cup rolled oats
  • 1/2 tsp. baking powder
  • 1/2 tsp. baking soda
  • 2 tbsp. coconut sugar
  • 1 tbsp. mixed spice
  • 1 tsp. ground cinnamon
  • 1/4 tsp. cloves
  • 1/2 cup sun butter
  • 2 tbsp. maple syrup
  • 3 tbsp. coconut milk
  • 1/4 tsp. vanilla bean powder
  • 1/4 tsp. salt
  • 1/4 cup dark chocolate chips
  • 1/4 cup raisins

Directions

  1. Preheat your oven to 180°c /360°f.
  2. Line a baking tray with baking paper or a silicone liner.
  3. Blend your oats into flour or use a coffee grinder.
  4. In a bowl add the oat flour and mix in the baking soda, baking powder, coconut sugar, mixed spice, ground cinnamon and cloves.
  5. In a separate bowl, mix your sun butter, maple syrup, coconut milk, vanilla bean powder and salt.
  6. Add your wet and dry ingredients together and mix until combined and you have a sticky but not too sticky cookie dough.
  7. Fold in your sultanas or choc chips, roll into cookies and place evenly on your lined trays.
  8. Press lightly on each to flatten and bake for 15 minutes.
  9. Cool and top with crosses.

Nutrition

Per Serving: 86 calories; 2g fat; 15g carbohydrates; 2g protein

Equipment   

  • Baking tray   
  • Baking paper or a silicone liner
  • Measuring cups
  • Measuring spoons   
  • Mixing bowl   
  • Spice mill   
  • Spatula   
  • Ice cream scoop   

Nutritional disclaimer

Nutrition information is provided as an estimate based on the ingredients used and available in my area (New Zealand). The nutritional information is here to help you understand the recipe; I use MyFitnessPal to generate my estimates. For more accurate nutritional information, please use a nutritional calculator with the ingredients in your area.


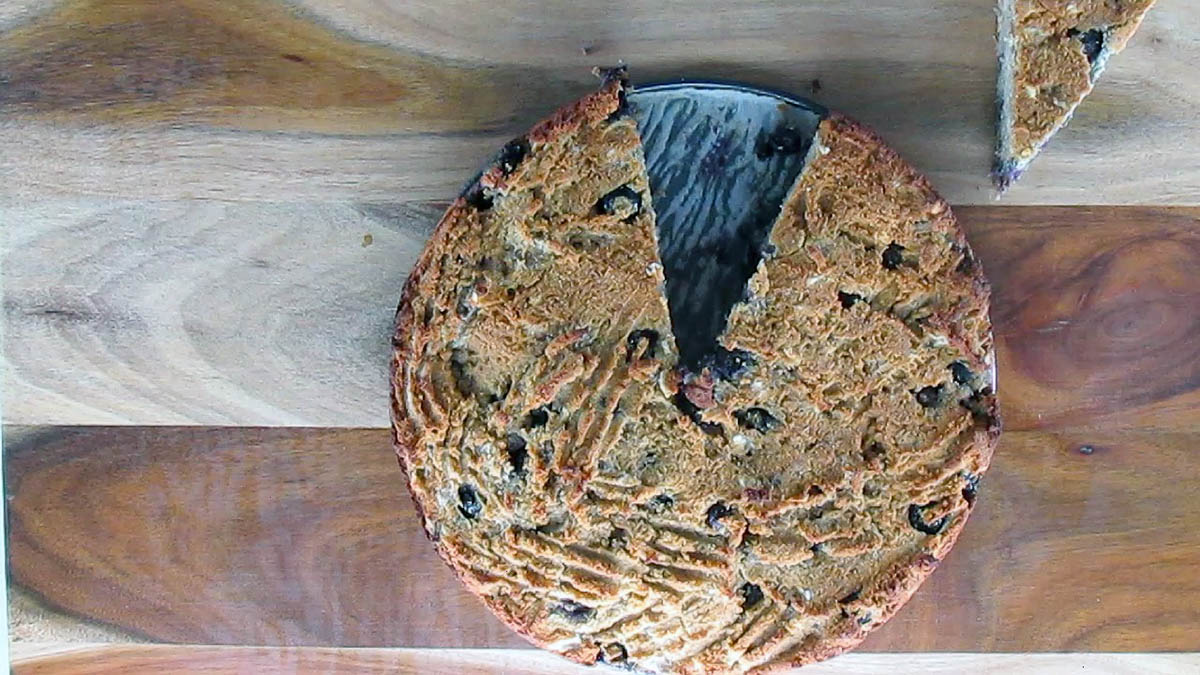
Banana blueberry cake

Updating as we go

Earlier in 2021, I moved to relocate and update my website; I’ve been making changes and improving all of the things as I go. This recipe is one of the many things I’ve tried to make better.

Something sweet but healthy

Sometimes we need something sweet to get us through the day. In the spirit of not eating crappy processed food, I like a simple recipe that is easy to whip up and reasonably healthy. This cake is easy to make, uses pantry items you should have already and will only take a short time to sit down and enjoy.

Banana blueberry cake

Ingredients

  • 1/2 cup coconut flour, sifted
  • 1/2 tsp. baking soda
  • 1/2 tsp. salt
  • 1/2 tsp. ground cinnamon
  • 1/2 tsp. ground nutmeg
  • 4 eggs
  • 2 bananas, ripe
  • 1/2 cup coconut oil, melted
  • 3 tbsp. honey
  • 1 cup blueberries

Instructions

Preheat the oven to 180 degrees C/ 350 degrees F.

In a large bowl, mix together the coconut flour, baking soda, salt, ground cinnamon and nutmeg.

In another bowl, mix together the eggs, bananas, coconut oil and honey.

Add the wet ingredients to the dry ingredients and mix well.

Fold in the blueberries.

Take a spring-form cake pan and line it with baking paper or a silicone liner.

Pour the batter into the cake pan.

Bake the cake for 30 minutes or until the cake is cooked through.

Remove the cake and allow it to cool slightly before removing it from the cake pan.

Banana blueberry cake

  • Rating: ★★★★★
  • Print


Credit: Cath @ easycleaneats 

Ingredients

  • 1/2 cup coconut flour, sifted
  • 1/2 tsp. baking soda
  • 1/2 tsp. salt
  • 1/2 tsp. ground cinnamon
  • 1/2 tsp. ground nutmeg
  • 4 eggs
  • 2 bananas, ripe
  • 1/2 cup coconut oil, melted
  • 3 tbsp. honey
  • 1 cup blueberries

Directions

Preheat the oven to 180 degrees C/ 350 degrees F. In a large bowl, mix together the coconut flour, baking soda, salt, ground cinnamon and nutmeg. In another bowl, mix together the eggs, bananas, coconut oil and honey. Add the wet ingredients to the dry ingredients and mix well. Fold in the blueberries. Take a spring-form cake pan and line it with baking paper or a silicone liner. Pour the batter into the cake pan. Bake the cake for 30 minutes or until the cake is cooked through. Remove the cake and allow it to cool slightly before removing it from the cake pan.

Nutrition

Per Serving: 166 calories; 12g fat; 14g carbohydrates; 3g protein

Equipment

  • Mixing bowl x2
  • Fork
  • Wooden spoon
  • Cake pan
  • Baking paper or a silicone liner
  • Measuring spoons
  • Measuring cups

Nutritional disclaimer

Nutrition information is provided as an estimate based on the ingredients used and available in my area (New Zealand). The nutritional information is here to help you understand the recipe; I use MyFitnessPal to generate my estimates. For more accurate nutritional information, please use a nutritional calculator with the ingredients in your area.


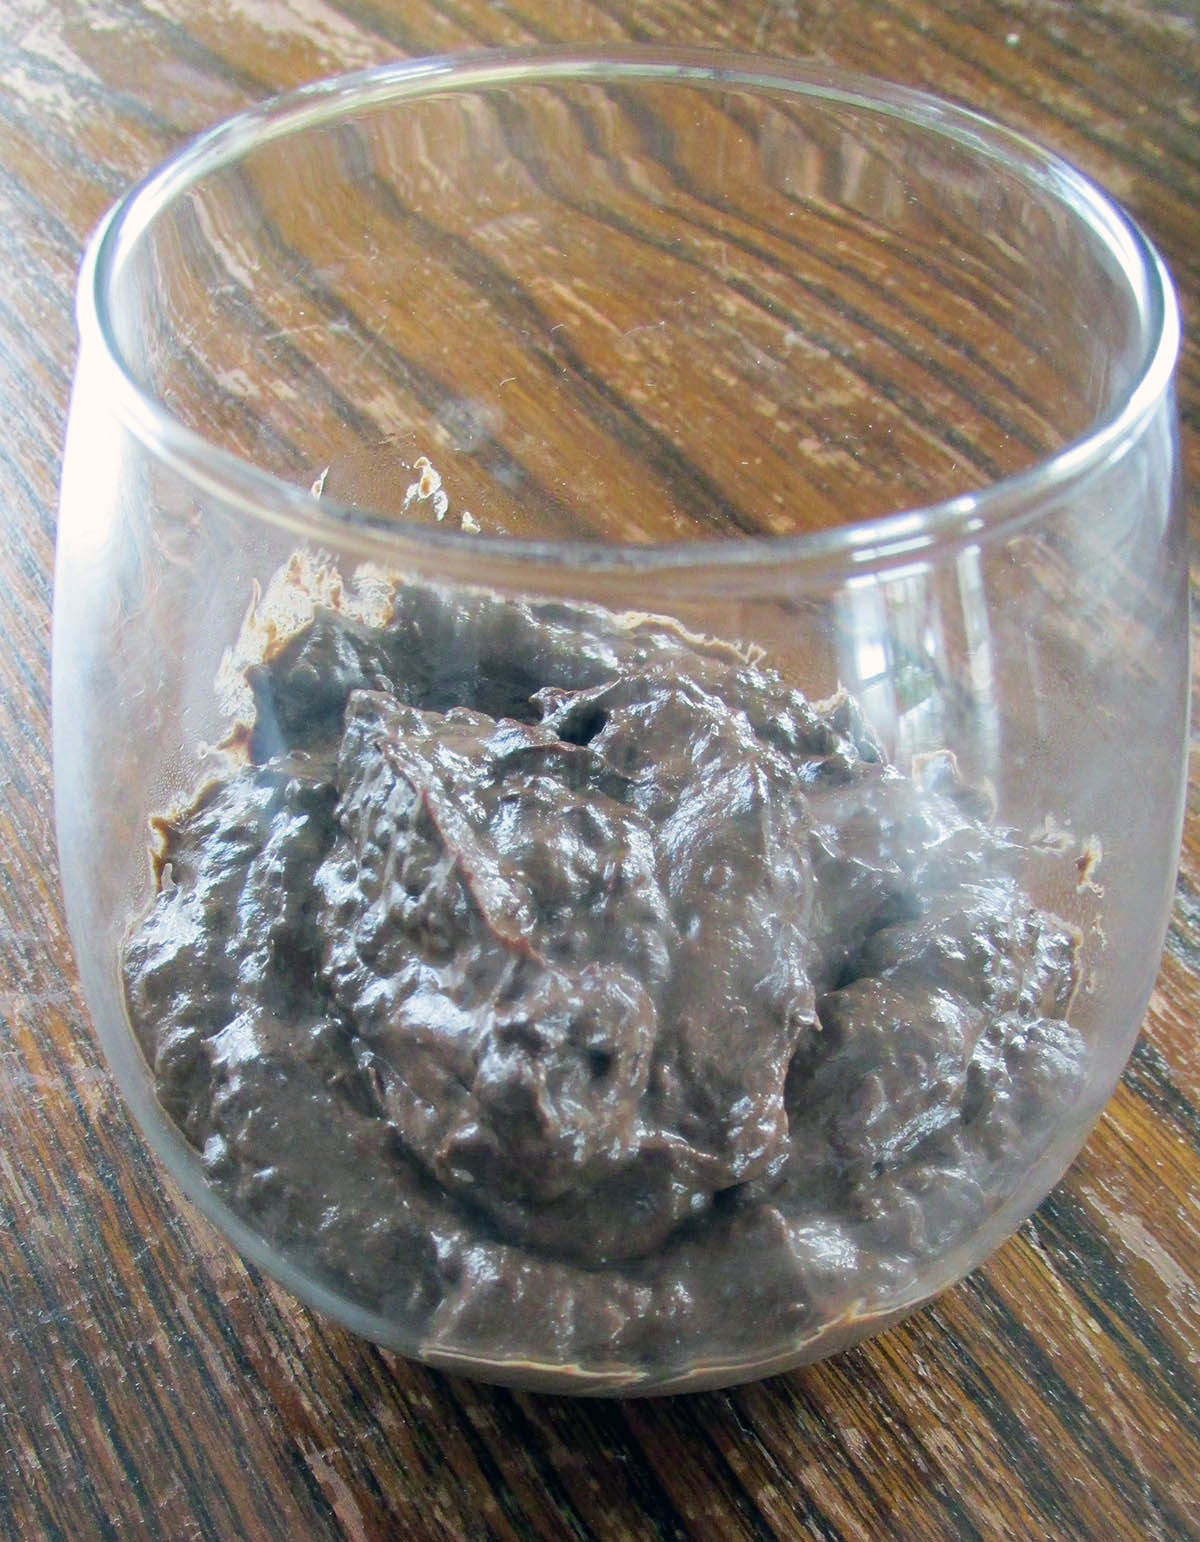
Avocado mousse

Did you know you could freeze avocado? 

I only recently discovered that you could freeze them, with that piece of information you now get to have avocado all year round. With this potential abundance of avocado in your life, you will need to find new and interesting uses for avocado. 

Enter avocado desserts

I love this dessert because it is quick, easy and packed with healthy ingredients, what more can you ask for? 

We are working hard to eat clean with no slip ups so having a dessert that tastes like really rich chocolate while being good for you is a big tick in the win column. 

This mousse passed the little (and big) boy chocolate test, they thought it tasted just as good as mousse that you buy.

The beauty of this dessert is that you can make it before dinner and put it in the fridge.

Avocado mousse recipe

Ingredients

  • 2 avocados
  • 125ml milk
  • 1/4 cup cacao powder
  • 1 tbsp. chia seeds
  • 1 tsp. stevia
  • 1 tsp. maple syrup
  • 1 tsp. vanilla bean paste
  • 1/2 tsp. ground cinnamon

Place all of the ingredients into a food processor and blend until everything is smooth.

Put the mousse into glasses and chill for an hour before serving.

Avocado mousse

  • Servings: 4
  • Rating: ★★★★★
  • Print

Chocolate and avocado are a match made in heaven, this rich mousse is perfect for a weeknight treat


Credit: Cath @ easycleaneats

Ingredients

  • 2 avocados
  • 125ml milk
  • 1/4 cup cacao powder
  • 1 tbsp. chia seeds
  • 1 tsp. stevia
  • 1 tsp. maple syrup
  • 1 tsp. vanilla bean paste
  • 1/2 tsp. ground cinnamon

Directions

  1. Place all of the ingredients into a food processor and blend until everything is smooth.
  2. Put the mousse into glasses and chill for an hour before serving.

Nutrition

Per Serving: 60 calories; 2.2 g fat; 7.8 g carbohydrates; 2.7 g protein

Equipment

  • Measuring spoons
  • Measuring jug
  • Knife
  • Chopping board
  • Spoon 
  • Food processor
  • Spatula
  • Glasses  

Nutritional disclaimer

Nutrition information is provided as an estimate based on the ingredients used and available in my area (New Zealand). The nutritional information is here to help you understand the recipe; I use MyFitnessPal to generate my estimates. For more accurate nutritional information, please use a nutritional calculator with the ingredients in your area.


No Sugar Meringue

What are Meringues?

The meringue started as little cookies that were crispy on the outside and chewy inside. There are a few different types of meringues from across Europe that have slightly different ingredients and techniques. Meringue has been used for cookies, pavlova, Eton mess, and lemon meringue pies.

Big on sugar

There is one thing that all meringues have in common is a considerable amount of sugar, which isn’t my bag. Some recipes take a long time to get right from a technical cooking perspective and others from a flavour perspective, it is usually one thing or another, but in this instance, it took a long time to get the flavour and the technique right. I will save you the tale of woe and the many failed experiments to get a recipe that gave me silky meringues that once baked were crisp on the outside and chewy on the inside. All you need to know is the best combination of cream of tartar, apple cider vinegar and monkfruit sweetener. 

No sugar meringue recipe

Ingredients

  • 3 egg whites
  • 1/2 tsp. apple cider vinegar
  • 1/4 tsp. Cream of tartar
  • 3 tbsp. Monkfruit sweetener
  • 1/4 tsp. vanilla bean powder

Preheat to 135 degrees C / 275 degrees F.

Crack the eggs and separate the egg whites from the yolks*.

Place the egg whites into a large, clean bowl or a mixer.

Using an electric whisk, start to beat the egg whites, use a medium speed setting on the whisk.

Beat the whites until they become foamy.

Whisk in the apple cider vinegar.

Add the monkfruit sweetener one tablespoon at a time, then whisk in the vanilla bean powder.

Keep beating the egg whites until they are stiff peaks and look glossy.

Line a baking tray with baking paper or a silicone liner.

You can use a spoon to put the whites onto the baking tray; alternatively, you can use a piping bag to create shaped meringues.

Bake at 135 degrees C 275 degrees F for 15 minutes.

After 15 minutes, turn down the oven’s temperature to 100 degrees C 210 degrees F and cook for another hour.

After an hour, turn the oven off and keep the meringues in for another 2 hours.

When the oven has cooled completely, remove the meringues and put them into an airtight container.

You can store the meringues at room temperature until you need them.

*keep the yolks. You can add them to your homemade mayo to make it more creamy

No sugar meringue

  • Servings: 24“
  • Rating: ★★★★★
  • Print

“These


Credit: Cath @ easycleaneats 

Ingredients

– 3 egg whites – 1/2 tsp. apple cider vinegar – 1/4 tsp. Cream of tartar – 3 tbsp. Monkfruit sweetener – 1/4 tsp. vanilla bean powder

Directions

  1. Preheat to 135 degrees C / 275 degrees F.
  2. Crack the eggs and separate the egg whites from the yolks*.
  3. Place the egg whites into a large, clean bowl or a mixer.
  4. Using an electric whisk, start to beat the egg whites, use a medium speed setting on the whisk. Beat the whites until they become foamy.
  5. Whisk in the apple cider vinegar.
  6. Add the monkfruit sweetener one tablespoon at a time, then whisk in the vanilla bean powder.
  7. Keep beating the egg whites until they are stiff peaks and look glossy.
  8. Line a baking tray with baking paper or a silicone liner.
  9. You can use a spoon to put the whites onto the baking tray; alternatively, you can use a piping bag to create shaped meringues.
  10. Bake at 135 degrees C 275 degrees F for 15 minutes.
  11. After 15 minutes, turn down the oven’s temperature to 100 degrees C 210 degrees F and cook for another hour.
  12. After an hour, turn the oven off and keep the meringues in for another 2 hours.
  13. When the oven has cooled completely, remove the meringues and put them into an airtight container.
  14. You can store the meringues at room temperature until you need them.

Nutrition

Per Serving:14 calories; 0.1g fat; 0.3g carbohydrates; 3.3g protein

Equipment

  • Mixing bowl
  • Electric whisk
  • Baking tray
  • Baking paper or silicone liner
  • Piping bag
  • Star piping tip 

Nutritional disclaimer

Nutrition information is provided as an estimate based on the ingredients used and available in my area (New Zealand). The nutritional information is here to help you understand the recipe; I use MyFitnessPal to generate my estimates. For more accurate nutritional information, please use a nutritional calculator with the ingredients in your area.


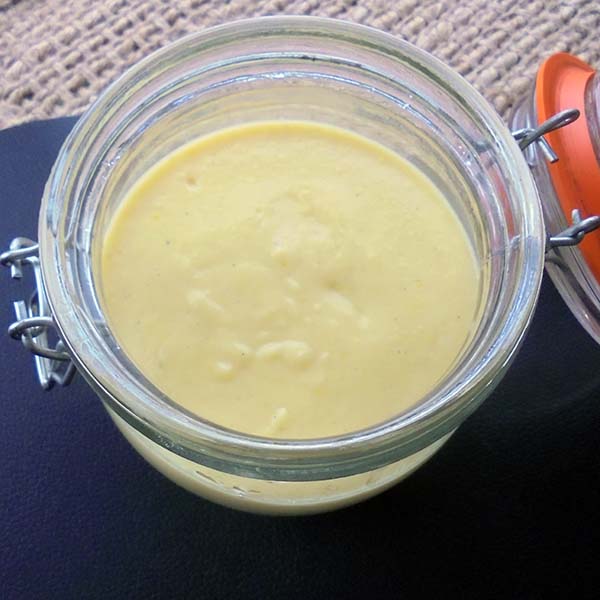
Lemon curd

Beautiful winter lemons

I got my hands on some beautiful lemons that are locally grown and perfectly ripe. There were so many I thought it would be rude not to make something absolutely delicious.

Sugar-free lemon curd

I love lemon curd, it is sweet, smooth, and if you do it right, it is also zingy. My only complaint with lemon curd is how much sugar you find in the store-bought kind. I’ve been working on my sourdough lately, so what better treat to spread over my toast than homemade sugar-free lemon curd. 

easycleaneatsnz

How to make good lemon curd

There are a few simple tips for making the perfect lemon curd. First, keep stirring to prevent lumps and secondly, don’t overcook it, or it will curdle. If you follow those simple rules, you will have amazing. 

Lemon curd recipe

Lemon curd ingredients

Ingredients 

  • 1 tbsp lemon zest 
  • 3 eggs 
  • 1/4 cup honey 
  • 1/2 cup lemon juice 
  • 6 tbsp coconut oil 
Take a large saucepan

Take a heavy bottom saucepan. 

Put the eggs in the saucepan and whisk them. 

Put the eggs in the saucepan and whisk them. 

Add the honey and lemon zest to the eggs and whisk. 

Add the honey and lemon zest to the eggs and whisk. 

Put the pan over low heat.

Keep whisking the mixture while it is over the heat.

Be patient and keep whisking; the mix will thicken and become pale. 

Be patient and keep whisking; the mix will thicken and become pale. 

Whisk in the lemon juice and coconut oil a tablespoon at a time. 

Whisk in the lemon juice and coconut oil a tablespoon at a time. 

Keep whisking. 

Remove the pan from the heat when the mix starts to bubble.

Keep stirring for a few minutes before letting the curd sit to cool. 

Strain the curd before serving.

Store in the fridge and enjoy.

easycleaneatsnz

“Lemon

  • Servings: 20
  • Rating: ★★★★★
  • Print

Sugar-free lemon curd


Credit: Cath @ easycleaneats 

Ingredients

  • 1 tbsp lemon zest 
  • 3 eggs 
  • 1/4 cup honey
  • 1/2 cup lemon juice 
  • 6 tbsp coconut oil 
  • 


Directions

  1. Take a heavy bottom saucepan. 
  2. Put the eggs in the saucepan and whisk them. 
  3. Add the honey to the eggs and whisk. 
  4. Put the pan over low heat.
  5. Keep whisking the mixture while it is over the heat.
  6. Be patient and keep whisking; the mix will thicken and become pale. 
  7. Whisk in the lemon juice and coconut oil a tablespoon at a time. 
  8. Keep whisking. 
  9. Remove the pan from the heat when the mix starts to bubble.
  10. Keep stirring for a few minutes before letting the curd sit to cool. 
  11. Strain the curd before serving.
  12. Store in the fridge and enjoy.


Nutrition

Per Serving: 61 calories; 5g fat; 4g carbohydrates; 1g protein

Equipment

  • Measuring cup
  • Measuring spoons
  • Saucepan
  • Whisk
  • Zester/ microplane

Nutritional disclaimer

Nutrition information is provided as an estimate based on the ingredients used and available in my area (New Zealand). The nutritional information is here to help you understand the recipe; I use MyFitnessPal to generate my estimates. For more accurate nutritional information, please use a nutritional calculator with the ingredients in your area.