Italian roast chicken

Something fancy

It’s been a busy few weeks; I’ve been keeping my meals simple and relying on freezer staples while operating in survival mode. I have a little bit of breathing room now and an intense craving for something fancier for dinner.

Italian roast chicken tray

Fancy but easily

In my book, fancy doesn’t have to mean spending hours in the kitchen boiling to death over a hot stove. This recipe delivers a very fancy meal with minimal effort; it is all cooked on a single tray, which makes it perfect.

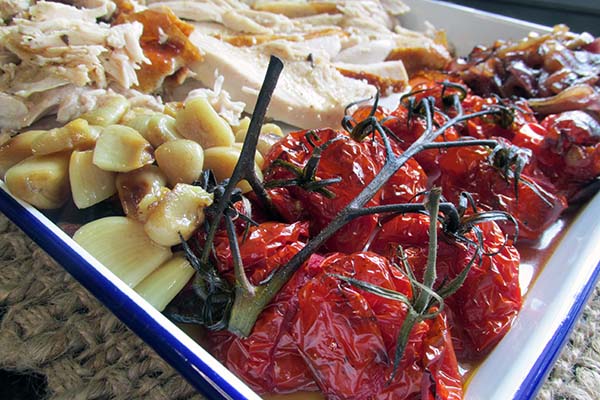
The roasted garlic is the star of this meal for me. The bed of garlic under the chicken means you get great flavour throughout the meat, while the roast garlic cloves have a deep, rich flavour that complements the rest of the dish.

The quick prep and hands-off cooking mean you can get on with other things and come back to a perfectly roasted chicken that can satisfy any desire for a fancy dinner. 

Dinner ready without effort

While living in survival mode, I try to make life easier for myself by multitasking so that life admin and essential tasks don’t take away from much-needed rest and relaxation. In the spirit of multitasking, I combined a trip home from the office with a pit stop at the supermarket to get everything I needed for my fancy dinner and did the prep (putting everything on a tray) while I waited for the kettle to boil. Knowing I would be ready for dinner after my workout, I smashed dinner in the oven before heading downstairs to throw around some weights. By the time I finished my workout, the chicken was ready for the foil and baking paper to be removed, and there was plenty of time for me to shower before sitting down to a flavourful, filling and fancy dinner.

Italian roast chicken recipe

Italian roast chicken ingredients

Ingredients 

  • 2 large tomatoes thickly sliced
  • 250g cherry tomatoes
  • 1 red onion thinly sliced
  • 1 garlic bulb peeled and bruised
  • 1/3 cup flat-leaf parsley chopped
  • 1/3 cup red wine vinegar
  • 1/4 cup olive oil
  • 3 sprigs rosemary
  • 1.6 kg chicken
Large chicken

Take a large baking tray.

Take a large baking tray.

Place one garlic bulb on the baking tray.

Place one garlic bulb on the baking tray.

Lay the chicken on top of the garlic.

Lay the chicken on top of the garlic.

Spread out the onion next to the chicken.

Spread out the onion next to the chicken.

Add the remaining garlic bulbs on top of the onions.

Add the remaining garlic bulbs on top of the onions.

Add the tomatoes on top of the garlic.

Add the tomatoes on top of the garlic.

Drizzle the vinegar and olive oil over the chicken and vegetables.

Drizzle the vinegar and olive oil over the chicken and vegetables.

Place the rosemary sprigs on top of the chicken and the vegetables.

Cover the baking tray with baking paper.

Cover the baking tray with baking paper.

Cover the baking paper with foil.

Cover the baking paper with foil.

Bake for 1 hour.

Check the chicken to make sure the meat is cooked and the juices are running clear before removing the baking paper and foil, this will depend on the size of the chicken.

Check the chicken to make sure the meat is cooked and the juices are running clear

Return the chicken to the oven uncovered for another 20 minutes or until the skin is golden brown.

Return the chicken to the oven uncovered for another 20 minutes

Slice the chicken, squeeze out the garlic and serve while hot.

Slice the chicken, squeeze out the garlic and serve while hot.

Italian roast chicken

  • Servings: 6
  • Rating: ★★★★★
  • Print

This one tray meal a great option for busy week nights or an action packed weekend.


Credit: Cath @ easycleaneats

Ingredients

  • 2 tomatoes thickly sliced
  • 250g cherry tomatoes
  • 1 red onion thinly sliced
  • 1 garlic bulb peeled and bruised
  • 1/3 cup flat leaf parsley chopped
  • 1/3 cup red wine vinegar
  • 1/4 cup olive oil
  • 3 sprigs rosemary
  • 1.6 kg chicken

Directions

  1. Preheat the oven to 200 degrees C/ 400 degrees F.  
  2. Take a large baking tray.
  3. Place one garlic bulb on the baking tray.
  4. Lay the chicken on top of the garlic.
  5. Spread out the onion next to the chicken.
  6. Add the remaining garlic bulbs on top of the onions.
  7. Add the tomatoes on top of the garlic.
  8. Drizzle the vinegar and olive oil over the chicken and vegetables.
  9. Place the rosemary sprigs on top of the chicken and the vegetables.
  10. Cover the baking tray with baking paper.
  11. Cover the baking paper with foil.
  12. Bake for 1 hour.
  13. Check the chicken to make sure the meat is cooked and the juices are running clear before removing the baking paper and foil, this will depend on the size of the chicken.
  14. Return the chicken to the oven uncovered for another 20 minutes or until the skin is golden brown.
  15. Slice the chicken, squeeze out the garlic and serve while hot.

Nutrition

Per Serving: 349 calories; 14 g fat; 9 g carbohydrates; 53 g protein

Equipment

  • Roasting tin
  • Baking paper 
  • Aluminium foil
  • Measuring cups
  • Scales 

Nutritional disclaimer

Nutrition information is provided as an estimate based on the ingredients used and available in my area (New Zealand). The nutritional information is here to help you understand the recipe; I use MyFitnessPal to generate my estimates. For more accurate nutritional information, please use a nutritional calculator with the ingredients in your area.
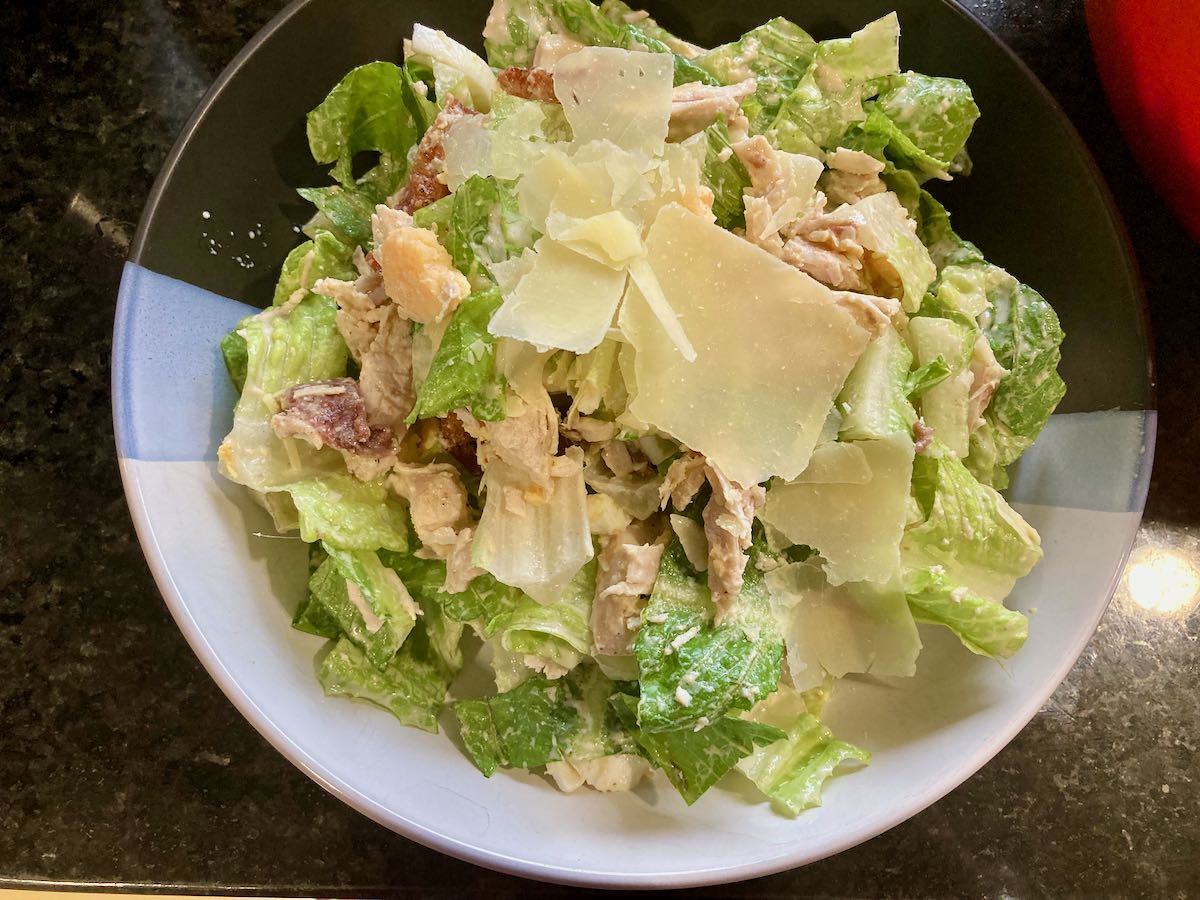

Chicken Caesar salad

Master the basics

Eating clean gets a lot easier once you have mastered a few essential recipes. This recipe is basic; not like basic unicorn basic, more like beard and flannel basic. Back to the point (which isn’t Unstable unicorns), having basic skills and recipes in your arsenal means you will never be left with only Uber Eats as your weeknight options. Once you master this recipe, the possibilities are endless.

Always make friends with salad

In my book, salad is something to get excited about; it is an amazingly fresh meal full of endless possibilities, not limp lettuce, sad dressing and soggy tomatoes. I’m one of those strange people who could happily eat salad for every meal. There was a time when proposing a salad for dinner would lead to groans, but not anymore. I can eat salad as much as I like and make it a star attraction on my plate.

Protein maxed classic

I try my best to pack in protein at every meal, which isn’t always easy with a salad. I love a good Caesar and think adding some chicken is a great way to boost protein without taking away from the salad’s flavour. This is my take on the classic Caesar salad. It is portioned for one person, but can easily be increased to feed more people. If you are using this recipe for meal prep, make the salad and keep the dressing on the side to add just before eating. This will prevent the salad from becoming soggy.

Chicken Caesar salad recipe

Ingredients

  • 200g chicken breast, cooked
  • 1 egg, hard-boiled
  • 2 pieces streaky bacon, cooked
  • 100g cos lettuce leaves, chopped into 4 pieces
  • Shaved parmesan cheese
  • 2 tbsp. Caesar salad dressing
  • Rating: ★★★★★
  • Print


Credit: Cath @ easycleaneats

Ingredients

  • 200g chicken breast, cooked
  • 1 egg, hard-boiled
  • 2 pieces streaky bacon, cooked
  • 100g cos lettuce leaves, chopped into 4 pieces
  • Shaved parmesan cheese
  • 2 tbsp. Caesar salad dressing
  • 2 anchovy fillets – optional

Directions

  1. Place the cos lettuce into a bowl or onto a platter.
  2. Slice the egg, chicken and bacon and layer them on top of the lettuce.
  3. Drizzle the Caesar dressing over the top.
  4. Mix gently to cover the cos
  5. Add the shaved parmesan cheese and anchovies before serving.

Nutrition

Per Serving: 244 calories; 10.5 g fat; 3.3 g carbohydrates; 30.3 g protein

Equipment

  • Knife
  • Chopping board
  • Mixing bowl or platter 
  • Scales

Nutritional disclaimer

Nutrition information is provided as an estimate based on the ingredients used and available in my area (New Zealand). The nutritional information is here to help you understand the recipe; I use MyFitnessPal to generate my estimates. For more accurate nutritional information, please use a nutritional calculator with the ingredients in your area.


Broccoli chicken salad

Trying to meet everyone’s needs

For years, I spent a lot of time trying to make everyone happy with the meals I put on the table, but it was never easy. For many years, I had to work around a very limited list of foods that everyone would eat, and then there were the silly requirements, like not wanting cold food unless it had a sauce on it, or anything with any spice at all. For a long time, I would spend hours in the kitchen making multiple meals to keep everyone happy; it was exhausting. 

Broccoli breakthrough

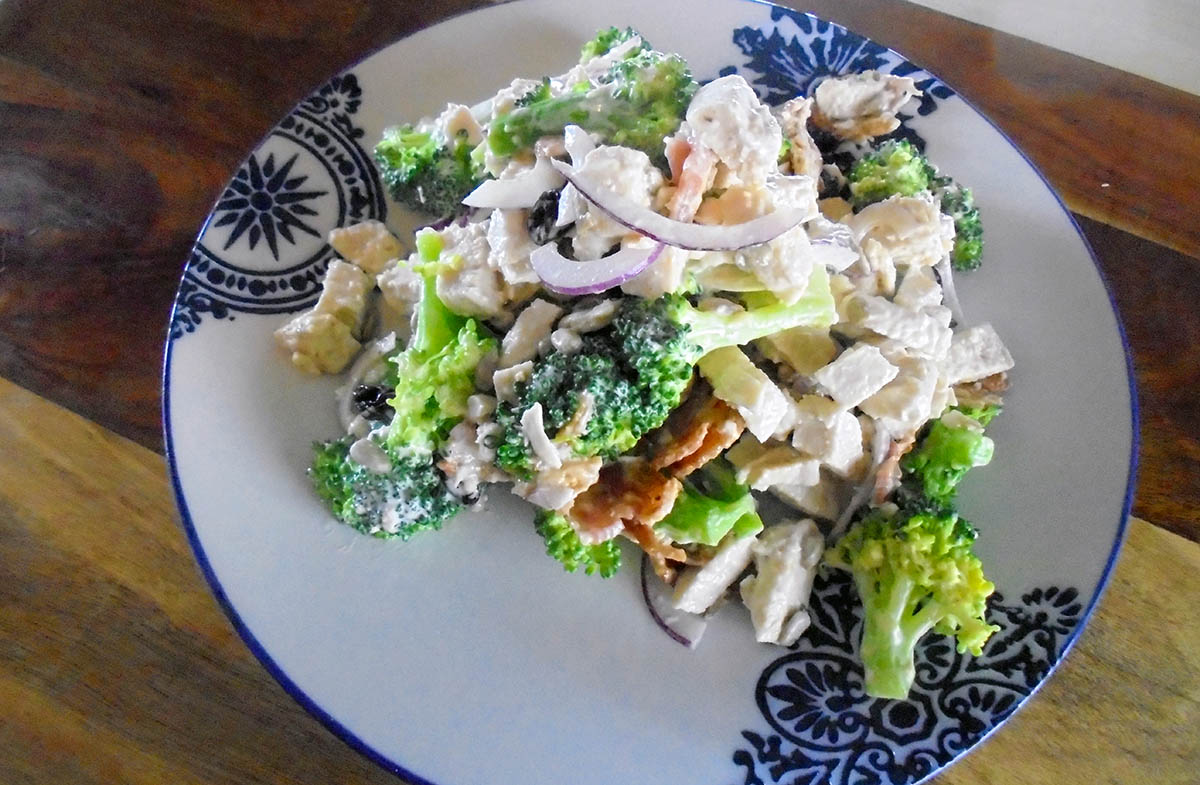
After many years of trial and error, there was a breakthrough in broccoli. When my youngest stepson finally decided that he liked broccoli (or baby trees, as he called them) and would eat it without making faces or complaining, I took full advantage. How many recipes can you develop with broccoli, you may ask? The answer is a lot. This salad was one of the first recipes I managed to get everyone to eat and enjoy so much that they asked for it again. I know, right? Hard to believe.

Making things I love

While this recipe was born from trying to make everyone else happy, it is actually one that makes me happy. Now that I am making meals for one, I try to make ones I can happily eat for a few days without getting bored. I’ve been spending my Saturday mornings doing meal prep, and this recipe has been in my rotation over the last few weeks. I can make a big bowl, and it does me for lunch and dinners for a few days and never gets old.

Broccoli chicken salad recipe

Ingredients

Broccoli chicken salad ingredients - chicken breast, broccoli, red onion, bacon, sunflower seeds, raisins, easy mayo and coconut vinegar
Broccoli chicken salad ingredients
  • 1 1/2 cups chicken breast, cooked and cubed
  • 1 1/2 cups broccoli florets, steamed
  • 1/4 cup red onion, chopped
  • 2 tbsp. sunflower seeds
  • 2 tbsp. raisins
  • 2 rashers bacon, cooked and crumbled
  • 1/3 cup easy mayo
  • 1 tbsp. coconut vinegar
Broccoli chicken salad

Broccoli chicken salad 

  • Servings: 8
  • Rating: ★★★★★
  • Print

A fresh salad that is full of flavour and texture


Credit: Cath @ easycleaneats

Ingredients

  • 1 1/2 cups chicken breast, cooked and cubed
  • 1 1/2 cups broccoli florets, steamed
  • 1/4 cup red onion, chopped
  • 2 tbsp. sunflower seeds
  • 2 tbsp. raisins
  • 2 rashers bacon, cooked and crumbled
  • 1/3 cup easy mayo
  • 1 tbsp. coconut vinegar

Directions

  1. Instructions
  2. In a bowl, combine all of the ingredients and make sure that everything is well coated.

Nutrition

Per Serving: 375 calories; 18 g fat; 7 g carbohydrates; 43 g protein

Equipment

  • Knife
  • Chopping board
  • Mixing bowl
  • Spoon
  • Measuring cups
  • Measuring spoons

Nutritional disclaimer

Nutrition information is provided as an estimate based on the ingredients used and available in my area (New Zealand). The nutritional information is here to help you understand the recipe; I use MyFitnessPal to generate my estimates. For more accurate nutritional information, please use a nutritional calculator with the ingredients in your area.


BLT salad in a jar

Awesome in a jar

I live for easy meals, and this salad is one of the easiest things to make. It’s so tasty that it’s ridiculous.

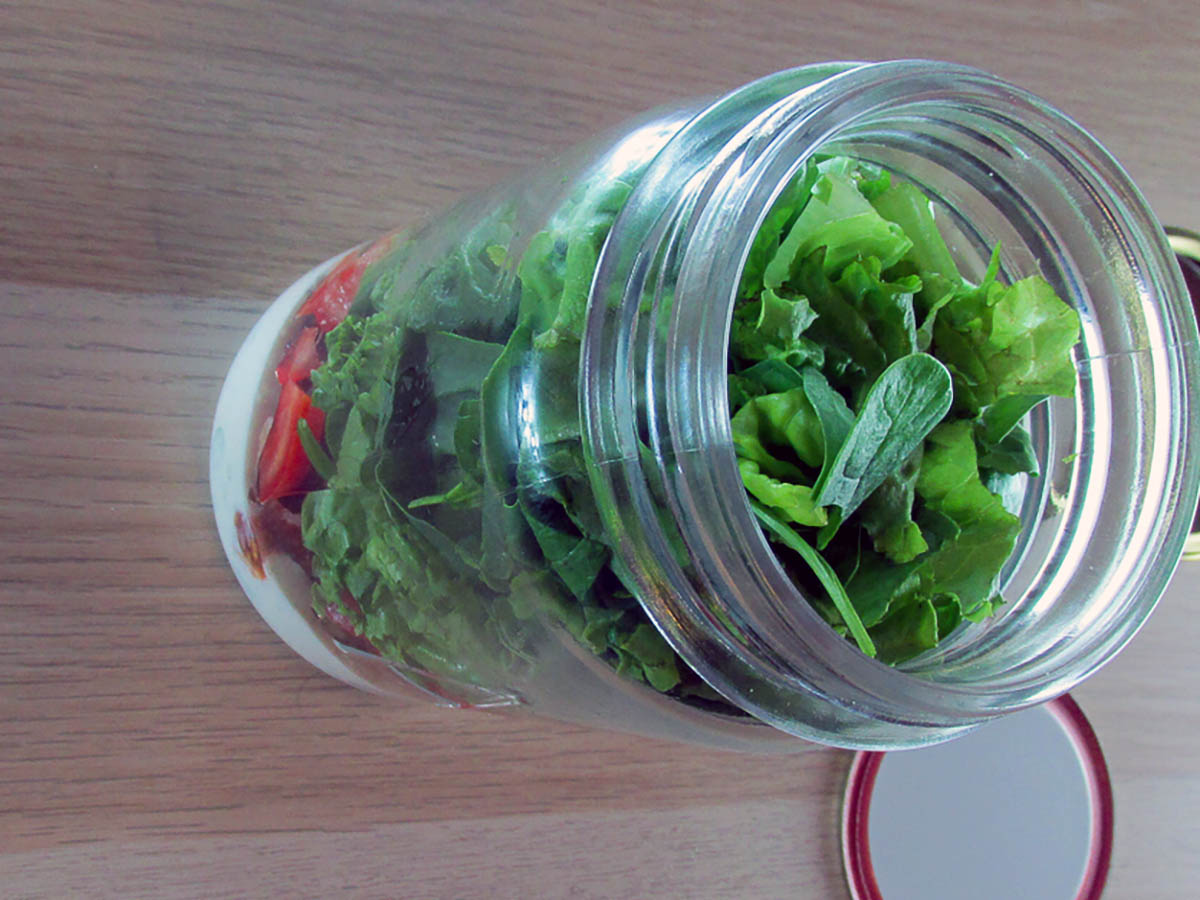
Bacon, lettuce and tomato in a jar with a simple dressing. I love this salad as a take-to-work lunch option. On the rare occasion I have bacon left over from breakfast, I use it for this. Bonus points for a plastic-free meal when you use a big glass jar. 

I bought a larger-than-normal pack of bacon at the supermarket last week and wanted to use as much as possible before I had to think about putting it in the freezer. This is how I decided to use it. 

Bacon makes everything better

I firmly believe that bacon can make anything better, and having it for lunch can turn a bad day around. I made the most of my large pack of bacon by making this salad to see me through what promised to be a challenging week at work that would require something to perk me up at lunchtime. Suddenly, my horror week at work now has small breaks that include bacon-based happiness and a weekend with the promise of eggs fried in bacon fat. Seriously, what more can a girl ask for? 

While I would like to live on bacon alone, my macros require more protein than bacon can provide in a single sitting. For an extra protein portion, I like to add half a chicken breast to my salad. This recipe is portioned for two servings, so you can enjoy bacon two days in a row.

BLT salad in a jar recipe

Ingredients

BLT salad in a jar ingredients
  • 4 slices bacon, cooked and crumbled
  • 2 tomatoes, diced
  • 2 cups cos lettuce
  • 2 cups iceberg lettuce
  • 1/4 cup easy mayo
  • 2 tbsp. milk
  • 2 tbsp. sour cream
  • Salt and pepper
Make the dressing and put some at the bottom of the jar
Make the dressing and put some in the bottom of the jar
Add the bacon to the jar
Add the tomato to the jar
Next add the tomato
Finally add the lettuce to the jar
Shake and serve salad.
Salad ready for a shake and serve

BLT salad in a jar 

  • Servings: 2
  • Rating: ★★★★★
  • Print

This easy salad is a great lunchtime and simple to make ahead


Credit: Cath @ easycleaneats

Ingredients

Directions

  1. At the bottom of a jar, mix the mayo, milk, sour cream, salt, and pepper.
  2. Add the bacon to the jar, followed by the spring onions, tomatoes, iceberg lettuce, and cos lettuce.
  3. Close the jar and store it in the fridge.
  4. Before opening it to eat, shake the jar to coat all the ingredients in the dressing.
  5. If you are fancier than I am, you can tip the jar into a bowl; you may need to scrape the dressing.

Nutrition

Per Serving: 239 calories; 20 g fat; 11 g carbohydrates; 8 g protein

Equipment

  • Mason jar
  • Fork or whisk
  • Knife
  • Chopping board
  • Measuring cups
  • Measuring spoons

Nutritional disclaimer

Nutrition information is provided as an estimate based on the ingredients used and available in my area (New Zealand). The nutritional information is here to help you understand the recipe; I use MyFitnessPal to generate my estimates. For more accurate nutritional information, please use a nutritional calculator with the ingredients in your area.


Instant Pot Pho

Enjoying the outside world

This summer has been a mixed bag so far, with more rain than I personally appreciate, even though my herbs like it. So whenever possible, I’ve been getting out and about as much as I can and using my fast-growing herbs when I get home from my adventures. After some adventuring, I never have much energy for cooking, so my Instant Pot is a lifesaver, and the pressure cooking setting means something like a tasty soup that should take hours to make can be ready to eat in less than an hour. 

Loving soup right now

As much as I love a good BBQ in the summer, this year I’ve been loving sitting down to a bowl of soup for dinner over the last few weeks, and this Pho has been my go-to. I’ve been making a pot and grabbing a bowl post-workout for a high-protein meal that doesn’t make me feel overfull or climbing the walls for a snack an hour later. If you are looking for an easy meal that is full of flavour and helps you hit your protein goals, I can highly recommend it.

Instant Pot Pho Soup

Ingredients

  • 500g Chicken thighs 
  • 1 1/2 tsp ground coriander
  • 2 tbsp ginger peeled and minced
  • 2 tsp garlic crushed
  • 1 stem Basil 
  • 1 tsp cloves whole 
  • 1/2 tbsp pepper
  • 1/4 tsp salt
  • 1 cup spring onions 
  • 1.5 ltr chicken bone broth 
  • 1 tbsp Sriracha 
  • 1 tbsp fish sauce, or more to taste 
  • 250g konjac noodles
  • 2 1/2 cups baby spinach
  • 1 1/2 cups cherry tomatoes, halved
  • 1 cup bean sprouts
  • Garnish
  • 1/4 cup fresh coriander, coarsely chopped 
  • 2 tbsp mint leaves, chopped
  • 4 Lime wedges to taste
  • 1/4 cup Jalapeno slices

Instructions

Place the chicken thighs, coriander, ginger, garlic, basil, cloves, pepper, salt, spring onions, and broth into the instant pot and cook for 35 minutes on high pressure.

While it is cooking, rinse the noodles and prepare the vegetables and toppings for the soup.

Let the pressure out using the quick release at the end of 35 minutes. 

Remove the chicken and shred it with a fork.

Strain the broth into a large bowl or container. For clear broth, use cheesecloth when you strain it.

Add the chicken back to the broth.

Mix the sriracha and fish sauce into the broth and mix well. You can add more sriracha to the broth if you like your soup hot.

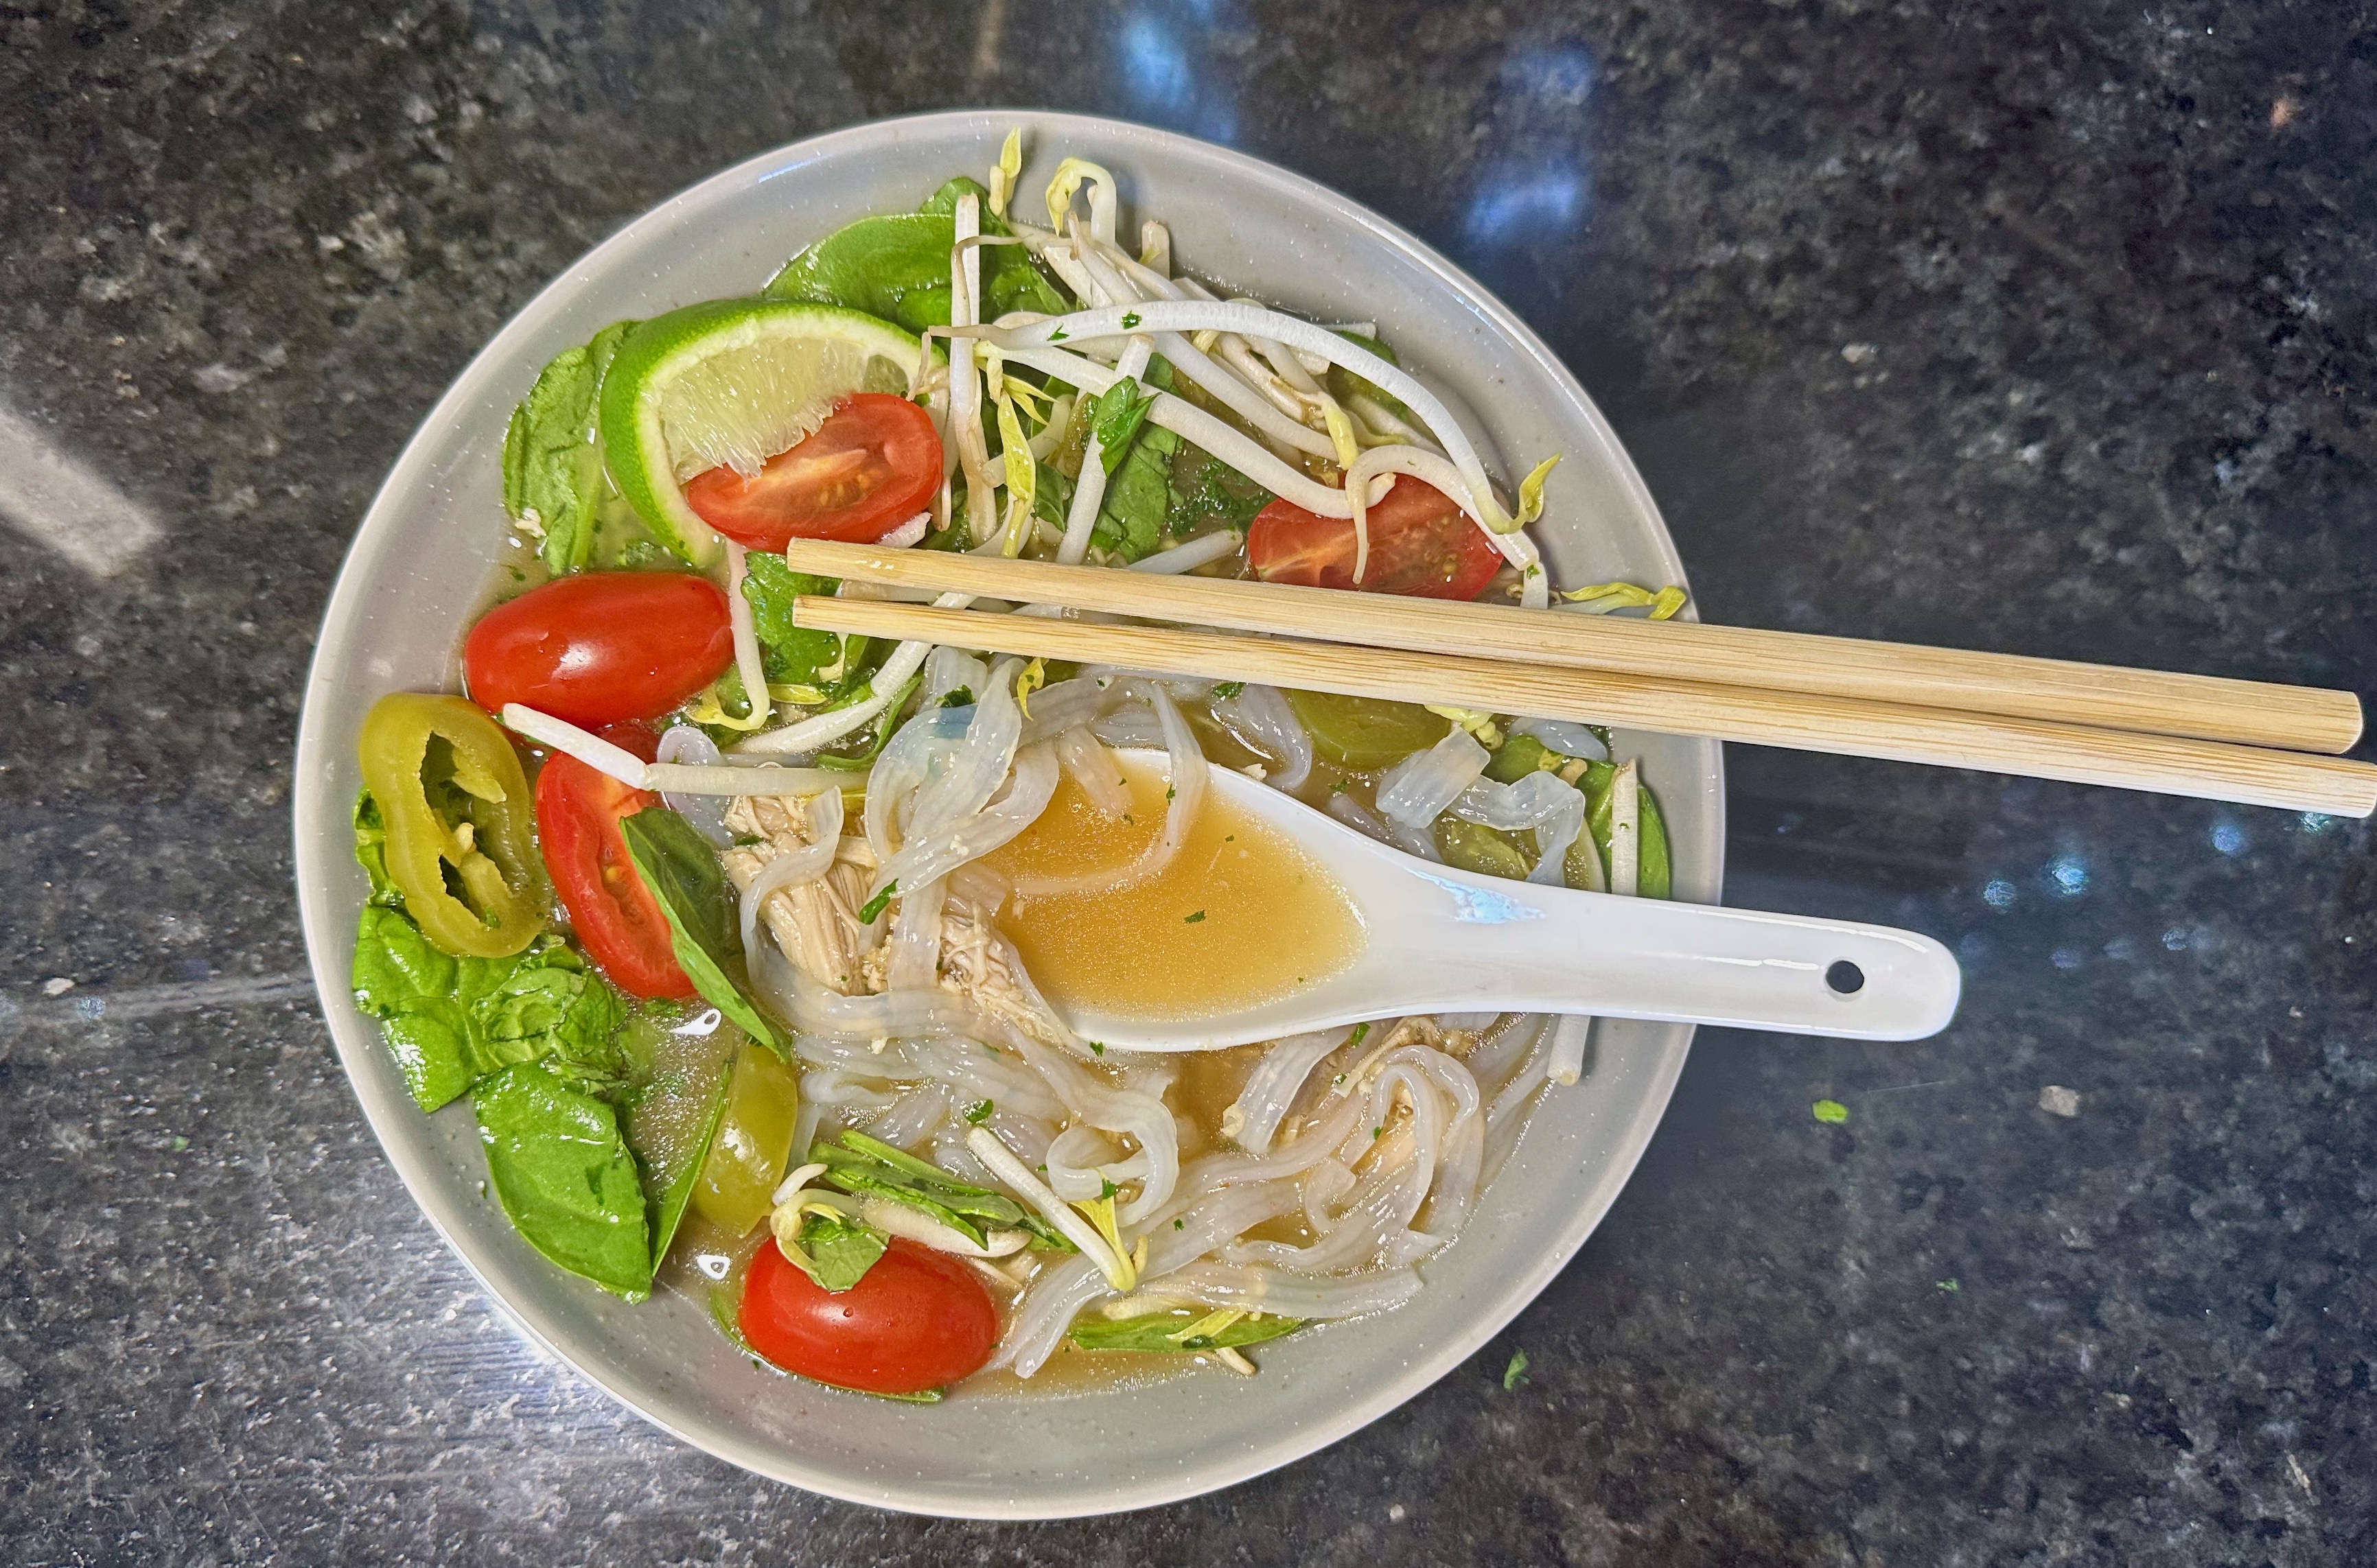
To serve the soup, dish it into a bowl, then add noodles, spinach, tomatoes, bean sprouts, and garnish with the chopped coriander and mint leaves, sliced jalapeño and a lime wedge.

“Instant

  • Rating: ★★★★★
  • Print

“This


Credit: Cath @ easycleaneats

Ingredients

  • 500g Chicken thighs 
  • 1 1/2 tsp ground coriander
  • 2 tbsp ginger peeled and minced
  • 2 tsp garlic crushed
  • 1 stem Basil 
  • 1 tsp cloves whole 
  • 1/2 tbsp pepper
  • 1/4 tsp salt
  • 1 cup spring onions 
  • 1.5 ltr chicken bone broth 
  • 1 tbsp Sriracha 
  • 1 tbsp fish sauce, or more to taste 
  • 250g konjac noodles
  • 2 1/2 cups baby spinach
  • 1 1/2 cups cherry tomatoes, halved
  • 1 cup bean sprouts
  • 1/4 cup fresh coriander, coarsely chopped 
  • 2 tbsp mint leaves, chopped
  • 4 Lime wedges to taste
  • 1/4 cup Jalapeno slices

Directions

  1. Place the chicken thighs, coriander, ginger, garlic, basil, cloves, pepper, salt, spring onions, and broth into the instant pot and cook for 35 minutes on high pressure.
  2. While it is cooking, rinse the noodles and prepare the vegetables and toppings for the soup.
  3. Let the pressure out using the quick release at the end of 35 minutes.
  4. Remove the chicken and shred it with a fork.
  5. Strain the broth into a large bowl or container. For clear broth, use cheesecloth when you strain it.
  6. Add the chicken back to the broth.
  7. Mix the sriracha and fish sauce into the broth and mix well. You can add more sriracha to the broth if you like your soup hot.
  8. To serve the soup, dish it into a bowl, then add noodles, spinach, tomatoes, bean sprouts, and garnish with the chopped coriander and mint leaves, sliced jalapeño and a lime wedge.

Nutrition

Per Serving: 201 calories; 11.1g fat; 5g carbohydrates; 21.6g protein

Equipment

  • Knife
  • Chopping board
  • Instant Pot or Pressure Cooker
  • Large mixing bowls
  • Forks
  • Cheesecloth
  • Strainer

Nutritional disclaimer

Nutrition information is provided as an estimate based on the ingredients used and available in my area (New Zealand). The nutritional information is here to help you understand the recipe; I use MyFitnessPal to generate my estimates. For more accurate nutritional information, please use a nutritional calculator with the ingredients in your area.


Tandoori chicken skewers

Spicy on the BBQ

The weather has been warming up, and I want to spend more of my time outside enjoying the beauty New Zealand has to offer. When the weather warms up, I want to spend less time hanging out in a hot kitchen; what an excellent excuse to get the BBQ cleaned and fired up. I love cooking over real flames, and the added flavours from cooking over charcoal are hard to beat.

Fire + spicy + meat = awesome!

Op shop inspiration

I bought a backyard BBQ cookbook a few years back on a trip to the Op Shop up in Whangarei. I loved that it was a Man’s cookbook, all about Manly cooking over an open flame without the womenfolk getting in the way. The recipes are all simple and don’t have heaps of prep. They are designed to let the good ingredients and smoke do all the work. While I found the idea of manly cooking requiring no women other than to bring out beers highly amusing, the cooking style and simplicity of the recipes felt like a good fit for me; easy and clean. While skimming through the cookbook, I found the good old chicken and veg skewer recipe, and it got me thinking: Could you make the standard meat and veg skewer better? Yes, you can, or I wouldn’t be posting this recipe.

Tandoori skewers

My backyard BBQ cookbook got me thinking about other foods that use smoke and flames to add more flavour to the food; the answer was reasonably obvious: tandoori. While the tandoor is made of clay and doesn’t use charcoal, the principles are the same- smoke, flames, and meat give you amazing flavours. I always have a jar of tandoori-style spice mix in my pantry to add a bit of extra spice to dinner when needed. I decided to combine BBQ and Indian inspired flavours to deliver something spicy and new for dinner.

Tandoori chicken skewers

Not to hot

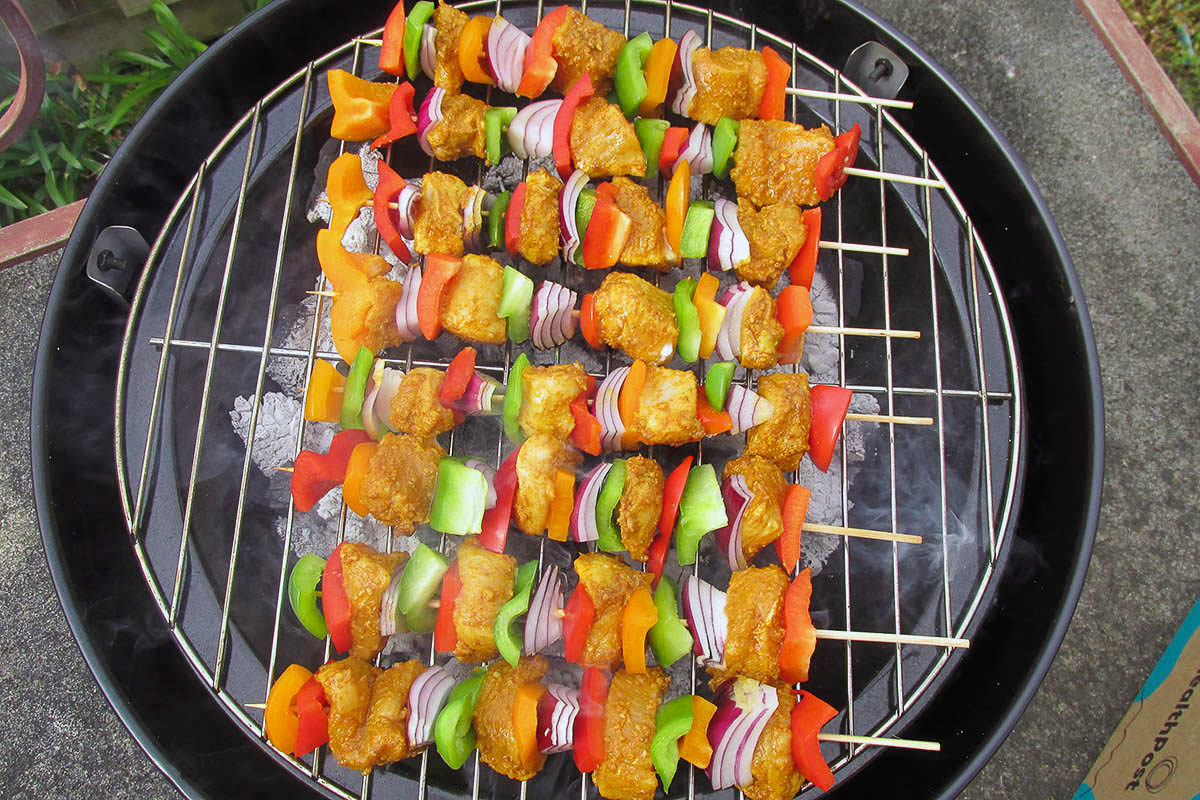
While I have nothing against the gas BBQ, I prefer the charcoal BBQ results. Charcoal BBQS take longer to set up and start cooking with, but once they are up and running, they are straightforward to use and can look after themselves and cook your food without too much effort from you. I am not a BBQ expert, but I know what works well for my cooking style and the recipes I have created or used. For this recipe, I set my BBQ up for indirect heat and put the skewers on to cook once all the charcoal had burned and was white. The BBQ internal temperature was around 300 degrees C or 600 degrees F, meaning the meat and veggies were cooked in minutes. Getting the temperature right before you put your food on the BBQ is key. If you put the food on when the BBQ is too hot, you end up with meat that is burned on the outside and raw in the middle. This is dangerous when you are cooking chicken. 

Tandoori chicken skewers recipe

Tandoori chicken skewers ingredients

Ingredients 

  • 1/3 cup tandoori spice powder 
  • 1 tbsp lime juice 
  • 2 garlic cloves, crushed 
  • 3 chicken breast, cubed 
  • 1/2 green pepper, cubed 
  • 1/2 red pepper, cubed 
  • 1 red onion, cubed-quartered, then halved 
  • 1/2 cup olive oil 
  • salt and pepper 

Instructions

Mix together the garlic, olive oil, salt, pepper, lime juice, and tandoori spice powder in a bowl. 

Place the tandoori spice powder in a large bowl.
Add the lime juice.
Add the garlic and oil a little at a time.
Mix well.
When you have added all the oil you will have a smooth paste.

Add the chicken to the bowl with the tandoori paste, mix to coat the chicken. 

Ad the chicken to the paste.
Mix well.
Make sure that chicken is fully coated
Get the vegetables and chicken together to start building the skewers

Thread the chicken, onion, pepper and peppers onto soaked bamboo skewers. 

Thread the chicken, onion, pepper and peppers onto soaked bamboo skewers. 
Keep adding chicken, onion and peppers to the skewer
Repeat with the remaining vegetables and chicken

Brush the extra paste onto the skewers. 

Cook the skewers on an oiled BBQ or in a chargrill pan, turning occasionally. 

Cook the skewers on an oiled BBQ or in a chargrill pan, turning occasionally. 

The chicken should be cooked through in about 10 minutes. 

Serve hot with some salad

“Tandoori

  • Rating: ★★★★★
  • Print

“A


Credit: Cath @ easycleaneats

Ingredients

  • 1/3 cup tandoori paste
  • 1 tbsp lime juice
  • 2 garlic cloves, crushed
  • 3 chicken breasts, cubed
  • 1/2 green pepper, cubed
  • 1/2 red pepper, cubed
  • 1 red onion, cubed, quartered, then halved
  • 1/2 cup Olive oil
  • salt and pepper

Directions

  1. Mix the garlic, olive oil, salt, pepper, lime juice, and tandoori paste in a bowl.
  2. Add the chicken to the bowl with the tandoori paste and mix to coat the chicken.
  3. Thread the chicken, onion, pepper and peppers onto soaked bamboo skewers.
  4. Brush the extra paste onto the skewers.
  5. Cook the skewers on an oiled BBQ or in a chargrill pan, turning occasionally.
  6. The chicken should be cooked through in about 10 minutes.

Nutrition

Per Serving: calories; g fat; g carbohydrates; g protein

Equipment 

  • Knife
  • Chopping board
  • Mixing bowl
  • Measuring spoons
  • Measuring cups
  • Fork
  • Spoon
  • Wooden skewers

Nutritional disclaimer

Nutrition information is provided as an estimate based on the ingredients used and available in my area (New Zealand). The nutritional information is here to help you understand the recipe; I use MyFitnessPal to generate my estimates. For more accurate nutritional information, please use a nutritional calculator with the ingredients in your area.


No rice sushi

Sushi is back on the menu 

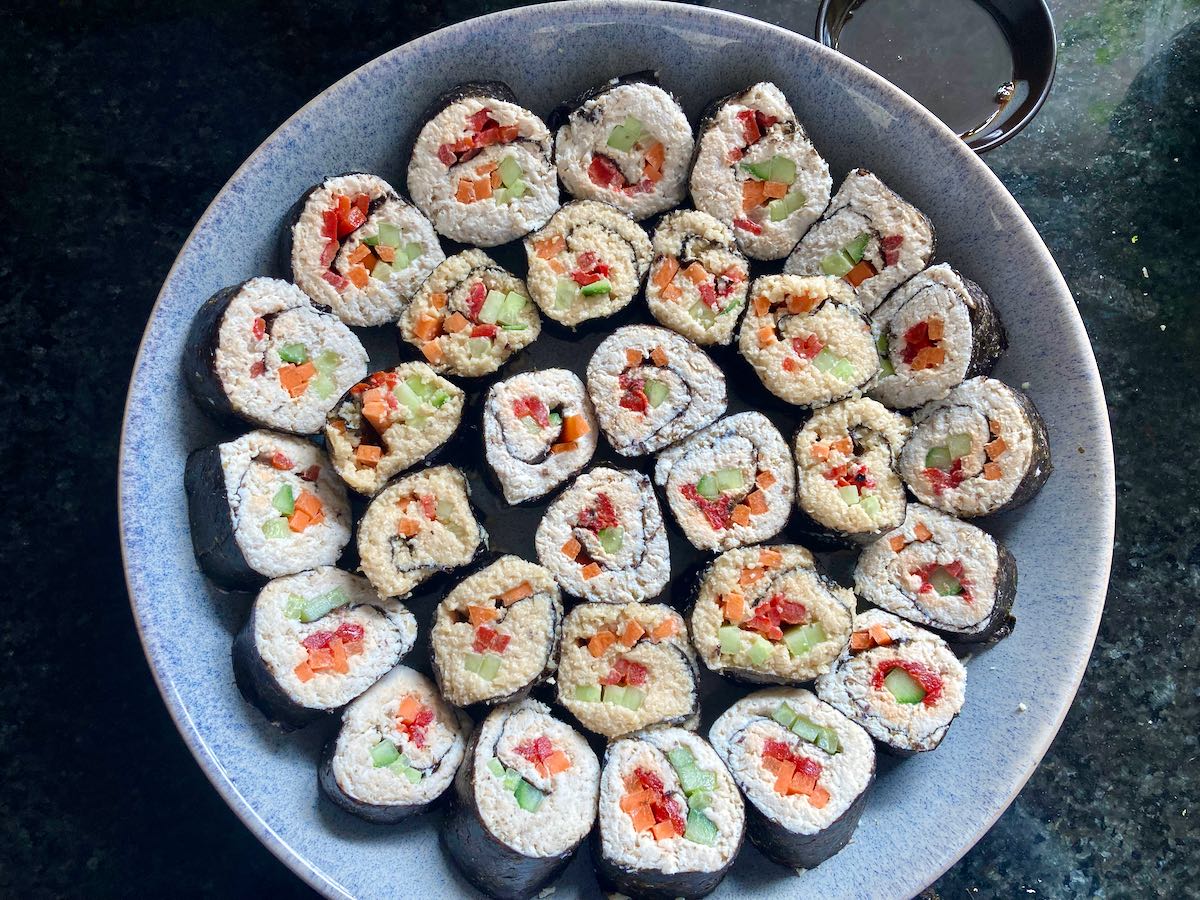
Sushi is one of the most popular options for lunch, and the sushi roll is, without doubt, one of the most recognisable forms. One of the best things about sushi is its versatility; you can have any filling you want and even have your sushi without rice. That is right, no rice sushi.

Swap the carbs for protein 

The best approach I have found when making no-rice sushi is swapping the rice for protein. For this recipe, I have swapped out the rice for cooked chicken, but it can also work with tuna, salmon, pork, or eggs. All you need to do is make sure the protein is mixed with something like mayo that makes it sticky enough to hold the sushi roll together. I love to add some seasoning to the protein to help add some flavour and a little kick.

Variety is the spice of life

The beauty of this recipe is that you can add anything you want (within reason) to the sushi as a filling. I love to mix things up to have a mix of vegetables that are crisp, crunchy and soft, so each bite is interesting to eat and packed with flavour.

No rice sushi

Ingredients

  • 5 nori sheets 
  • 4 cups cooked chicken, shredded
  • 2 tsp. Chicken seasoning
  • 3/4 cup easy mayo
  • A mix of vegetables cut into matchsticks 
    • 1 Carrot
    • 1 Celery stick
    • 1 Pepper
    • 1 Cucumber

Instructions

Mix the chicken, chicken seasoning and mayo in a bowl to form a thick paste. 

Take the sushi mat and place it on a clean flat surface.

Take a sheet of nori, and put the nori sheet smooth side down.

Take the filling of choice and spread it out on the nori sheet.

The mixture should be spread evenly, but not to the edge of the sheet at one end.

Take the additional fillings (vegetables, cheese, etc.) and lay them out on top of the spread-out filling.

Lay out the fillings in lines starting near the edge of the nori sheet. 

Each filling should have its own line with a space between the next line.

Have the sushi mat in front of you with the edge without filling furthest away from you.

Lift the edge of the mat up and use the mat to roll the edge of the nori over the first line of filling.

Make sure that the fillings are sticking together.

Tuck the nori into the roll and use the mat to continue rolling and tucking the nori; remove the mat from the roll as you go.

Move slowly so that the sushi roll is even.

Roll the sushi roll backwards and forward to seal it and keep it tight for cutting.

Let the sushi roll sit for a minute to make cutting easier.

Cut the roll into segments with a sharp, wet knife.

Serve and eat immediately.

No rice sushi

  • Servings: 28“
  • Rating: ★★★★★
  • Print

“One


Credit: Cath @ easycleaneats

Ingredients

  • 5 nori sheets
  • 4 cups cooked chicken, shredded
  • 2 tsp. Chicken seasoning
  • 3/4 cup easy mayo
  • Mix of vegetables cut into matchsticks
  • 1 Carrot
  • 1 Celery stick
  • 1 Pepper
  • 1 Cucumber

Directions

  1. Mix the chicken, chicken seasoning and mayo in a bowl to form a thick paste.
  2. Take the sushi mat and place it on a clean flat surface.
  3. Take a sheet of nori, and put the nori sheet smooth side down.
  4. Take the filling of choice and spread it out on the nori sheet.
  5. The mixture should be spread evenly, but not to the edge of the sheet at one end.
  6. Take the additional fillings (vegetables, cheese, etc.) and lay them out on top of the spread-out filling.
  7. Lay out the fillings in lines starting near the edge of the nori sheet.
  8. Each filling should have its own line with a space between the next line.
  9. Have the sushi mat in front of you with the edge without filling furthest away from you.
  10. 10.Lift the edge of the mat up and use the mat to roll the edge of the nori over the first line of filling.
  11. Make sure that the fillings are sticking together.
  12. Tuck the nori into the roll and use the mat to continue rolling and tucking the nori; remove the mat from the roll as you go.
  13. Move slowly so that the sushi roll is even.
  14. Roll the sushi roll backwards and forward to seal it and keep it tight for cutting.
  15. Let the sushi roll sit for a minute to make cutting easier.
  16. Cut the roll into segments with a sharp, wet knife.
  17. Serve and eat immediately.

Nutrition

Per Serving: 85 calories; 5g fat; 3g carbohydrates; 7g protein

Equipment

  • Sushi rolling mat
  • Spatula
  • Spoon  
  • Mixing bowl

Nutritional disclaimer

Nutrition information is provided as an estimate based on the ingredients used and available in my area (New Zealand). The nutritional information is here to help you understand the recipe; I use MyFitnessPal to generate my estimates. For more accurate nutritional information, please use a nutritional calculator with the ingredients in your area.


Taco style salad

Making friends with salad

I love salad, it is sad, but true. For a long time, if I suggested salad for dinner, it was met with grumbles, groans, and complaints. Nowadays, I have the freedom to eat salad as often as I want, and I’ll be honest, I eat it a lot. In my book, salad is something to get excited about; it is an amazingly fresh meal full of endless possibilities, not limp lettuce, sad dressing and soggy tomatoes. I love to create salads that taste amazing and look great.

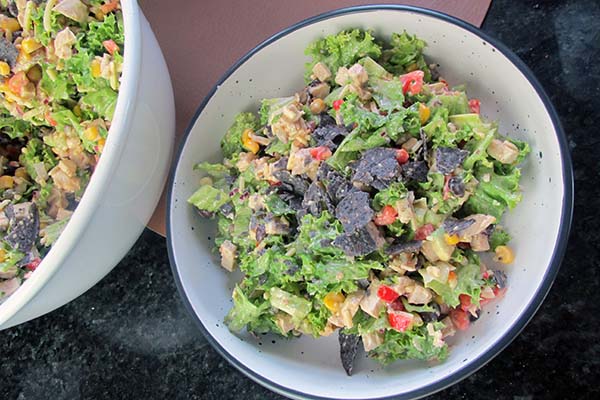
Taco style salad

More spicy flavours

While I find it hard to say no to tacos, I sometimes want the flavour of tacos without so many carbs. This salad is my compromise; it is a taco in a bowl. This salad delivers on the flavour of tacos, but with a tasty and creamy dressing that brings everything together. It is easy to make, and the recipe is enough to feed a hungry family and leave you with some leftovers. If you don’t need quite so much food, it is easy to half the ingredients to make 5 servings rather than 10.

Taco style salad

Taco style salad ingredients

Ingredients 

  • 6 cups cos lettuce, chopped
  • 6 cups chicken, cooked and cubed 
  • 1 can corn
  • 1 can black beans
  • 2 tomatoes, diced
  • 1 avocado, diced
  • 1/2 red onion, diced
  • 3/4 cup cheddar cheese, grated
  • 1 cup tortilla chips, crushed 
  • 1 handful fresh coriander, chopped
  • 1/2 cup plain yogurt
  • 3 tbsp. avocado oil 
  • 2 tsp. honey
  • 2 tsp. apple cider vinegar
  • 1 tsp. garlic, minced 
  • 1 lime, juiced
  • 1/2 jalapeño, finely diced
  • 2 tsp. taco seasoning 

Instructions  

Mix the lettuce, corn, beans, tomatoes, avocado, onion and cheese in a large bowl.

Take a large bowl.
Add the lettuce and chicken to the bowl.
Add the corn and beans.
Add the tomatoes and avocado.
Add the red onion.
Mix well.

Set the bowl to one side.

In another bowl, whisk together the yoghurt, oil, honey, apple cider vinegar, garlic, lime juice, jalapeño, and taco seasoning.

Take the ingredients for the dressing
Add the ingredients to a bowl.
Add the jalapenos and whisk.

When you are ready to serve the salad, add the dressing to the bowl with the salad.

Add the dressing.

Toss the salad to coat everything with the dressing. 

Mix well.

Top the salad with the crushed chips and coriander to serve.

Add the crushed corn chips
Serve

Taco style salad

  • Servings: 10
  • Rating: ★★★★★
  • Print

Sometimes want the flavour of tacos without so many carbs. This salad is my compromise; it is a taco in a bowl.


Credit: Cath @ easycleaneats

Ingredients

  • 6 cups cos lettuce, chopped
  • 6 cups chicken, cooked and cubed
  • 1 can corn
  • 1 can black beans
  • 2 tomatoes, diced
  • 1 avocado, diced
  • 1/2 red onion, diced
  • 3/4 cup cheddar cheese, grated
  • 1 cup tortilla chips, crushed
  • 1 handful fresh coriander, chopped
  • 1/2 cup plain yogurt
  • 3 tbsp. avocado oil
  • 2 tsp. honey
  • 2 tsp. apple cider vinegar
  • 1 tsp. garlic, minced
  • 1 lime, juiced
  • 1/2 jalapeño, finely diced
  • 2 tsp. taco seasoning

Directions

  1. Mix the lettuce, corn, beans, tomatoes, avocado, onion and cheese in a large bowl.
  2. Set the bowl to one side.
  3. In another bowl, whisk together the yoghurt, oil, honey, apple cider vinegar, garlic, lime juice, jalapeño, and taco seasoning.
  4. When you are ready to serve the salad, add the dressing to the bowl with the salad.
  5. Toss the salad to coat everything with the dressing.
  6. Top the salad with the crushed chips and coriander to serve.

Nutrition

Per Serving: 287 calories; 12 g fat; 18 g carbohydrates; 26 g protein.

Equipment

  • Chopping board
  • Knife
  • Large mixing bowl
  • Small mixing bowl
  • Whisk
  • Spoon
  • Measuring cups
  • Measuring spoons
  • Scales

Nutritional disclaimer

Nutrition information is provided as an estimate based on the ingredients used and available in my area (New Zealand). The nutritional information is here to help you understand the recipe; I use MyFitnessPal to generate my estimates. For more accurate nutritional information, please use a nutritional calculator with the ingredients in your area.


Mango chicken curry

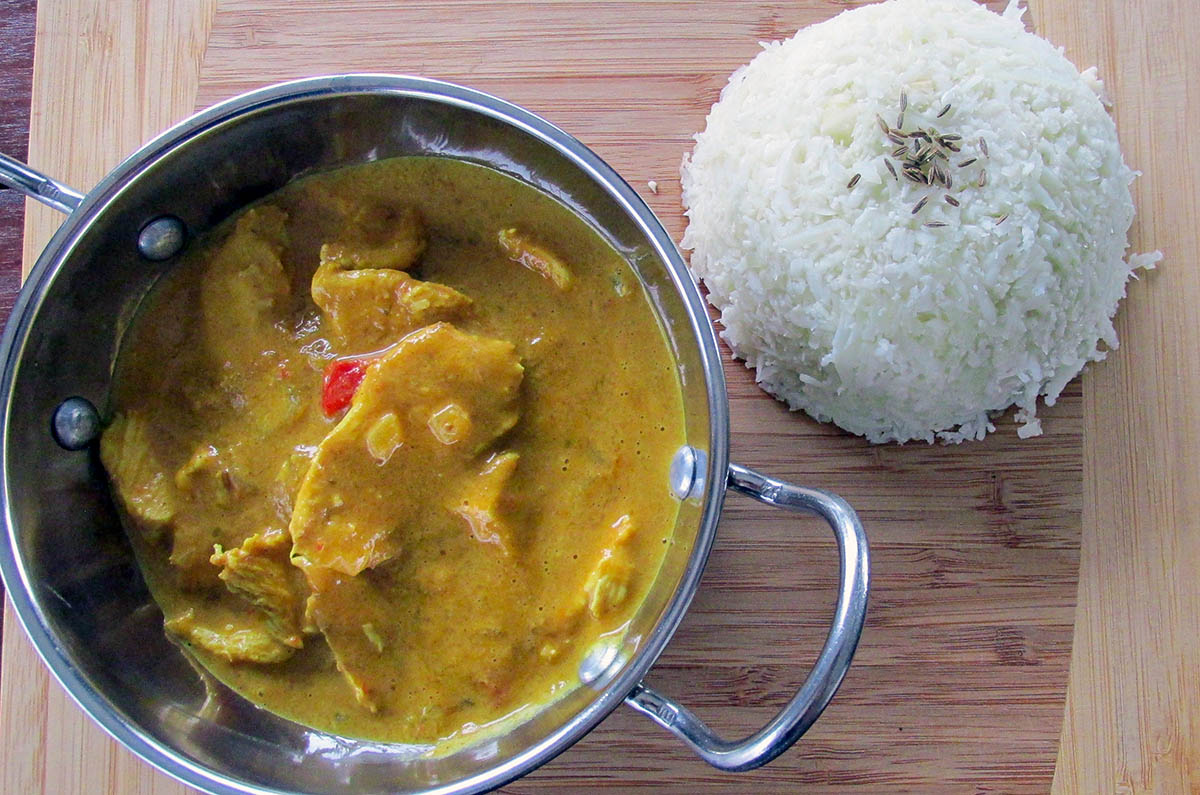
It has been a good week, and I had some leftover energy (for a change) come Thursday night, so I decided to play in the kitchen. I wasn’t in the mood to spend hours choring over a fancy dinner. I wanted something easy and tasty, but I also felt like I was having something naughty. Mango chicken curry popped into my mind. It is fruity and meaty, which is a winning combination in my book. It is simple to make and doesn’t require hours of cooking to get all the flavours flowing. 

Not authentic at all

I make no claims that my recipe is anywhere close to authentic, mine is basic but not in a bad way. Being basic doesn’t mean it lacks flavour; it has all the key elements: sweet mango, creamy gravy with a mild spice. 

Mango chicken curry is one of those dishes that I love for a weeknight dinner. It is fruity and meaty, which is always a winning combination. It is simple to make and perfect for a freezer meal. To mix it up a bit, you can add some seeds or raisins.

Mango chicken curry recipe

Ingredients

  • 600g chicken, diced
  • 1 onion, finely diced
  • 1 red pepper, diced
  • 2 mangos, diced
  • 2 tsp. curry powder
  • 1 tsp. turmeric
  • 1 tsp. coriander
  • 1 can coconut milk
  • 1 tbsp. coconut oil

Instructions

In a large saucepan heat the coconut oil over a low to medium heat.

Add the onion to the pan and cook off until it is soft. 

When the onion is soft add in the pepper and the mango and cook for 5 minutes.

Add in curry powder, turmeric, and coriander, stir well and make sure that everything is coated. 

Add the coconut milk and simmer for 5 minutes. 

Remove half of the sauce and put it in a blender.

Blend it until you have a smooth puree.

Add the puree back to the pan and add in the chicken. 

Simmer the sauce with the chicken in the sauce for 30 minutes.

Serve over cauliflower rice.

“Mango

  • Servings: “6
  • Rating: ★★★★★
  • Print

“Mango


Credit: Cath @ easycleaneats

Ingredients

  • 600g chicken, diced
  • 1 onion, finely diced
  • 1 red pepper, diced
  • 2 mangos, diced
  • 2 tsp. curry powder
  • 1 tsp. turmeric
  • 1 tsp. coriander
  • 1 can coconut milk
  • 1 tbsp. coconut oil

Directions

  1. In a large saucepan heat the coconut oil over a low to medium heat.
  2. Add the onion to the pan and cook off until it is soft.
  3. When the onion is soft add in the pepper and the mango and cook for 5 minutes.
  4. Add in curry powder, turmeric, and coriander, stir well and make sure that everything is coated.
  5. Add the coconut milk and simmer for 5 minutes. 
  6. Remove half of the sauce and put it in a blender.
  7. Blend it until you have a smooth puree.
  8. Add the puree back to the pan and add in the chicken. 
  9. Simmer the sauce with the chicken in the sauce for 30 minutes.
  10. Serve over cauliflower rice.

Nutrition

Per Serving: 293 calories; 2.5g fat; 26.4 g carbohydrates; 33.7 g protein

Equipment

  • Knife
  • Chopping board
  • Saucepan
  • Wooden spoon
  • Blender
  • Spatula

Nutritional disclaimer

Nutrition information is provided as an estimate based on the ingredients used and available in my area (New Zealand). The nutritional information is here to help you understand the recipe; I use MyFitnessPal to generate my estimates. For more accurate nutritional information, please use a nutritional calculator with the ingredients in your area


Fried not rice

Master the basics

Eating clean gets a lot easier once you have mastered a few essential recipes. This recipe is basic- not like basic unicorn basic, but more like beard and flannel basic. Back to the point (which isn’t Unstable unicorns), having basic skills and recipes in your arsenal means you will never be left with only UberEats as your weeknight options. Once you master this recipe, the possibilities are endless.

Make the most of leftovers

This is a great way to use up leftovers (if you ever have any) or a quick and easy dinner that will fill up the family. You can add pretty much anything you want, and it will still taste awesome.

Fried rice recipe

Ingredients

  • 1 head cauliflower, finely grated
  • 1/2 onion, minced
  • 2 garlic cloves, finely minced
  • 2 spring onions
  • 1 cup vegetables
  • 2 eggs
  • 1 chicken breast
  • 1 cup prawns
  • Handful of ham
  • 1 tbsp. coconut oil
  • 1/4 cup coconut aminos

Instructions

In a large frying pan, heat coconut oil over a medium heat

Add the chicken and cook for about 3 – 5 minutes until it is cooked most of the way.

Keep the meat moving around the pan.

Add the garlic and cook for 1 minute.

Add the vegetables and keep everything moving.

Add the ham and make sure it is well mixed in.

Push the meat and vegetables to the side of the wok and pour the egg into the space you have made. 

Use chopsticks or a spatula to keep the egg moving and cooking.

Mix the egg into the veggies and meat.

Add the cauliflower rice and the prawns to the wok and mix well. 

Keep everything moving in the wok and cook for 3 minutes.

Add the coconut aminos to the wok and mix well to ensure everything gets covered.

Serve with a topping of sliced spring onions and some sesame seeds.

Fried non-rice

  • Servings: 4
  • Rating: ★★★★★
  • Print

Your healthy alternative to fried rice. Made with cauliflower rice for a low carb option for this take away favourite.


Credit: Cath @ easycleaneats

Ingredients

  • 1 head cauliflower, finely grated
  • 1/2 onion, minced
  • 2 garlic cloves, finely minced
  • 2 spring onions, sliced
  • 1 cup vegetables
  • 2 eggs
  • 1 chicken breast
  • 1 cup prawns, cooked
  • Handful of ham
  • 1 tbsp. coconut oil
  • 1/4 cup coconut aminos

Directions

  1. In a large frying pan heat coconut oil over a medium heat
  2. Add the chicken and cook for about 3 – 5 minutes until it is cooked most of the way.
  3. Keep the meat moving around the pan.
  4. Add the garlic and cook for 1 minute.
  5. Add the vegetables and keep everything moving.
  6. Add the ham and make sure it is well mixed in.
  7. Push the meat and vegetables to the side of the wok and pour the egg into the space you have made.
  8. Use chopsticks or a spatula to keep the egg moving and cooking.
  9. Mix the egg into the veggies and meat.
  10. Add the cauliflower rice and the prawns to the wok and mix well.
  11. Keep everything moving in the wok and cook for 3 minutes.
  12. Add the coconut aminos to the wok and mix well to ensure everything gets covered.
  13. Serve with a topping of sliced spring onions and some sesame seeds.

Nutrition

Per Serving: 231 calories; 7 g fat; 12 g carbohydrates; 26 g protein

Equipment

  • Measuring cup
  • Grater
  • Chopping board
  • Knife
  • Frying pan
  • Spatula 
  • Small bowl
  • Whisk  

Nutritional disclaimer

Nutrition information is provided as an estimate based on the ingredients used and available in my area (New Zealand). The nutritional information is here to help you understand the recipe; I use MyFitnessPal to generate my estimates. For more accurate nutritional information, please use a nutritional calculator with the ingredients in your area.