Banana bites

Ready for a snack

I’m trying different things as snacks at the moment; I had been munching on yoghurt and fruit for a while, so I needed to switch things up a bit. I had a stack of bananas and some protein white chocolate in the cupboard, so I thought I would have a go at making my own banana bites. 

No peanut butter, thanks

I am one of those unfortunate people who is allergic to not only peanuts but also tree nuts. When it comes to food options, not having nuts on the menu can be challenging at times and frustrating at others. Not eating nuts doesn’t have to be the end of the world; there are always replacements and alternatives that give you a nut-free option. I’ve seen peanut butter banana bites all over the internet, but it was not an option for me. This recipe is my attempt to create a nut-free version of a usually nut-packed recipe.

Sunflower seed butter

Instead of using peanut butter, I decided to use my homemade sun butter as the alternative filling on my banana bites. As I am not a milk or dark chocolate fan, I decided to use my white chocolate for a perfect coating.

Banana bites recipe

Ingredients

  • 1 banana
  • 1/4 cup sun butter
  • 1 bar protein white chocolate

Instructions

Peel the banana and slice it into 26 pieces.

Line a baking sheet or flat plate with a silicone liner.

On half of the banana pieces, add a small dollop of the sun butter.

Top each piece that has sun butter on it with another piece of banana.

Place the banana in the freezer to harden the sun butter for about 15 minutes.

Before taking the banana bites from the fridge, melt the chocolate.

Take a small microwave-safe bowl and break up the chocolate.

Microwave the chocolate for 30 seconds at a time and mix between.

Repeat until the chocolate is melted and runny.

Take the banana bites from the freezer.

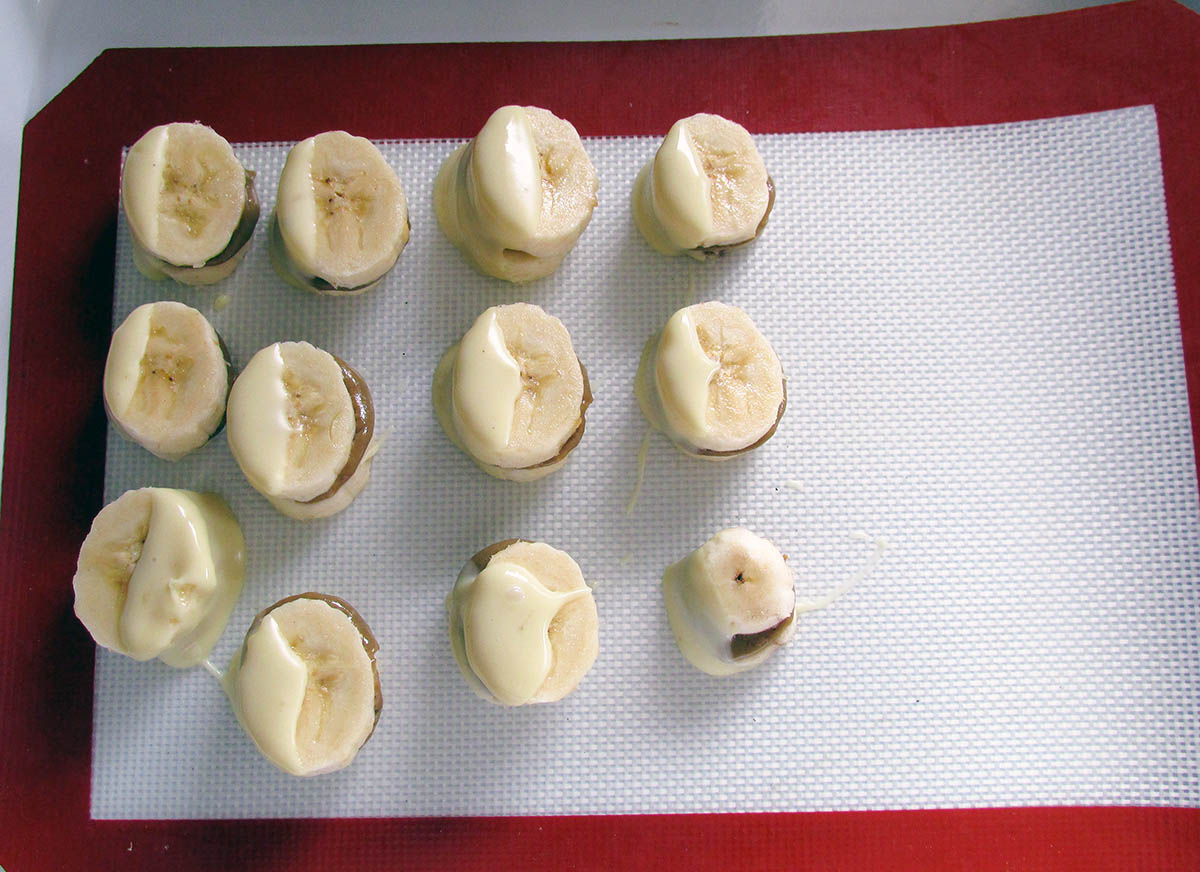
Dip half of each bite into the melted chocolate and place it back on the lined baking sheet.

Return the bites to the freezer for another 15 minutes.

Transfer the set bites to an airtight container and stop in the fridge for up to 3 days.

“Banana

  • Servings: 4
  • Print


Credit: Cath @ easycleaneats 

Ingredients

  • 1 banana
  • 1/4 cup sun butter
  • 1 bar protein white chocolate

Directions

Peel the banana and slice it into 26 pieces. Line a baking sheet or flat plate with a silicone liner. On half of the banana pieces, add a small dollop of the sun butter. Top each piece that has sun butter on it with another piece of banana. Place the banana in the freezer to harden the sun butter for about 15 minutes. Before taking the banana bites from the fridge, melt the chocolate. Take a small microwave-safe bowl and break up the chocolate. Microwave the chocolate for 30 seconds at a time and mix between. Repeat until the chocolate is melted and runny. Take the banana bites from the freezer. Dip half of each bite into the melted chocolate and place it back on the lined baking sheet. Return the bites to the freezer for another 15 minutes. Transfer the set bites to an airtight container and stop in the fridge for up to 3 days.

Nutrition

Per Serving: 156 calories; 11g fat; 11g carbohydrates; 5g protein

Equipment

  • Knife
  • Chopping board
  • Spoon
  • Small microwave-safe bowl
  • Fork
  • Baking sheet
  • Silicone liner or baking paper

Nutritional disclaimer

Nutrition information is provided as an estimate based on the ingredients used and available in my area (New Zealand). The nutritional information is here to help you understand the recipe; I use MyFitnessPal to generate my estimates. For more accurate nutritional information, please use a nutritional calculator with the ingredients in your area.

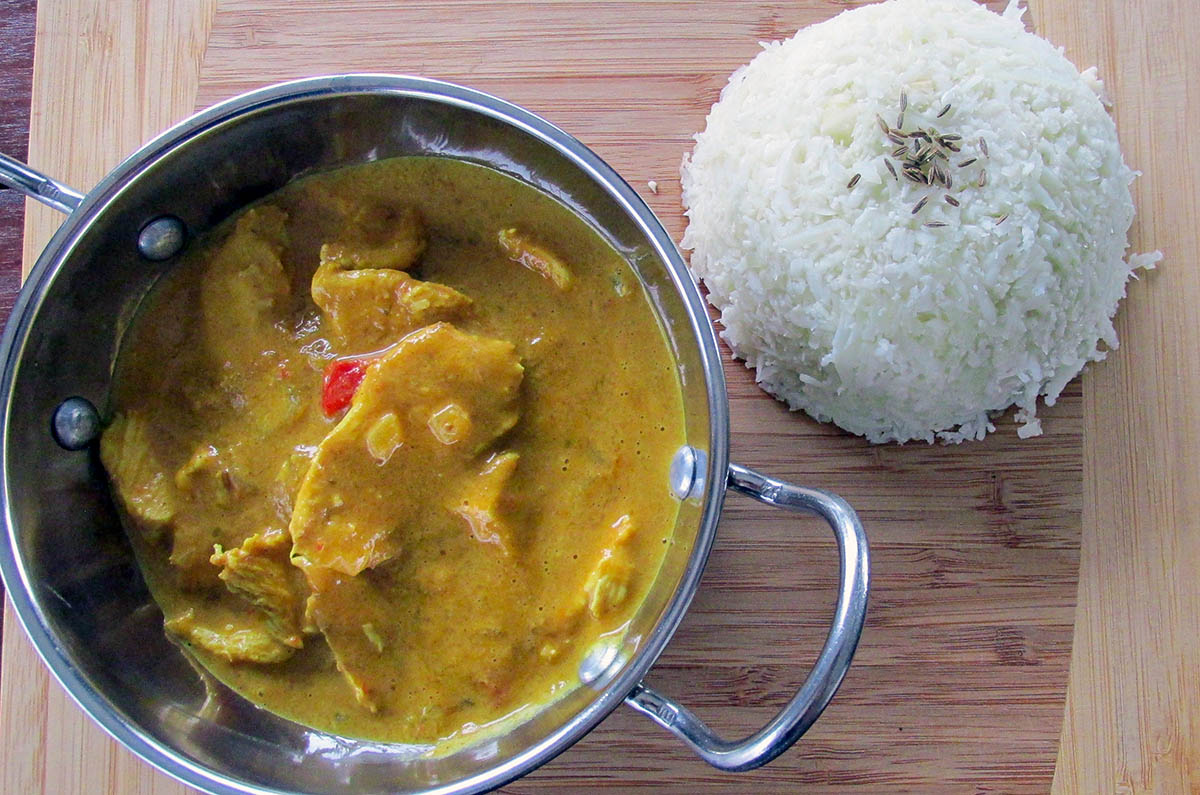
Mango chicken curry

It has been a good week, and I had some leftover energy (for a change) come Thursday night, so I decided to play in the kitchen. I wasn’t in the mood to spend hours choring over a fancy dinner. I wanted something easy and tasty, but I also felt like I was having something naughty. Mango chicken curry popped into my mind. It is fruity and meaty, which is a winning combination in my book. It is simple to make and doesn’t require hours of cooking to get all the flavours flowing. 

Not authentic at all

I make no claims that my recipe is anywhere close to authentic, mine is basic but not in a bad way. Being basic doesn’t mean it lacks flavour; it has all the key elements: sweet mango, creamy gravy with a mild spice. 

Mango chicken curry is one of those dishes that I love for a weeknight dinner. It is fruity and meaty, which is always a winning combination. It is simple to make and perfect for a freezer meal. To mix it up a bit, you can add some seeds or raisins.

Mango chicken curry recipe

Ingredients

  • 600g chicken, diced
  • 1 onion, finely diced
  • 1 red pepper, diced
  • 2 mangos, diced
  • 2 tsp. curry powder
  • 1 tsp. turmeric
  • 1 tsp. coriander
  • 1 can coconut milk
  • 1 tbsp. coconut oil

Instructions

In a large saucepan heat the coconut oil over a low to medium heat.

Add the onion to the pan and cook off until it is soft. 

When the onion is soft add in the pepper and the mango and cook for 5 minutes.

Add in curry powder, turmeric, and coriander, stir well and make sure that everything is coated. 

Add the coconut milk and simmer for 5 minutes. 

Remove half of the sauce and put it in a blender.

Blend it until you have a smooth puree.

Add the puree back to the pan and add in the chicken. 

Simmer the sauce with the chicken in the sauce for 30 minutes.

Serve over cauliflower rice.

“Mango

  • Servings: “6
  • Rating: ★★★★★
  • Print

“Mango


Credit: Cath @ easycleaneats

Ingredients

  • 600g chicken, diced
  • 1 onion, finely diced
  • 1 red pepper, diced
  • 2 mangos, diced
  • 2 tsp. curry powder
  • 1 tsp. turmeric
  • 1 tsp. coriander
  • 1 can coconut milk
  • 1 tbsp. coconut oil

Directions

  1. In a large saucepan heat the coconut oil over a low to medium heat.
  2. Add the onion to the pan and cook off until it is soft.
  3. When the onion is soft add in the pepper and the mango and cook for 5 minutes.
  4. Add in curry powder, turmeric, and coriander, stir well and make sure that everything is coated.
  5. Add the coconut milk and simmer for 5 minutes. 
  6. Remove half of the sauce and put it in a blender.
  7. Blend it until you have a smooth puree.
  8. Add the puree back to the pan and add in the chicken. 
  9. Simmer the sauce with the chicken in the sauce for 30 minutes.
  10. Serve over cauliflower rice.

Nutrition

Per Serving: 293 calories; 2.5g fat; 26.4 g carbohydrates; 33.7 g protein

Equipment

  • Knife
  • Chopping board
  • Saucepan
  • Wooden spoon
  • Blender
  • Spatula

Nutritional disclaimer

Nutrition information is provided as an estimate based on the ingredients used and available in my area (New Zealand). The nutritional information is here to help you understand the recipe; I use MyFitnessPal to generate my estimates. For more accurate nutritional information, please use a nutritional calculator with the ingredients in your area


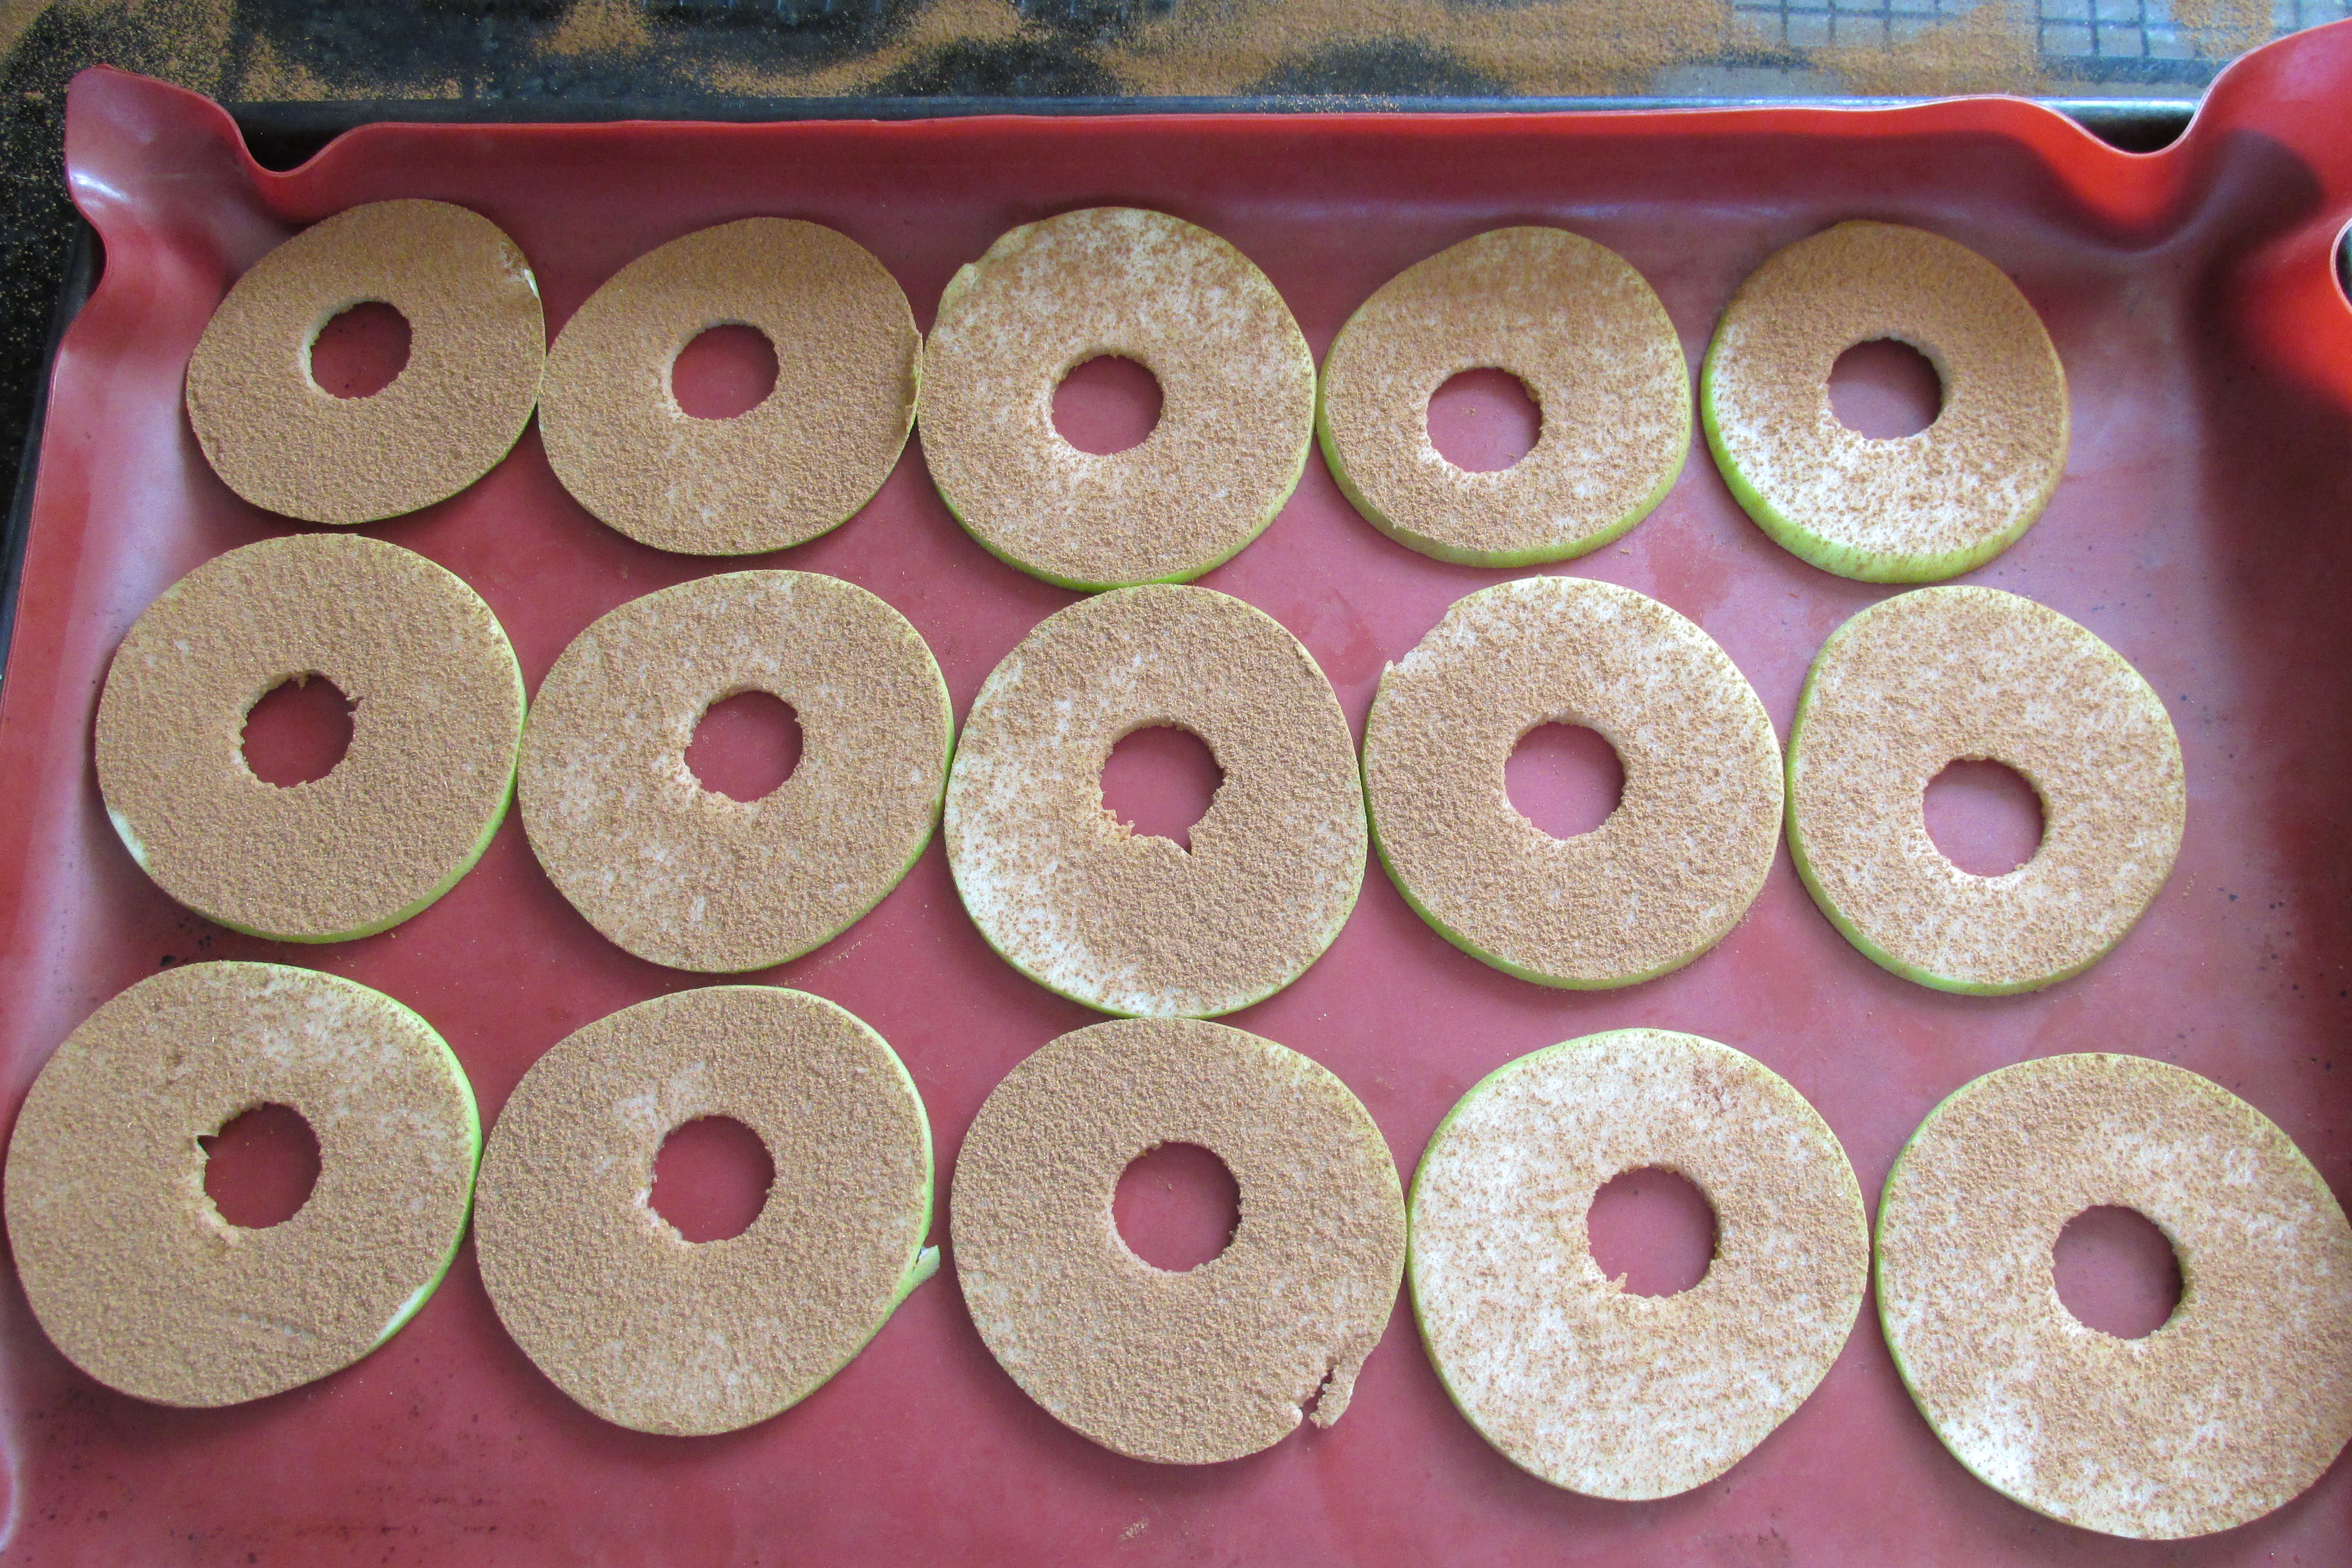
Apple chips

Updating as we go

Early in 2021, I relocated and started updating my website; I’ve been making changes and improving everything as I go. This recipe is one of the many things I’ve tried to improve. 

Getting off the sugar train

Over the last year, sugar has crept back into my diet, and I’ve noticed the adverse effects of late. Between my busy work life and lots of travel for work, I have found it challenging to eat clean and stay healthy. I decided to return to the sugar-free wagon and start feeling more like myself again.

Easy snack

Apple chips are a cheap and easy snack. They make a great alternative to potato chips; they are sweet, crisp and slightly addictive. If you are looking for a way to get fruit into little people, they are a brilliant option. 

Apple chips recipe

Ingredients

  • 3 apples
  • 2 tsp. ground cinnamon

“Apple

  • Rating: ★★★★★
  • Print


Credit: Cath @ easycleaneats

Ingredients

  • 3 apples
  • 2 tsp. ground cinnamon

Directions

  1. Preheat your oven to 100 degrees C/ 220 degrees F.
  2. Line two baking trays with baking paper or a silicone liner.
  3. Cut the apples into thin slices, for uniform size slices you can use a mandolin.
  4. Spread the apple slices on the baking trays, making sure you have no overlapping edges.
  5. Sprinkle the ground cinnamon on top of the apples.
  6. Place the baking trays in the oven.
  7. Leave the chips in the oven for two hours; turn them over after the first hour.
  8. Let the chips cool before eating.
  9. Keep the chips in an airtight container in the fridge for up to a week

Nutrition

Per Serving: 40 calories; 0 g fat; 11 g carbohydrates; 0 g protein

Equipment

  • Knife 
  • Chopping board
  • Mandolin
  • Baking tray
  • Baking paper or silicone liner

Nutritional disclaimer

Nutrition information is provided as an estimate based on the ingredients used and available in my area (New Zealand). The nutritional information is here to help you understand the recipe; I use MyFitnessPal to generate my estimates. For more accurate nutritional information, please use a nutritional calculator with the ingredients in your area.


Hawaiian pork chops

Slow cooker

Cards on the table, I hate coming home from a busy day and knowing I have to walk into the kitchen at 7 pm, cook a full meal, and then clean up. Don’t get me wrong; I love cooking, and it gives me the joy of creating a beautiful meal for myself and not having to turn to Uber Eats. After a 10-hour day at work, an hour-long commute home, and a heavy workout, cooking is not much of a joy. I am usually borderline hangry at the end of a long day, and I want my food as fast as possible. 

This is where having a slow cooker comes into its own; I know that I can walk in and find a meal that is cooked, hot and ready to serve. That means food is served as soon as I am ready to sit down, not 30 to 60 minutes later.

Ready for a comfort meal

It has been a bit frantic at work of late, I knew that this week was going to be a rough one so I planned something comforting for dinner today to help wind down for the week. Before starting work today I put my pork chops and sauce in the slow cooker and set it up for a long slow cook. Don’t you love the delayed start function on slow cookers? Coming home to perfectly cooked chops ready to serve up was just what was needed.

Hawaiian pork chops recipe

Ingredients 

  • 1 kg Pork chops
  • 2 cloves garlic, minced
  • 3 cups cauliflower rice
  • 1 tbsp. coriander chopped
  • 1/4 cup tomato puree
  • 1/2 cup coconut aminos
  • 1/3 cup honey
  • 3 tbsp. coconut vinegar
  • 1/2 cup water
  • 1 tbsp. tapioca flour
  • 1 can pineapple slices in juice

Whisk together the coconut aminos, honey, tomato puree, coconut vinegar, garlic, and pineapple juice.

In a separate bowl mix together the tapioca flour and water, whisk well so that there are no lumps in the liquid.

Add the flour mixture to the sauce and whisk well.

Pour half of the sauce into the bottom of your slow cooker.

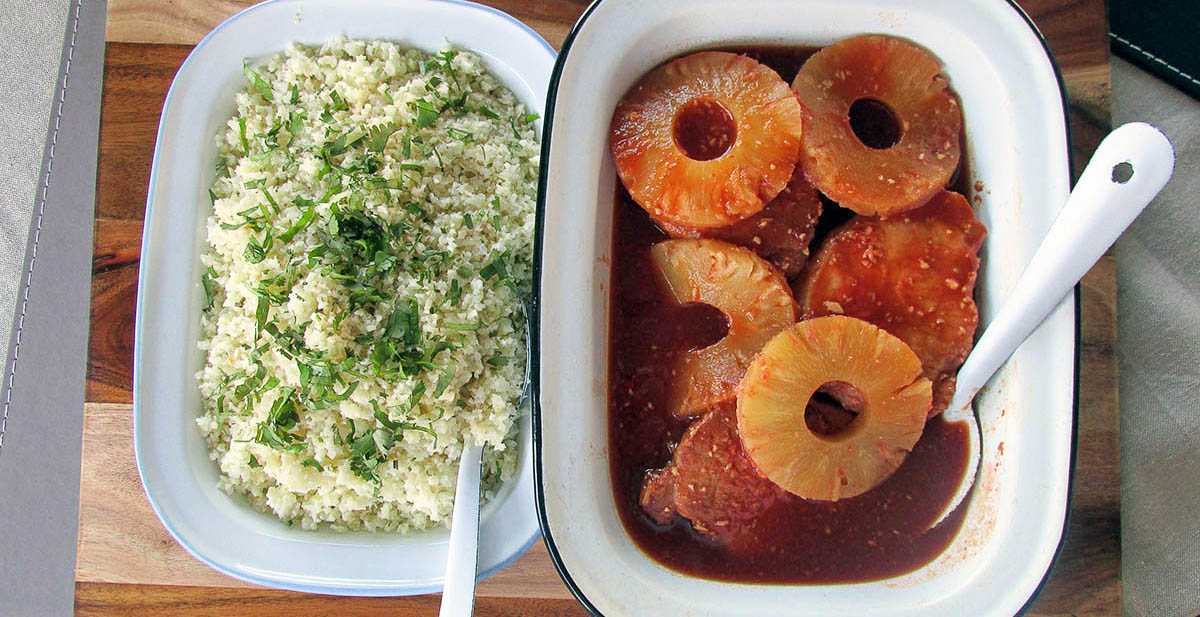
Place the pork chops into the sauce and place the pineapple slices on top of the chops.

Pour the remaining sauce over the chops and pineapple slices.

Cook the chops for 3-4 hours on high or 6-8 hours on low setting.

Serve hot over the cauliflower rice and garnish with the chopped coriander.

Hawaiian pork chops

  • Rating: ★★★★★
  • Print

“Hawaiian


Credit: Cath @ easycleaneats

Ingredients

  • 1 kg Pork chops
  • 2 cloves garlic, minced
  • 3 cups cauliflower rice https://easycleaneats.co.nz/2016/08/19/cauliflower-rice/
  • 1 tbsp. coriander chopped
  • 1/4 cup tomato puree
  • 1/2 cup coconut aminos
  • 1/3 cup honey
  • 3 tbsp. coconut vinegar
  • 1/2 cup water
  • 1 tbsp. tapioca flour
  • 1 can pineapple slices in juice

Directions

  1. Whisk together the coconut aminos, honey, tomato puree, coconut vinegar, garlic, and pineapple juice.
  2. In a separate bowl mix together the tapioca flour and water, whisk well so that there are no lumps in the liquid.
  3. Add the flour mixture to the sauce and whisk well.
  4. Pour half of the sauce into the bottom of your slow cooker.
  5. Place the pork chops into the sauce and place the pineapple slices on top of the chops.
  6. Pour the remaining sauce over the chops and pineapple slices.
  7. Cook the chops for 3-4 hours on high or 6-8 hours on low setting.
  8. Serve hot over the cauliflower rice and garnish with the chopped coriander.

Nutrition

Per Serving:325 calories; 7 g fat; 31 g carbohydrates; 36 g protein

Equipment

  • Measuring spoons
  • Measuring cups
  • Whisk
  • Mixing bowl
  • Spoon

Nutritional disclaimer

Nutrition information is provided as an estimate based on the ingredients used and available in my area (New Zealand). The nutritional information is here to help you understand the recipe; I use MyFitnessPal to generate my estimates. For more accurate nutritional information, please use a nutritional calculator with the ingredients in your area.


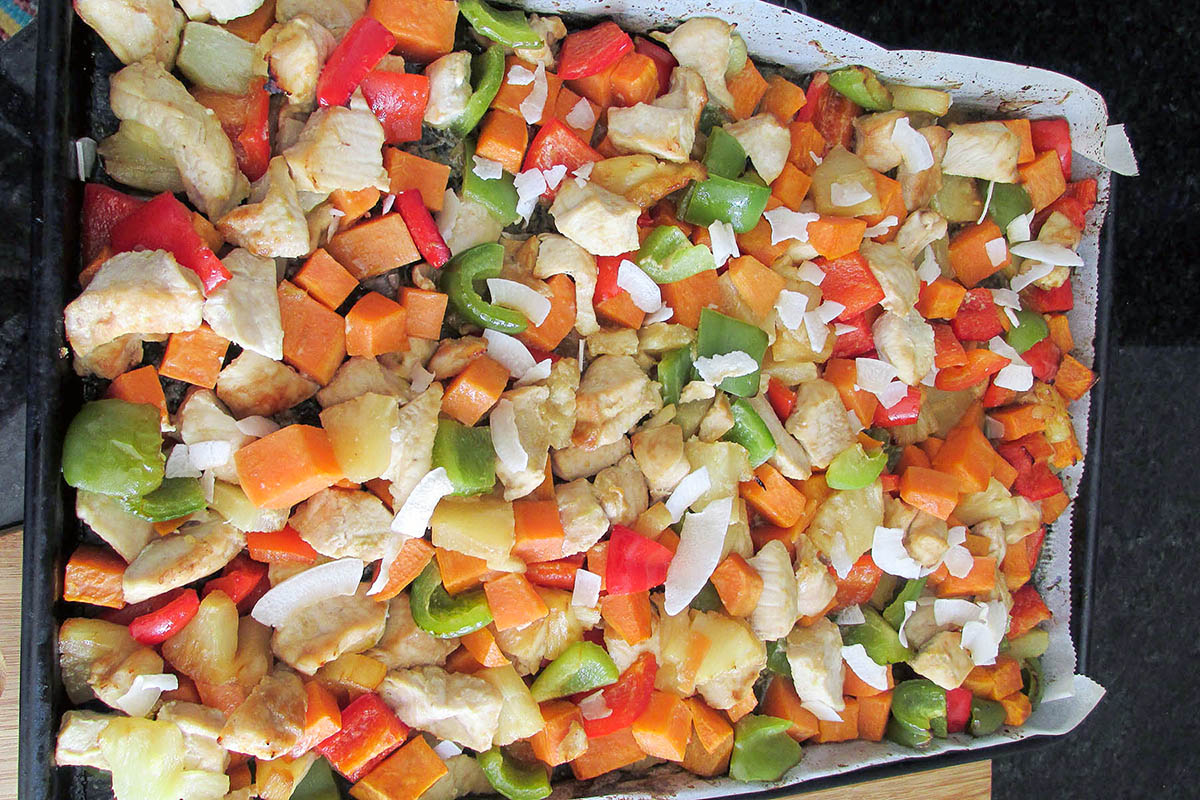
One tray Hawaiian chicken

Simple meals don’t have to be boring  

I have been on a mission to make simple and tasty meals. I aim to create recipes that can be prepared and cooked quickly on a busy weeknight. We all struggle to make healthy and delicious meals while keeping on top of everything else in life. So this recipe is designed to be healthy, delicious and easy to make. You can cook this meal on a single tray in the oven. The preparation takes no more than 20 minutes and is portioned to feed four adults.  

Sweet and sour on one plate

There is something irresistible about chicken and pineapple; they go so well together. Add in the sweetness of some peppers, and I am sold. I’ll be honest this one-tray meal was born from a pantry cleanout. I found a tin of pineapple that was soon to go out of date; in an effort to save on food waste, I thought of a way to make the most of the pineapple slices, other than eating them from the tin, of course.

One tray Hawaiian chicken recipe

Ingredients 

  • 500g chicken breast, cubed
  • 2 cups pineapple chunks
  • 1 red pepper, cubed
  • 1 green pepper, cubed
  • 1 sweet potato, cubed
  • 1 tbsp. Sesame seed oil
  • 1 tbsp. Coconut oil
  • 1 tbsp. Coconut sugar
  • 1 tbsp. Coconut flakes
  • 1 tbsp. Lime juice

Instructions 

Preheat the oven to 200 degrees C/ 400 degrees F.

Line a baking tray with baking paper or a silicone liner.

Mix the chicken, peppers, sweet potatoes and pineapple in a bowl with the oils and sugar.

Spread out on the baking tray and bake for 15 minutes.

Turn the vegetables and chicken and bake for another 10 minutes.

Sprinkle the lime juice and coconut flakes over the tray before serving.

“One

  • Rating: ★★★★
  • Print

“An


Credit: Cath @ easycleaneats 

Ingredients

–500g chicken breast, cubed –2 cups pineapple chunks –1 red pepper, cubed –1 green pepper, cubed –1 sweet potato, cubed –1 tbsp. Sesame seed oil –1 tbsp. Coconut oil –1 tbsp. Coconut sugar –1 tbsp. Coconut flakes –1 tbsp. Lime juice

Directions

  1. Preheat the oven to 200 degrees C/ 400 degrees F.
  2. Line a baking tray with baking paper or a silicone liner.
  3. Mix the chicken, peppers, sweet potatoes and pineapple in a bowl with the oils and sugar.
  4. Spread out on the baking tray and bake for 15 minutes.
  5. Turn the vegetables and chicken and bake for another 10 minutes.
  6. Sprinkle the lime juice and coconut flakes over the tray before serving.

Nutrition

Per Serving: 322 calories; 13g fat; 26g carbohydrates; 26g protein

Equipment

  • Measuring cups
  • Measuring spoons
  • Kitchen scale
  • Mixing bowl
  • Baking sheet
  • Baking paper or silicone liner

Nutritional disclaimer

Nutrition information is provided as an estimate based on the ingredients used and available in my area (New Zealand). The nutritional information is here to help you understand the recipe; I use MyFitnessPal to generate my estimates. For more accurate nutritional information, please use a nutritional calculator with the ingredients in your area.


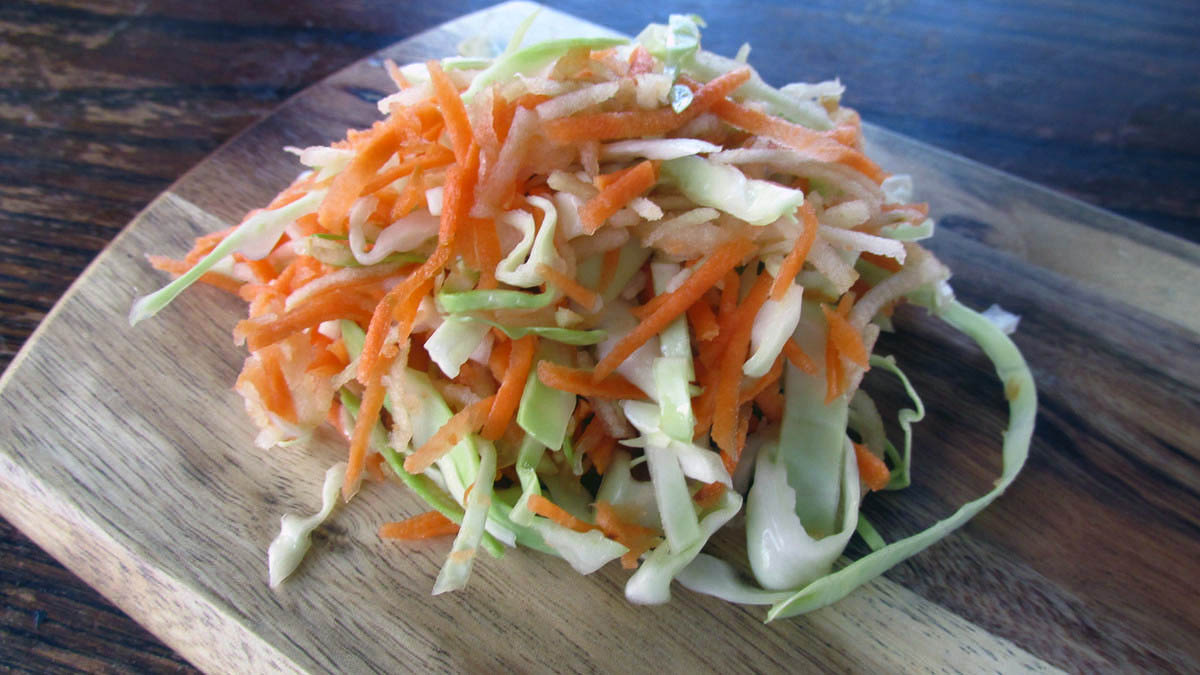
Apple slaw

Make your own

If you are like me and you try to avoid mass-produced processed foods, the best option is to make your own. When you make your own, you get to control which ingredients you use and how much or how sweet you want it to be. Once you have a go at making your own and realise how easy it is, you will never go back to store-bought again. 

Reinvention

Years ago, I was looking for something to go with my garlic pulled pork. I had a great recipe from my former mother-in-law for a classic slaw that I decided to tinker with. This recipe is what I ended up with. The crisp apple goes so well with the crunchy cabbage and tangy honeygar. Like the normal slaw, it is quick and easy to make but packs a lot more punch in the flavour stakes.

If you have the attachments on a food processor, I recommend using the shredding and grating features to make it even faster to make your slaw. 

Apple slaw recipe

Ingredients

  • 1/2 head cabbage, finely sliced
  • 2 carrots, finely grated
  • 2 apples, finely grated or diced
  • 2 tbsp. honey-gar
  • 1 tbsp. lemon juice

Instructions
Mix vegetables together in a bowl.


Add in the honeygar and lemon juice, mix and serve.
This makes enough slaw to go with a 2kg pork shoulder and will easily fill six grown and hungry men.

“Apple

  • Rating: ★★★★★
  • Print

“The


Credit: Cath @ easycleaneats

Ingredients

  • 1/2 head cabbage, finely sliced
  • 2 carrots, finely grated
  • 2 apples, finely grated
  • 2 tbsp. honey-gar
  • 1 tbsp. lemon juice

Directions


Mix vegetables together in a bowl.
Add in the honeygar and lemon juice, mix and serve.

Nutrition

Per Serving: 71 calories; 0.2g fat; 17.5g carbohydrates; 1.8g protein

Equipment

  • Chopping board
  • Knife
  • Grater
  • Vegetable peeler
  • Mixing bowl
  • Fork 

Nutritional disclaimer

Nutrition information is provided as an estimate based on the ingredients used and available in my area (New Zealand). The nutritional information is here to help you understand the recipe; I use MyFitnessPal to generate my estimates. For more accurate nutritional information, please use a nutritional calculator with the ingredients in your area.


Strawberry balsamic sauce

Last of the berries  

I have a few cups of strawberries in the freezer and the last of the berries off the garden. To make the most of the final berries I am making this strawberry balsamic sauce to capture the taste of summer.  
Strawberry balsamic sauce on pancakes.

Sweet and sour  

The flavour combination of sweet and sour has been around for a long time. If you can get the balance right, it is incredible. I think the combination of strawberries which are sweet and juicy with the tart flavour of a good quality balsamic vinegar is perfect.  

Multi-use sauce  

This sauce has many uses and is a great way to keep the taste of summer in the fridge for a few weeks. This sauce is an excellent topping on ice cream, pancakes, a cheesecake, cake, Panna cotta or even added to a smoothie. Alternatively, you can turn this sauce into jellies, if you do be warned the kids won’t want to eat them.  

Strawberry balsamic sauce recipe 

Ingredients 

  • ¼cup balsamic vinegar 
  • 2 cups strawberries 
  • 2tbsp. honey 
  • 1tbsp. fresh lemon juice 
  • 1tsp. vanilla extract 
  • ¼tsp. salt 
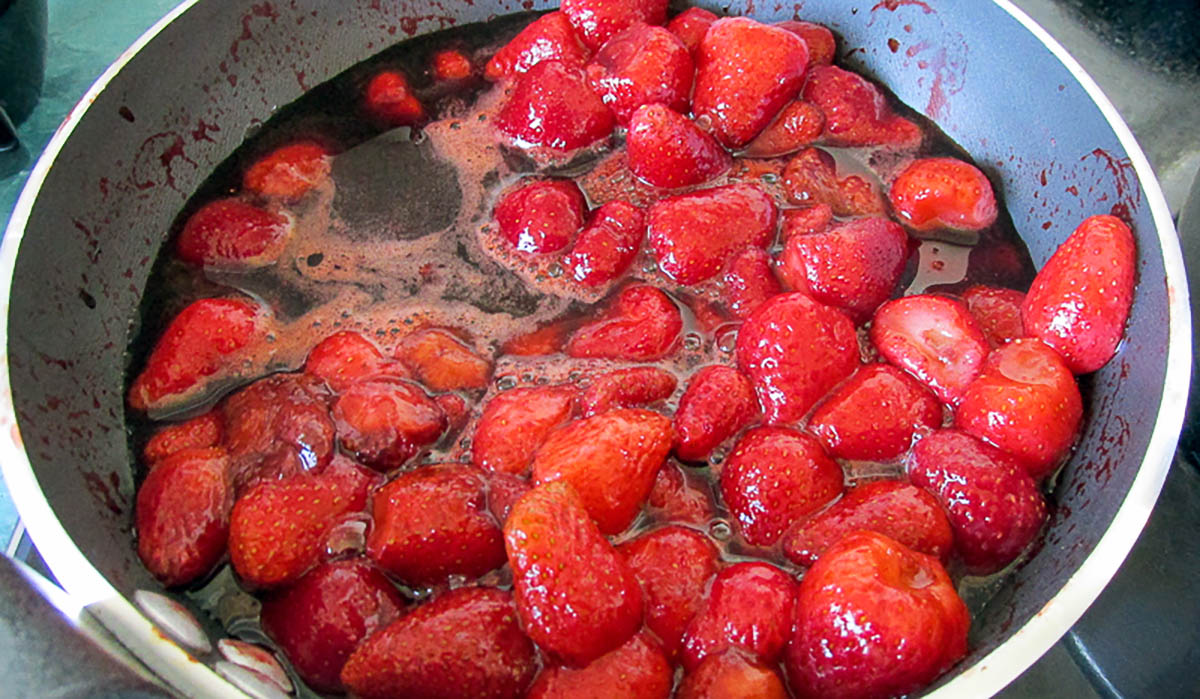
Strawberries cooking down.
Strawberry balsamic sauce on pancakes.

Strawberry balsamic sauce 

  • Servings: 12
  • Rating: ★★★★★
  • Print

Sweet and tangy sauce is just for grown ups


Credit: Cath @ easycleaneats

Ingredients

  • 1/4 cup balsamic vinegar 
  • 2 cups strawberries 
  • 2 tbsp. honey 
  • 1 tbsp. fresh lemon juice 
  • 1 tsp. vanilla extract 
  • 1/4 tsp. salt 

Directions

  1. Instructions 
  2. In a pan heat up the balsamic vinegar over high heat. 
  3. When the vinegar begins to bubble, turn the heat down to medium, let it simmer until it has reduced by half. 
  4. When the vinegar is thick and syrupy in texture, add the strawberries to the pan. 
  5. Then add the honey, lemon, vanilla and salt. 
  6. Simmer the mix over a medium heat until the strawberries break down, anywhere from 20 30 minutes. 
  7. For a smoother sauce blend it then strain. 
  8. Store the sauce in the fridge for up to a week. Store the sauce in the fridge for up to a week. 

Nutrition

Per Serving: 16 calories; 0 g fat; 4 g carbohydrates; 0 g protein

Equipment 

  • Saucepan 
  • Spoon 
  • Measuring spoons
  • Measuring cups
  • Blender
  • Sieve

Nutritional disclaimer

Nutrition information is provided as an estimate based on the ingredients used and available in my area (New Zealand). The nutritional information is here to help you understand the recipe; I use MyFitnessPal to generate my estimates. For more accurate nutritional information, please use a nutritional calculator with the ingredients in your area.