Boiled eggs

Perfect boiled eggs

Don’t you just hate it when you get a hard-boiled egg with that green ring inside; I think it has to be the most off-putting thing.

Getting the perfectly boiled egg is not difficult; the secret is that it is just about timing.

Soft or hard, it is all the same.

From much trial and error, I have found that the method for getting perfectly cooked soft and hard-boiled eggs is the same; the only difference is how long you leave the eggs in the water. To get perfect boiled eggs, here are some of the essential things to remember:

  • Start with cold water
  • Bring the water to the boil
  • Take the pan off the heat to let the eggs cook

Everyone has their own version of the “perfect egg”, but some guide times are a good place to start.

  • White just set and yolk runny 3 minutes
  • White set and yolk slightly runny 4 minutes
  • White set and yolk custard consistency 6 minutes
  • White set and yolk creamy consistency 10 minutes
  • Firm white and firm yolk 15 minutes

For the perfect boiled eggs, every time, here is what you need to do.

Place your eggs in a saucepan and fill the pan with cold water; you want at least 3cm of water over the top of the eggs.

Set the pan over high heat and bring the water to a boil. 

Set the pan over high heat and bring the water to a boil. 

You don’t need to cover the pan at this point.

Wait for the water to come to a boil.

Remove the pan from the heat and put a lid on the pan. 

Wait for the water to come to a boil.

Remove the pan from the heat and put a lid on the pan. 

Start the timer.

Remove the pan from the heat and put a lid on the pan. 

When the timer goes off, remove the eggs from the pan.

Gently tap the egg with a spoon to break the shell; don’t crack the shells if you have 3-minute eggs.

Place the eggs into a bowl of cold water; this will stop the eggs from cooking.

Let them sit in the cold water for at least 1 minute (and stop the green ring).

The eggs will then be ready to eat, peel off the shells, and you are ready to go.

Perfect eggs peeled and ready to eat

If you have any eggs that you will not use straight away, leave them in their shells and store them in the fridge.

Instant Pot / Pressure Cooker option

Equipment

  • Instant Pot
  • Trivet for the Instant Pot
  • Long-handled tongs

Instructions

Pour one cup of water into the bottom of the Instant Pot.

Place the trivet inside the pot.

Place the trivet inside the pot.

Place the eggs on the top of the trivet, leave space between them.

Place the eggs on the top of the trivet, leave space between them.

The eggs will be steamed during cooking.

Add the pressure cooking lid to the Instant Pot and make sure the lock is closed.

Set the timer for your desired consistency on the high pressure setting. 

Set the timer for your desired consistency on the high pressure setting. 
  • Soft-boiled eggs: 3 to 4 minutes at high pressure.
  • Medium-boiled eggs: 5 to 6 minutes at high pressure.
  • Hard-boiled eggs: 8 to 10 minutes at high pressure.

These times work for up to 10 eggs in an 8-quart Instant pot.

When the timer beeps, release the pressure immediately.

As soon as the pressure has dropped, remove the eggs from the pressure cooker using the tongs.

As soon as the pressure has dropped, remove the eggs from the pressure cooker using the tongs.

Place the eggs into an ice bath as quickly as possible.

Place the eggs into an ice bath as quickly as possible.
Perfect eggs peeled and ready to eat
  1. Pour one cup of water into the bottom of the Instant Pot.
  2. Place the trivet inside the pot.
  3. Place the eggs on the top of the trivet, leave space between them.
  4. The eggs will be steamed during cooking.
  5. Add the pressure cooking lid to the Instant Pot and make sure the lock is closed.
  6. Set the timer for your desired consistency on the high pressure setting. 
  7. Soft-boiled eggs: 3 to 4 minutes at high pressure.
  8. Medium-boiled eggs: 5 to 6 minutes at high pressure.
  9. Hard-boiled eggs: 8 to 10 minutes at high pressure.
  10. These times work for up to 10 eggs in an 8-quart Instant pot.
  11. When the timer beeps, release the pressure immediately.
  12. As soon as the pressure has dropped, remove the eggs from the pressure cooker using the tongs.
  13. Place the eggs into an ice bath as quickly as possible.


How to roast peppers

Here is another quick, easy and practical post to add to your kitchen skill toolbox.

Let’s talk about peppers

Today I want to talk about peppers. It might not seem important, but the ability to roast your own peppers is not only a must but also super easy to do. As with most ingredients how you prepare them can enhance the flavour. This holds very true for roasting peppers. The roasting process brings out their sweetness. 

Yes, you can go to the supermarket and buy roasted peppers in a jar, but you miss out on the freshly roasted flavours. Plus you have to figure out what that firming agent is.

Roasted peppers can be used in a range of recipes; you can replace that tomato sauce for a pizza, add them to a salad or blend them down into soup.

Three ways to roast

There are a few methods you could use to roast your peppers

  • Oven roasting
  • Grill
  • Stovetop roasting

Stovetop Roasting 

If you are fortunate enough to have a gas cooker this method is the perfect option for roasting one or two peppers at a time. This method requires a little more effort from you but is still great.

  1. Turn your gas flame on to a low to medium heat.
  2. Place the pepper over the flame; I lean the pepper against the metal for pans. 
  3. When the skin of the pepper starts to colour rotate the pepper so that a new part of the skin is over the flame. Keep turning the pepper when the skin begins to colour.
  4. Keep turning the pepper when the skin begins to colour.
  5. When the pepper is charred take it off the heat, put them in a bowl, cover the bowl with cling film and let the peppers steam for 10 minutes
  6. After 10 minutes take the peppers out of the bowl and use your fingers to peel the skin away
  7. Use your fingers to peel the skin away
  8. Pull the stem out of the pepper and use a knife to scrape out the seeds.

Turn your gas flame on to a low to medium heat.

Place the pepper over the flame; I lean the pepper against the metal for pans. 

When the skin of the pepper starts to colour rotate the pepper so that a new part of the skin is over the flame. Keep turning the pepper when the skin begins to colour.

Keep turning the pepper when the skin begins to colour.

When the pepper is charred take it off the heat, put them in a bowl, cover the bowl with cling film and let the peppers steam for 10 minutes

After 10 minutes take the peppers out of the bowl and use your fingers to peel the skin awayUse your fingers to peel the skin away

Pull the stem out of the pepper and use a knife to scrape out the seeds.

Oven roasting

This is the easiest method because you can roast lots of peppers at the same time and the clean-up is a lot easier. 

  1. Preheat your oven to 200 degrees C/ 400 degrees F
  2. Start with some fresh peppers
  3. Line a baking tray with some aluminium foil
  4. Place the peppers on the baking sheet
  5. Place the peppers on the baking sheet
  6. Roast the peppers for 20 minutes then turn them and roast for another 20 minutes. When the peppers are soft and have collapsed in on themselves, they are ready. 
  7. When the peppers are soft and have collapsed in on themselves, they are ready.
  8. Remove the peppers from the oven and put them in a bowl, cover the bowl with cling film and let the peppers steam for 10 minutes
  9. Remove the peppers from the oven and put them in a bowl,
  10. After 10 minutes take the peppers out of the bowl and use your fingers to peel the skin away
  11. Use your fingers to peel the skin away
  12. Pull the stem out of the pepper and use a knife to scrape out the seeds.

Grilling

This method is similar to the oven roasting method, you can’t roast as many under a grill, but it is still an easy cleanup.

  1. Preheat your oven grill to its highest setting
  2. Line a baking tray with some aluminium foil
  3. Place the peppers on the baking sheet
  4. Grill the peppers for until the skin starts to colour, turn the peppers and continue to grill and turn until all parts of the pepper are coloured. 
  5. When the peppers are soft and have collapsed in on themselves, they are ready. 
  6. Remove the peppers from the oven and put them in a bowl, cover the bowl with cling film and let the peppers steam for 10 minutes
  7. After 10 minutes take the peppers out of the bowl and use your fingers to peel the skin away
  8. Pull the stem out of the pepper and use a knife to scrape out the seeds.

Ready to use

Once the peppers have been skinned and deseeded they are ready to slice and use. If you plan to keep them sort a while you can store the peppers on oil in the fridge, they should last for about a week.

Sliced peppers ready to use

How do you eat yours?

If you roast peppers what do you eat them with, let me know in the comments below


How to steam vegetables

Steaming vegetables is a quick and easy option for getting vegetables onto your plate. 

Steaming your vegetables is a great way of keeping some of the crunch in your vegetables, none of us likes soggy broccoli with dinner. 

Here are some things you may need to know about how you can get perfect steamed vegetables every time. 

One important factor in steaming vegetables is keeping your vegetables the same size, if vegetables are cut to the same size they will cook at the same rate, this means you will be getting consistent texture in the finished vegetables.

Do not overfill the steamer, too much in one batch will mean some vegetables will overcook and others will barely be heated through.

Steam the dense vegetables first; things like carrots take slightly longer to cook than things like broccoli, if you are steaming a mix of vegetables try adding the dense first and tender vegetables towards the end. 

If you do not want mushy vegetables set a timer, steaming is quick so try checking your veggies after 3 minutes; you should be able to tell how much longer they need to cook.

Take the vegetables out just before they are done, this means you will not overcook them and end up with a mushy mess but perfectly cooked vegetables.

Different vegetables take different lengths of time to steam; this is a rough idea of how long some commonly used vegetables take to steam 

  • Spinach and Rocket: 3 minutes 
  • Peas: 3 minutes 
  • Broccoli Florets, Cauliflower Florets, Green Beans: 5 to 7 minutes 
  • Carrots, Potatoes, Turnips, Squash: 8 to 20 minutes 
  • Kale and Collards: 10 minutes 

How to Steam Vegetables 

Ingredients 

  • Any vegetables you want to steam 

Equipment 

  • Chopping board 
  • Chef’s knife 
  • Small saucepan with lid 
  • Steamer basket or colander 

Instructions

Cut the vegetables into uniformly sized pieces. The smaller the pieces the faster they will cook. 

Add 2-3cm of water to the pan and place the steamer basket or colander on top of the pan, the basket or colander should not touch the water. 

Bring the water to a boil, when you can see steam rising from the pot it is ready to use. 

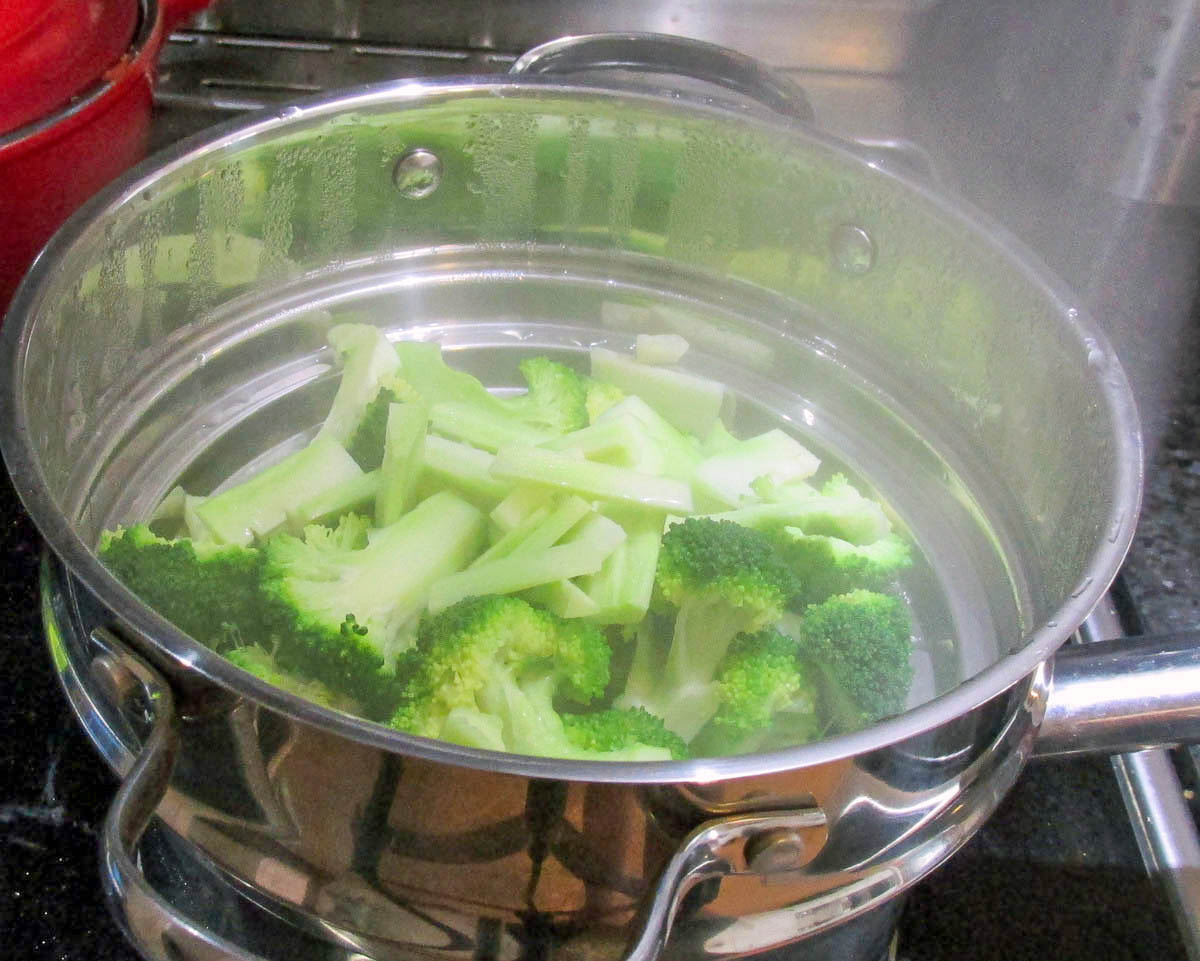
Add your vegetables to the steamer basket or colander and cover with a lid. 

Check on the vegetables after approximately 3 minutes, vegetables will be ready when they are just tender and often look vibrantly and brightly coloured when they are ready. 

Remove the vegetables when they have a little crunch left, they will continue to cook even when they come out of the steamer 

Freshly steamed vegetables are great served with a little olive oil or some butter. 

Instructions

  1. Cut the vegetables into uniformly sized pieces. The smaller the pieces the faster they will cook. 
  2. Add 2-3cm of water to the pan and place the steamer basket or colander on top of the pan, the basket or colander should not touch the water. 
  3. Bring the water to a boil, when you can see steam rising from the pot it is ready to use. 
  4. Add your vegetables to the steamer basket or colander and cover with a lid. 
  5. Check on the vegetables after approximately 3 minutes, vegetables will be ready when they are just tender and often look vibrantly and brightly coloured when they are ready. 
  6. Remove the vegetables when they have a little crunch left, they will continue to cook even when they come out of the steamer 
  7. Freshly steamed vegetables are great served with a little olive oil or some butter. 

Cold brew coffee

Easy cold brew coffee

I’m a bit lover of coffee. That is actually an understatement; coffee keeps me going, I may have more coffee than water in my body. It upsets me to say this, but there are times when it is too hot to drink a hot coffee; fear not as the solution is to have cold brew coffee. 

So what is cold brew coffee? 

I can tell you that cold brew coffee is not an espresso poured over ice or left to go cold. That is bad coffee. It will be bitter and acidic; trust me, you do not want this kind of coffee. What you want is coffee that is made cold and stays that way. 

Cold brew coffee is made using cold water and good quality coffee grounds, it takes a long time to brew, but the flavour profile is fantastic. 

Interested? Keep reading to find out what you need

Equipment 

  • Large jar (2-litre capacity)
  • 2 large coffee filters or two cloths
  • 2 rubber bands
  • 200g Coffee beans/grounds

Instructions 

Take your jar and fill it to 3/4 full with cold water, set it to one side. 

Take the coffee beans and grind them coarsely; get the plunger ground coffee if you are using pre-ground beans. 

Lay out the coffee filters or cloth.

Divide the ground coffee between the two filters or cloths.

Fold the edges of the filter up over the coffee grounds and secure the top with a rubber band. 

You should have two coffee bombs. 

Place the coffee bombs into the jar with the cold water and top up the jar with more cold water. 

Let the coffee brew for at least 14 hours, but if you want a strong brew to leave it for 24 hours. 

When your coffee is at a strength right for you, remove the coffee bombs from the jar. 

Store your coffee in the fridge for up to one week; if you don’t drink it all at once. 

Serve over ice when you need a cold coffee boost. 

  1. Take your jar and fill it to 3/4 full with cold water, set it to one side. 
  2. Take the coffee beans and grind them coarsely; get the plunger ground coffee if you are using pre-ground beans. 
  3. Lay out the coffee filters or cloth.
  4. Divide the ground coffee between the two filters or cloths.
  5. Fold the edges of the filter up over the coffee grounds and secure the top with a rubber band. 
  6. You should have two coffee bombs. 
  7. Place the coffee bombs into the jar with the cold water and top up the jar with more cold water. 
  8. Let the coffee brew for at least 14 hours, but if you want a strong brew to leave it for 24 hours. 
  9. When your coffee is at a strength right for you, remove the coffee bombs from the jar. 
  10. Store your coffee in the fridge for up to one week; if you don’t drink it all at once. 
  11. Serve over ice when you need a cold coffee boost. 

Nutritional disclaimer

Nutrition information is provided as an estimate based on the ingredients used and available in my area (New Zealand). The nutritional information is here to help you understand the recipe; I use MyFitnessPal to generate my estimates. For more accurate nutritional information, please use a nutritional calculator with the ingredients in your area.


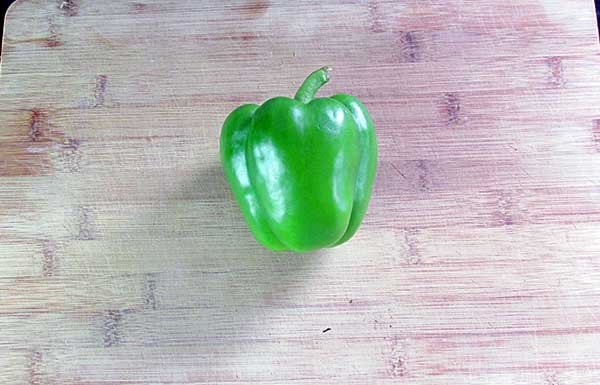
A pepper

Working with peppers

Working with peppers doesn’t have to be difficult, and you don’t need to spend your time scraping seeds from the inside of the peppers.  Here is the best method I have found for preparing peppers 

Equipment  

A pepper
A pepper
  • A chopping board
  • A sharp knife 
  • A pepper 

What to do 

Firstly, cut off the top of the pepper
Firstly, cut off the top of the pepper

Firstly, cut off the top of the pepper, I recommend you slice about 1-2 cm below the stalk of the pepper. 

Put the top of the pepper to one side.
Put the top of the pepper to one side. 

Put the top of the pepper to one side. 

Using your fingers pull out the clump of seeds out of the centre of the pepper.

Using your fingers pull out the clump of seeds out of the centre of the pepper. 

Take the top of the pepper and push out the stem using your thumbs, this way you don’t waste any of the pepper. 

Pepper cut in half
Pepper cut in half

Slice as you wish 

Slice as you wish
Slice as you wish 

Strips, cubes, finely diced, rings