Quick pickle pink onions

Quick pickle pink onions

Small addiction

I think I have a problem. No, I am not talking about my addiction to buying workout clothing or Post-its. I am talking about my addiction to all of the Mexican food. 

It could be the spicy and fresh flavour combinations, the colours, or the avocados. It is most likely all of the above.

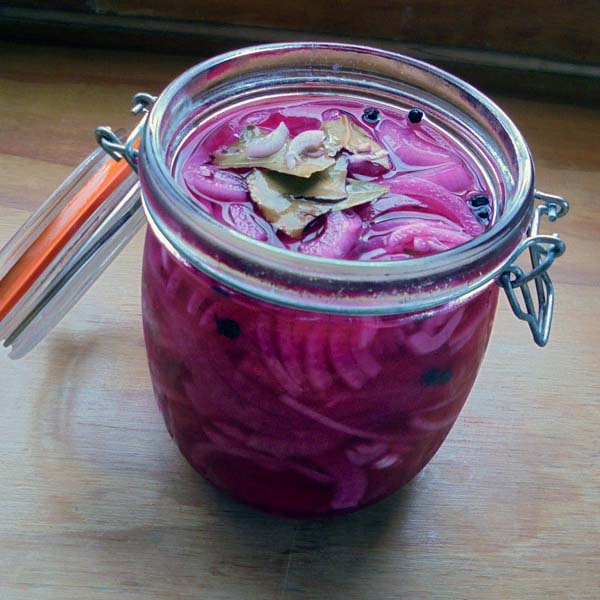
I adore topping my salads (enchiladas and tacos) with pink pickled onions. Full disclosure, I also love adding jalapeños to the top of all those things (and other things, too). I digress. Pink pickled onions are the best; the colour and crunch are amazing. They add a little sharp dimension to a meal. 

As with everything, I search for a way to have the things I want without them being bad for me. 

Traditionally, pickling requires a combination of vinegar, sugar, and water. I try to avoid sugar whenever possible, so I set about making a sugar-free pickle solution without compromising on flavour. 

Bro science warning

I’m going to attempt to explain what the pickle solution does. 

What is pickling? Pickling is the process of soaking foods in solutions to prevent spoilage. 

There are two basic types of pickling.  

Type one pickling uses an acidic solution that kills bacteria, often vinegar. Sugar and spices are often added to a vinegar solution to add more flavour. Some examples of type one pickling are pickled cucumbers and onions. 

Type two uses salt or brine (saltwater) to encourage fermentation, which means that good bacteria grow and beat out the harmful bacteria that make food spoil. Some examples of type two pickling are sauerkraut and kimchi. 

Bro science completed

So, the challenge was to find a replacement for the sugar usually added to a pickling solution without having a negative impact. I found a way to preserve the onions like a traditional pickle solution, but I replaced the sugar with something else. 

Test 1 coconut sugar

coconut sugar

The first attempt used three tablespoons of coconut sugar as a replacement. I used apple cider vinegar, which has its own slight sweetness while still acting as a preservative.  

The result was onions that were far too sweet for me, the mixture worked well, and the pickles were good to eat for four weeks, but I didn’t enjoy the flavour.   

Test 2 maple syrup

maple syrup
maple syrup

For this test, I decided to use two tablespoons of maple syrup to see if it would give the right flavour. I stuck with the apple cider vinegar, as I do like the flavour. 

The result, while this batch was much better than the coconut sugar version, I still didn’t really like it.

Test 3 honey

Honey
Honey

For this test, I used two tablespoons of honey to see if it would give the right flavour I was looking for.  

The result is that we have a winner! The honey gave the onions the perfect amount of sweetness without changing the vinegar’s flavours. The bonus was that honey also gave me onions that were good to eat for about 6 weeks.

Quick pickle pink onions

Quick pickle pink onions ingredients

Ingredients

  • 1 red onion, thinly sliced
  • 3/4 cup apple cider vinegar
  • 1 tsp. Salt
  • 2 tbsp. Honey
  • 1 bay leaf
  • 6 peppercorns
Quick pickle pink onions

Instructions 

In a pan, combine the vinegar, salt, honey, bay leaf and peppercorns over a medium heat. 

Remove the pan from the heat when the honey and salt have dissolved. 

Add the sliced onions to the jar. 

Pour the mix into a sterilised jar. 

Seal the jar and put it in the fridge for at least one hour before using. 

The onions will keep in the fridge for four weeks. 

Quick pickle pink onions

Quick pickle pink onions

  • Servings: 10
  • Rating: ★★★★★
  • Print

I topping my salads (enchiladas and tacos) with pink pickled onions. Pink pickled onions are the best, the colour and crunch are amazing. They add a little sharp dimension to a meal. As with all things, I search for a way to have the things I want without them being bad for me.


Credit: Cath @ easycleaneats

Ingredients

  • 1 red onion, thinly sliced
  • 3/4 cup apple cider vinegar
  • 1 tsp. Salt
  • 2 tbsp. Honey
  • 1 bay leaf
  • 6 peppercorns

Directions

  1. In a pan combine the vinegar, salt, honey bay leaf and peppercorns over a medium heat.
  2. When the honey and salt has dissolved remove the pan from the heat.
  3. Pour the mix into a sterilised jar.
  4. Add the sliced onions to the jar.
  5. Seal the jar and put in the fridge for at least one hour before using.
  6. The onions will keep in the fridge for four weeks.

Nutrition

Per Serving: 21 calories; 0 g fat; 6 g carbohydrates; 0 g protein.

Equipment 

  • Saucepan 
  • Wooden spoon 
  • Measuring  cup 
  • Measuring spoons
  • Mason jar/ preserve jar 

Nutritional disclaimer

Nutrition information is provided as an estimate based on the ingredients used and available in my area (New Zealand). The nutritional information is here to help you understand the recipe; I use MyFitnessPal to generate my estimates. For more accurate nutritional information, please use a nutritional calculator with the ingredients in your area.

No rice sushi

Sushi is back on the menu 

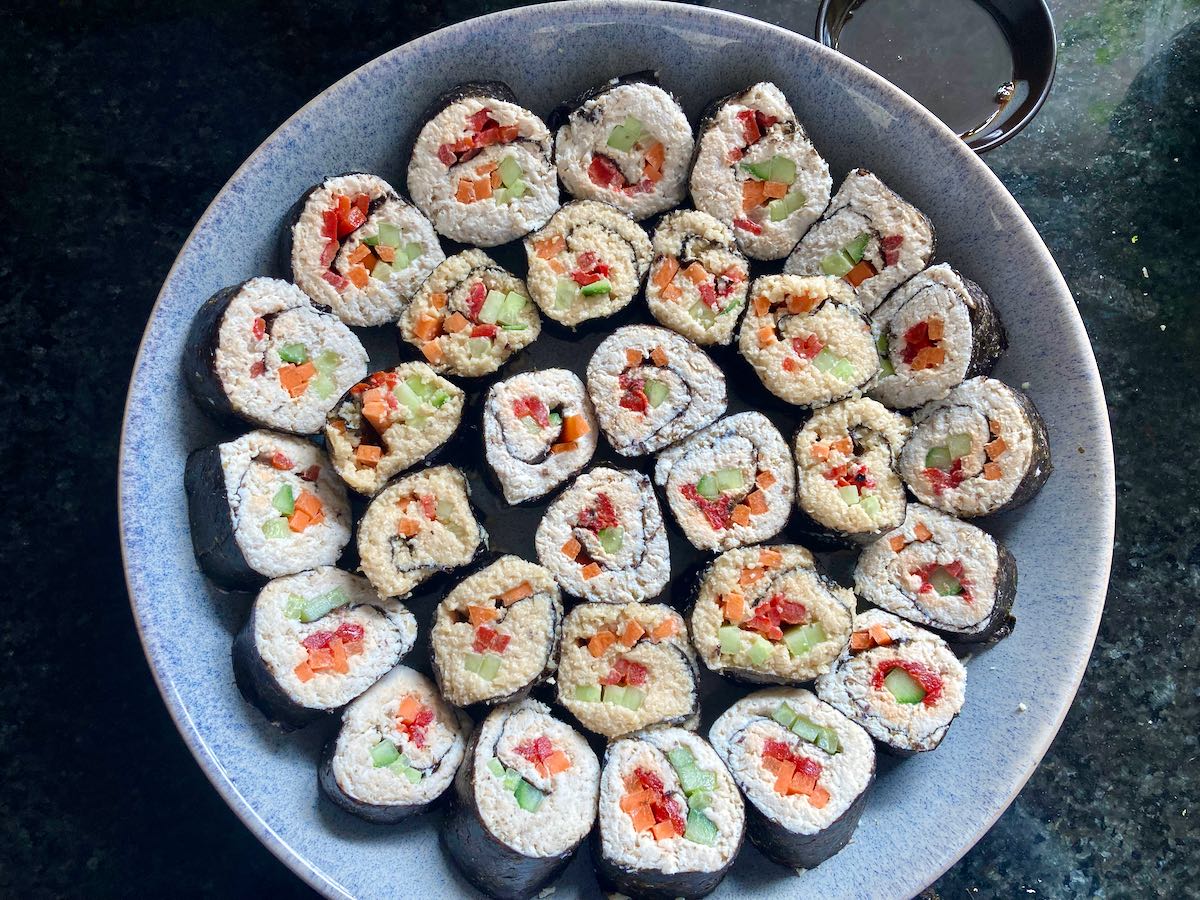
Sushi is one of the most popular options for lunch, and the sushi roll is, without doubt, one of the most recognisable forms. One of the best things about sushi is its versatility; you can have any filling you want and even have your sushi without rice. That is right, no rice sushi.

Swap the carbs for protein 

The best approach I have found when making no-rice sushi is swapping the rice for protein. For this recipe, I have swapped out the rice for cooked chicken, but it can also work with tuna, salmon, pork, or eggs. All you need to do is make sure the protein is mixed with something like mayo that makes it sticky enough to hold the sushi roll together. I love to add some seasoning to the protein to help add some flavour and a little kick.

Variety is the spice of life

The beauty of this recipe is that you can add anything you want (within reason) to the sushi as a filling. I love to mix things up to have a mix of vegetables that are crisp, crunchy and soft, so each bite is interesting to eat and packed with flavour.

No rice sushi

Ingredients

  • 5 nori sheets 
  • 4 cups cooked chicken, shredded
  • 2 tsp. Chicken seasoning
  • 3/4 cup easy mayo
  • A mix of vegetables cut into matchsticks 
    • 1 Carrot
    • 1 Celery stick
    • 1 Pepper
    • 1 Cucumber

Instructions

Mix the chicken, chicken seasoning and mayo in a bowl to form a thick paste. 

Take the sushi mat and place it on a clean flat surface.

Take a sheet of nori, and put the nori sheet smooth side down.

Take the filling of choice and spread it out on the nori sheet.

The mixture should be spread evenly, but not to the edge of the sheet at one end.

Take the additional fillings (vegetables, cheese, etc.) and lay them out on top of the spread-out filling.

Lay out the fillings in lines starting near the edge of the nori sheet. 

Each filling should have its own line with a space between the next line.

Have the sushi mat in front of you with the edge without filling furthest away from you.

Lift the edge of the mat up and use the mat to roll the edge of the nori over the first line of filling.

Make sure that the fillings are sticking together.

Tuck the nori into the roll and use the mat to continue rolling and tucking the nori; remove the mat from the roll as you go.

Move slowly so that the sushi roll is even.

Roll the sushi roll backwards and forward to seal it and keep it tight for cutting.

Let the sushi roll sit for a minute to make cutting easier.

Cut the roll into segments with a sharp, wet knife.

Serve and eat immediately.

No rice sushi

  • Servings: 28“
  • Rating: ★★★★★
  • Print

“One


Credit: Cath @ easycleaneats

Ingredients

  • 5 nori sheets
  • 4 cups cooked chicken, shredded
  • 2 tsp. Chicken seasoning
  • 3/4 cup easy mayo
  • Mix of vegetables cut into matchsticks
  • 1 Carrot
  • 1 Celery stick
  • 1 Pepper
  • 1 Cucumber

Directions

  1. Mix the chicken, chicken seasoning and mayo in a bowl to form a thick paste.
  2. Take the sushi mat and place it on a clean flat surface.
  3. Take a sheet of nori, and put the nori sheet smooth side down.
  4. Take the filling of choice and spread it out on the nori sheet.
  5. The mixture should be spread evenly, but not to the edge of the sheet at one end.
  6. Take the additional fillings (vegetables, cheese, etc.) and lay them out on top of the spread-out filling.
  7. Lay out the fillings in lines starting near the edge of the nori sheet.
  8. Each filling should have its own line with a space between the next line.
  9. Have the sushi mat in front of you with the edge without filling furthest away from you.
  10. 10.Lift the edge of the mat up and use the mat to roll the edge of the nori over the first line of filling.
  11. Make sure that the fillings are sticking together.
  12. Tuck the nori into the roll and use the mat to continue rolling and tucking the nori; remove the mat from the roll as you go.
  13. Move slowly so that the sushi roll is even.
  14. Roll the sushi roll backwards and forward to seal it and keep it tight for cutting.
  15. Let the sushi roll sit for a minute to make cutting easier.
  16. Cut the roll into segments with a sharp, wet knife.
  17. Serve and eat immediately.

Nutrition

Per Serving: 85 calories; 5g fat; 3g carbohydrates; 7g protein

Equipment

  • Sushi rolling mat
  • Spatula
  • Spoon  
  • Mixing bowl

Nutritional disclaimer

Nutrition information is provided as an estimate based on the ingredients used and available in my area (New Zealand). The nutritional information is here to help you understand the recipe; I use MyFitnessPal to generate my estimates. For more accurate nutritional information, please use a nutritional calculator with the ingredients in your area.


Taco style salad

Making friends with salad

I love salad, it is sad, but true. For a long time, if I suggested salad for dinner, it was met with grumbles, groans, and complaints. Nowadays, I have the freedom to eat salad as often as I want, and I’ll be honest, I eat it a lot. In my book, salad is something to get excited about; it is an amazingly fresh meal full of endless possibilities, not limp lettuce, sad dressing and soggy tomatoes. I love to create salads that taste amazing and look great.

Taco style salad

More spicy flavours

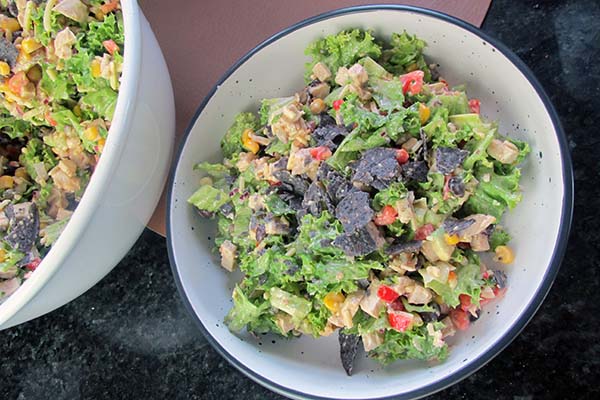
While I find it hard to say no to tacos, I sometimes want the flavour of tacos without so many carbs. This salad is my compromise; it is a taco in a bowl. This salad delivers on the flavour of tacos, but with a tasty and creamy dressing that brings everything together. It is easy to make, and the recipe is enough to feed a hungry family and leave you with some leftovers. If you don’t need quite so much food, it is easy to half the ingredients to make 5 servings rather than 10.

Taco style salad

Taco style salad ingredients

Ingredients 

  • 6 cups cos lettuce, chopped
  • 6 cups chicken, cooked and cubed 
  • 1 can corn
  • 1 can black beans
  • 2 tomatoes, diced
  • 1 avocado, diced
  • 1/2 red onion, diced
  • 3/4 cup cheddar cheese, grated
  • 1 cup tortilla chips, crushed 
  • 1 handful fresh coriander, chopped
  • 1/2 cup plain yogurt
  • 3 tbsp. avocado oil 
  • 2 tsp. honey
  • 2 tsp. apple cider vinegar
  • 1 tsp. garlic, minced 
  • 1 lime, juiced
  • 1/2 jalapeño, finely diced
  • 2 tsp. taco seasoning 

Instructions  

Mix the lettuce, corn, beans, tomatoes, avocado, onion and cheese in a large bowl.

Take a large bowl.
Add the lettuce and chicken to the bowl.
Add the corn and beans.
Add the tomatoes and avocado.
Add the red onion.
Mix well.

Set the bowl to one side.

In another bowl, whisk together the yoghurt, oil, honey, apple cider vinegar, garlic, lime juice, jalapeño, and taco seasoning.

Take the ingredients for the dressing
Add the ingredients to a bowl.
Add the jalapenos and whisk.

When you are ready to serve the salad, add the dressing to the bowl with the salad.

Add the dressing.

Toss the salad to coat everything with the dressing. 

Mix well.

Top the salad with the crushed chips and coriander to serve.

Add the crushed corn chips
Serve

Taco style salad

  • Servings: 10
  • Rating: ★★★★★
  • Print

Sometimes want the flavour of tacos without so many carbs. This salad is my compromise; it is a taco in a bowl.


Credit: Cath @ easycleaneats

Ingredients

  • 6 cups cos lettuce, chopped
  • 6 cups chicken, cooked and cubed
  • 1 can corn
  • 1 can black beans
  • 2 tomatoes, diced
  • 1 avocado, diced
  • 1/2 red onion, diced
  • 3/4 cup cheddar cheese, grated
  • 1 cup tortilla chips, crushed
  • 1 handful fresh coriander, chopped
  • 1/2 cup plain yogurt
  • 3 tbsp. avocado oil
  • 2 tsp. honey
  • 2 tsp. apple cider vinegar
  • 1 tsp. garlic, minced
  • 1 lime, juiced
  • 1/2 jalapeño, finely diced
  • 2 tsp. taco seasoning

Directions

  1. Mix the lettuce, corn, beans, tomatoes, avocado, onion and cheese in a large bowl.
  2. Set the bowl to one side.
  3. In another bowl, whisk together the yoghurt, oil, honey, apple cider vinegar, garlic, lime juice, jalapeño, and taco seasoning.
  4. When you are ready to serve the salad, add the dressing to the bowl with the salad.
  5. Toss the salad to coat everything with the dressing.
  6. Top the salad with the crushed chips and coriander to serve.

Nutrition

Per Serving: 287 calories; 12 g fat; 18 g carbohydrates; 26 g protein.

Equipment

  • Chopping board
  • Knife
  • Large mixing bowl
  • Small mixing bowl
  • Whisk
  • Spoon
  • Measuring cups
  • Measuring spoons
  • Scales

Nutritional disclaimer

Nutrition information is provided as an estimate based on the ingredients used and available in my area (New Zealand). The nutritional information is here to help you understand the recipe; I use MyFitnessPal to generate my estimates. For more accurate nutritional information, please use a nutritional calculator with the ingredients in your area.


Slow-roast leg of lamb

A treat for me

Last weekend, I gave myself a treat for Easter and made myself a kick-ass roast dinner. I’m not a lover of chocolate, but I wanted something nice to enjoy over the long weekend. After braving the supermarket, seriously, I never get over the mad panic when the supermarket is closed for one day. I managed to get everything I needed for slow-roasted leg of lamb with all the fixings and didn’t lose my mind in the process.

Fall apart perfect meat

For me, the perfectly roasted leg of lamb falls off the bone and melts in your mouth. In my experience, the best way to get meat that falls apart perfectly is to cook it low and slow. This recipe is a foolproof way to cook a leg of lamb perfectly, and it takes minimal effort, which is also perfect. The bonus of cooking lamb this way is that you also have everything you need to make a rich gravy to go with your meat.

Cook once, eat twice

In my sad little life, if I can cook once and get a couple of meals out of it, I’m winning. This recipe is a great option for cooking once and eating many times.

Slow roast leg of lamb recipe

Ingredients

  • 1.5-2kg Leg of Lamb
  • 1 carrot, roughly chopped
  • 1 onion, roughly chopped
  • 2 celery stalks, roughly chopped
  • 1 sweet potato, roughly chopped
  • 2 garlic cloves minced
  • 3 tsp. rosemary
  • 500ml water

Instructions

Preheat the oven to 200 degrees C/ 400 degrees F. 

Take a large roasting tin and lightly grease it.

Lay the chopped vegetables out at the bottom of the tray.

Pour the water into the roasting tin.

Place the leg of lamb on top of the vegetables.

Rub the lamb with the garlic and rosemary.

Cover the tin with baking paper and then foil, ensuring the roasting tin is completely covered to keep the moisture in.

Put the roasting tin into the preheated oven.

Cook for 30 minutes at 200 degrees C/ 400 degrees F.

Reduce the heat to 120 degrees C/ 250 degrees F and cook for 6 to 8 hours, depending on the weight of the lamb.

Check the meat after 6 to 8 hours. If the lamb is falling off the bone, take it out and let it rest. 

Remove the vegetables from the tray and use the remaining liquid to make gravy.

“Slow

  • Rating: ★★★★★
  • Print


Credit: Cath @ easycleaneats

Ingredients

  • 1.5-2kg Leg of Lamb
  • 1 carrot, roughly chopped
  • 1 onion, roughly chopped
  • 2 celery stalks, roughly chopped
  • 1 sweet potato, roughly chopped
  • 2 garlic cloves minced
  • 3 tsp. rosemary
  • 500ml water

Directions

  1. Preheat the oven to 200 degrees C/ 400 degrees F.
  2. Take a large roasting tin and lightly grease it.
  3. Lay the chopped vegetables out at the bottom of the tray.
  4. Pour the water into the roasting tin.
  5. Place the leg of lamb on top of the vegetables.
  6. Rub the lamb with the garlic and rosemary.
  7. Cover the roasting tin with baking paper and then foil, ensuring it is completely covered to keep the moisture in.
  8. Put the roasting tin into the preheated oven.
  9. Cook for 30 minutes at 200 degrees C/ 400 degrees F.
  10. Reduce the heat to 120 degrees C/ 250 degrees F and cook for 6 to 8 hours, depending on the weight of the lamb.
  11. Check the meat after 6 to 8 hours. If the lamb is falling off the bone, take it out and let it rest.
  12. Remove the vegetables from the tray and use the remaining liquid to make gravy.

Nutrition

Per Serving: 181 calories; 11.8g fat; 5.8g carbohydrates; 15.2g protein

Equipment

  • Measuring spoons
  • Measuring jug
  • Knife
  • Chopping board
  • Roasting tin
  • Baking paper
  • Aluminium foil

Nutritional disclaimer

Nutrition information is provided as an estimate based on the ingredients used and available in my area (New Zealand). The nutritional information is here to help you understand the recipe; I use MyFitnessPal to generate my estimates. For more accurate nutritional information, please use a nutritional calculator with the ingredients in your area.


Fried not rice

Master the basics

Eating clean gets a lot easier once you have mastered a few essential recipes. This recipe is basic- not like basic unicorn basic, but more like beard and flannel basic. Back to the point (which isn’t Unstable unicorns), having basic skills and recipes in your arsenal means you will never be left with only UberEats as your weeknight options. Once you master this recipe, the possibilities are endless.

Make the most of leftovers

This is a great way to use up leftovers (if you ever have any) or a quick and easy dinner that will fill up the family. You can add pretty much anything you want, and it will still taste awesome.

Fried rice recipe

Ingredients

  • 1 head cauliflower, finely grated
  • 1/2 onion, minced
  • 2 garlic cloves, finely minced
  • 2 spring onions
  • 1 cup vegetables
  • 2 eggs
  • 1 chicken breast
  • 1 cup prawns
  • Handful of ham
  • 1 tbsp. coconut oil
  • 1/4 cup coconut aminos

Instructions

In a large frying pan, heat coconut oil over a medium heat

Add the chicken and cook for about 3 – 5 minutes until it is cooked most of the way.

Keep the meat moving around the pan.

Add the garlic and cook for 1 minute.

Add the vegetables and keep everything moving.

Add the ham and make sure it is well mixed in.

Push the meat and vegetables to the side of the wok and pour the egg into the space you have made. 

Use chopsticks or a spatula to keep the egg moving and cooking.

Mix the egg into the veggies and meat.

Add the cauliflower rice and the prawns to the wok and mix well. 

Keep everything moving in the wok and cook for 3 minutes.

Add the coconut aminos to the wok and mix well to ensure everything gets covered.

Serve with a topping of sliced spring onions and some sesame seeds.

Fried non-rice

  • Servings: 4
  • Rating: ★★★★★
  • Print

Your healthy alternative to fried rice. Made with cauliflower rice for a low carb option for this take away favourite.


Credit: Cath @ easycleaneats

Ingredients

  • 1 head cauliflower, finely grated
  • 1/2 onion, minced
  • 2 garlic cloves, finely minced
  • 2 spring onions, sliced
  • 1 cup vegetables
  • 2 eggs
  • 1 chicken breast
  • 1 cup prawns, cooked
  • Handful of ham
  • 1 tbsp. coconut oil
  • 1/4 cup coconut aminos

Directions

  1. In a large frying pan heat coconut oil over a medium heat
  2. Add the chicken and cook for about 3 – 5 minutes until it is cooked most of the way.
  3. Keep the meat moving around the pan.
  4. Add the garlic and cook for 1 minute.
  5. Add the vegetables and keep everything moving.
  6. Add the ham and make sure it is well mixed in.
  7. Push the meat and vegetables to the side of the wok and pour the egg into the space you have made.
  8. Use chopsticks or a spatula to keep the egg moving and cooking.
  9. Mix the egg into the veggies and meat.
  10. Add the cauliflower rice and the prawns to the wok and mix well.
  11. Keep everything moving in the wok and cook for 3 minutes.
  12. Add the coconut aminos to the wok and mix well to ensure everything gets covered.
  13. Serve with a topping of sliced spring onions and some sesame seeds.

Nutrition

Per Serving: 231 calories; 7 g fat; 12 g carbohydrates; 26 g protein

Equipment

  • Measuring cup
  • Grater
  • Chopping board
  • Knife
  • Frying pan
  • Spatula 
  • Small bowl
  • Whisk  

Nutritional disclaimer

Nutrition information is provided as an estimate based on the ingredients used and available in my area (New Zealand). The nutritional information is here to help you understand the recipe; I use MyFitnessPal to generate my estimates. For more accurate nutritional information, please use a nutritional calculator with the ingredients in your area.


Chicken chilli wraps

Revisiting favourites

I’ve been revisiting some of my old-school recipes and favourites, which were staples when I started eating clean. I first posted this recipe in 2017; at that time, my stepkids were fussy, vegetables had to be hidden and disguised, and there was no potential for intense flavours or spice. 

Times (thankfully) changed, and the kids grew up (like man-sized grown) and learned to enjoy a wide range of foods. Things like vegetables no longer meant faces being pulled, spice and chilli were consumed without complaint, and new ingredients were tried without tantrums.

As the kids grew, my recipes changed organically to meet their palates and preferences. Because of that, I’ve updated this recipe, but fear not; the original recipe, suitable for kids with less developed palates, is at the bottom of the post.

Quick, easy and spicy

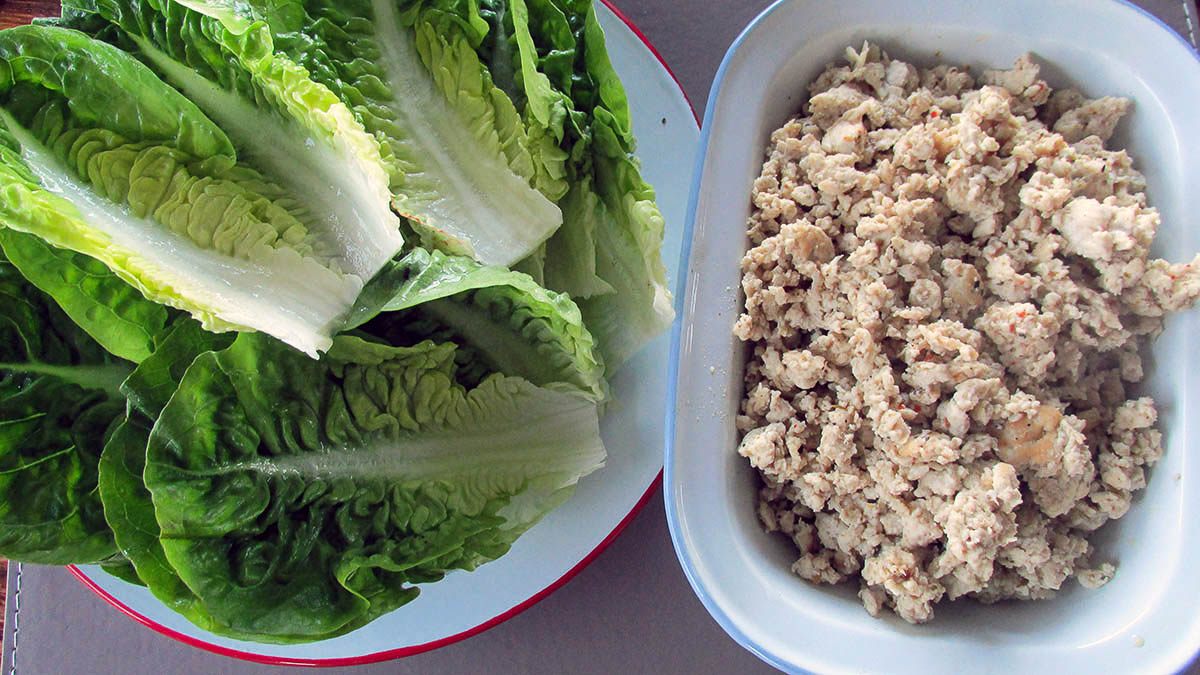
It has been another whirlwind week packed with workouts, life admin and another work trip to Wellington. No matter how much I try to keep myself organised before a work trip, I always end up on the back foot. My fridge was looking empty, and I had no energy to go shopping, so this recipe sprung to mind as it’s a great example of making something out of nothing. A well-stocked pantry means I always have something to make a sauce or spicy mix to turn essential ingredients into a tasty meal. These wraps were easy to make and were the perfect end-of-week option. If you don’t like your food with a lot of spice, reduce the amount of red pepper flakes. 

Chicken chilli wraps recipe

Ingredients

  • 1 Cos Lettuce
  • 500g chicken mince
  • 2 tsp. red pepper flakes
  • 2 tsp. minced garlic
  • 1/2 tsp. salt
  • 1 tbsp. coconut aminos
  • 2 tbsp. water
  • 2 tbsp. sweet chilli sauce

Instructions

In a bowl, mix the water, coconut aminos, salt, garlic, and red pepper flakes.

Cut the lettuce at the stalk and wash the leaves.

Dry the lettuce leaves and store them in the fridge with a damp towel over the top.

Heat some oil in a large frying pan and add the minced chicken to the pan.

Pour the amino and chilli mixture over the chicken while it is cooking.

When the chicken is cooked, stir in the sweet chilli sauce

Plate up the cos leaves, spoon the cooked chicken into the leaves and serve.

Chicken chilli wraps

  • Rating: ★★★★★
  • Print

“These


Credit: Cath @ easycleaneats

Ingredients

  • 1 Cos Lettuce
  • 500g chicken mince
  • 2 tsp. red pepper flakes
  • 2 tsp. minced garlic
  • 1/2 tsp. salt
  • 1 tbsp. coconut aminos
  • 2 tbsp. water
  • 2 tbsp. sweet chilli sauce

Directions

  1. In a bowl, mix the water, coconut aminos, salt, garlic, and red pepper flakes.
  2. Cut the lettuce at the stalk and wash the leaves.
  3. Dry the lettuce leaves and store them in the fridge with a damp towel over the top.
  4. Heat some oil in a large frying pan and add the minced chicken to the pan.
  5. Pour the amino and chilli mixture over the chicken while it is cooking.
  6. When the chicken is cooked, stir in the sweet chilli sauce
  7. Plate up the cos leaves, spoon the cooked chicken into the leaves and serve.

Nutrition

Per Serving:203 calories; 9.5g fat; 4.7g carbohydrates; 15.9g protein

Equipment

  • Mixing bowl
  • Whisk 
  • Kitchen towel
  • Knife
  • Chopping board
  • Frying pan

Nutritional disclaimer

Nutrition information is provided as an estimate based on the ingredients used and available in my area (New Zealand). It is here to help you understand the recipe. I generate my estimates using MyFitnessPal. For more accurate nutritional information, please use a nutritional calculator with the ingredients in your area.


Crunch salad

Fresh and crunchy

Can you believe it is 2025? I have no idea where the time is going. The last few weeks have been crazy busy at work, and non-work life has been a blur. This week I’ve had my first holiday in 3 years if you can call a 20km walk across the Tongariro Crossing as a holiday. I do; it was the first time I had been out of Auckland for over a day. 

After my mini break, I had the joy of a work trip to Wellington before the end of the week, which meant I wasn’t overly enthused about spending hours in the kitchen cooking. I decided to use an easy recipe born of my laziness and a fridge raid at the end of the long Auckland Covid lockdown a few years ago. 

Fridge raid

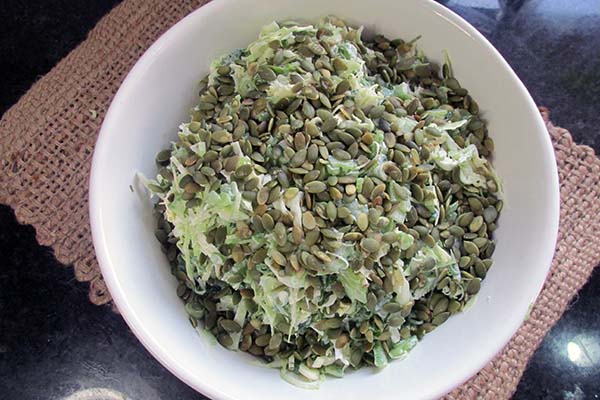
Inspirational always strikes me when I can’t be bothered to do a supermarket run but have a collection of random foods in the fridge. This is another of those kinds of recipes. A quick raid of the fridge and pantry presented the ingredients for a new type of crunchy salad to go with the chicken skewers that originally were cooking happily on the BBQ but, in this case, were ready and waiting in the fridge. 

Crunch salad recipe

Ingredients 

  • 1/4 cup pumpkin seeds, toasted 
  • 1 head green cabbage, shredded 
  • 4 celery stalks, sliced 
  • 2 handfuls rocket 
  • 1/2 cup spring onions, sliced 
  • 1/4 cup easy mayo 

Instructions

In a large bowl mix together all of the ingredients and serve.

In a large bowl, mix together all ingredients. 

“Crunch

  • Servings: “10
  • Rating: ★★★★
  • Print

“This


Credit: Cath @ easycleaneats

Ingredients

  • 1/4 cup pumpkin seeds, toasted
  • 1 head green cabbage, shredded
  • 4 celery stalks, sliced
  • 2 handfuls rocket
  • 1/2 cup spring onions, sliced
  • 1/4 cup Mayo

Directions

  1. In a large bowl, mix together all ingredients.

Nutrition

Per Serving: 123 calories; 9 g fat; 10 g carbohydrates; 6 g protein

Equipment

  • Knife
  • Chopping board
  • Measuring cups
  • Mixing bowl
  • Tongs

Nutritional disclaimer

Nutrition information is provided as an estimate based on the ingredients used and available in my area (New Zealand). The nutritional information is here to help you understand the recipe; I use MyFitnessPal to generate my estimates. For more accurate nutritional information, please use a nutritional calculator with the ingredients in your area.


Sesame beef salad

Making friends with salad

I do love a good salad. Being able to put together something fresh and crunchy with a nice piece of meat might be my ideal meal. For me, salads aren’t sad bits of iceberg lettuce with a bit of tomato. They are a brilliant combination of flavours and textures. 

I’m going on an adventure!!!

This week, I’m channelling my inner Bilbo, and I’m going on an adventure. Maybe I’m channelling my inner Frodo as, technically, I will be going close to Mount Doom (really known as Ngauruhoe). I’m off to do the Tongariro Crossing with a friend, which takes you past Ngauruhoe, which was where Sam and Frodo climbed to throw the one ring into the fires of the mountain. Yes, I know my geek is showing again, and I am completely fine with it. As much as I would like to climb Ngauruhoe, I would rather respect the hapū. I’ll be sticking to the Tongariro Crossing and taking as many pictures as possible of Mount Doom along the way.

With a long drive ahead and limited healthy options on the road, I’ll be taking my dinner with me to fuel up during our road trip pit stop. With summer in full swing and fresh vegetables in abundance, I’ll be packing this simple and tasty salad to keep me going on what promises to be a typical long weekend drive.

Always looking for an easy option

Years ago, this salad was born of my stepkids being willing to eat steak and me being unwilling to make another hot meal. In summertime in Auckland, I like to fire up the BBQ to do as much cooking and meal prep as possible on the deck. The first time I made this recipe, I had two perfectly cooked steaks from a BBQ sitting in the fridge, waiting to be made into a tasty meal. Within 10 minutes, I had a meaty salad and a set of happy campers. I warmed up the steak before I dropped dinner on the table; the instructions below tell you what you do to make this salad from scratch.

Sesame beef salad recipe

Ingredients 

  • 2 sirloin steak, sliced
  • 1 cos lettuce, sliced
  • 1/2 cup sesame seeds
  • 1 cucumber, seeded and sliced
  • 1 tbsp. oil
  • 1 tbsp. sesame seed oil

Instructions 

In a bowl, mix together the lettuce, sliced cucumber and sesame seed oil.

In a frying pan, heat the oil over a medium heat and fry off the steak slices, the meat should be browned on the outside, 

Cook the meat in batches.

The beef should be seared on the outside and pink on the inside.

Set the beef aside to cool.

Add the beef to the salad with the sesame seed oil, toss and serve.

Sesame beef salad

  • Rating: ★★★★★
  • Print

“A


Credit: Cath @ easycleaneats

Ingredients

  • 2 sirloin steak, sliced
  • 1 cos lettuce, sliced
  • 1/2 cup sesame seeds
  • 1 cucumber, seeded and sliced
  • 1 tbsp. oil
  • 1 tbsp. sesame seed oil

Directions

  1. In a bowl, mix together the lettuce, cucumber and sesame seed oil.
  2. In a frying pan, heat the oil over a medium heat and fry off the steak slices, the meat should be browned on the outside,
  3. Cook the meat in batches.
  4. The beef should be seared on the outside and pink on the inside.
  5. Set the beef aside to cool.
  6. Add the beef to the salad with the sesame seed oil, toss and serve.

Nutrition

Per Serving:174 calories; 11 g fat; 3 g carbohydrates; 14 g protein

Equipment

  • Knife
  • Chopping board
  • Frying pan
  • Tongs
  • Measuring cups
  • Measuring spoons

Nutritional disclaimer

Nutrition information is provided as an estimate based on the ingredients used and available in my area (New Zealand). The nutritional information is here to help you understand the recipe; I use MyFitnessPal to generate my estimates. For more accurate nutritional information, please use a nutritional calculator with the ingredients in your area.


Working with kale

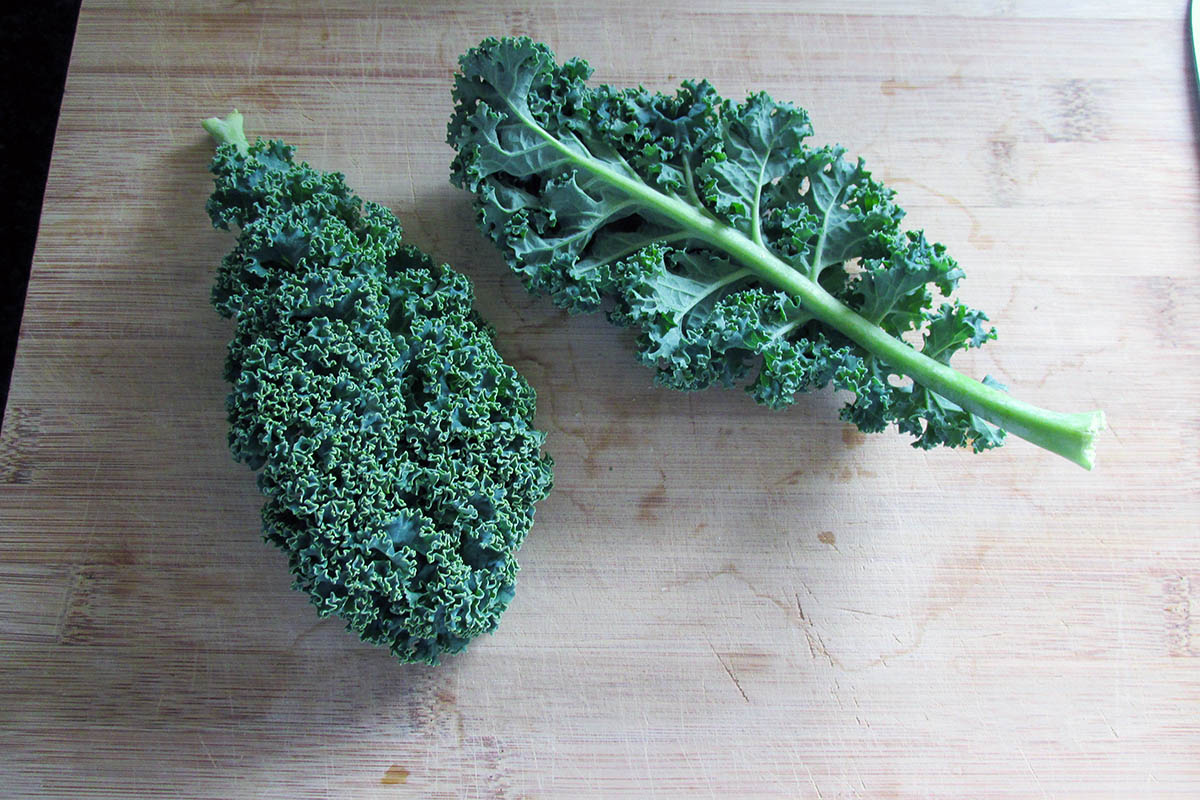
Kale is very popular at the moment which is a good thing as it is packed with beneficial nutrients. Kale is easy to grow and a versatile leaf, it grows year-round in Auckland and is available in many varieties.

Preparing kale is easy enough you just need to follow some simple steps

Wash the kale before you use it, make sure you get rid of all the slugs. Use cold running water to clean the kale then let it sit on some kitchen towel to get rid of any excess water 

Place the kale onto a chopping board flat.

Place the leaf flat

Using a sharp knife slice along the stem of the leaf.

Repeat with the other side of the leaf.

Slice along the stem

This will remove the stem and give you two kale leaves 

Repeat with the other side of the leaf

You now have the option of using the leaves as they are or cutting them up into strips.

Roll the leaf

If you are cutting the leaves up further, you can roll the leaves up into a cigar before slicing them.

Slice the roll


One tray Hawaiian chicken

Simple meals don’t have to be boring  

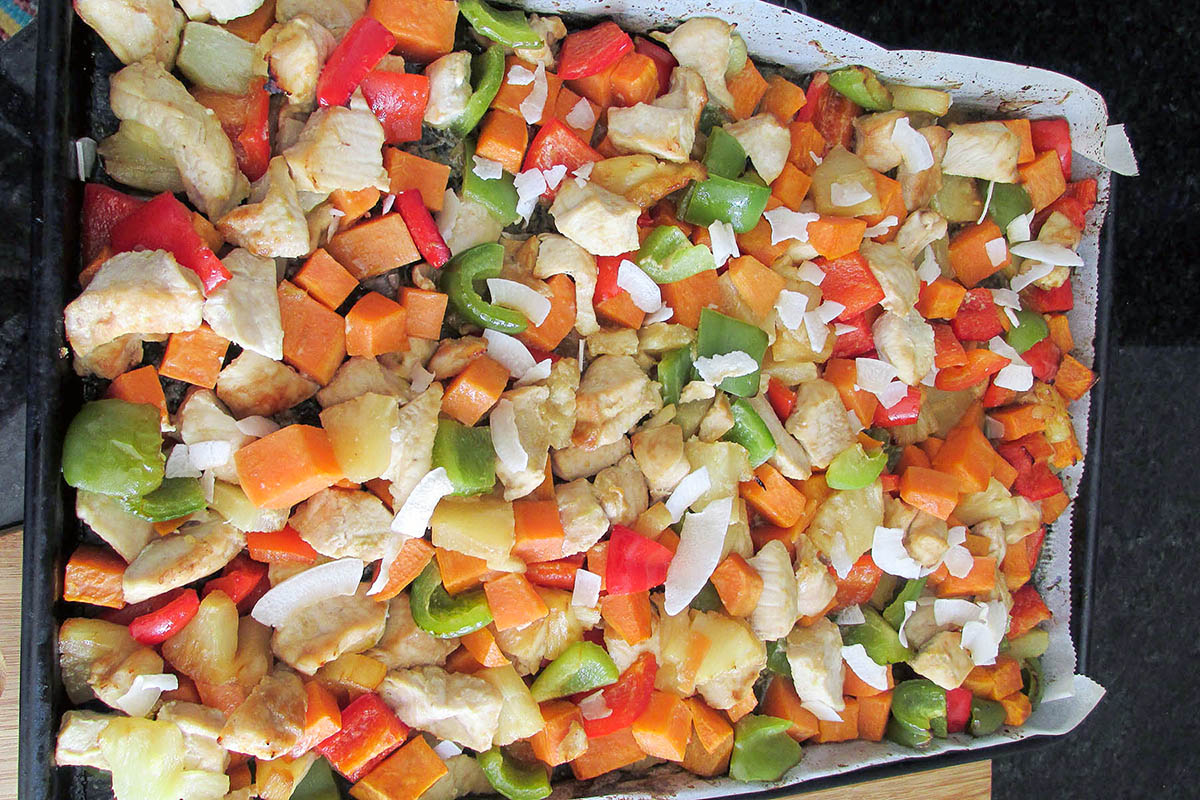
I have been on a mission to make simple and tasty meals. I aim to create recipes that can be prepared and cooked quickly on a busy weeknight. We all struggle to make healthy and delicious meals while keeping on top of everything else in life. So this recipe is designed to be healthy, delicious and easy to make. You can cook this meal on a single tray in the oven. The preparation takes no more than 20 minutes and is portioned to feed four adults.  

Sweet and sour on one plate

There is something irresistible about chicken and pineapple; they go so well together. Add in the sweetness of some peppers, and I am sold. I’ll be honest this one-tray meal was born from a pantry cleanout. I found a tin of pineapple that was soon to go out of date; in an effort to save on food waste, I thought of a way to make the most of the pineapple slices, other than eating them from the tin, of course.

One tray Hawaiian chicken recipe

Ingredients 

  • 500g chicken breast, cubed
  • 2 cups pineapple chunks
  • 1 red pepper, cubed
  • 1 green pepper, cubed
  • 1 sweet potato, cubed
  • 1 tbsp. Sesame seed oil
  • 1 tbsp. Coconut oil
  • 1 tbsp. Coconut sugar
  • 1 tbsp. Coconut flakes
  • 1 tbsp. Lime juice

Instructions 

Preheat the oven to 200 degrees C/ 400 degrees F.

Line a baking tray with baking paper or a silicone liner.

Mix the chicken, peppers, sweet potatoes and pineapple in a bowl with the oils and sugar.

Spread out on the baking tray and bake for 15 minutes.

Turn the vegetables and chicken and bake for another 10 minutes.

Sprinkle the lime juice and coconut flakes over the tray before serving.

“One

  • Rating: ★★★★
  • Print

“An


Credit: Cath @ easycleaneats 

Ingredients

–500g chicken breast, cubed –2 cups pineapple chunks –1 red pepper, cubed –1 green pepper, cubed –1 sweet potato, cubed –1 tbsp. Sesame seed oil –1 tbsp. Coconut oil –1 tbsp. Coconut sugar –1 tbsp. Coconut flakes –1 tbsp. Lime juice

Directions

  1. Preheat the oven to 200 degrees C/ 400 degrees F.
  2. Line a baking tray with baking paper or a silicone liner.
  3. Mix the chicken, peppers, sweet potatoes and pineapple in a bowl with the oils and sugar.
  4. Spread out on the baking tray and bake for 15 minutes.
  5. Turn the vegetables and chicken and bake for another 10 minutes.
  6. Sprinkle the lime juice and coconut flakes over the tray before serving.

Nutrition

Per Serving: 322 calories; 13g fat; 26g carbohydrates; 26g protein

Equipment

  • Measuring cups
  • Measuring spoons
  • Kitchen scale
  • Mixing bowl
  • Baking sheet
  • Baking paper or silicone liner

Nutritional disclaimer

Nutrition information is provided as an estimate based on the ingredients used and available in my area (New Zealand). The nutritional information is here to help you understand the recipe; I use MyFitnessPal to generate my estimates. For more accurate nutritional information, please use a nutritional calculator with the ingredients in your area.