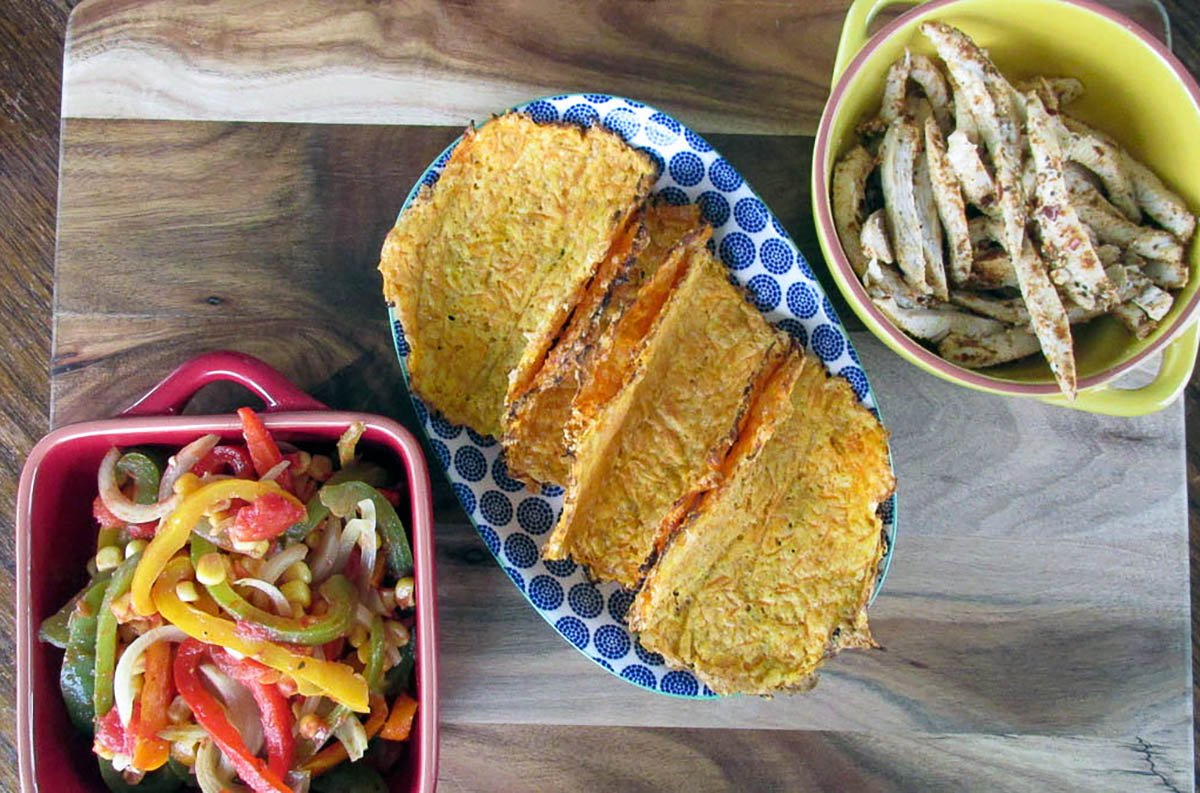
Carrot taco shells

Everything is awesome 

I feel like Taco Tuesday has been a thing for a long time, but it seems to be a new regular feature in people’s lives now (thank you, Lego Movie). #everythingisawesome 

Taco Tuesday is a regular feature in my house, mainly because I love tacos, and what could be better after a day in the office and a monster workout?  

Extra veggies for the kids 

I enjoy using egg wraps with my tacos, and while traditional corn taco shells are great, I sometimes want to increase my vegetable intake. In the past, I was quite creative in sneaking vegetables into my children’s diets. Carrot taco shells were one of my sneaky ways to get kids to eat veggies without complaint, and now they are my go-to method for using up those carrots in the fridge before they start looking sad.

Worth the effort 

I will be honest, these taco shells take a little bit of effort; they probably aren’t an easy option for a weeknight, but if you make them on the weekend, they will keep well in the fridge in an airtight container. If you are making them ahead of time, they are easy to re-crisp in the oven or in the trusty air fryer.

Carrot taco shells recipe

Ingredients

  • 200g carrots, cooked and grated
  • 75g cheese, grated 
  • 2 eggs
  • 3 tbsp. Oat flour

Peel the carrots and cook them in boiling water for about 10 minutes. 

Drain the carrots and let them cool before grating the carrots.

Squeeze out the excess water from the grated carrots, so the taco shells are not too soggy.

Place the carrots into a bowl, add the cheese eggs and flour, and then mix everything together.

Line a baking tray with baking paper or a silicone liner.

Preheat the oven to 200 degrees C/ 390 degrees F

Use an ice cream scoop to portion out the carrot mix onto the lined baking paper, use your fingers to flatten out each portion into a thin disc.

Bake at 200C for 15 minutes or until crispy around the edges. 

Allow the discs to cool for a few minutes then gently remove the shells from the baking paper or a silicone liner. If you would like to shape the shells, you can lay them over a bottle or rolling pin.

As the shells cool, they will harden slightly.

Fill the shells with your choice of taco filling and they are ready to go.

Carrot taco shells

  • Servings: 10
  • Rating: ★★★★★
  • Print

These taco sheels are ideal for a low carb taco Tuesday


Credit: Cath @ easycleaneats 

Ingredients

  • 200g carrots, cooked and grated
  • 75g cheese, grated 
  • 2 eggs
  • 3 tbsp. Buckwheat flour

Directions

  1. Peel the carrots and cook them in boiling water for about 10 minutes. 
  2. Drain the carrots and let them cool before grating them.
  3. Squeeze out the excess water from the grated carrots, so the taco shells are not too soggy.
  4. Place the carrots into a bowl, add the cheese, eggs and flour, and then mix everything together.
  5. Line a baking tray with baking paper or a silicone liner.
  6. Preheat the oven to 200 degrees C/ 390 degrees F
  7. Use an ice cream scoop to portion out the carrot mix onto the lined baking paper, and use your fingers to flatten out each portion into a thin disc.
  8. Bake at 200 °C for 15 minutes or until crispy around the edges. 
  9. Allow the discs to cool for a few minutes, then gently remove the shells from the baking paper or a silicone liner. If you want to shape the shells, you can lay them over a bottle or rolling pin.
  10. As the shells cool, they will harden slightly.
  11. Fill the shells with your choice of taco filling, and they are ready to go.

Nutrition

Per Serving: 64 calories; 3.8 g fat; 4.4 g carbohydrates; 3.5 g protein

Equipment 

  • Grater 
  • Knife 
  • Chopping board 
  • Bowl 
  • Baking tray 
  • Spatula 
  • Ice cream scoop 
  • Cooling rack 

Nutritional disclaimer

Nutrition information is provided as an estimate based on the ingredients used and available in my area (New Zealand). The nutritional information is here to help you understand the recipe; I use MyFitnessPal to generate my estimates. For more accurate nutritional information, please use a nutritional calculator with the ingredients in your area.
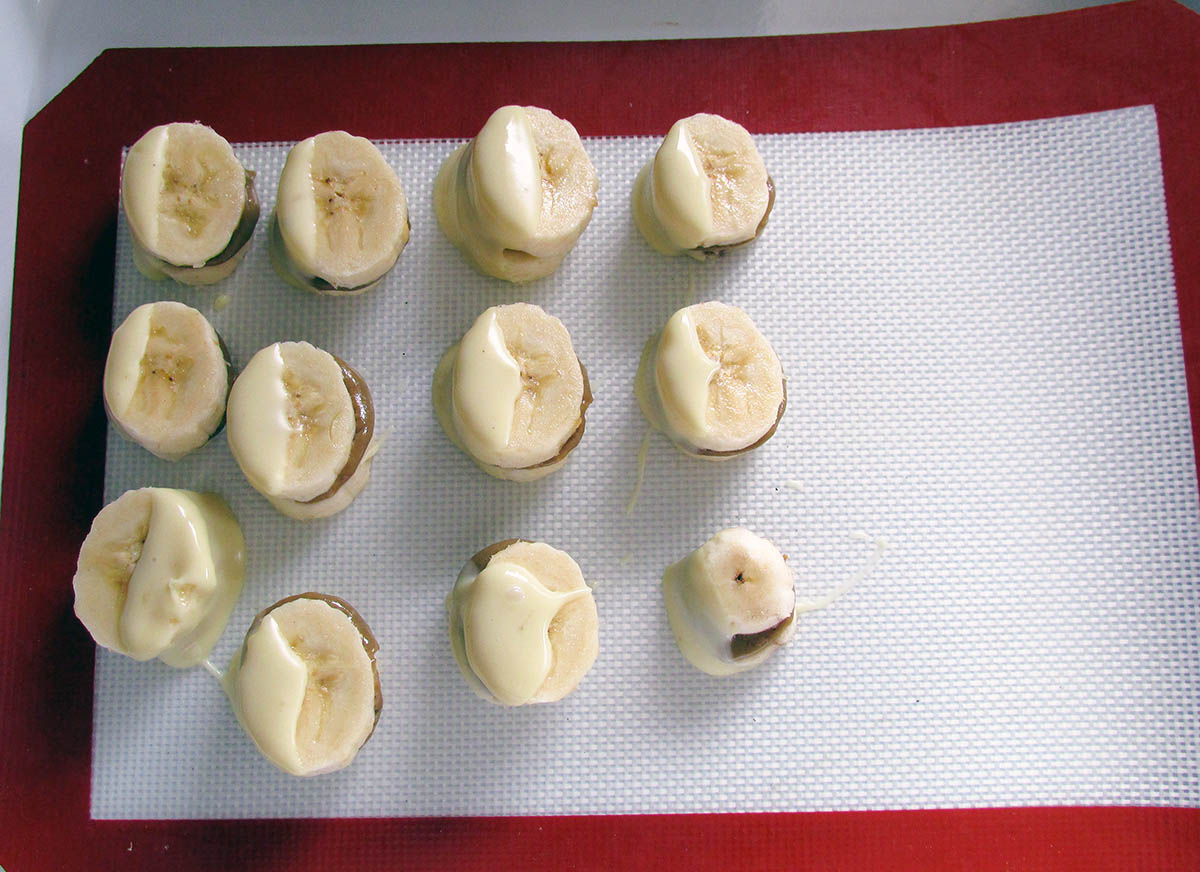

Banana bites

Ready for a snack

I’m trying different things as snacks at the moment; I had been munching on yoghurt and fruit for a while, so I needed to switch things up a bit. I had a stack of bananas and some protein white chocolate in the cupboard, so I thought I would have a go at making my own banana bites. 

No peanut butter, thanks

I am one of those unfortunate people who is allergic to not only peanuts but also tree nuts. When it comes to food options, not having nuts on the menu can be challenging at times and frustrating at others. Not eating nuts doesn’t have to be the end of the world; there are always replacements and alternatives that give you a nut-free option. I’ve seen peanut butter banana bites all over the internet, but it was not an option for me. This recipe is my attempt to create a nut-free version of a usually nut-packed recipe.

Sunflower seed butter

Instead of using peanut butter, I decided to use my homemade sun butter as the alternative filling on my banana bites. As I am not a milk or dark chocolate fan, I decided to use my white chocolate for a perfect coating.

Banana bites recipe

Ingredients

  • 1 banana
  • 1/4 cup sun butter
  • 1 bar protein white chocolate

Instructions

Peel the banana and slice it into 26 pieces.

Line a baking sheet or flat plate with a silicone liner.

On half of the banana pieces, add a small dollop of the sun butter.

Top each piece that has sun butter on it with another piece of banana.

Place the banana in the freezer to harden the sun butter for about 15 minutes.

Before taking the banana bites from the fridge, melt the chocolate.

Take a small microwave-safe bowl and break up the chocolate.

Microwave the chocolate for 30 seconds at a time and mix between.

Repeat until the chocolate is melted and runny.

Take the banana bites from the freezer.

Dip half of each bite into the melted chocolate and place it back on the lined baking sheet.

Return the bites to the freezer for another 15 minutes.

Transfer the set bites to an airtight container and stop in the fridge for up to 3 days.

“Banana

  • Servings: 4
  • Print


Credit: Cath @ easycleaneats 

Ingredients

  • 1 banana
  • 1/4 cup sun butter
  • 1 bar protein white chocolate

Directions

Peel the banana and slice it into 26 pieces. Line a baking sheet or flat plate with a silicone liner. On half of the banana pieces, add a small dollop of the sun butter. Top each piece that has sun butter on it with another piece of banana. Place the banana in the freezer to harden the sun butter for about 15 minutes. Before taking the banana bites from the fridge, melt the chocolate. Take a small microwave-safe bowl and break up the chocolate. Microwave the chocolate for 30 seconds at a time and mix between. Repeat until the chocolate is melted and runny. Take the banana bites from the freezer. Dip half of each bite into the melted chocolate and place it back on the lined baking sheet. Return the bites to the freezer for another 15 minutes. Transfer the set bites to an airtight container and stop in the fridge for up to 3 days.

Nutrition

Per Serving: 156 calories; 11g fat; 11g carbohydrates; 5g protein

Equipment

  • Knife
  • Chopping board
  • Spoon
  • Small microwave-safe bowl
  • Fork
  • Baking sheet
  • Silicone liner or baking paper

Nutritional disclaimer

Nutrition information is provided as an estimate based on the ingredients used and available in my area (New Zealand). The nutritional information is here to help you understand the recipe; I use MyFitnessPal to generate my estimates. For more accurate nutritional information, please use a nutritional calculator with the ingredients in your area.


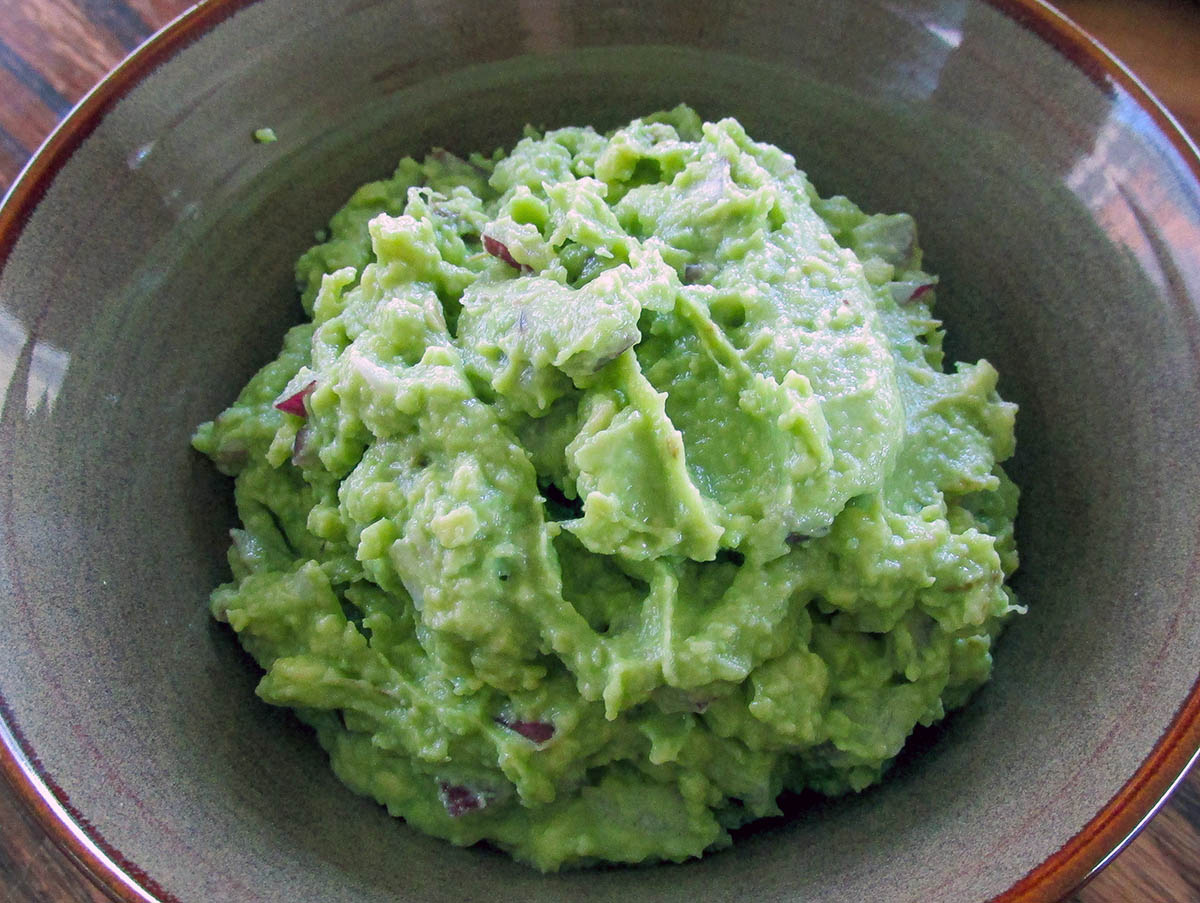
Guacamole

Guac you gonna do about it?

I love avocados and get very excited when they come into season. I would happily eat them with every meal, but guacamole is my favourite way to have them.

I will be honest; I am eating guacamole with almost every meal at the moment. I may add a healthy dose of jalapeño to make it too spicy for everyone else. I didn’t say I was doing that; I might be doing it. It could be that the jalapeños are extra spicy. 

Back to the point

I have two ways to make guacamole; both are easy, but they give two different textures, so it is a matter of personal preference. If you are making guacamole for the kids to enjoy, you can leave the chilli out of the recipe. This Guacamole recipe is suitable for those eating Primal, Paleo, and Clean. With minor modification, it is also kid-friendly; leave out the chilli.

Guacamole recipe

Ingredients

  • 2 avocados
  • 1/2 red onion
  • 1 jalapeno chilli (optional)
  • 1 tbsp. lemon juice

Take your avocados, cut them in half, remove the stones, and then scoop out the flesh

This is where you get to choose.

Option 1 Chunky

For a more chunky texture, I use a food processor to finely mince the chilli, pulse the onion then add the avocado with lemon juice and pulse again, this gives a part chunky part smooth texture that is great as a dip or addition to something spicy.

Option 2 Smooth

For a smoother texture, I like to finely mince the chilli and onion together into a paste, add the avocado and lemon juice and blend until you get a smooth texture.

If you are making guacamole without a food processor, it is down to you how finely you want to chop your ingredients and how much you mush the avocado with a fork.

The result should still be great tasting guacamole 

Guacamole

  • Servings: 8
  • Rating: ★★★★★
  • Print


Credit: Cath @ easycleaneats

Ingredients

  • 2 avocados
  • 1/2 red onion
  • 1 jalapeno chilli (optional)
  • 1 tbsp. lemon juice

Directions

  1. Take your avocados, cut them in half, remove the stones, and then scoop out the flesh
  2. This is where you get to choose.
  3. For a more chunky texture I use a food processor to finely mince the chilli, pulse the onion then add the avocado with lemon juice and pulse again, this gives a part chunky part smooth texture that is great as a dip or addition to something spicy.
  4. Or
  5. For a smoother texture, I like to finely mince the chilli and onion together into a paste, add the avocado and lemon juice and blend until you get a smooth texture.
  6. If you are making the guacamole without a food processor, it is down to you how finely you want to chop your ingredients.
  7. The result should still be great tasting guacamole 

Nutrition

Per Serving: 39 calories; 3 g fat; 2 g carbohydrates; 1 g protein

Equipment 

  • Knife 
  • Chopping board 
  • Food processor 
  • Measuring spoons
  • Fork 

Nutritional disclaimer

Nutrition information is provided as an estimate based on the ingredients used and available in my area (New Zealand). The nutritional information is here to help you understand the recipe; I use MyFitnessPal to generate my estimates. For more accurate nutritional information, please use a nutritional calculator with the ingredients in your area.


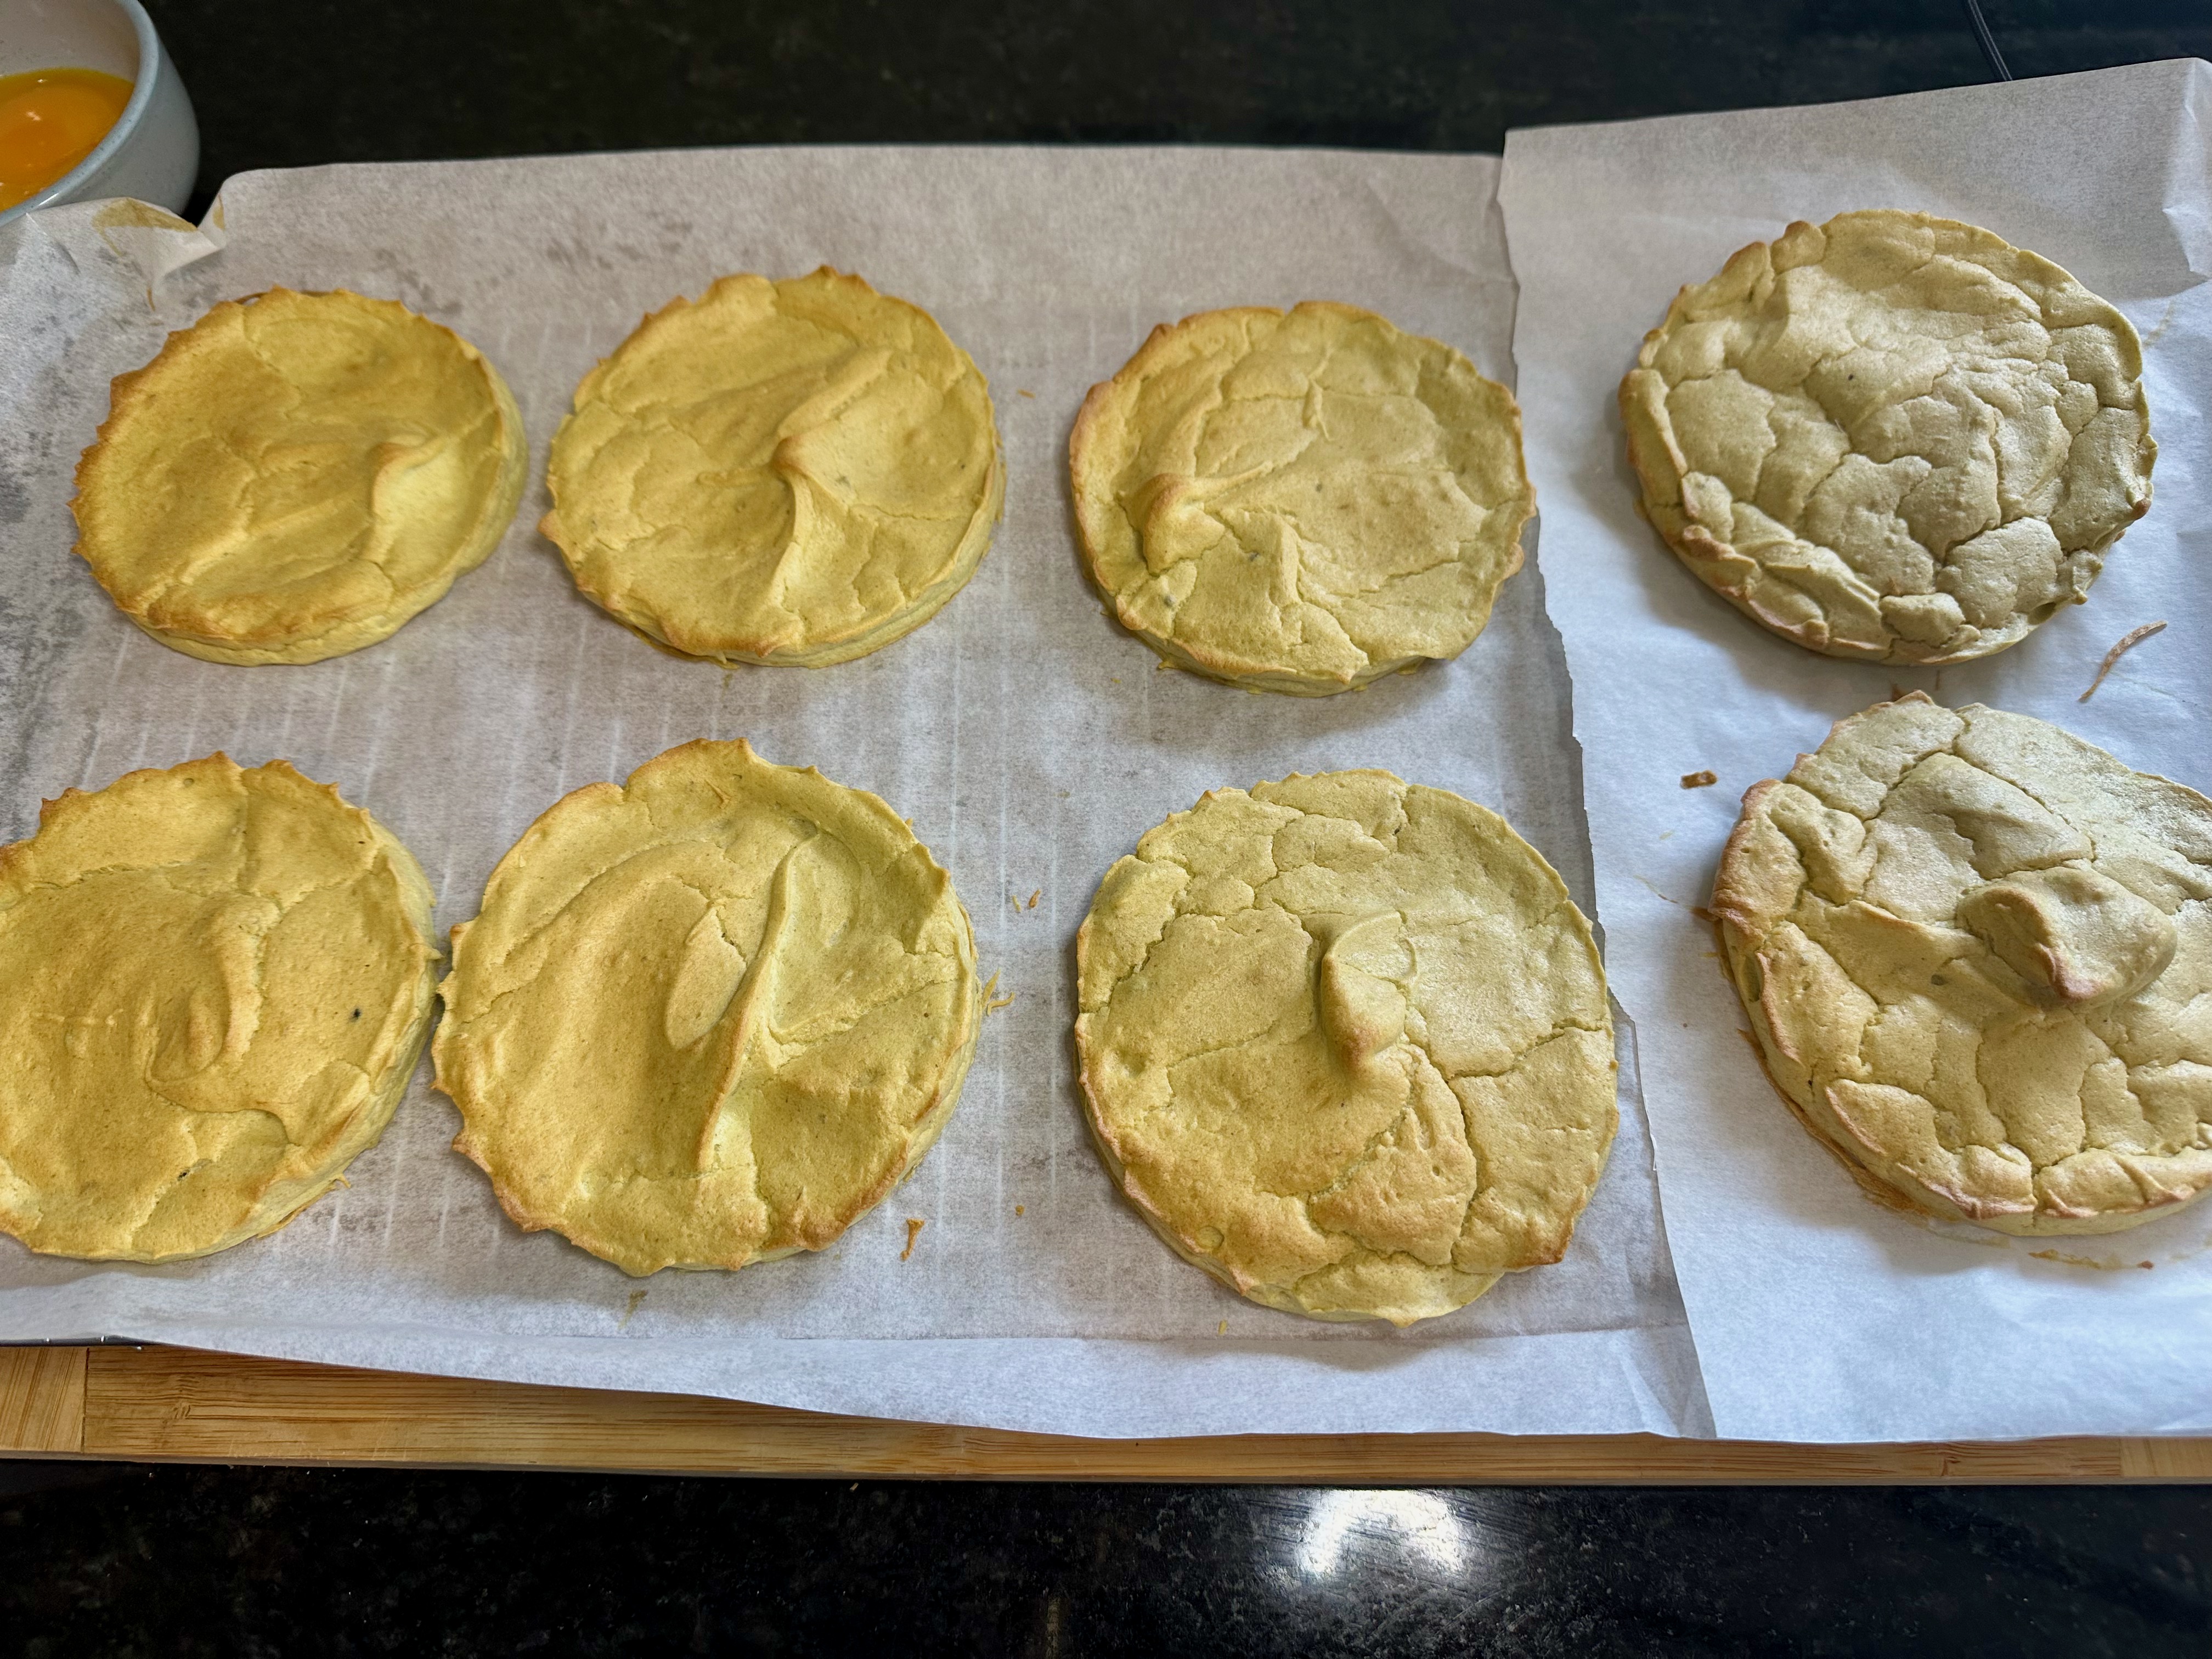
Avocado burger buns

Ready for more grain-free bread, please

It’s time to break out the BBQ down here in the Southern Hemisphere, which means lots of burgers being made in the sunshine. I’m not looking to add all the carbs that go with the beef burgers, so I’ve been whipping up quick bread with a twist.  

Avocado abundance 

Whenever avocados are in season, I try to make the most of them. We all know that avocados have a small window of perfect ripeness, and they all hit that point simultaneously. So as not to waste them, I buy and then freeze the avocado pulp. To make my quick break a little more interesting, I’ve used some avocado pulp to make my burger buns extra. If you have fresh avocados, they also work for this recipe. If you use frozen avocado pulp, make sure it is completely thawed before folding it into the mix.

Burger buns recipe

Ingredients

  • 4 egg whites
  • 2 avocados 
  • 4 tbsp. buckwheat flour
  • 1/4 tsp. cream of tartar
  • 1/4 tsp. baking soda

Instructions

Preheat oven to 160 degrees C/ 320 degrees F. 

Line a baking tray with baking paper or a silicone liner. 

In a large mixing bowl, whisk the egg whites for 30 seconds using an electric whisk or stand mixer. 

Add the cream of tartar and keep whisking on high speed until stiff peaks form.

Place the avocado flesh into a food processor, and blend until you get a smooth puree.

Add the avocado puree to the egg whites.

Add the buckwheat flour and baking soda to the bowl with the egg whites.

Use a spatula to combine the ingredients together; fold the ingredients together, don’t stir them. 

You want a smooth, fluffy batter.

Divide the batter into 12 rounds on the baking tray.

Bake the buns for 15 – 20 minutes or until the edges are slightly golden.

Remove the buns from the oven and transfer the buns on the baking paper to a cooling rack.

Let the buns cool for 10 minutes before filling them up with burgers.

Remove the buns from the oven and transfer the buns on the baking paper to a cooling rack.

Let the buns cool for 10 minutes before filling them up with burgers.

“Avocado

  • Rating: ★★★★★
  • Print

“What


Credit: Cath @ easycleaneats 

Ingredients

  • 4 egg whites
  • 2 avocados 
  • 4 tbsp. buckwheat flour
  • 1/4 tsp. cream of tartar
  • 1/4 tsp. baking soda

Directions

  1. Preheat oven to 160 degrees C/ 320 degrees F. 
  2. Line a baking tray with baking paper or a silicone liner. 
  3. In a large mixing bowl, whisk the egg whites for 30 seconds using an electric whisk or stand mixer. 
  4. Add the cream of tartar and keep whisking on high speed until stiff peaks form.
  5. Place the avocado flesh into a food processor, and blend until you get a smooth puree.
  6. Add the avocado puree to the egg whites.
  7. Add the buckwheat flour and baking soda to the bowl with the egg whites.
  8. Use a spatula to combine the ingredients together; fold the ingredients together, don’t stir them. 
  9. You want a smooth, fluffy batter.
  10. Divide the batter into 12 rounds on the baking tray.
  11. Bake the buns for 15 – 20 minutes or until the edges are slightly golden.
  12. Remove the buns from the oven and transfer the buns on the baking paper to a cooling rack.
  13. Let the buns cool for 10 minutes before filling them up with burgers.

Nutrition

Per Serving: calories; 4g fat; 4g carbohydrates; 2g protein

Equipment

  • Baking tray
  • Whisk
  • Food processor
  • Spatula
  • Mixing bowl
  • Cooling rack

Nutritional disclaimer

Nutrition information is provided as an estimate based on the ingredients used and available in my area (New Zealand). The nutritional information is here to help you understand the recipe; I use MyFitnessPal to generate my estimates. For more accurate nutritional information, please use a nutritional calculator with the ingredients in your area.


Pasta free lasagne

Revisiting family favourites

I’ve been revisiting recipes that have been some of my old-school recipes and favourites that were staples when I got started eating clean. I first posted this recipe in 2015; at that time, my step kids were fussy, vegetables had to be hidden and disguised, and there was no potential for intense flavours or spice. 

As the kids grew, my recipes changed organically to meet their palates and preferences. I’ve updated this recipe because of that, but fear not; the original recipe suitable for kids and less developed palates is at the bottom of the post.

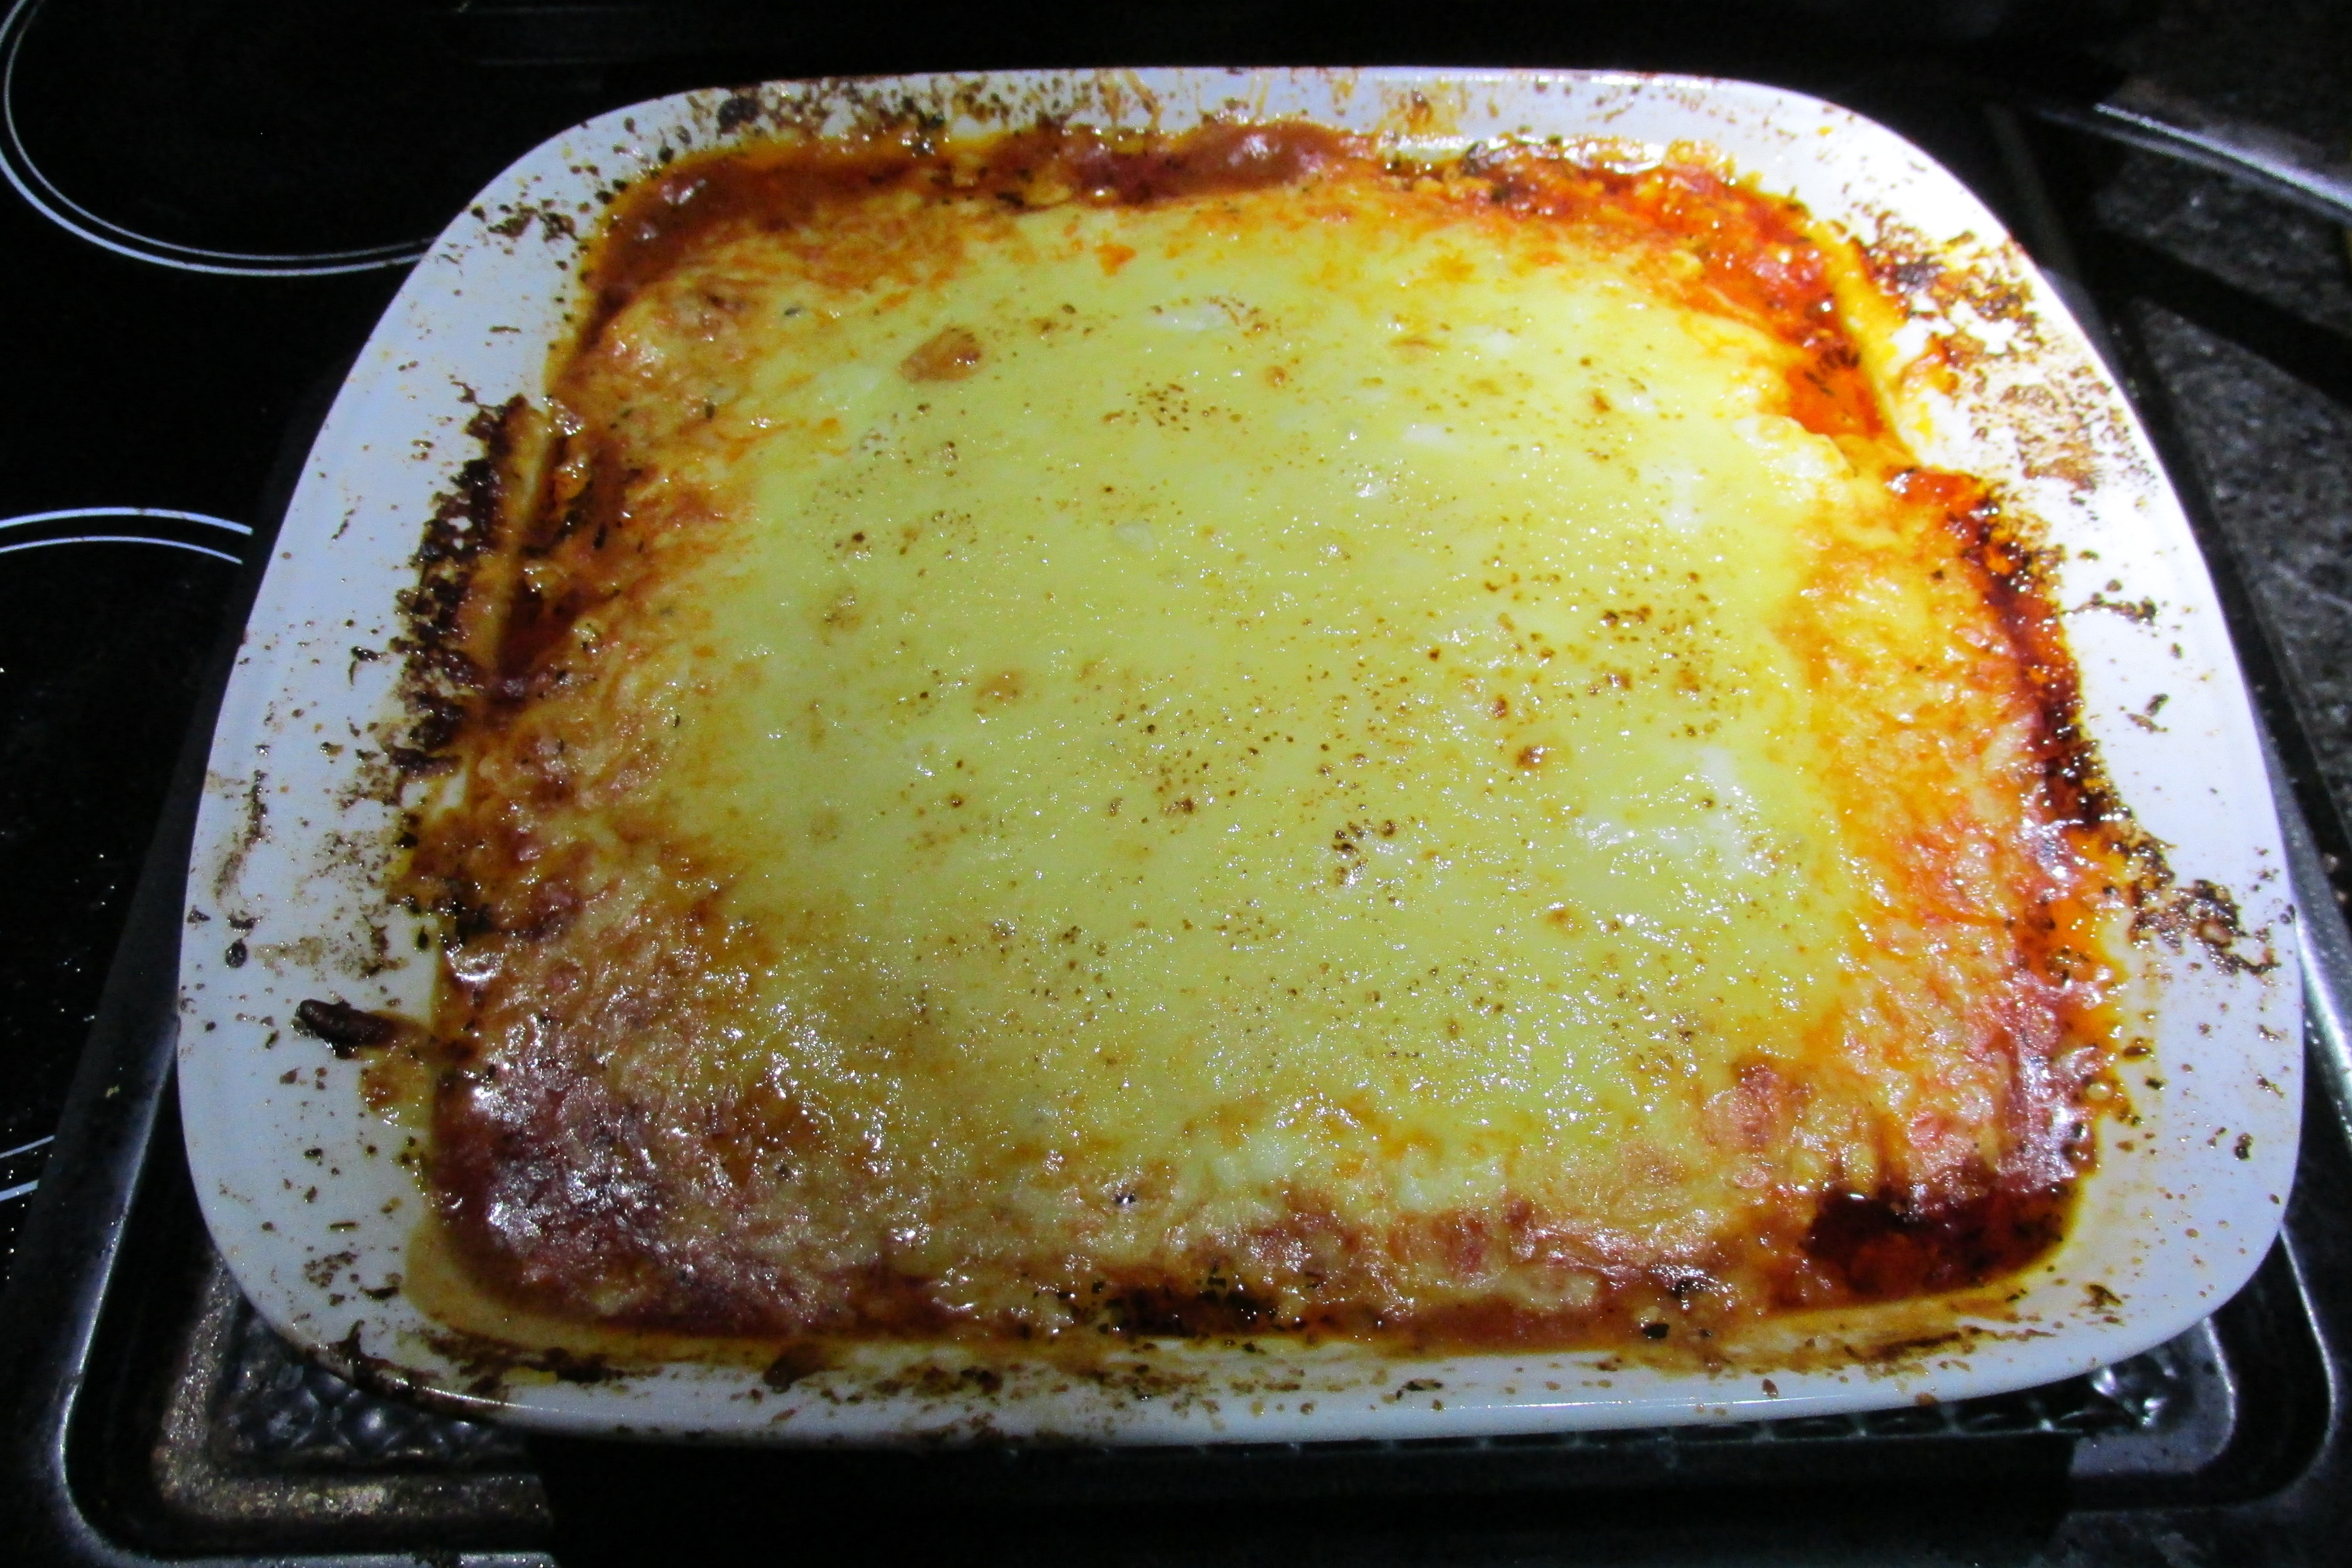
Hot lasagne fresh from the oven

Clean eating take of a classic

This was one of the first meals I made with a pasta alternative; much like replacing pasta with zoodles/coodles. I was always game to sneak some extra vegetables into the family meals, but this is one of the few meals I don’t need to hide the vegetables at all. The popular opinion of the kids back then was that this lasagne was better than one made with traditional pasta. I can’t say I disagree. As times have changed and this lasagne recipe is no longer entirely consumed in one sitting, it has become one of my favourite freezer meals. I can either make it in bulk and portion it out to enjoy some comfort food when needed or have a tray in the freezer for when I have company over. 

Secret to success

The secret to a good lasagna is the depth of flavour. Flavour isn’t instant; it takes time and some effort. When I’m making lasagna, I tend to make the meat sauce the day before to let the herbs get to know the meat and sauce, mingle, and start the flavour party. The longer you leave the meat and herbs to party, the better your lasagna will taste. 

Pasta free lasagne recipe

Lasagne ingredients
Lasagne ingredients

Ingredients

  • 500g minced beef
  • 1 onion finely diced
  • 2 celery sticks, finely chopped
  • 1 can tomatoes, chopped
  • 2 garlic cloves minced
  • 1 tsp. basil
  • 1 tsp. oregano
  • 1 tbsp. red chilli flakes
  • 1 tbsp. coconut oil
  • 4 carrots cut into ribbons
  • 2 cups cheese, grated 
  • 250g cottage cheese

Instructions

Add the coconut oil to a stockpot over medium heat.

Add the onion and cook until the onion starts to soften.

Add the onion to a stockpot and cook until the onion starts to soften

Add the garlic, basil, chilli and oregano to the pan.

Add the garlic, basil and oregano to the pan
Cook until the onion is softening

Add the beef mince to the pan and cook the beef until it browns.

Add the beef mince to the pan
Cook the beef until it browns

Add the chopped tomatoes to the pan along with the chopped celery.

Add the celery
Add the celery
Add the chopped tomatoes to the pan
Add the chopped tomatoes to the pan 

Simmer the mixture for 10 minutes, then turn off the heat.

Simmer the mixture for 10 minutes then turn off the heat

While the meat and sauce are simmering, take a baking dish and ensure you have enough carrot ribbons to build your lasagne layers.

When the meat simmers, you can start to layer the lasagne.

Start with a carrot ribbons layer at the baking dish’s bottom.

Start with a layer of carrot ribbons at the bottom of the baking dish.

Next, add half the meat and sauce to create a layer in the baking dish.

Next add a half of the meat and sauce to create a layer in the baking dish.
Create a layer in the baking dish.

Add another layer of carrot ribbons on top of the meat.

Add another layer of carrot ribbons on top of the meat.

Next, add half of the cottage cheese and spread it across the dish, then top it with half the grated cheese.

Next add half of the cottage cheese
Top with half the cheese
Top with half the cheese 

Top with half the cheese, and another layer of carrot ribbons.

Repeat the layers with meat, carrot ribbons, cottage cheese and grated cheese.

Repeat the layers with meat, carrot ribbons, cottage cheese and grated cheese.

If you can leave the lasagna overnight before baking it, the longer you leave it, the better it will taste.

Bake the lasagne at 180 degrees C/ 350 degrees F for 30 minutes.

Remove the lasagne from the oven when the cheese is brown and bubbly.

Bake the lasagne at 180 degrees C/ 350 degrees F for 30 minutes

Let the lasagne rest for 5 minutes before slicing and serving.

Let the lasagne rest for 5 minutes before slicing and serving

Pasta free lasagne

  • Servings: 8
  • Rating: ★★★★★
  • Print


Credit: Cath @ easycleaneats

Ingredients

  • 500g minced beef
  • 1 courgette diced
  • 1 onion finely diced
  • 1 red pepper diced
  • 1 can tomatoes
  • 2 garlic cloves minced
  • 1 tsp. basil
  • 1 tsp. oregano
  • 1 tbsp. Red chilli flakes
  • 1 tbsp. coconut oil
  • 2 courgettes cut into ribbons
  • 2 carrots cut into ribbons
  • 2 cups cheese, grated

Directions

  1. Add the coconut oil to a stockpot over medium heat.
  2. Add the onion and cook until the onion starts to soften.
  3. Add the garlic, basil, chilli and oregano to the pan.
  4. Add the beef mince to the pan and cook the beef until it browns.
  5. Add the chopped tomatoes to the pan along with the chopped celery.
  6. Simmer the mixture for 10 minutes, then turn off the heat.
  7. While the meat and sauce are simmering, take a baking dish and ensure you have enough carrot ribbons to build your lasagne layers.
  8. When the meat simmers, you can start to layer the lasagne.
  9. Start with a carrot ribbons layer at the baking dish’s bottom.
  10. Next, add half the meat and sauce to create a layer in the baking dish.
  11. Add another layer of carrot ribbons on top of the meat.
  12. Next, add half of the cottage cheese and spread it across the dish, then top it with half the grated cheese.
  13. Top with half the cheese, and another layer of carrot ribbons.
  14. Repeat the layers with meat, carrot ribbons, cottage cheese and grated cheese.
  15. If you can leave the lasagna overnight before baking it, the longer you leave it, the better it will taste.
  16. Bake the lasagne at 180 degrees C/ 350 degrees F for 30 minutes.
  17. Remove the lasagne from the oven when the cheese is brown and bubbly.
  18. Let the lasagne rest for 5 minutes before slicing and serving.

Nutrition

Per Serving: 350 calories; 25.7 g fat; 8.2 g carbohydrates; 21.7 g protein

Equipment

  • Stockpot
  • Wooden spoon
  • Vegetable peeler
  • Knife
  • Grater
  • Chopping board
  • Baking dish

Nutritional disclaimer

Nutrition information is provided as an estimate based on the ingredients used and available in my area (New Zealand). The nutritional information is here to help you understand the recipe; I use MyFitnessPal to generate my estimates. For more accurate nutritional information, please use a nutritional calculator with the ingredients in your area.

Pasta free lasagne – kid friendly recipe

Ingredients

  • 500g minced beef
  • 1 courgette diced
  • 1 onion finely diced
  • 1 red pepper diced
  • 1 can tomatoes 
  • 2 garlic cloves minced
  • 1 tsp. basil
  • 1 tsp. oregano
  • 1 tbsp. coconut oil
  • 2 courgettes cut into ribbons
  • 2 carrots cut into ribbons
  • 2 cups cheese, grated 

Instructions

  1. In a stockpot heat the coconut oil, garlic, onion basil and oregano over a medium heat, cook until the onion is soft.
  2. Add the beef mince and cook off until browned. 
  3. Pour in the tomatoes along with the diced vegetables to the meat and cook for 10 minutes. 
  4. In a baking dish create a layer of carrot ribbons to cover the bottom add a layer of meat then cover with a layer of courgette ribbons, top with cheese. 
  5. Repeat until you reach the top of the baking dish, top the final layer with cheese.
  6. If you can leave the lasagne overnight before you bake it, the longer you leave it the better it will taste.
  7. Bake the lasagne at 180 degrees C/ 350 degrees F for 30 minutes.
  8. When the cheese is brown and bubbly remove the lasagne from the oven.
  9. Let the lasagne rest for 5 minutes before slicing and serving.

Protein cheesecake

Just because I love a challenge

I love looking at recipe books and figuring out if they can be changed and if I could make a clean-eating version. This recipe was initially given to me from the Ross Edgley The World’s Fittest book, and I asked if it could be adapted. As I love a challenge, I decided to give it a go.

Easy Swaps

Sometimes, I can look at a recipe and know what ingredients are easy to swap out for alternative ingredients. Other recipes require some trial and error before you have something close to what the recipe would give you. Thankfully, this was one of the easy swap recipes that ended up giving me a finished cheesecake that didn’t last very long (3 days). 

The original recipe called for quark, cocoa, muesli, blueberries, and strawberries. I swapped out the quark for crème fraiche and sour cream to increase the fat content, changed the cocoa for cacao powder, and ditched the fruit. While some may not have an issue with muesli, I swapped it out for my nut-free breakfast crunch for more texture in the base. 

Protein cheesecake

Protein cheesecake ingredients

Ingredients

  • 250g creme fraiche
  • 250g sour cream
  • 250g yoghurt
  • 60g protein powder
  • 3 tsp. cacao powder
  • 1/2 tsp vanilla powder
  • 2 egg whites
  • 2 tbsp. gelatine
  • 200ml coconut milk
  • 200g nut-free breakfast crunch
  • 2 tsp honey
  • 1 tsp coconut oil, melted

Instructions  

Mix the breakfast crunch with the honey and the melted coconut oil in a bowl, ensuring it is fully coated. I like to use a food processor for this step.

Mix the nut-free breakfast crunch with the honey and the melted coconut oil together

Spread the crunch mixture out in the bottom of a springform cake tin and press it gently into the tin.

Spread the crunch mixture out in the bottom of a spring form cake tin
Spread the crunch mixture out
press it gently into the tin
Press it gently into the tin

Put the tin in the fridge to get the coconut oil to firm up the mixture.

In a small bowl, bloom the gelatine as the packet instructs.

Bloom the gelatine as the packet instructs

In a large bowl, mix the crème fraiche, sour cream, and yoghurt with the protein powder, making sure there are no lumps.

Whisk in the protein powder.
Mix well.
Mix well.

Gently heat the coconut milk and whisk in the cacao powder, followed by the gelatine.

Heat the milk and chocolate with the gelatine.

Set the milk and gelatine mix to one side.

In another bowl, whisk the egg whites until they form stiff peaks.

Take a stand mixer.
Take a stand mixer.
Whisk the egg white.
In another bowl whisk the creme fraiche, sour cream and yoghurt.

Slowly fold the egg whites into the protein and yoghurt mixture.

Fold the egg whites into the cheese mix

Be careful not to overwork the egg whites; you want to keep as much air in the mixture as possible.

Whisk the gelatine and milk into the protein and yoghurt mixture.

Fold in the chocolate mixture.

Take the cake tin with the base out of the fridge.

Pour the cheesecake mix into the cake pan.

Pour the protein mixture into the spring form tin and smooth the top with the back of a spoon.

Put the cheesecake in the fridge to set up.

Put the cheesecake in the fridge for 4 to 8 hours to set. 

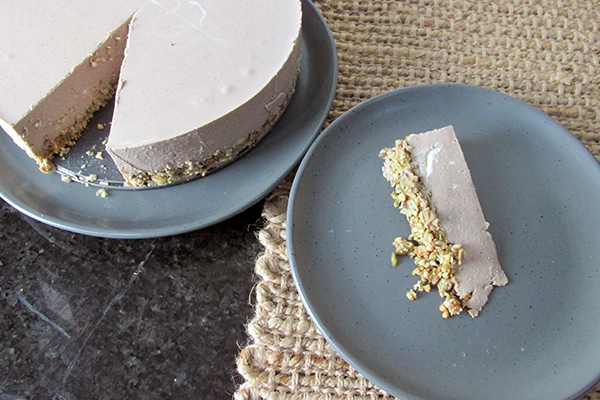
Once the cheesecake has set, cut it into 12 pieces.

Cheesecake set in the fridge.
Slice the cheesecake
Protein cheesecake ready to eat. Enjoy

Protein cheesecake

  • Servings: 12
  • Rating: ★★★★★
  • Print

I love looking at recipe books and figuring out if they can be changed and if I could make a clean-eating version.


Credit: Cath @ easycleaneats

Ingredients

  • 250g crème fraiche
  • 250g sour cream
  • 250g yoghurt
  • 60g protein powder
  • 3 tsp. Cacao powder
  • 1/2 tsp. vanilla bean powder
  • 2 egg whites
  • 2 tbsp. Gelatine
  • 200ml coconut milk
  • 200g breakfast crunch
  • 2 tsp. honey
  • 1 tsp. coconut oil, melted

Directions

  1. Mix the breakfast crunch with the honey and the melted coconut oil in a bowl, ensuring it is fully coated.
  2. Spread the crunch mixture out in the bottom of a springform cake tin and press it gently into the tin.
  3. Put the tin in the fridge to get the coconut oil to firm up the mixture.
  4. In a small bowl, bloom the gelatine as the packet instructs.
  5. In a large bowl, mix the crème fraiche, sour cream, and yoghurt with the protein powder, making sure there are no lumps.
  6. Gently heat the coconut milk and whisk in the cacao powder, followed by the gelatine.
  7. Set the milk and gelatine mix to one side.
  8. In another bowl, whisk the egg whites until they form stiff peaks.
  9. Slowly fold the egg whites into the protein and yoghurt mixture.
  10. Be careful not to overwork the egg whites; you want to keep as much air in the mixture as possible.
  11. Whisk the gelatine and milk into the protein and yoghurt mixture.
  12. Take the cake tin with the base out of the fridge.
  13. Pour the protein mixture into the spring form tin and smooth the top with the back of a spoon.
  14. Put the cheesecake in the fridge for 4 8 hours to set.
  15. Once the cheesecake has set, cut it into 12 pieces.

Nutrition

Per Serving: 177 calories; 12.2 g fat; 7.3 g carbohydrates; 6.8 g protein.

Equipment  

  • Bowl x2  
  • Spatula x2  
  • Whisk  
  • Spring form cake tin  
  • Saucepan  
  • Measuring spoons
  • Scales
  • Measuring jug
  • Spoon

Nutritional disclaimer

Nutrition information is provided as an estimate based on the ingredients used and available in my area (New Zealand). The nutritional information is here to help you understand the recipe; I use MyFitnessPal to generate my estimates. For more accurate nutritional information, please use a nutritional calculator with the ingredients in your area.


No rice sushi

Sushi is back on the menu 

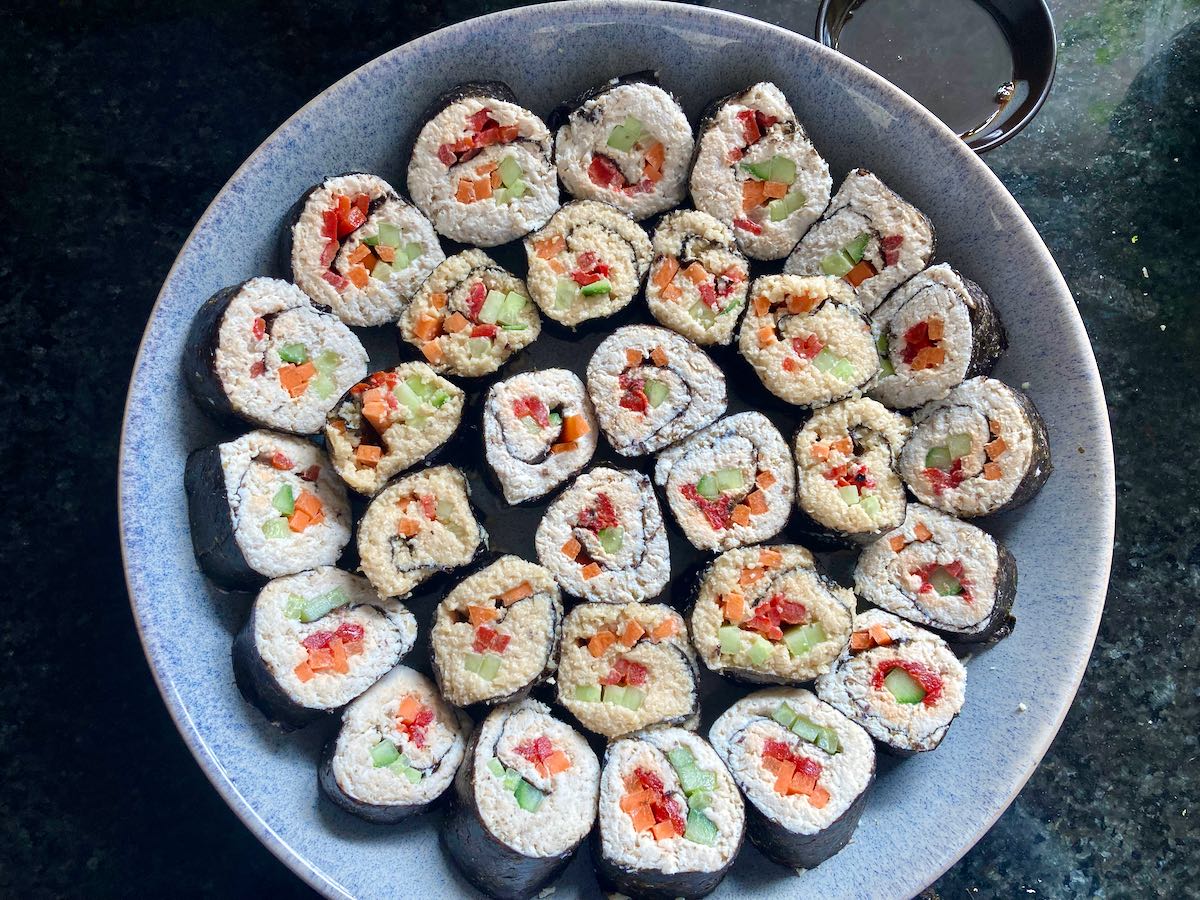
Sushi is one of the most popular options for lunch, and the sushi roll is, without doubt, one of the most recognisable forms. One of the best things about sushi is its versatility; you can have any filling you want and even have your sushi without rice. That is right, no rice sushi.

Swap the carbs for protein 

The best approach I have found when making no-rice sushi is swapping the rice for protein. For this recipe, I have swapped out the rice for cooked chicken, but it can also work with tuna, salmon, pork, or eggs. All you need to do is make sure the protein is mixed with something like mayo that makes it sticky enough to hold the sushi roll together. I love to add some seasoning to the protein to help add some flavour and a little kick.

Variety is the spice of life

The beauty of this recipe is that you can add anything you want (within reason) to the sushi as a filling. I love to mix things up to have a mix of vegetables that are crisp, crunchy and soft, so each bite is interesting to eat and packed with flavour.

No rice sushi

Ingredients

  • 5 nori sheets 
  • 4 cups cooked chicken, shredded
  • 2 tsp. Chicken seasoning
  • 3/4 cup easy mayo
  • A mix of vegetables cut into matchsticks 
    • 1 Carrot
    • 1 Celery stick
    • 1 Pepper
    • 1 Cucumber

Instructions

Mix the chicken, chicken seasoning and mayo in a bowl to form a thick paste. 

Take the sushi mat and place it on a clean flat surface.

Take a sheet of nori, and put the nori sheet smooth side down.

Take the filling of choice and spread it out on the nori sheet.

The mixture should be spread evenly, but not to the edge of the sheet at one end.

Take the additional fillings (vegetables, cheese, etc.) and lay them out on top of the spread-out filling.

Lay out the fillings in lines starting near the edge of the nori sheet. 

Each filling should have its own line with a space between the next line.

Have the sushi mat in front of you with the edge without filling furthest away from you.

Lift the edge of the mat up and use the mat to roll the edge of the nori over the first line of filling.

Make sure that the fillings are sticking together.

Tuck the nori into the roll and use the mat to continue rolling and tucking the nori; remove the mat from the roll as you go.

Move slowly so that the sushi roll is even.

Roll the sushi roll backwards and forward to seal it and keep it tight for cutting.

Let the sushi roll sit for a minute to make cutting easier.

Cut the roll into segments with a sharp, wet knife.

Serve and eat immediately.

No rice sushi

  • Servings: 28“
  • Rating: ★★★★★
  • Print

“One


Credit: Cath @ easycleaneats

Ingredients

  • 5 nori sheets
  • 4 cups cooked chicken, shredded
  • 2 tsp. Chicken seasoning
  • 3/4 cup easy mayo
  • Mix of vegetables cut into matchsticks
  • 1 Carrot
  • 1 Celery stick
  • 1 Pepper
  • 1 Cucumber

Directions

  1. Mix the chicken, chicken seasoning and mayo in a bowl to form a thick paste.
  2. Take the sushi mat and place it on a clean flat surface.
  3. Take a sheet of nori, and put the nori sheet smooth side down.
  4. Take the filling of choice and spread it out on the nori sheet.
  5. The mixture should be spread evenly, but not to the edge of the sheet at one end.
  6. Take the additional fillings (vegetables, cheese, etc.) and lay them out on top of the spread-out filling.
  7. Lay out the fillings in lines starting near the edge of the nori sheet.
  8. Each filling should have its own line with a space between the next line.
  9. Have the sushi mat in front of you with the edge without filling furthest away from you.
  10. 10.Lift the edge of the mat up and use the mat to roll the edge of the nori over the first line of filling.
  11. Make sure that the fillings are sticking together.
  12. Tuck the nori into the roll and use the mat to continue rolling and tucking the nori; remove the mat from the roll as you go.
  13. Move slowly so that the sushi roll is even.
  14. Roll the sushi roll backwards and forward to seal it and keep it tight for cutting.
  15. Let the sushi roll sit for a minute to make cutting easier.
  16. Cut the roll into segments with a sharp, wet knife.
  17. Serve and eat immediately.

Nutrition

Per Serving: 85 calories; 5g fat; 3g carbohydrates; 7g protein

Equipment

  • Sushi rolling mat
  • Spatula
  • Spoon  
  • Mixing bowl

Nutritional disclaimer

Nutrition information is provided as an estimate based on the ingredients used and available in my area (New Zealand). The nutritional information is here to help you understand the recipe; I use MyFitnessPal to generate my estimates. For more accurate nutritional information, please use a nutritional calculator with the ingredients in your area.


Taco style salad

Making friends with salad

I love salad, it is sad, but true. For a long time, if I suggested salad for dinner, it was met with grumbles, groans, and complaints. Nowadays, I have the freedom to eat salad as often as I want, and I’ll be honest, I eat it a lot. In my book, salad is something to get excited about; it is an amazingly fresh meal full of endless possibilities, not limp lettuce, sad dressing and soggy tomatoes. I love to create salads that taste amazing and look great.

Taco style salad

More spicy flavours

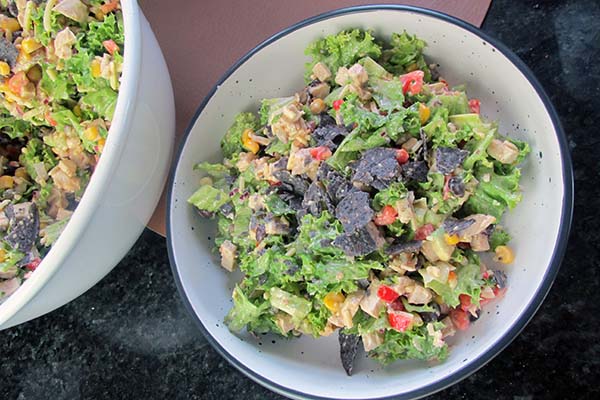
While I find it hard to say no to tacos, I sometimes want the flavour of tacos without so many carbs. This salad is my compromise; it is a taco in a bowl. This salad delivers on the flavour of tacos, but with a tasty and creamy dressing that brings everything together. It is easy to make, and the recipe is enough to feed a hungry family and leave you with some leftovers. If you don’t need quite so much food, it is easy to half the ingredients to make 5 servings rather than 10.

Taco style salad

Taco style salad ingredients

Ingredients 

  • 6 cups cos lettuce, chopped
  • 6 cups chicken, cooked and cubed 
  • 1 can corn
  • 1 can black beans
  • 2 tomatoes, diced
  • 1 avocado, diced
  • 1/2 red onion, diced
  • 3/4 cup cheddar cheese, grated
  • 1 cup tortilla chips, crushed 
  • 1 handful fresh coriander, chopped
  • 1/2 cup plain yogurt
  • 3 tbsp. avocado oil 
  • 2 tsp. honey
  • 2 tsp. apple cider vinegar
  • 1 tsp. garlic, minced 
  • 1 lime, juiced
  • 1/2 jalapeño, finely diced
  • 2 tsp. taco seasoning 

Instructions  

Mix the lettuce, corn, beans, tomatoes, avocado, onion and cheese in a large bowl.

Take a large bowl.
Add the lettuce and chicken to the bowl.
Add the corn and beans.
Add the tomatoes and avocado.
Add the red onion.
Mix well.

Set the bowl to one side.

In another bowl, whisk together the yoghurt, oil, honey, apple cider vinegar, garlic, lime juice, jalapeño, and taco seasoning.

Take the ingredients for the dressing
Add the ingredients to a bowl.
Add the jalapenos and whisk.

When you are ready to serve the salad, add the dressing to the bowl with the salad.

Add the dressing.

Toss the salad to coat everything with the dressing. 

Mix well.

Top the salad with the crushed chips and coriander to serve.

Add the crushed corn chips
Serve

Taco style salad

  • Servings: 10
  • Rating: ★★★★★
  • Print

Sometimes want the flavour of tacos without so many carbs. This salad is my compromise; it is a taco in a bowl.


Credit: Cath @ easycleaneats

Ingredients

  • 6 cups cos lettuce, chopped
  • 6 cups chicken, cooked and cubed
  • 1 can corn
  • 1 can black beans
  • 2 tomatoes, diced
  • 1 avocado, diced
  • 1/2 red onion, diced
  • 3/4 cup cheddar cheese, grated
  • 1 cup tortilla chips, crushed
  • 1 handful fresh coriander, chopped
  • 1/2 cup plain yogurt
  • 3 tbsp. avocado oil
  • 2 tsp. honey
  • 2 tsp. apple cider vinegar
  • 1 tsp. garlic, minced
  • 1 lime, juiced
  • 1/2 jalapeño, finely diced
  • 2 tsp. taco seasoning

Directions

  1. Mix the lettuce, corn, beans, tomatoes, avocado, onion and cheese in a large bowl.
  2. Set the bowl to one side.
  3. In another bowl, whisk together the yoghurt, oil, honey, apple cider vinegar, garlic, lime juice, jalapeño, and taco seasoning.
  4. When you are ready to serve the salad, add the dressing to the bowl with the salad.
  5. Toss the salad to coat everything with the dressing.
  6. Top the salad with the crushed chips and coriander to serve.

Nutrition

Per Serving: 287 calories; 12 g fat; 18 g carbohydrates; 26 g protein.

Equipment

  • Chopping board
  • Knife
  • Large mixing bowl
  • Small mixing bowl
  • Whisk
  • Spoon
  • Measuring cups
  • Measuring spoons
  • Scales

Nutritional disclaimer

Nutrition information is provided as an estimate based on the ingredients used and available in my area (New Zealand). The nutritional information is here to help you understand the recipe; I use MyFitnessPal to generate my estimates. For more accurate nutritional information, please use a nutritional calculator with the ingredients in your area.

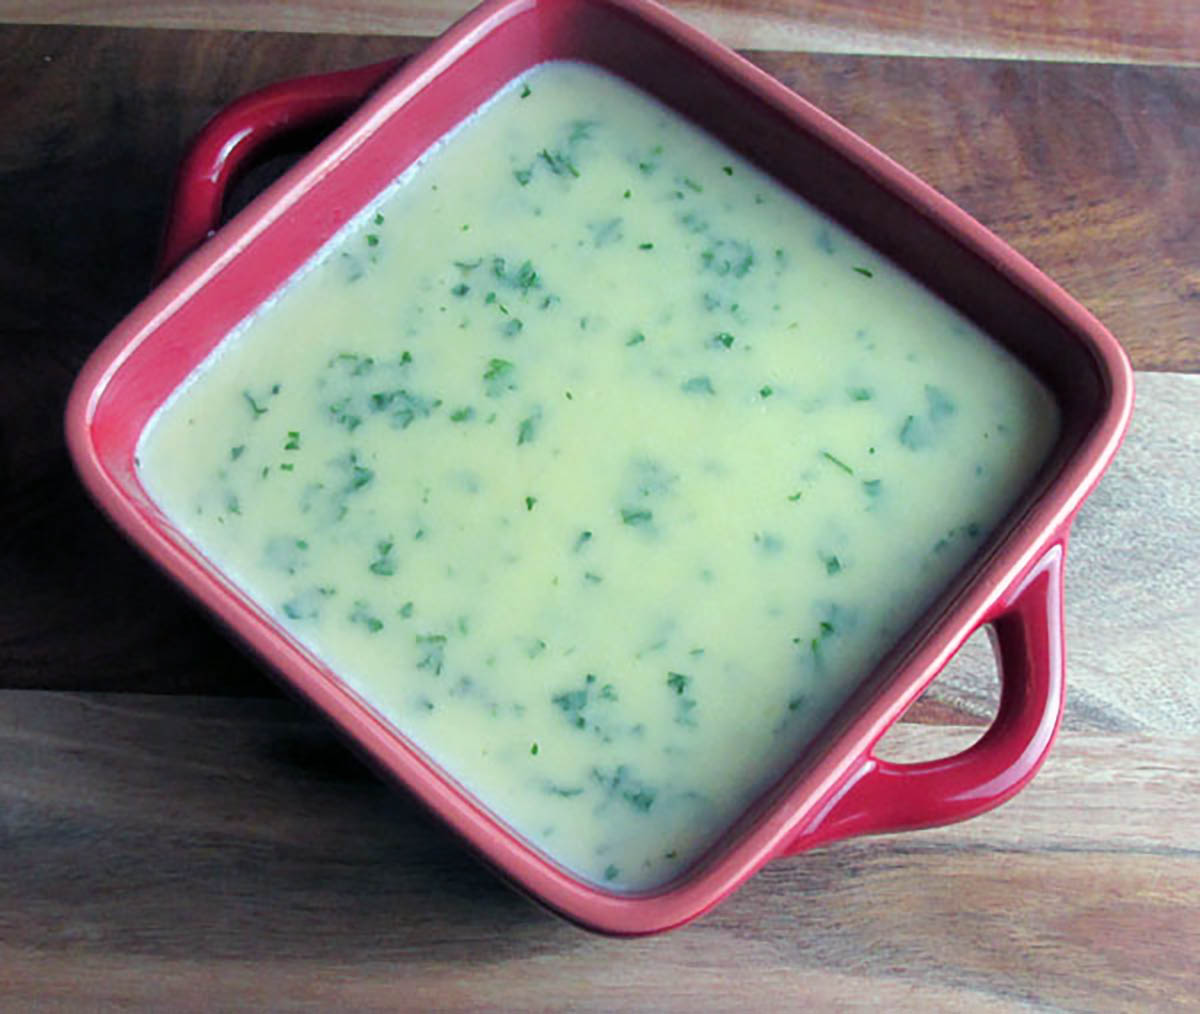
Alfredo sauce

Make your own

If you are like me and you try to avoid mass-produced processed foods, the best option is to make your own. When you make your own, you control which ingredients you use and how much or how sweet you want it to be. Once you have a go at making your own and realise how easy it is, you will never go back to store-bought again.

Updating as we go

Early in 2021, I relocated and started updating my website; I’ve been making changes and improving everything as I go. This recipe is one of the many things I’ve tried to improve.

Fancy a fakeaway

We all love a naughty takeaway, but we can all live without the extra calories and the expanding waistlines. You don’t need to live without your takeaway; swap it out for a delicious, healthier fakeaway. Fettuccine Alfredo was one of my favourite takeaway pasta dishes back in the day. As much as I would love the carb-filled dinner after a long day and a hard workout, it is never worth the carb coma afterwards. A while ago, I started experimenting to perfect my Alfredo sauce, which I could quickly whip up to pour over a bowl of coodles and generous chicken. It is ideal as a healthier takeaway option and keeps in the fridge for a few days.

Alfredo sauce recipe

Ingredients

  • 1/4 cup butter
  • 1 cup heavy cream
  • 1 garlic clove, crushed
  • 1 1/2 cups Parmesan cheese, grated
  • 1/4 cup parsley, chopped

Instructions

Melt butter in a medium saucepan over medium-low heat.

Add cream and simmer for 5 minutes.

Add the garlic and cheese and whisk quickly, heating through.

Stir in parsley and serve.

“Alfredo

  • Rating: ★★★★★
  • Print


Credit: Cath @ easycleaneats

Ingredients

  • 1/4 cup butter
  • 1 cup heavy cream
  • 1 garlic clove, crushed
  • 1 1/2 cups Parmesan cheese, grated
  • 1/4 cup parsley, chopped

Directions

  1. Melt butter in a medium saucepan over medium-low heat.
  2. Add cream and simmer for 5 minutes.
  3. Add the garlic and cheese and whisk quickly, heating through.
  4. Stir in parsley and serve.

Nutrition

Per Serving: 230 calories; 21 g fat; 3.5 g carbohydrates; 5.4 g protein

Equipment

  • Measuring cups
  • Knife
  • Chopping board
  • Saucepan
  • Spatula
  • Grater 

Nutritional disclaimer

Nutrition information is provided as an estimate based on the ingredients used and available in my area (New Zealand). The nutritional information is here to help you understand the recipe; I use MyFitnessPal to generate my estimates. For more accurate nutritional information, please use a nutritional calculator with the ingredients in your area.


Slow-roast leg of lamb

A treat for me

Last weekend, I gave myself a treat for Easter and made myself a kick-ass roast dinner. I’m not a lover of chocolate, but I wanted something nice to enjoy over the long weekend. After braving the supermarket, seriously, I never get over the mad panic when the supermarket is closed for one day. I managed to get everything I needed for slow-roasted leg of lamb with all the fixings and didn’t lose my mind in the process.
Fall apart perfect meat

For me, the perfectly roasted leg of lamb falls off the bone and melts in your mouth. In my experience, the best way to get meat that falls apart perfectly is to cook it low and slow. This recipe is a foolproof way to cook a leg of lamb perfectly, and it takes minimal effort, which is also perfect. The bonus of cooking lamb this way is that you also have everything you need to make a rich gravy to go with your meat.

Cook once, eat twice

In my sad little life, if I can cook once and get a couple of meals out of it, I’m winning. This recipe is a great option for cooking once and eating many times.

Slow roast leg of lamb recipe

Ingredients

  • 1.5-2kg Leg of Lamb
  • 1 carrot, roughly chopped
  • 1 onion, roughly chopped
  • 2 celery stalks, roughly chopped
  • 1 sweet potato, roughly chopped
  • 2 garlic cloves minced
  • 3 tsp. rosemary
  • 500ml water

Instructions

Preheat the oven to 200 degrees C/ 400 degrees F. 

Take a large roasting tin and lightly grease it.

Lay the chopped vegetables out at the bottom of the tray.

Pour the water into the roasting tin.

Place the leg of lamb on top of the vegetables.

Rub the lamb with the garlic and rosemary.

Cover the tin with baking paper and then foil, ensuring the roasting tin is completely covered to keep the moisture in.

Put the roasting tin into the preheated oven.

Cook for 30 minutes at 200 degrees C/ 400 degrees F.

Reduce the heat to 120 degrees C/ 250 degrees F and cook for 6 to 8 hours, depending on the weight of the lamb.

Check the meat after 6 to 8 hours. If the lamb is falling off the bone, take it out and let it rest. 

Remove the vegetables from the tray and use the remaining liquid to make gravy.

“Slow

  • Rating: ★★★★★
  • Print


Credit: Cath @ easycleaneats

Ingredients

  • 1.5-2kg Leg of Lamb
  • 1 carrot, roughly chopped
  • 1 onion, roughly chopped
  • 2 celery stalks, roughly chopped
  • 1 sweet potato, roughly chopped
  • 2 garlic cloves minced
  • 3 tsp. rosemary
  • 500ml water

Directions

  1. Preheat the oven to 200 degrees C/ 400 degrees F.
  2. Take a large roasting tin and lightly grease it.
  3. Lay the chopped vegetables out at the bottom of the tray.
  4. Pour the water into the roasting tin.
  5. Place the leg of lamb on top of the vegetables.
  6. Rub the lamb with the garlic and rosemary.
  7. Cover the roasting tin with baking paper and then foil, ensuring it is completely covered to keep the moisture in.
  8. Put the roasting tin into the preheated oven.
  9. Cook for 30 minutes at 200 degrees C/ 400 degrees F.
  10. Reduce the heat to 120 degrees C/ 250 degrees F and cook for 6 to 8 hours, depending on the weight of the lamb.
  11. Check the meat after 6 to 8 hours. If the lamb is falling off the bone, take it out and let it rest.
  12. Remove the vegetables from the tray and use the remaining liquid to make gravy.

Nutrition

Per Serving: 181 calories; 11.8g fat; 5.8g carbohydrates; 15.2g protein

Equipment

  • Measuring spoons
  • Measuring jug
  • Knife
  • Chopping board
  • Roasting tin
  • Baking paper
  • Aluminium foil

Nutritional disclaimer

Nutrition information is provided as an estimate based on the ingredients used and available in my area (New Zealand). The nutritional information is here to help you understand the recipe; I use MyFitnessPal to generate my estimates. For more accurate nutritional information, please use a nutritional calculator with the ingredients in your area.