Pasta free lasagne

Revisiting family favourites

I’ve been revisiting recipes that have been some of my old-school recipes and favourites that were staples when I got started eating clean. I first posted this recipe in 2015; at that time, my step kids were fussy, vegetables had to be hidden and disguised, and there was no potential for intense flavours or spice. 

As the kids grew, my recipes changed organically to meet their palates and preferences. I’ve updated this recipe because of that, but fear not; the original recipe suitable for kids and less developed palates is at the bottom of the post.

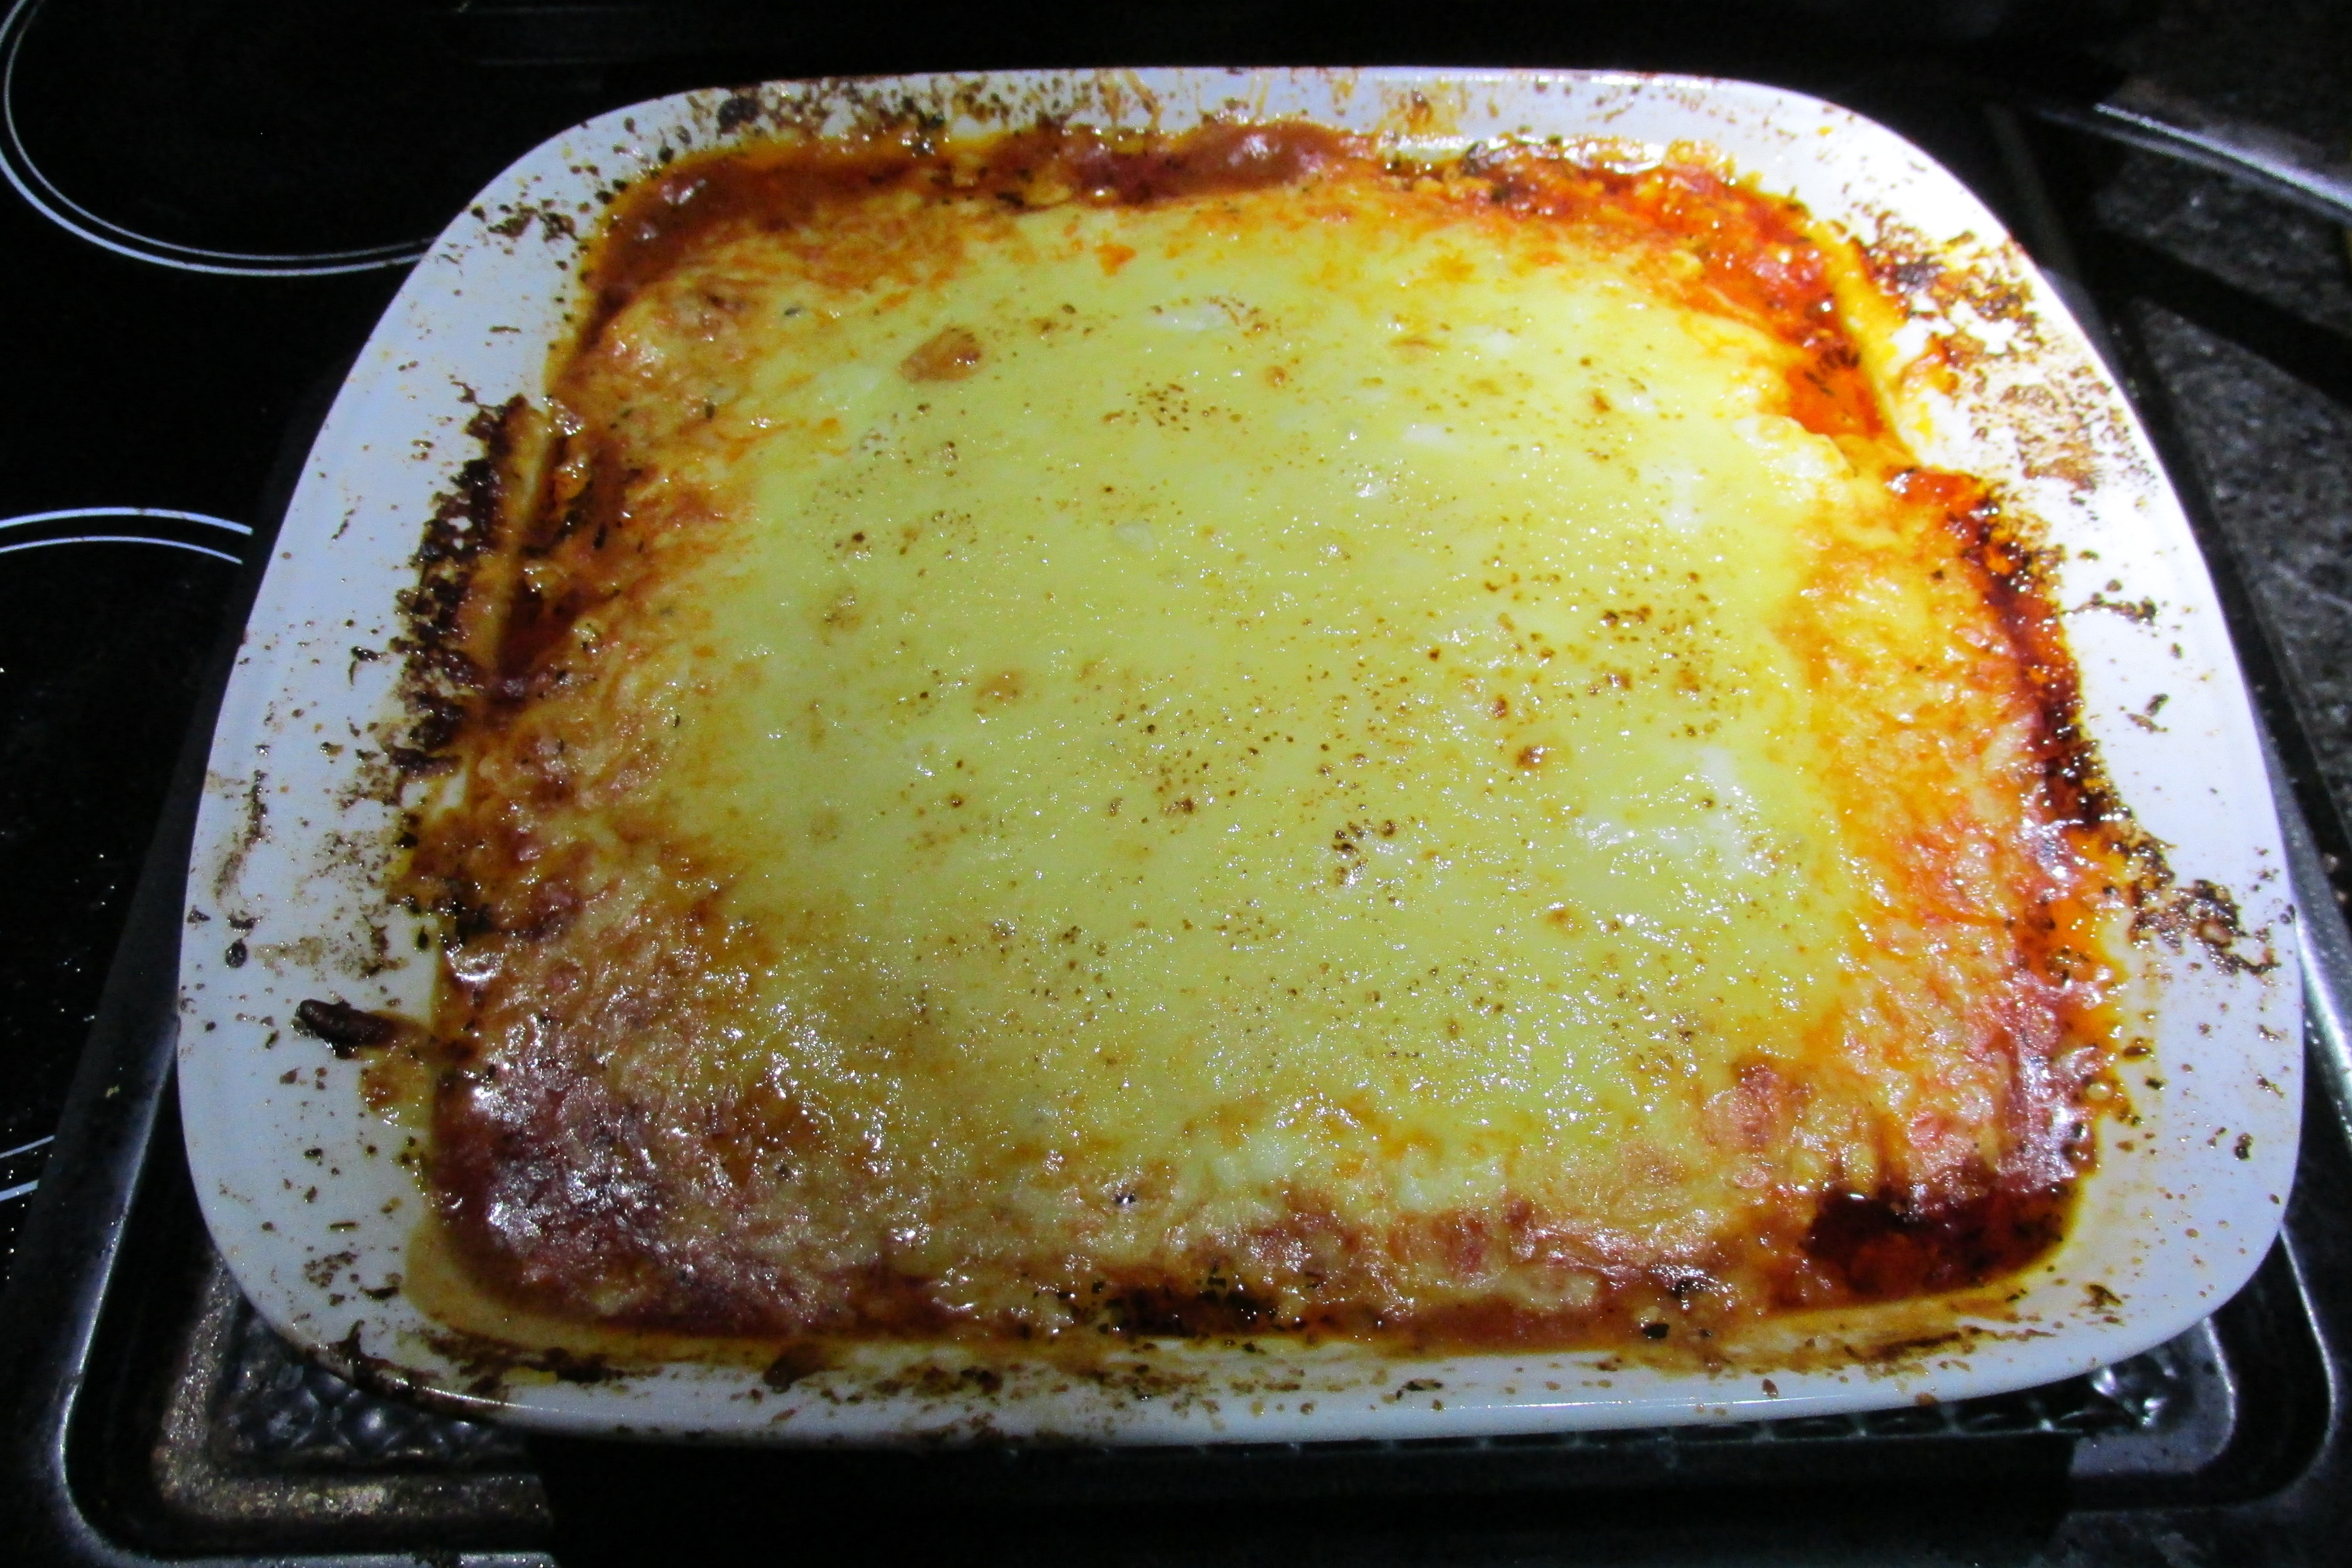
Hot lasagne fresh from the oven

Clean eating take of a classic

This was one of the first meals I made with a pasta alternative; much like replacing pasta with zoodles/coodles. I was always game to sneak some extra vegetables into the family meals, but this is one of the few meals I don’t need to hide the vegetables at all. The popular opinion of the kids back then was that this lasagne was better than one made with traditional pasta. I can’t say I disagree. As times have changed and this lasagne recipe is no longer entirely consumed in one sitting, it has become one of my favourite freezer meals. I can either make it in bulk and portion it out to enjoy some comfort food when needed or have a tray in the freezer for when I have company over. 

Secret to success

The secret to a good lasagna is the depth of flavour. Flavour isn’t instant; it takes time and some effort. When I’m making lasagna, I tend to make the meat sauce the day before to let the herbs get to know the meat and sauce, mingle, and start the flavour party. The longer you leave the meat and herbs to party, the better your lasagna will taste. 

Pasta free lasagne recipe

Lasagne ingredients
Lasagne ingredients

Ingredients

  • 500g minced beef
  • 1 onion finely diced
  • 2 celery sticks, finely chopped
  • 1 can tomatoes, chopped
  • 2 garlic cloves minced
  • 1 tsp. basil
  • 1 tsp. oregano
  • 1 tbsp. red chilli flakes
  • 1 tbsp. coconut oil
  • 4 carrots cut into ribbons
  • 2 cups cheese, grated 
  • 250g cottage cheese

Instructions

Add the coconut oil to a stockpot over medium heat.

Add the onion and cook until the onion starts to soften.

Add the onion to a stockpot and cook until the onion starts to soften

Add the garlic, basil, chilli and oregano to the pan.

Add the garlic, basil and oregano to the pan
Cook until the onion is softening

Add the beef mince to the pan and cook the beef until it browns.

Add the beef mince to the pan
Cook the beef until it browns

Add the chopped tomatoes to the pan along with the chopped celery.

Add the celery
Add the celery
Add the chopped tomatoes to the pan
Add the chopped tomatoes to the pan 

Simmer the mixture for 10 minutes, then turn off the heat.

Simmer the mixture for 10 minutes then turn off the heat

While the meat and sauce are simmering, take a baking dish and ensure you have enough carrot ribbons to build your lasagne layers.

When the meat simmers, you can start to layer the lasagne.

Start with a carrot ribbons layer at the baking dish’s bottom.

Start with a layer of carrot ribbons at the bottom of the baking dish.

Next, add half the meat and sauce to create a layer in the baking dish.

Next add a half of the meat and sauce to create a layer in the baking dish.
Create a layer in the baking dish.

Add another layer of carrot ribbons on top of the meat.

Add another layer of carrot ribbons on top of the meat.

Next, add half of the cottage cheese and spread it across the dish, then top it with half the grated cheese.

Next add half of the cottage cheese
Top with half the cheese
Top with half the cheese 

Top with half the cheese, and another layer of carrot ribbons.

Repeat the layers with meat, carrot ribbons, cottage cheese and grated cheese.

Repeat the layers with meat, carrot ribbons, cottage cheese and grated cheese.

If you can leave the lasagna overnight before baking it, the longer you leave it, the better it will taste.

Bake the lasagne at 180 degrees C/ 350 degrees F for 30 minutes.

Remove the lasagne from the oven when the cheese is brown and bubbly.

Bake the lasagne at 180 degrees C/ 350 degrees F for 30 minutes

Let the lasagne rest for 5 minutes before slicing and serving.

Let the lasagne rest for 5 minutes before slicing and serving

Pasta free lasagne

  • Servings: 8
  • Rating: ★★★★★
  • Print


Credit: Cath @ easycleaneats

Ingredients

  • 500g minced beef
  • 1 courgette diced
  • 1 onion finely diced
  • 1 red pepper diced
  • 1 can tomatoes
  • 2 garlic cloves minced
  • 1 tsp. basil
  • 1 tsp. oregano
  • 1 tbsp. Red chilli flakes
  • 1 tbsp. coconut oil
  • 2 courgettes cut into ribbons
  • 2 carrots cut into ribbons
  • 2 cups cheese, grated

Directions

  1. Add the coconut oil to a stockpot over medium heat.
  2. Add the onion and cook until the onion starts to soften.
  3. Add the garlic, basil, chilli and oregano to the pan.
  4. Add the beef mince to the pan and cook the beef until it browns.
  5. Add the chopped tomatoes to the pan along with the chopped celery.
  6. Simmer the mixture for 10 minutes, then turn off the heat.
  7. While the meat and sauce are simmering, take a baking dish and ensure you have enough carrot ribbons to build your lasagne layers.
  8. When the meat simmers, you can start to layer the lasagne.
  9. Start with a carrot ribbons layer at the baking dish’s bottom.
  10. Next, add half the meat and sauce to create a layer in the baking dish.
  11. Add another layer of carrot ribbons on top of the meat.
  12. Next, add half of the cottage cheese and spread it across the dish, then top it with half the grated cheese.
  13. Top with half the cheese, and another layer of carrot ribbons.
  14. Repeat the layers with meat, carrot ribbons, cottage cheese and grated cheese.
  15. If you can leave the lasagna overnight before baking it, the longer you leave it, the better it will taste.
  16. Bake the lasagne at 180 degrees C/ 350 degrees F for 30 minutes.
  17. Remove the lasagne from the oven when the cheese is brown and bubbly.
  18. Let the lasagne rest for 5 minutes before slicing and serving.

Nutrition

Per Serving: 350 calories; 25.7 g fat; 8.2 g carbohydrates; 21.7 g protein

Equipment

  • Stockpot
  • Wooden spoon
  • Vegetable peeler
  • Knife
  • Grater
  • Chopping board
  • Baking dish

Nutritional disclaimer

Nutrition information is provided as an estimate based on the ingredients used and available in my area (New Zealand). The nutritional information is here to help you understand the recipe; I use MyFitnessPal to generate my estimates. For more accurate nutritional information, please use a nutritional calculator with the ingredients in your area.

Pasta free lasagne – kid friendly recipe

Ingredients

  • 500g minced beef
  • 1 courgette diced
  • 1 onion finely diced
  • 1 red pepper diced
  • 1 can tomatoes 
  • 2 garlic cloves minced
  • 1 tsp. basil
  • 1 tsp. oregano
  • 1 tbsp. coconut oil
  • 2 courgettes cut into ribbons
  • 2 carrots cut into ribbons
  • 2 cups cheese, grated 

Instructions

  1. In a stockpot heat the coconut oil, garlic, onion basil and oregano over a medium heat, cook until the onion is soft.
  2. Add the beef mince and cook off until browned. 
  3. Pour in the tomatoes along with the diced vegetables to the meat and cook for 10 minutes. 
  4. In a baking dish create a layer of carrot ribbons to cover the bottom add a layer of meat then cover with a layer of courgette ribbons, top with cheese. 
  5. Repeat until you reach the top of the baking dish, top the final layer with cheese.
  6. If you can leave the lasagne overnight before you bake it, the longer you leave it the better it will taste.
  7. Bake the lasagne at 180 degrees C/ 350 degrees F for 30 minutes.
  8. When the cheese is brown and bubbly remove the lasagne from the oven.
  9. Let the lasagne rest for 5 minutes before slicing and serving.
Protein cheesecake

Just because I love a challenge

I love looking at recipe books and figuring out if they can be changed and if I could make a clean-eating version. This recipe was initially given to me from the Ross Edgley The World’s Fittest book, and I asked if it could be adapted. As I love a challenge, I decided to give it a go.

Easy Swaps

Sometimes, I can look at a recipe and know what ingredients are easy to swap out for alternative ingredients. Other recipes require some trial and error before you have something close to what the recipe would give you. Thankfully, this was one of the easy swap recipes that ended up giving me a finished cheesecake that didn’t last very long (3 days). 

The original recipe called for quark, cocoa, muesli, blueberries, and strawberries. I swapped out the quark for crème fraiche and sour cream to increase the fat content, changed the cocoa for cacao powder, and ditched the fruit. While some may not have an issue with muesli, I swapped it out for my nut-free breakfast crunch for more texture in the base. 

Protein cheesecake

Protein cheesecake ingredients

Ingredients

  • 250g creme fraiche
  • 250g sour cream
  • 250g yoghurt
  • 60g protein powder
  • 3 tsp. cacao powder
  • 1/2 tsp vanilla powder
  • 2 egg whites
  • 2 tbsp. gelatine
  • 200ml coconut milk
  • 200g nut-free breakfast crunch
  • 2 tsp honey
  • 1 tsp coconut oil, melted

Instructions  

Mix the breakfast crunch with the honey and the melted coconut oil in a bowl, ensuring it is fully coated. I like to use a food processor for this step.

Mix the nut-free breakfast crunch with the honey and the melted coconut oil together

Spread the crunch mixture out in the bottom of a springform cake tin and press it gently into the tin.

Spread the crunch mixture out in the bottom of a spring form cake tin
Spread the crunch mixture out
press it gently into the tin
Press it gently into the tin

Put the tin in the fridge to get the coconut oil to firm up the mixture.

In a small bowl, bloom the gelatine as the packet instructs.

Bloom the gelatine as the packet instructs

In a large bowl, mix the crème fraiche, sour cream, and yoghurt with the protein powder, making sure there are no lumps.

Whisk in the protein powder.
Mix well.
Mix well.

Gently heat the coconut milk and whisk in the cacao powder, followed by the gelatine.

Heat the milk and chocolate with the gelatine.

Set the milk and gelatine mix to one side.

In another bowl, whisk the egg whites until they form stiff peaks.

Take a stand mixer.
Take a stand mixer.
Whisk the egg white.
In another bowl whisk the creme fraiche, sour cream and yoghurt.

Slowly fold the egg whites into the protein and yoghurt mixture.

Fold the egg whites into the cheese mix

Be careful not to overwork the egg whites; you want to keep as much air in the mixture as possible.

Whisk the gelatine and milk into the protein and yoghurt mixture.

Fold in the chocolate mixture.

Take the cake tin with the base out of the fridge.

Pour the cheesecake mix into the cake pan.

Pour the protein mixture into the spring form tin and smooth the top with the back of a spoon.

Put the cheesecake in the fridge to set up.

Put the cheesecake in the fridge for 4 to 8 hours to set. 

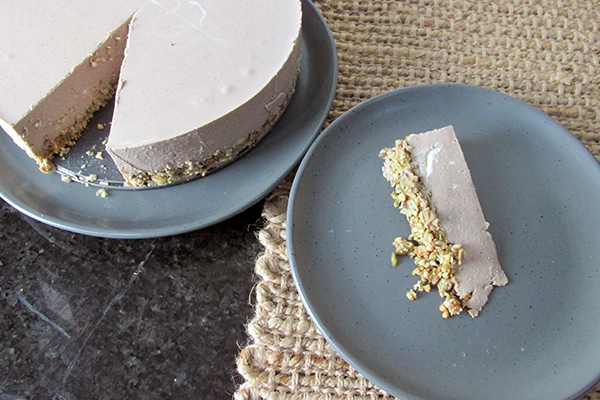
Once the cheesecake has set, cut it into 12 pieces.

Cheesecake set in the fridge.
Slice the cheesecake
Protein cheesecake ready to eat. Enjoy

Protein cheesecake

  • Servings: 12
  • Rating: ★★★★★
  • Print

I love looking at recipe books and figuring out if they can be changed and if I could make a clean-eating version.


Credit: Cath @ easycleaneats

Ingredients

  • 250g crème fraiche
  • 250g sour cream
  • 250g yoghurt
  • 60g protein powder
  • 3 tsp. Cacao powder
  • 1/2 tsp. vanilla bean powder
  • 2 egg whites
  • 2 tbsp. Gelatine
  • 200ml coconut milk
  • 200g breakfast crunch
  • 2 tsp. honey
  • 1 tsp. coconut oil, melted

Directions

  1. Mix the breakfast crunch with the honey and the melted coconut oil in a bowl, ensuring it is fully coated.
  2. Spread the crunch mixture out in the bottom of a springform cake tin and press it gently into the tin.
  3. Put the tin in the fridge to get the coconut oil to firm up the mixture.
  4. In a small bowl, bloom the gelatine as the packet instructs.
  5. In a large bowl, mix the crème fraiche, sour cream, and yoghurt with the protein powder, making sure there are no lumps.
  6. Gently heat the coconut milk and whisk in the cacao powder, followed by the gelatine.
  7. Set the milk and gelatine mix to one side.
  8. In another bowl, whisk the egg whites until they form stiff peaks.
  9. Slowly fold the egg whites into the protein and yoghurt mixture.
  10. Be careful not to overwork the egg whites; you want to keep as much air in the mixture as possible.
  11. Whisk the gelatine and milk into the protein and yoghurt mixture.
  12. Take the cake tin with the base out of the fridge.
  13. Pour the protein mixture into the spring form tin and smooth the top with the back of a spoon.
  14. Put the cheesecake in the fridge for 4 8 hours to set.
  15. Once the cheesecake has set, cut it into 12 pieces.

Nutrition

Per Serving: 177 calories; 12.2 g fat; 7.3 g carbohydrates; 6.8 g protein.

Equipment  

  • Bowl x2  
  • Spatula x2  
  • Whisk  
  • Spring form cake tin  
  • Saucepan  
  • Measuring spoons
  • Scales
  • Measuring jug
  • Spoon

Nutritional disclaimer

Nutrition information is provided as an estimate based on the ingredients used and available in my area (New Zealand). The nutritional information is here to help you understand the recipe; I use MyFitnessPal to generate my estimates. For more accurate nutritional information, please use a nutritional calculator with the ingredients in your area.


Cross bun cookies

Easter treats  

Yep, it really is Easter already; I know that the supermarket had the Easter eggs out at the end of January, but it is actually Easter now. I feel like Easter is not complete without hot cross buns. You can keep your chocolate eggs and your cream eggs; I miss the smell and taste of toasted hot cross buns smothered with butter. I have tried (and failed) many times to come up with a grain-free, sugar-free alternative for the hot cross bun. I’m convinced that it can’t be done; they just aren’t the same. That realisation set me free to try making hot cross other things like cookies!  

Same but different  

These cross-bun cookies have all of the fruity, spicy flavours of the traditional hot cross bun but in a gluten-free, sugar-free compact form. I make no claims about these cookies being healthy or good for you; they are just an alternative if you don’t want the pain and suffering that will come from those toasted hot cross buns.

I’ve used dark chocolate chips in this recipe to help the cookies retain some moisture; you can swap these out for any kind of chocolate that you prefer. As with all my recipes, these cookies are nut-free, thanks to sunflower seed butter. If you are happy to include nuts, you can swap out the sunflower butter for either cashew or almond butter without having to adjust the quantities.

Cross bun cookies recipe 

Ingredients  

  • 1 1/4 cup rolled oats  
  • 1/2 tsp. baking powder  
  • 1/2 tsp. baking soda  
  • 2 tbsp. coconut sugar  
  • 1 tbsp. mixed spice  
  • 1 tsp. ground cinnamon  
  • 1/4 tsp. cloves  
  • 1/2 cup sun butter  
  • 2 tbsp. maple syrup  
  • 3 tbsp. coconut milk  
  • 1/4 tsp. vanilla bean powder  
  • 1/4 tsp. salt  
  • 1/4 cup dark chocolate chips  
  • 1/4 cup raisins 

Instructions

Preheat your oven to 180°c /360°f.  

Line a baking tray with baking paper or a silicone liner.  

Blend your oats into flour or use a coffee grinder.  

In a bowl add the oat flour and mix in the baking soda, baking powder, coconut sugar, mixed spice, ground cinnamon and cloves.  

In a separate bowl, mix your sun butter, maple syrup, coconut milk, vanilla bean powder and salt.  

Add your wet and dry ingredients together and mix until combined and you have a sticky but not too sticky cookie dough.  

Fold in your sultanas or choc chips.

Divide the dough into cookies and place evenly on your lined trays.  

Press lightly on each to flatten and bake for 15 minutes.  

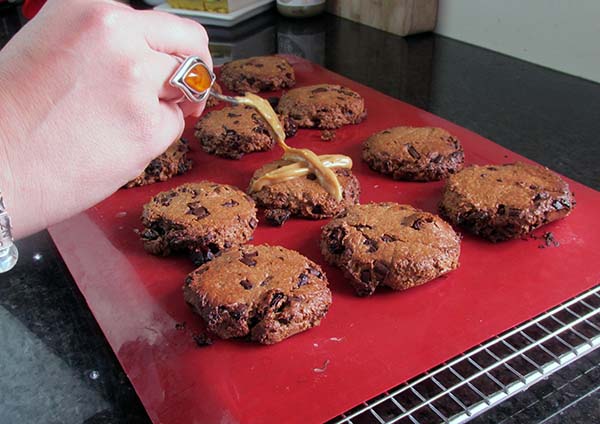
Cool and top with crosses.  

“Lemon

  • Servings: 15
  • Rating: ★★★★★
  • Print

“These


Credit: Cath @ easycleaneats 

Ingredients

  • 1 1/4 cup rolled oats
  • 1/2 tsp. baking powder
  • 1/2 tsp. baking soda
  • 2 tbsp. coconut sugar
  • 1 tbsp. mixed spice
  • 1 tsp. ground cinnamon
  • 1/4 tsp. cloves
  • 1/2 cup sun butter
  • 2 tbsp. maple syrup
  • 3 tbsp. coconut milk
  • 1/4 tsp. vanilla bean powder
  • 1/4 tsp. salt
  • 1/4 cup dark chocolate chips
  • 1/4 cup raisins

Directions

  1. Preheat your oven to 180°c /360°f.
  2. Line a baking tray with baking paper or a silicone liner.
  3. Blend your oats into flour or use a coffee grinder.
  4. In a bowl add the oat flour and mix in the baking soda, baking powder, coconut sugar, mixed spice, ground cinnamon and cloves.
  5. In a separate bowl, mix your sun butter, maple syrup, coconut milk, vanilla bean powder and salt.
  6. Add your wet and dry ingredients together and mix until combined and you have a sticky but not too sticky cookie dough.
  7. Fold in your sultanas or choc chips, roll into cookies and place evenly on your lined trays.
  8. Press lightly on each to flatten and bake for 15 minutes.
  9. Cool and top with crosses.

Nutrition

Per Serving: 86 calories; 2g fat; 15g carbohydrates; 2g protein

Equipment   

  • Baking tray   
  • Baking paper or a silicone liner
  • Measuring cups
  • Measuring spoons   
  • Mixing bowl   
  • Spice mill   
  • Spatula   
  • Ice cream scoop   

Nutritional disclaimer

Nutrition information is provided as an estimate based on the ingredients used and available in my area (New Zealand). The nutritional information is here to help you understand the recipe; I use MyFitnessPal to generate my estimates. For more accurate nutritional information, please use a nutritional calculator with the ingredients in your area.


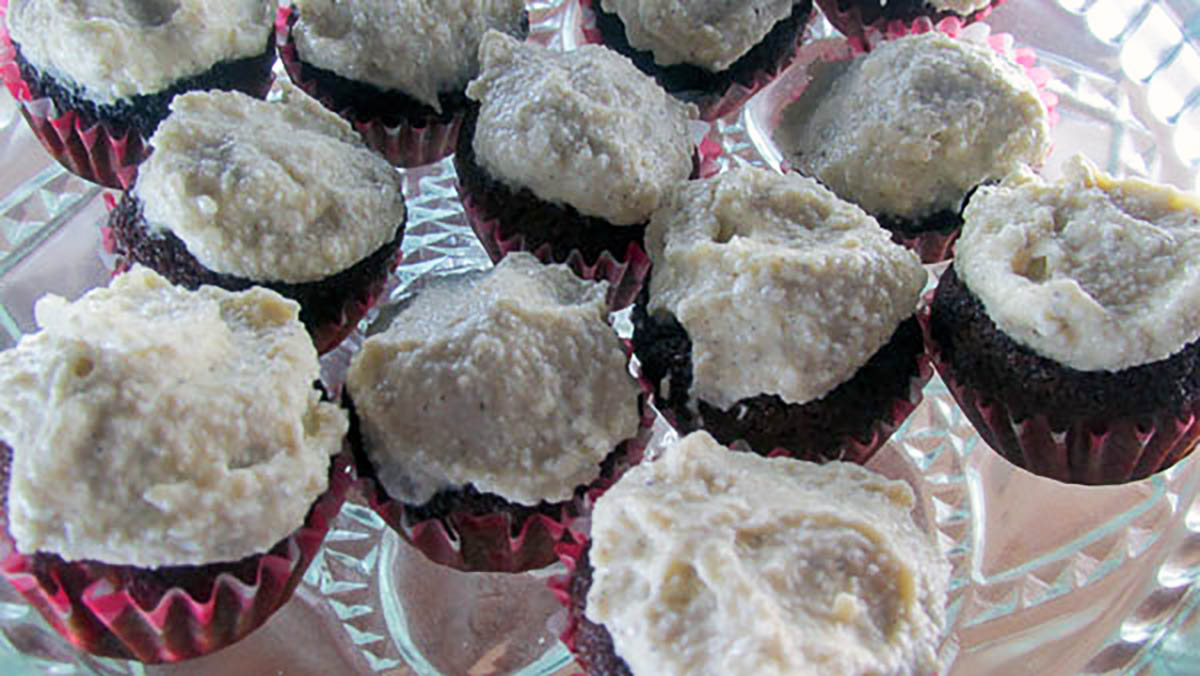
Small vanilla cupcakes with vanilla icing

Vanilla cupcakes

Something sweet 

I realised recently that I don’t post a lot of sweet treats so thought I would give your something sweet this week. This is my grain-free vanilla cupcakes with sugar-free frosting. The cake mix is soft and airy which gives these cupcakes a real cake texture and taste without any sugar or grains.

Making it feel like real cake 

I often find that making cakes taste like cakes when you aren’t using standard cake ingredients is difficult. The light and fluffy texture are not easy to achieve unless you know that eggs hold the key. It has taken me a while to get the technique right, but I think I have it. Egg whites whisked to stiff peaks that are folded into a cake batter make grain free cakes light, fluffy and airy. You would swear you were biting into a sponge cake. 

Coconut flour 

Jaime has come to a decision that he doesn’t like coconut flour; he doesn’t like cookies and cakes baked with coconut flour. I didn’t have the heart to tell him that the tray of cupcakes he ate in one afternoon was made from coconut flour, I didn’t want to ruin his afternoon. When you bake with coconut flour, it is a good idea to remember that not all coconut flour is made equally. Sometimes coconut flour can be very dry, it will soak up all the liquid in your recipe and leave you with something difficult to eat. When I bake cakes with a new bag or brand of coconut flour, I like to leave the batter to hang out for 10 minutes. This is to make sure that the flour doesn’t steal all the moisture in my cake. If the flour is super thirsty, you can add a little more liquid and save the cake before you bake. 

Vanilla cupcakes recipe

Ingredients

  • 1/4 cup coconut flour
  • 1/8 tsp. salt
  • 1/8 tsp. baking soda
  • 3 eggs
  • 1/4 cup coconut oil
  • 2 tbsp. honey
  • 1 tbsp. vanilla bean paste

Vanilla cupcakes

  • Servings: 12
  • Rating: ★★★★★
  • Print

The cake mix is soft and airy which gives these cupcakes a real cake texture and taste without any sugar or grains.


Credit: Cath @ easycleaneats

Ingredients

  • 1/4 cup coconut flour
  • 1/8 tsp. salt
  • 1/8 tsp. baking soda
  • 3 eggs
  • 1/4 cup coconut oil
  • 2 tbsp. honey
  • 1 tbsp. vanilla bean paste

Directions

  1. Instructions
  2. Separate the egg whites and yolks. 
  3. Put the egg whites in a clean mixing bowl and whisk until they are stiff peaks. 
  4. Set the egg whites to one side
  5. Put the remaining ingredients into a food processor and blend together to create a smooth batter.
  6. Gently fold the egg whites into the batter.
  7. Line a 12- cup muffin pan with cupcake wrappers, the number of cakes you get will depend on how large your cake pan is
  8. Pour the batter into the cupcake wrappers, don’t overfill the cupcake wrappersPour the batter into the cupcake wrappers, don’t overfill the cupcake wrappers
  9. Bake at 180 degrees C/ 350 degrees F for 20 minutes
  10. Allow the cakes to cool completely before icing

Nutrition

Per Serving: 80 calories; 6 g fat; 5 g carbohydrates; 2 g protein

Equipment

  • Whisk
  • Bowl
  • Food processor
  • Muffin tin
  • Cupcake wrappers
  • Measuring cups
  • Measuring spoons

Nutritional disclaimer

Nutrition information is provided as an estimate based on the ingredients used and available in my area (New Zealand). The nutritional information is here to help you understand the recipe; I use MyFitnessPal to generate my estimates. For more accurate nutritional information, please use a nutritional calculator with the ingredients in your area.