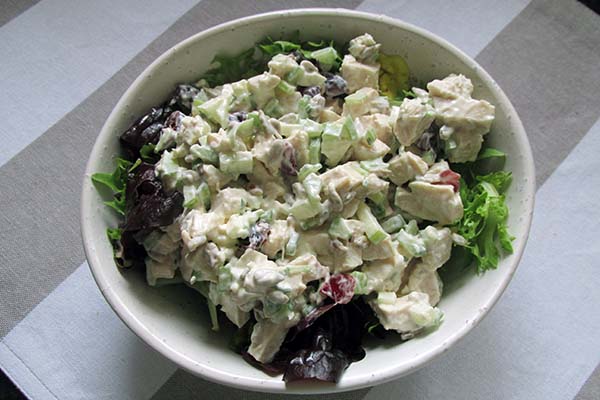
Coronation Chicken

Instant pot awesome

A few years ago, I upgraded my slow cooker to an Instant Pot Duo and fell in love with it. The upgrade meant having one appliance in the cupboard that was a slow cooker, and an air fryer in one. It has to be my favourite appliance for baking and roasting during summer. Usually, I would refuse to roast a chicken during the summer months for fear of heat stroke. That all changed with the Instant Pot Duo in my arsenal. The little pot happily roasts a chicken without kicking out a million degrees of heat to the room and always delivers moist chicken for any occasion. I’ve been eating through my freezer supplies over the last few weeks and found a whole chicken at the bottom of the freezer, which was begging to be made into a tasty salad.

Coronation chicken
Coronation chicken

An oldie but a goodie

When you want something that feels like comfort food, it is far too hot to have a hot meal; try Coronation chicken salad. It is my answer to a summertime comfort meal. It’s a good old English favourite and an excellent way to add some spice to a cooked chicken. While my version of Coronation is a departure from the original recipe, it still delivers on flavour and won’t remind you of soggy sandwiches.

Coronation chicken recipe

Ingredients

Coronation chicken ingredients
  • 1 onion finely chopped
  • 2 tsp. curry powder
  • 1 tbsp. tomato paste
  • 1/2 cup water
  • 1/4 cup mango chutney
  • 1/2 cup Greek yoghurt
  • 1/2 cup easy mayo
  • 2 celery sticks, chopped
  • 1 red pepper, chopped
  • 1 chicken, cooked
Over a medium heat in a frying pan heat some oil.
Add the onions to the pan.
Add the curry powder and tomato paste.
Mix well.
Mix well.
Then add the water and continue to mix.
Add the shredded chicken to the pan and mix.
Add the shredded chicken to the pan and mix. 
Add the shredded chicken to the pan and mix.
Add the shredded chicken to the pan and mix. 
Mix well.
Mix well.
The chicken should be coated in the sauce.
Removed the chicken from the heat and set it aside to cool slightly.
In another bowl add the mayo, yoghurt and chutney.
Mix well.
Mix well.
Add the peppers and celery.
Mix well.
Mix well.
Add the chicken mixture.
Mix well.
Mix well.
Serve the salad on a bed of lettuce.
Serve on a bed of lettuce.

Coronation chicken

  • Servings: 6
  • Rating: ★★★★★
  • Print

It’s a good old English favourite and a nice way to add some spice to a cooked chicken.


Credit: Cath @ easycleaneats

Ingredients

  • 1 onion finely chopped
  • 2 tsp. curry powder
  • 1 tbsp. tomato paste
  • 1/2 cup water
  • 1/4 cup mango chutney
  • 1/2 cup Greek yoghurt
  • 1/2 cup easy mayo
  • 2 celery sticks, chopped
  • 1 red pepper, chopped
  • 1 chicken, cooked

Directions

  1. Shred the cooked chicken and set it to one side.
  2. Over a medium heat in a frying pan heat some oil.
  3. Fry off the onions.
  4. When the onion has softened, add the curry powder and tomato paste to the pan and mix well.
  5. Then add the water and continue to mix.
  6. Add the shredded chicken to the pan and mix.
  7. The chicken should be coated in the sauce.
  8. Removed the chicken from the heat and set it aside to cool slightly.
  9. In another bowl, mix together the chutney, yoghurt and mayo.
  10. Add the chicken mixture along with the chopped pepper and celery.
  11. Put the chicken in the fridge to cool for 30 minutes.
  12. Serve with fresh salad leaves and a sprinkle of raisins if you want a little extra sweetness.

Nutrition

Per Serving: 285 calories; 17.3 g fat; 7.4 g carbohydrates; 28.3 g protein

Equipment

  • Frying pan
  • Wooden spoon
  • Mixing bowl
  • Whisk  

Nutritional disclaimer

Nutrition information is provided as an estimate based on the ingredients used and available in my area (New Zealand). The nutritional information is here to help you understand the recipe; I use MyFitnessPal to generate my estimates. For more accurate nutritional information, please use a nutritional calculator with the ingredients in your area.

Chicken chilli wraps

Revisiting favourites

I’ve been revisiting some of my old-school recipes and favourites, which were staples when I started eating clean. I first posted this recipe in 2017; at that time, my stepkids were fussy, vegetables had to be hidden and disguised, and there was no potential for intense flavours or spice. 

Times (thankfully) changed, and the kids grew up (like man-sized grown) and learned to enjoy a wide range of foods. Things like vegetables no longer meant faces being pulled, spice and chilli were consumed without complaint, and new ingredients were tried without tantrums.

As the kids grew, my recipes changed organically to meet their palates and preferences. Because of that, I’ve updated this recipe, but fear not; the original recipe, suitable for kids with less developed palates, is at the bottom of the post.

Quick, easy and spicy

It has been another whirlwind week packed with workouts, life admin and another work trip to Wellington. No matter how much I try to keep myself organised before a work trip, I always end up on the back foot. My fridge was looking empty, and I had no energy to go shopping, so this recipe sprung to mind as it’s a great example of making something out of nothing. A well-stocked pantry means I always have something to make a sauce or spicy mix to turn essential ingredients into a tasty meal. These wraps were easy to make and were the perfect end-of-week option. If you don’t like your food with a lot of spice, reduce the amount of red pepper flakes. 

Chicken chilli wraps recipe

Ingredients

  • 1 Cos Lettuce
  • 500g chicken mince
  • 2 tsp. red pepper flakes
  • 2 tsp. minced garlic
  • 1/2 tsp. salt
  • 1 tbsp. coconut aminos
  • 2 tbsp. water
  • 2 tbsp. sweet chilli sauce

Instructions

In a bowl, mix the water, coconut aminos, salt, garlic, and red pepper flakes.

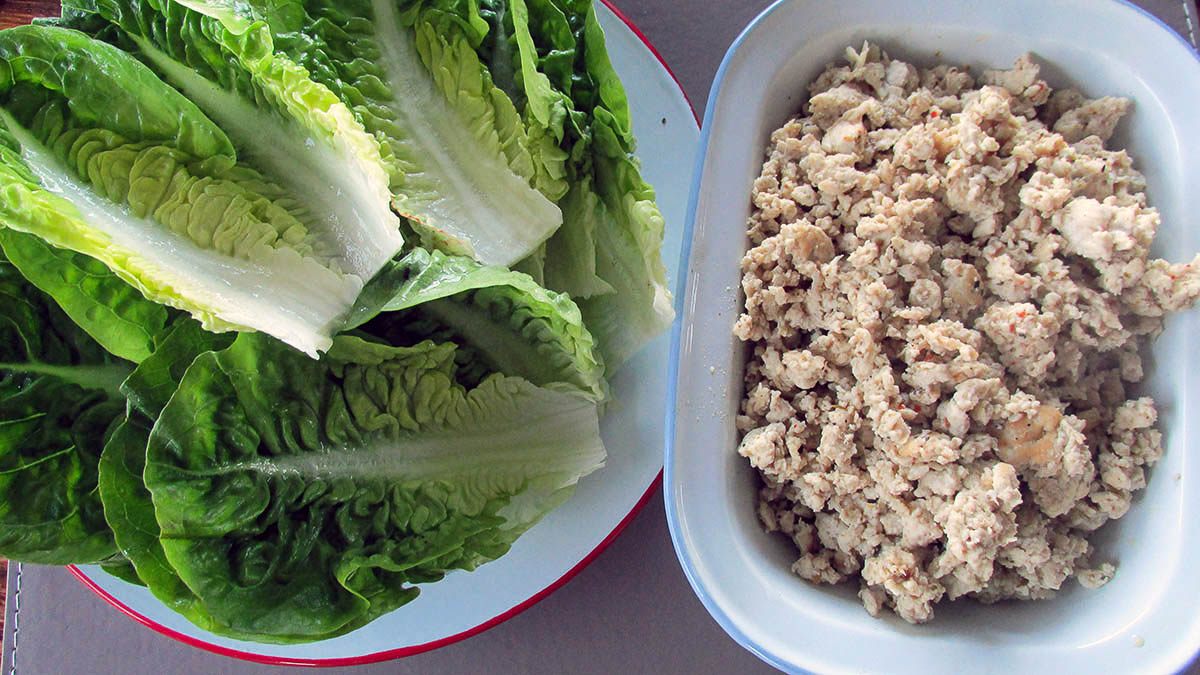
Cut the lettuce at the stalk and wash the leaves.

Dry the lettuce leaves and store them in the fridge with a damp towel over the top.

Heat some oil in a large frying pan and add the minced chicken to the pan.

Pour the amino and chilli mixture over the chicken while it is cooking.

When the chicken is cooked, stir in the sweet chilli sauce

Plate up the cos leaves, spoon the cooked chicken into the leaves and serve.

Chicken chilli wraps

  • Rating: ★★★★★
  • Print

“These


Credit: Cath @ easycleaneats

Ingredients

  • 1 Cos Lettuce
  • 500g chicken mince
  • 2 tsp. red pepper flakes
  • 2 tsp. minced garlic
  • 1/2 tsp. salt
  • 1 tbsp. coconut aminos
  • 2 tbsp. water
  • 2 tbsp. sweet chilli sauce

Directions

  1. In a bowl, mix the water, coconut aminos, salt, garlic, and red pepper flakes.
  2. Cut the lettuce at the stalk and wash the leaves.
  3. Dry the lettuce leaves and store them in the fridge with a damp towel over the top.
  4. Heat some oil in a large frying pan and add the minced chicken to the pan.
  5. Pour the amino and chilli mixture over the chicken while it is cooking.
  6. When the chicken is cooked, stir in the sweet chilli sauce
  7. Plate up the cos leaves, spoon the cooked chicken into the leaves and serve.

Nutrition

Per Serving:203 calories; 9.5g fat; 4.7g carbohydrates; 15.9g protein

Equipment

  • Mixing bowl
  • Whisk 
  • Kitchen towel
  • Knife
  • Chopping board
  • Frying pan

Nutritional disclaimer

Nutrition information is provided as an estimate based on the ingredients used and available in my area (New Zealand). It is here to help you understand the recipe. I generate my estimates using MyFitnessPal. For more accurate nutritional information, please use a nutritional calculator with the ingredients in your area.


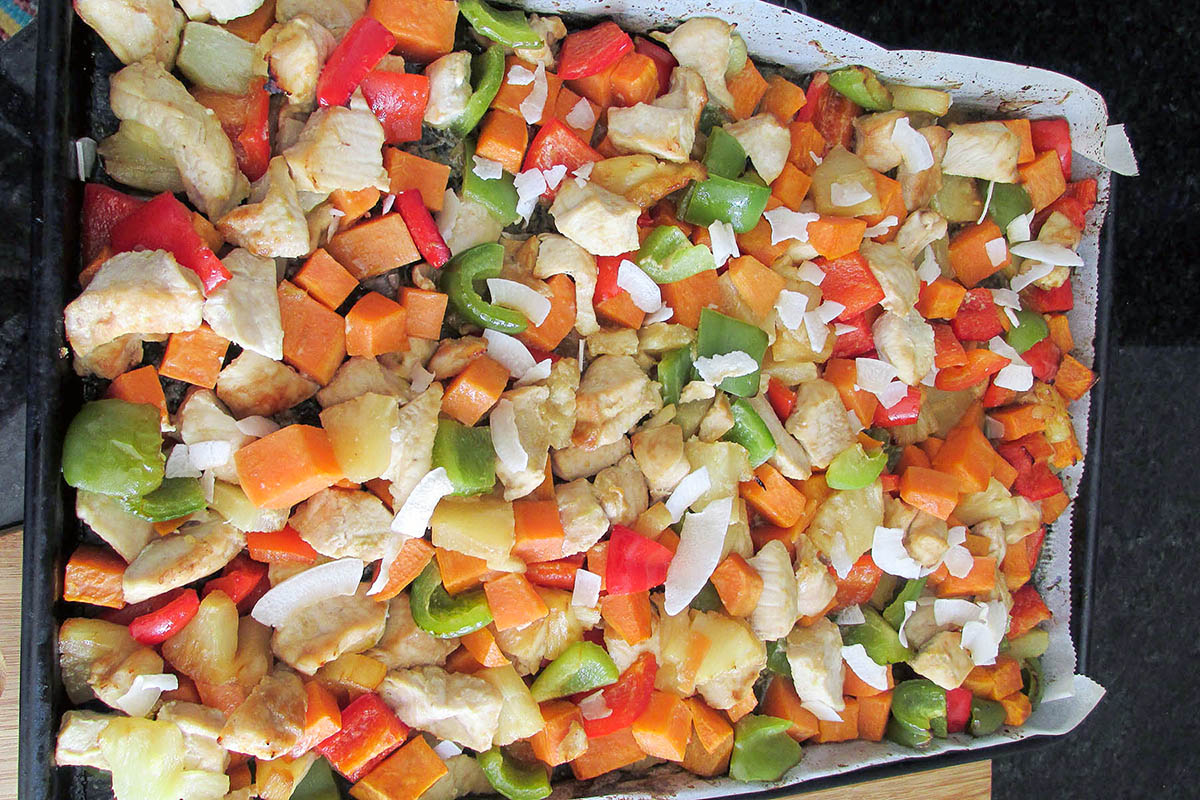
One tray Hawaiian chicken

Simple meals don’t have to be boring  

I have been on a mission to make simple and tasty meals. I aim to create recipes that can be prepared and cooked quickly on a busy weeknight. We all struggle to make healthy and delicious meals while keeping on top of everything else in life. So this recipe is designed to be healthy, delicious and easy to make. You can cook this meal on a single tray in the oven. The preparation takes no more than 20 minutes and is portioned to feed four adults.  

Sweet and sour on one plate

There is something irresistible about chicken and pineapple; they go so well together. Add in the sweetness of some peppers, and I am sold. I’ll be honest this one-tray meal was born from a pantry cleanout. I found a tin of pineapple that was soon to go out of date; in an effort to save on food waste, I thought of a way to make the most of the pineapple slices, other than eating them from the tin, of course.

One tray Hawaiian chicken recipe

Ingredients 

  • 500g chicken breast, cubed
  • 2 cups pineapple chunks
  • 1 red pepper, cubed
  • 1 green pepper, cubed
  • 1 sweet potato, cubed
  • 1 tbsp. Sesame seed oil
  • 1 tbsp. Coconut oil
  • 1 tbsp. Coconut sugar
  • 1 tbsp. Coconut flakes
  • 1 tbsp. Lime juice

Instructions 

Preheat the oven to 200 degrees C/ 400 degrees F.

Line a baking tray with baking paper or a silicone liner.

Mix the chicken, peppers, sweet potatoes and pineapple in a bowl with the oils and sugar.

Spread out on the baking tray and bake for 15 minutes.

Turn the vegetables and chicken and bake for another 10 minutes.

Sprinkle the lime juice and coconut flakes over the tray before serving.

“One

  • Rating: ★★★★
  • Print

“An


Credit: Cath @ easycleaneats 

Ingredients

–500g chicken breast, cubed –2 cups pineapple chunks –1 red pepper, cubed –1 green pepper, cubed –1 sweet potato, cubed –1 tbsp. Sesame seed oil –1 tbsp. Coconut oil –1 tbsp. Coconut sugar –1 tbsp. Coconut flakes –1 tbsp. Lime juice

Directions

  1. Preheat the oven to 200 degrees C/ 400 degrees F.
  2. Line a baking tray with baking paper or a silicone liner.
  3. Mix the chicken, peppers, sweet potatoes and pineapple in a bowl with the oils and sugar.
  4. Spread out on the baking tray and bake for 15 minutes.
  5. Turn the vegetables and chicken and bake for another 10 minutes.
  6. Sprinkle the lime juice and coconut flakes over the tray before serving.

Nutrition

Per Serving: 322 calories; 13g fat; 26g carbohydrates; 26g protein

Equipment

  • Measuring cups
  • Measuring spoons
  • Kitchen scale
  • Mixing bowl
  • Baking sheet
  • Baking paper or silicone liner

Nutritional disclaimer

Nutrition information is provided as an estimate based on the ingredients used and available in my area (New Zealand). The nutritional information is here to help you understand the recipe; I use MyFitnessPal to generate my estimates. For more accurate nutritional information, please use a nutritional calculator with the ingredients in your area.


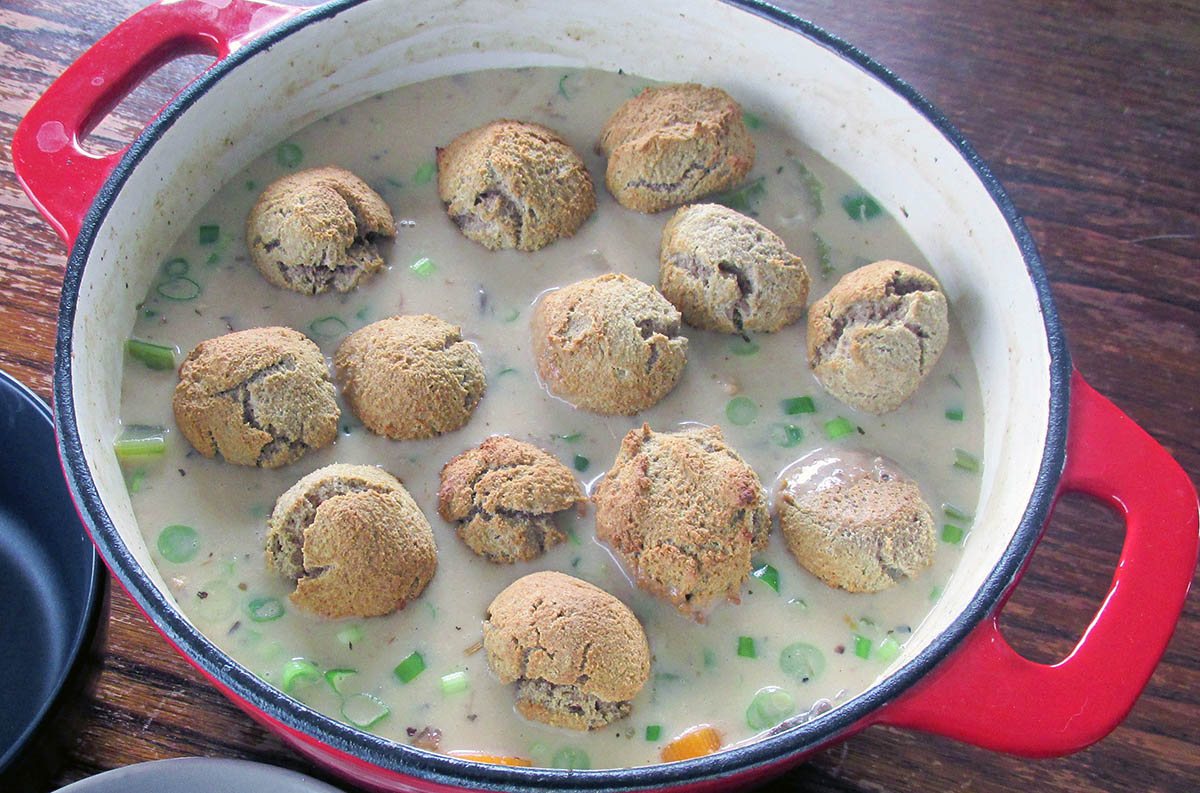
Chicken stew and dumplings

Comfort food 

When the weather starts to get cold, I look forward to a hot meal that makes me feel safe and warm. Nothing is more comforting than a big pot of hot chicken stew with homemade dumplings. 

What kind of dumplings? 

When I ask the question, ‘who wants dumplings?’ The response is usually ‘What kind of dumplings?’ There is a slight obsession with dumplings that go well with coconut aminos. My cabbage and prawn dumplings are a firm favourite but probably not the best thing to put in a stew. The dumplings I like to put in my stew are grain free and reasonably high in protein, thanks to a healthy dose of egg whites. 

This chicken stew and dumplings might actually be the ultimate in comfort food. If you want a good for you meal on the table for the family, give this a go. 

Freezer meal

Hands up if you are busy. Who is way too tired to get in the kitchen to cook at the end of the day? Definitely not me.

My days are filled with meetings, to-do lists, emails and telling people what to do, by the time I finish work the last thing I want to do is get stuck into cooking a meal and then cleaning up afterwards. I want to work out and spend some time with Jaime. That is why freezer meals are my favourite solutions to the challenge of a busy life. A few hours on the weekend, and you find yourself with a stack of options for dinner that can be thawed and cooked for a healthy, delicious meal for the family.

Chicken stew and dumplings recipe 

Ingredients 

For stew 

  • 500g chicken breast, cubed 
  • 3 tbsp. coconut oil 
  • 1 onion, chopped 
  • 2 garlic cloves, minced 
  • 1/4 cup tapioca flour 
  • 2 cups chicken broth 
  • 2 carrots, chopped 
  • 2 celery stalks, chopped 
  • 3 portabella mushrooms, sliced 
  • 1/2 cup coconut cream 
  • 2 spring onions, sliced 
  • Salt and pepper to taste 
  • 1/2 tsp. Italian seasoning 

For dumplings 

  • 1/3 cup buckwheat flour 
  • 1/3 cup coconut flour 
  • 1/2 tsp. baking powder 
  • 1/4 cup coconut cream 
  • 2 tbsp coconut oil, softened 
  • 5 egg whites 

Chicken stew and dumplings 

  • Servings: 6
  • Rating: ★★★★★
  • Print

Nothing is more comforting than a big pot of hot chicken stew with homemade dumplings.


Credit: Cath @ easycleaneats

Ingredients

  • 500g chicken breast, cubed 
  • 3 tbsp. coconut oil 
  • 1 onions, chopped 
  • 2 garlic cloves, minced 
  • 1/4 cup tapioca flour 
  • 2 cups chicken broth 
  • 2 carrots, chopped 
  • 2 celery stalks, chopped 
  • 3 portabella mushrooms, sliced 
  • 1/2 cup coconut cream 
  • 2 spring onions, sliced 
  • Salt and pepper to taste 
  • 1/2 tsp. Italian seasoning 
  • 1/3 cup buckwheat flour 
  • 1/3 cup coconut flour 
  • 1/2 tsp. baking powder 
  • 1/4 cup coconut cream 
  • 2 tbsp coconut oil, softened 

Directions

  1. Place a large saucepan or Dutch oven over a medium heat, melt the coconut oil. 
  2. Add in half of the chicken pieces and cook until golden brown on all sides when golden brown remove from the pan and put to one side. 
  3. Cook the other half of the chicken until golden brown and put it with the other chicken to rest. 
  4. Add the onions to the pan the chicken was cooked in, you may need to add more coconut oil. 
  5. Sautee the onions, when they begin to brown add in the garlic and cook for 2 minutes. 
  6. Have the chicken broth warm and ready to use. 
  7. Add tapioca flour to the pan and stir well to coat bottom of pan and onions 
  8. Slowly pour in the chicken broth and whisk together the stock and the onions, be sure to scrape the bottom of the pan as you are whisking to get all of the flour and flavours from the pan. 
  9. Once all of the stock has been whisked in add in the vegetables and chicken to the pan. 
  10. Season and add in the Italian seasoning. 
  11. Bring the liquid up to a gentle simmer then cover the pan, you want the heat low, but the liquid should still be simmering. 
  12. Cook for 20-30minutes, this will depend on how large your vegetables are. 
  13. While the stew is simmering, you can make the dumplings. 
  14. Preheat the oven to 200 degrees C/ 400 degrees F. 
  15. Line a baking tray with baking paper or a silicone liner. 
  16. In a large bowl mix together the buckwheat flour, coconut flour and baking powder. 
  17. Mix in a 1/4 cup of coconut cream and the softened coconut oil, you should end up with a crumbly mix 
  18. In a separate bowl, beat the egg whites until stiff peaks form. 
  19. Fold the egg whites into the flour mixture, this takes a little time, but you should end up with a wet-looking combination. 
  20. Using a spoon divide the mixture into 12 portions onto the baking tray. 
  21. Bake for 12-15 minutes, or until the dumplings are golden. 
  22. Once the dumplings are cooked 
  23. Stir in the remaining coconut cream and spring onions into the stew and take it off the heat. 
  24. Add the dumplings to the pan and serve. 

Nutrition

Per Serving: 337 calories; 16 g fat; 16 g carbohydrates; 23 g protein

Equipment 

  • Knife 
  • Chopping board 
  • Saucepan or Dutch oven 
  • Wooden spoon 
  • Whisk 
  • Large bowl 
  • Baking tray
  • Baking paper or a silicone liner
  • Scales
  • Measuring cups
  • Measuring spoons

Nutritional disclaimer

Nutrition information is provided as an estimate based on the ingredients used and available in my area (New Zealand). The nutritional information is here to help you understand the recipe; I use MyFitnessPal to generate my estimates. For more accurate nutritional information, please use a nutritional calculator with the ingredients in your area.


Fajita Chicken Casserole

Revisiting family favourites

I’ve been revisiting recipes that have been some of my old school recipes and family favourites that were our staples when we got started as clean eaters. I first posted this recipe in 2018; at that time, the kids were fussy, vegetables had to be hidden and disguised, and there was no potential for intense flavours or spice. 

Times (thankfully) have changed, the kids have grown (like man-sized grown), and they now enjoy a wide range of foods. Things like vegetables are enjoyed, spice and chilli are consumed without complaint, and new ingredients are tried without tantrums.

As the kids have grown, my recipes have changes organically to meet their palates and preferences, I’ve updated this recipe because of that, but fear not, all I have done is make it a little bit better.

Can you improve fajitas?

Maybe you can, by turning them in to a casserole. So, full disclosure, I first made this recipe because of a brain fart. One Friday night shop didn’t go to plan, so I had all of the ingredients for fajitas, except for tortillas. What is life without a little challenge? Not wanting to make another trip out to the supermarket, I decided to do something different with my fajita ingredients. Some melted cheese and bite-sized chicken chunks combined with the fajita vegetables make perfect comfort food.

Fajita chicken casserole recipe

Ingredients

  • 10 boneless chicken thighs
  • 1 pepper, sliced
  • 1 onion, sliced
  • 250g cream cheese, softened
  • 205g cheese, grated 
  • 2 tbsp. fajita seasoning

Instructions

Preheat the oven to 180 degrees C/ 350 degrees F. 

Place the chicken in the casserole dish and cover the dish with foil.

Bake the chicken for 30 minutes or into the chicken, is cooked through.

When the chicken is cooked, remove it from the oven and set it to one side to cool.

Drain any liquid from the casserole dish.

In a frying pan over medium heat, cook the pepper and onion until they are golden and soft.

When the chicken is cooled enough to touch, chop it into bite-sized chunks.

In a bowl, mix the cream cheese and half of the cheese with the fajita seasoning.

Add the chicken, onion and pepper to the cheese mix, give everything a good stir to coat all of the chicken with the cheese mixture.

Put the mix back into the casserole and sprinkle it with the remaining cheese.

Bake the casserole for 30 minutes until the casserole is hot and the cheese is bubbling.

  • Rating: ★★★★★
  • Print


Credit: Cath @ easycleaneats

Ingredients

  • 10 boneless chicken thighs
  • 1 pepper, sliced
  • 1 onion, sliced
  • 250g cream cheese, softened
  • 205g cheese, grated
  • 2 tbsp. fajita seasoning

Directions

  1. Preheat the oven to 180 degrees C/ 350 degrees F.
  2. Place the chicken in the casserole dish and cover the dish with foil.
  3. Bake, the chicken for 30 minutes or into the chicken, is cooked through.
  4. When the chicken is cooked remove it from the oven and set it to one side to cool.
  5. Drain any liquid from the casserole dish.
  6. In a frying pan over a medium heat cook the pepper and onion until they are golden and soft.
  7. When the chicken is cooled enough to touch chop it into bite-sized chunks.
  8. In a bowl mix the cream cheese and half of the cheese with the fajita seasoning.
  9. Add the chicken, onion and pepper to the cheese mix, give everything a good stir to coat all of the chicken with the cheese mixture.
  10. Put the mix back into the casserole and sprinkle it with the remaining cheese.
  11. Bake the casserole for 30 minutes until the casserole is hot and the cheese is bubbling.

Nutrition

Per Serving: 486 calories; 26 g fat; 3 g carbohydrates; 34g protein

Equipment

  • Scales
  • Measuring spoons
  • Knife
  • Fork 
  • Chopping board
  • Casserole dish
  • Frying pan
  • Wooden spoon
  • Tongs
  • Mixing bowl
  • Spatula 

Nutritional disclaimer

Nutrition information is provided as an estimate based on the ingredients used and available in my area (New Zealand). The nutritional information is here to help you understand the recipe; I use MyFitnessPal to generate my estimates. For more accurate nutritional information, please use a nutritional calculator with the ingredients in your area.


Chicken and mushroom sauce

Making up for missed date nights

We haven’t been very good at making time for ourselves or making time to hang out together recently. Work tends to get in the way, but other activities like workouts, yoga and BJJ also take up our time during the week.

I decided to do something a little bit fancy for dinner to make up for missing our date night last week.

Mushroom Sauce

A general rule in our house is if the food has sauce on it you probably have a winner. If the sauce is cream-based, you have a must greater chance that dinner will be a success. This mushroom sauce is thick, chunky and full of flavour. The simple one-pan only recipe is always great. The most complicated part is not overcooking the chicken, not that I would tell Jay that. ‘No baby I spent hours making sure the sauce was perfect for you = 10 girlfriend points for me.

Greens on the side

I paired the chicken with a healthy portion of coodles coated in a large helping of garlic and butter. What more could you ask for?

Freezer meal

Hands up if you are busy. Who is way too tired to get in the kitchen to cook at the end of the day? Definitely not me.

My days are filled with meetings, to-do lists, emails and telling people what to do, by the time I finish work the last thing I want to do is get stuck into cooking a meal and then cleaning up afterwards. I want to work out and spend some time with Jaime. That is why freezer meals are my favourite solutions to the challenge of a busy life. A few hours on the weekend, and you find yourself with a stack of options for dinner that can be thawed and cooked for a healthy, delicious meal for the family.

Chicken breasts with mushroom cream sauce recipe

Ingredients

  • 4 Chicken breasts, boneless skinless
  • 2 cups button mushrooms
  • 1 garlic clove
  • 1/2 cup onions
  • 2 tbsp. Thyme
  • 2 tbsp. Buckwheat flour
  • 1/4 tsp. salt
  • 3 tbsp. Olive oil
  • 3/4 cup cream

Chicken breasts with mushroom cream sauce

  • Servings: 4
  • Rating: ★★★★★
  • Print

Rich gravy with a thick and perfectly cooked chicken breast, what more could you ask for.


Credit: Cath @ easycleaneats

Ingredients

  • 4 Chicken breasts, boneless skinless
  • 2 cups button mushrooms
  • 1 garlic clove
  • 1/2 cup onions
  • 2 tbsp. Thyme
  • 2 tbsp. Buckwheat flour
  • 1/4 tsp. salt
  • 3 tbsp. Olive oil
  • 3/4 cup cream

Directions

  1. Fry the chicken breasts over medium heat until they begin to colour.
  2. Once the chicken has coloured, remove it from the heat set to one side.
  3. Add olive oil to the pan then fry up the onions and garlic.
  4. Once the onions are softened, add the mushrooms to the pan cook for 3 minutes.
  5. Sprinkle in the thyme and stir in the buckwheat flour, mix everything well.
  6. Reduce the heat and add the cream into the pan, mix to create a creamy sauce.
  7. Return the chicken to the pan.
  8. Cook for another 10 minutes until the sauce has reduced slightly and the chicken is very hot.

Nutrition

Per Serving: 473 calories; 33 g fat; 23 g carbohydrates; 24 g protein

Equipment

  • Knife
  • Chopping board
  • Large frying pan
  • Wooden spoon
  • Measuring cups
  • Measuring spoons

Nutritional disclaimer

Nutrition information is provided as an estimate based on the ingredients used and available in my area (New Zealand). The nutritional information is here to help you understand the recipe; I use MyFitnessPal to generate my estimates. For more accurate nutritional information, please use a nutritional calculator with the ingredients in your area.


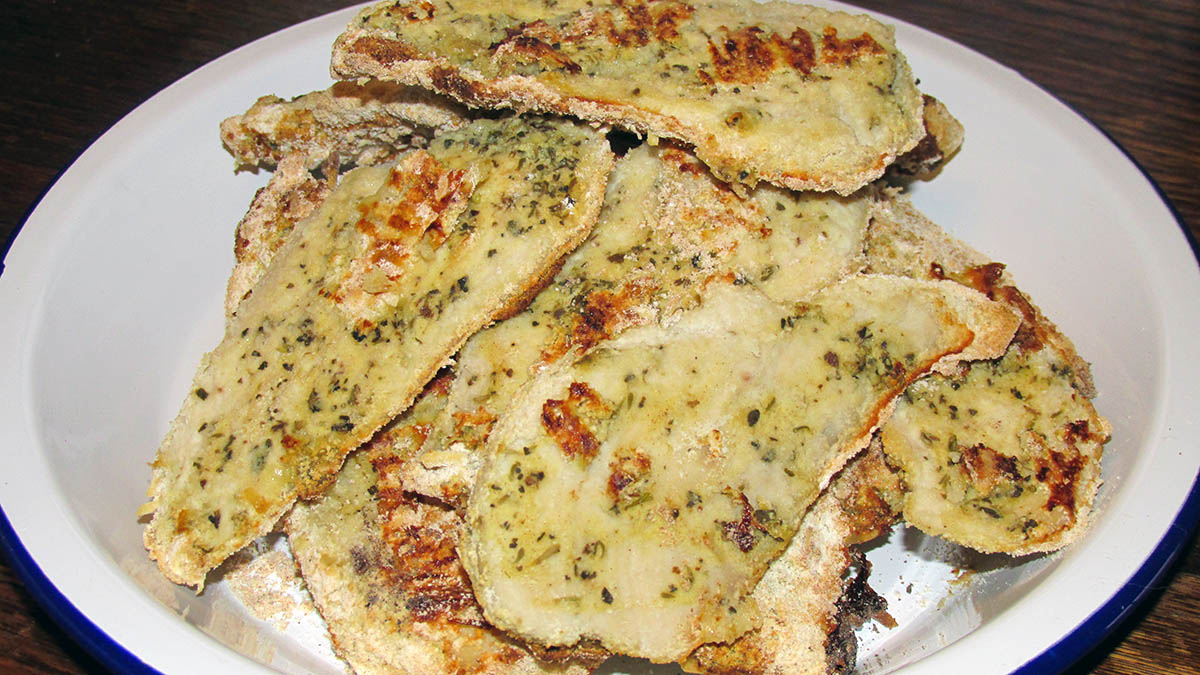
Mustard herb crusted chicken

Chicken again? 

I do like to mix things up a little when it comes to chicken. We eat a reasonable amount of chicken; it can get boring if you don’t add a bit more flavour now and then.  

It is crust but not as you know it. 

Normally crusted chicken will be panko or, but I like to do things a little differently. The crust for this chicken comes entirely from items in my pantry and fridge, a quick raid around the kitchen and I was ready to go. I didn’t have to buy anything special for this recipe, and it took very little work to get a crisp and tasty coating. 

Cheese is the key 

I think a great crust needs to have some crunch; it can be challenging to get a good crunch from a coating that doesn’t use breadcrumbs. The solution is to add cheese. Not all cheese will give you a crunch; most will not give you a crunch at all; you will probably get a fatty coating. To get a crunch in your coating Parmesan cheese is the key. When Parmesan cheese cooks it gives up some fat but as it cools it gives you a nice crisp crunch to your coating.

Mustard herb crusted chicken recipe

Ingredients

  • 450g chicken breasts
  • 1 tbsp. basil
  • 1 tbsp. thyme
  • 1 tbsp. oregano
  • 2 garlic cloves, minced
  • 6 tbsp. Dijon mustard
  • 1/2 cup coconut flour
  • 1/4 cup tapioca flour
  • 1/4 cup Parmesan cheese, grated
  • 1 tbsp. olive oil
  • minced parsley for serving (optional)

Preheat the oven to 200 degrees C/ 400 degrees F.

Slice each chicken breast in half lengthwise, and then flatten each cutlet out between some cling film.

In a bowl mix together the herbs, garlic and mustard together.

On a plate mix together the flours and cheese.

Coat each of the chicken with the mustard and herb mix before covering the chicken in the flour and cheese mixture.

Heat some oil over a medium to high heat, fry off each of the chicken breast until they are golden brown on each side.

Place breasts on a baking tray lined with baking paper or a silicone liner.

Bake for 10 minutes at 165 degrees C 325 degrees F.

Sprinkle with chopped parsley to serve.

Mustard herb crusted chicken

  • Servings:
  • Rating: ★★★★★
  • Print

“This


Credit: Cath @ easycleaneats

Ingredients

  • 450g chicken breasts
  • 1 tbsp. basil
  • 1 tbsp. thyme
  • 1 tbsp. oregano
  • 2 garlic cloves, minced
  • 6 tbsp. Dijon mustard
  • 1/2 cup coconut flour
  • 1/4 cup tapioca flour
  • 1/4 cup Parmesan cheese, grated
  • 1 tbsp. olive oil
  • minced parsley for serving (optional)

Directions

  1. Preheat the oven to 200 degrees C/ 400 degrees F.
  2. Slice each chicken breast in half lengthwise, and then flatten each cutlet out between some cling film.
  3. In a bowl mix together the herbs, garlic and mustard together.
  4. On a plate mix together the flours and cheese.
  5. Coat each of the chicken with the mustard and herb mix before covering the chicken in the flour and cheese mixture.
  6. Heat some oil over a medium to high heat, fry off each of the chicken breast until they are golden brown on each side.
  7. Place breasts on a baking tray lined with baking paper or a silicone liner.
  8. Bake for 10 minutes at 165 degrees C 325 degrees F.
  9. Sprinkle with chopped parsley to serve.

Nutrition

Per Serving: 230 calories; 15g fat; 13g carbohydrates; 21g protein

Equipment

  • Knife
  • Chopping board
  • Small bowl
  • Plate
  • Frying pan
  • Baking tray
  • Baking paper or a silicone liner
  • Measuring spoons
  • Measuring cups
  • Scales

Nutritional disclaimer

Nutrition information is provided as an estimate based on the ingredients used and available in my area (New Zealand). The nutritional information is here to help you understand the recipe; I use MyFitnessPal to generate my estimates. For more accurate nutritional information, please use a nutritional calculator with the ingredients in your area.


Fried chicken

Revisiting family favourites

I’ve been revisiting recipes that have been some of my old school recipes and family favourites that were our staples when we got started as clean eaters. I first posted this recipe in 2016; at that time, the kids were fussy, vegetables had to be hidden and disguised, and there was no potential for intense flavours or spice. 

Times (thankfully) have changed, the kids have grown (like man-sized grown), and they now enjoy a wide range of foods. Things like vegetables are enjoyed, spice and chilli are consumed without complaint, and new ingredients are tried without tantrums.

As the kids have grown, my recipes have changed organically to meet their palates and preferences. I’ve updated this recipe because of that, but fear not, the original suitable be kids, and less developed palates is at the bottom of the post.

Not KFC

We all love a naughty takeaway, but we can all live without the extra calories and the expanding waistlines. You don’t need to live without your takeaway; swap it out for a delicious and healthier fakeaway. Thankfully, KFC was never on my junk food list, so I have never felt the need to reproduce it. The idea of fried chicken as a replacement for chicken nuggets for little people did appeal when the kids were young. I had a play around with a grain-free coating for some fried chicken that would keep the kids happy back in the day. I managed to come up with a simple coating that was light and crunchy, the coconut gives a great texture, and the flavour is a nice change from your standard heavy batter.

Fried chicken recipe

Ingredients

  • 400ml milk 
  • 800g chicken thigh fillets
  • 1 tsp. Garlic powder
  • 1 tsp. paprika
  • 1/2 cup coconut flour
  • 1/2 cup buckwheat flour
  • 1/4 cup parmesan cheese, grated
  • 1 tsp. paprika 
  • Salt and pepper to taste

Instructions

Take the chicken thighs and place them in a large bowl or tub.

In a bowl, whisk together the milk, paprika and garlic powder.

Pour the milk over the chicken thighs.

Cover the bowl or tub and put it in the fridge for a minimum of 2 hours but ideally overnight.

When you are ready to use the chicken, remove the bowl or tub from the fridge.

On a plate with tall sides or a bowl, mix together the coconut flour, buckwheat flour, parmesan cheese, paprika, salt and pepper.

Take a piece of the chicken from the milk mixture and place it into the flour mix.

Spoon the flour over the chicken, making sure to coat the chicken thoroughly.

Lightly shake the excess flour off the chicken and place the chicken on a baking sheet to rest. 

Repeat with all of the chicken.

Take a large frying pan and heat a little oil over a medium heat.

Shallow fry the chicken. 

The coating should be a golden brown all over.

Make sure that the chicken is cooked through.

Set the cooked chicken on some kitchen paper to soak up any excess oil.

Serve with a helping of slaw.

“Fried

  • Rating: ★★★★★
  • Print


Credit: Cath @ easycleaneats 

Ingredients

– 400ml milk  – 800g chicken thigh fillets – 1 tsp. Garlic powder – 1 tsp. paprika – 1/2 cup coconut flour – 1/2 cup buckwheat flour – 1/4 cup parmesan cheese, grated – 1 tsp. paprika  – Salt and pepper to taste

Directions

  1. Take the chicken thighs and place them in a large bowl or tub.
  2. In a bowl, whisk together the milk, paprika and garlic powder.
  3. Pour the milk over the chicken thighs.
  4. Cover the bowl or tub and put it in the fridge for a minimum of 2 hours but ideally overnight.
  5. When you are ready to use the chicken, remove the bowl or tub from the fridge.
  6. On a plate with tall sides or a bowl, mix together the coconut flour, buckwheat flour, parmesan cheese, paprika, salt and pepper.
  7. Take a piece of the chicken from the milk mixture and place it into the flour mix.
  8. Spoon the flour over the chicken, making sure to coat the chicken thoroughly.
  9. Lightly shake the excess flour off the chicken and place the chicken on a baking sheet to rest. 
  10. Repeat with all of the chicken.
  11. Take a large frying pan and heat a little oil over a medium heat.
  12. Shallow fry the chicken. 
  13. The coating should be a golden brown all over.
  14. Make sure that the chicken is cooked through.
  15. Set the cooked chicken on some kitchen paper to soak up any excess oil.
  16. Serve with a helping of slaw.

Nutrition

Per Serving:387 calories;6 g fat;16 g carbohydrates;53 g protein

Equipment

  • Mixing bowl
  • Food tub
  • Plate x1
  • Cooling rack/baking tray
  • Frying pan
  • Tongs
  • Kitchen paper

Nutritional disclaimer

Nutrition information is provided as an estimate based on the ingredients used and available in my area (New Zealand). The nutritional information is here to help you understand the recipe; I use MyFitnessPal to generate my estimates. For more accurate nutritional information, please use a nutritional calculator with the ingredients in your area.

Fried chicken recipe

Ingredients

  • 1/2 cup coconut flour
  • 1/2 cup shredded coconut
  • 1 egg beaten
  • 600g chicken breast, large dices

Instructions

  1. In a mixing bowl, mix together shredded coconut and flour; put the flour mix onto a plate. 
  2. In a bowl, beat the egg.
  3. Take the chicken pieces, dip each of them in the egg and then roll them in the flour mix.
  4. Put the coated chicken on a cooling rack.
  5. Once all of the chicken has been coated, it is ready to fry.
  6. In a frying pan over medium heat with some coconut oil, shallow fry the chicken.
  7. The coating should be a golden brown all over.
  8. Set the cooked chicken on some kitchen paper to soak up any excess oil.
  9. Sprinkle the cooked chicken with a little paprika before serving.


Chicken cranberry salad

What a week

It has been a busy week. With the world going insane we had to cancel our holiday plans and opt for a staycation in Auckland. Basically, that meant we hadn’t done any food shopping so our meal options were somewhat limited. I had no intention of going near a supermarket and dealing with the insane humans buying toilet paper. A quick raid of the fridge, I discovered some sour cream that was on its way out, so I wanted to come up with a way to use it up. Some pre-cooked chicken out of the freezer and we were in business.

Chicken cranberry salad

Salad with dressing

Over the last year, there has been a shift in how the family feel about salads. I now have a list of five salads that everyone is on board with eating. The common feature of the salads that everyone likes is a creaming dressing or sauce. With creamy dressings seem to be the ones that are most loved around here so this salad is a winner. The simple combination of mayo, sour cream and lemon juice give the rest of the salad a nice coating without overpowering the other favours.

Chicken cranberry salad recipe

Chicken cranberry salad ingredients

Ingredients

  • 1/2  cup  easy mayo
  • 1/4  cup  sour cream
  • 1  tsp.  lemon juice
  • 1  tbsp.  parsley
  • 3  cups chicken, cooked and chopped
  • 1/4  cup  celery, finely chopped
  • 1/4  cup  apple, finely chopped
  • 1/3  cup  dried cranberries
  • 1/3  cup  sunflower seeds, toasted
  • Salt and pepper to taste
In a large bowl add the easy mayo
Sour cream
Lemon juice
Parsley
Whisk together
Add the chicken, apple and celery.
Mix well
Add the cranberries and sunflower seeds
Mix well
Serve chilled on a bed of lettuce

Chicken cranberry salad

  • Servings: 6
  • Rating: ★★★★★
  • Print

It has been a busy week and still far too warm to be spending hours in the kitchen making meals. I had some sour cream in the fridge that was on its way out so I wanted to come up with a way to use it up.'


Credit: Cath @ easycleaneats

Ingredients

  • 1/2 cup easy mayo
  • 1/4 cup sour cream
  • 1 tsp. lemon juice
  • 1 tbsp. parsley
  • 3 cups chicken, cooked and chopped
  • 1/4 cup celery, finely chopped
  • 1/4 cup apple, finely chopped
  • 1/3 cup dried cranberries
  • 1/3 cup sunflower seeds, toasted
  • Salt and pepper to taste

Directions

  1. In a large bowl, whisk the mayo, sour cream, lemon juice and parsley.
  2. Add remaining ingredients and stir until combined.
  3. Add salt and pepper to taste.
  4. Serve chilled on a bed of lettuce.

Nutrition

Per Serving: 299 calories; 24 g fat; 10 g carbohydrates; 19 g protein.

Equipment

  • Large mixing bowl
  • Whisk
  • Spatula
  • Measuring cups
  • Measuring spoons

Nutritional disclaimer

Nutrition information is provided as an estimate based on the ingredients used and available in my area (New Zealand). The nutritional information is here to help you understand the recipe; I use MyFitnessPal to generate my estimates. For more accurate nutritional information, please use a nutritional calculator with the ingredients in your area.


Lemon chicken burgers

New freezer favourite

In the last half of 2019, we had a hectic time, the only night on the workweek we had a home with no classes or chores to do. The mass amount of activity and varied nutritional needs meant I needed to get creative to keep everyone happy. I made a few staples to have in the freezer that could be taken out in the morning or thawed in the afternoon to prepare for a quick and healthy meal. These burgers have been one of the firm favourites for weeknight dinners after Brazilian Jiu-Jitsu, and they are also a firm favourite on the weekends. The kids like to have them as a burger with a bun, I love them with a lettuce bun or chopped up in a burger salad.

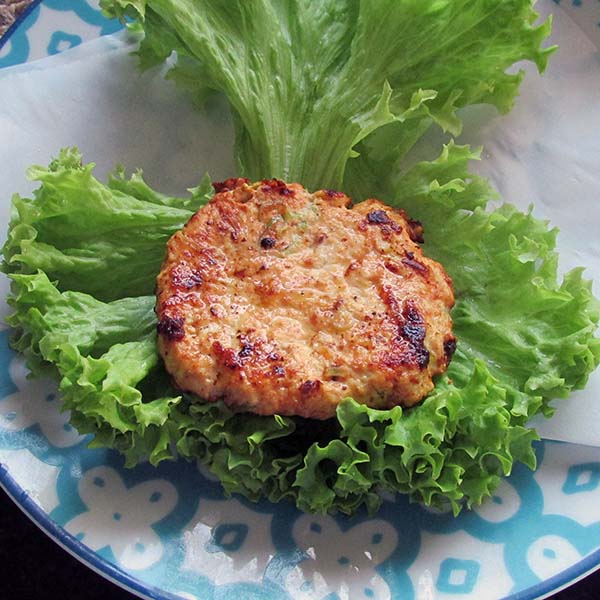
Lemon chicken burger in a lettuce bun.
Lemon chicken burgers

A moment of pride

When I was working on the recipe for these burgers, it was a weekend, and I was playing around to try to make the raw mixture smell right. As I was there playing in the kitchen getting ready to fry up the first burger when the youngest member of the clan arrived home from a birthday party. He arrived home clutching a bag from MacDonald’s with the chicken nuggets and chips he got from the party but couldn’t eat. As is the way he stood in the kitchen nattering to us about the movie he saw, what he did, what his friends said and what he said. When Liam took a breath, I managed to ask if he wanted any dinner with us. He said he wasn’t hungry when he was. He would eat the nuggets and chips when he was. Not long after I was building lettuce bun burgers for Jaime and myself when Jaime pops into the kitchen asking if I could make another burger for Liam. Apparently, he liked the smell of the burgers; they smelled a lot better than his chicken nuggets. The bag from MacDonald’s was put to one side while he demolished a homemade chicken burger. I was so proud. 

Sadly the chicken nuggets were eaten for lunch the next day along with the chips, but I still hold on to the fact that when offered, he picked my burger over MacDonald’s.

Lemon chicken burgers

Lemon chicken burger ingredients

Ingredients 

  • 500g chicken mince
  • 2 spring onions, finely chopped
  • 1 garlic clove, minced
  • 1/2 lemon, juiced and zested
  • 1/2 cup parmesan cheese, grated
  • 1 egg
  • 1 tbsp. olive oil
  • Salt and pepper
Add the chicken mince to a large bowl.
Add the egg, garlic and cheese to the mince.
Add the spring onions and lemon to the bowl.
Mix the ingredients together with your hands.
Well mixed burger mix.
Use a measuring cup to portion out the burgers.
Shape the meat into burger patties.
Cook the burgers over a medium heat.
Serve in a lettuce bun.
With cheese and caramelised onions.
Lemon burger in a lettuce bun.
Enjoy!

Lemon chicken burgers

  • Servings: 8
  • Rating: ★★★★★
  • Print

Not long ago if I had suggested we have a salad for dinner, that suggestion would have been met with grumbles, groans and complaints. Thankfully that is no longer the case. The first time I made this salad for dinner, I did get the grumbles and groans, then the kids tried some.


Credit: Cath @ easycleaneats

Ingredients

  • 500g chicken mince
  • 2 spring onions, finely chopped
  • 1 garlic clove, minced
  • 1/2 lemon, juiced and zested
  • 1/2 cup parmesan cheese, grated
  • 1 egg
  • 1 tbsp. olive oil
  • Salt and pepper

Directions

  1. In a large bowl mix together all the ingredients.
  2. Use your hands to get an even mix.
  3. Divide the mix into six portions and shape into burgers try the burgers over medium heat for 6 minutes on each side.

Nutrition

Per Serving: 189 calories; 11 g fat; 2 g carbohydrates; 14 g protein.

Equipment

  • Chopping board
  • Knife
  • Zester
  • Fork
  • Frying pan
  • Spatula
  • Mixing bowl
  • Measuring cups
  • Measuring spoons
  • Scales

Nutritional disclaimer

Nutrition information is provided as an estimate based on the ingredients used and available in my area (New Zealand). The nutritional information is here to help you understand the recipe; I use MyFitnessPal to generate my estimates. For more accurate nutritional information, please use a nutritional calculator with the ingredients in your area.