Early in 2021, I relocated and started updating my website; I’ve been making changes and improving everything as I go. This recipe is one of the many things I’ve tried to improve.
Getting off the sugar train
Over the last year, sugar has crept back into my diet, and I’ve noticed the adverse effects of late. Between my busy work life and lots of travel for work, I have found it challenging to eat clean and stay healthy. I decided to return to the sugar-free wagon and start feeling more like myself again.
Easy snack
Apple chips are a cheap and easy snack. They make a great alternative to potato chips; they are sweet, crisp and slightly addictive. If you are looking for a way to get fruit into little people, they are a brilliant option.
Preheat your oven to 100 degrees C/ 220 degrees F.
Line two baking trays with baking paper or a silicone liner.
Cut the apples into thin slices, for uniform size slices you can use a mandolin.
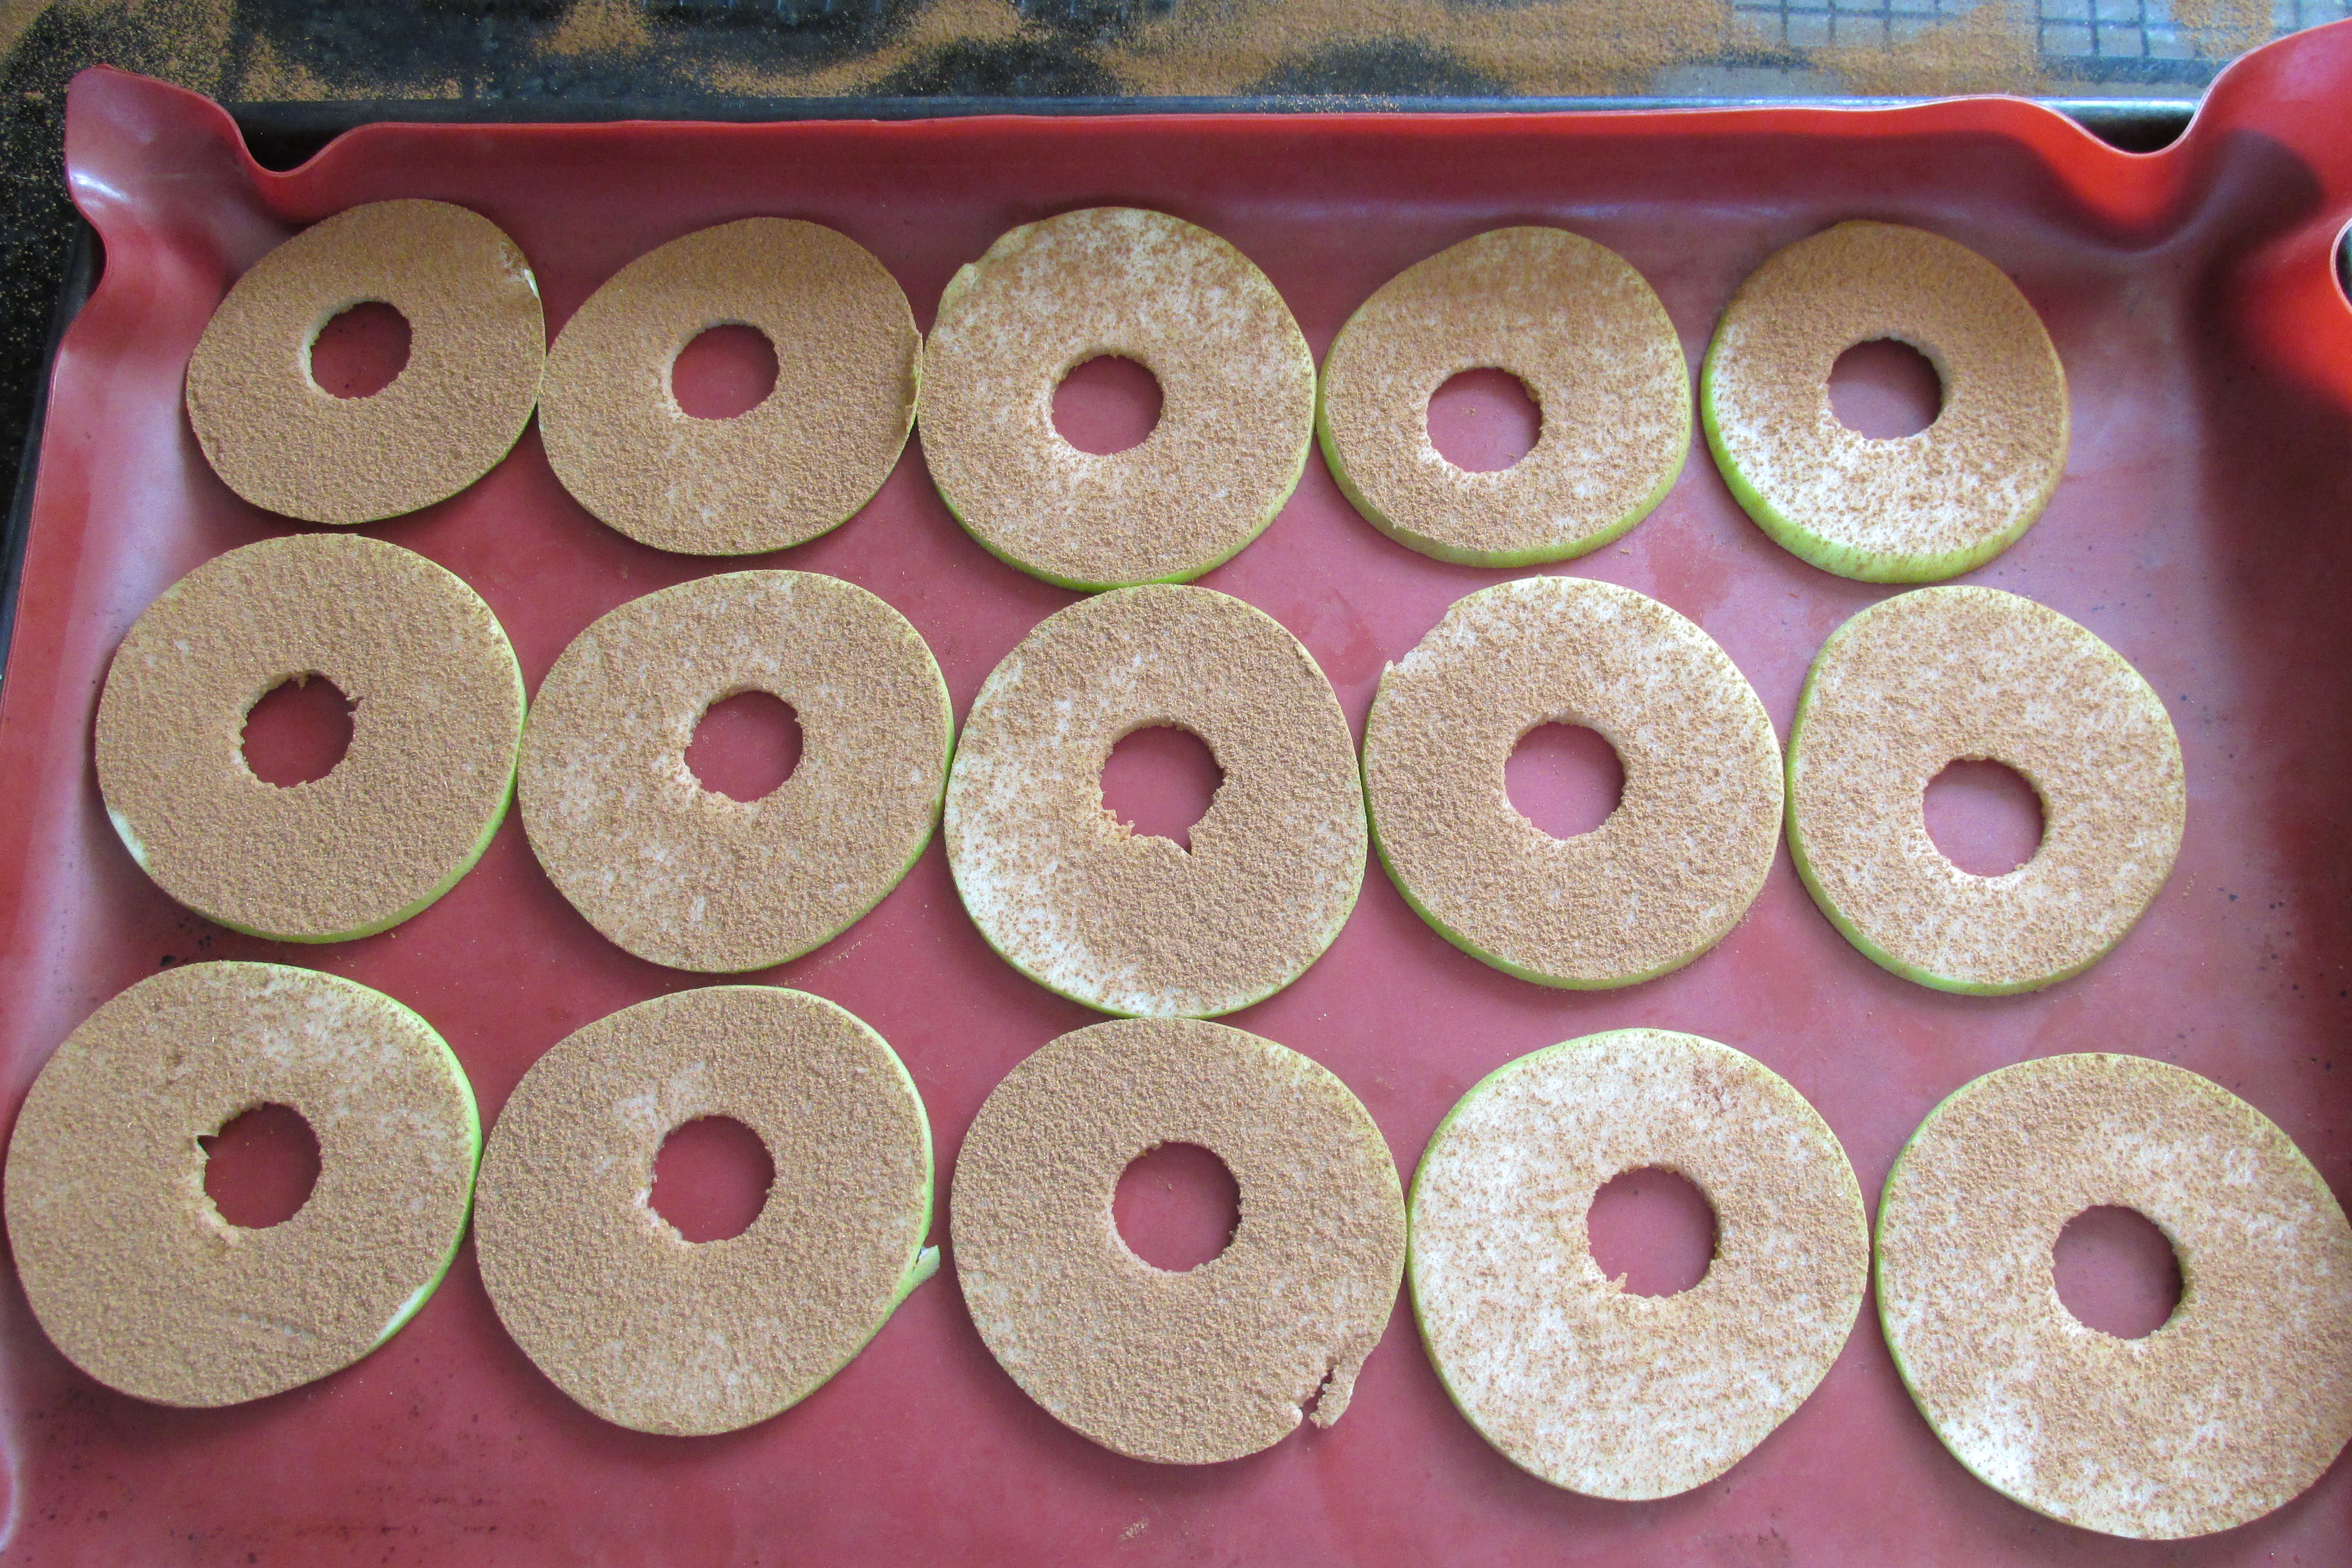
Spread the apple slices on the baking trays, making sure you have no overlapping edges.
Sprinkle the ground cinnamon on top of the apples.
Place the baking trays in the oven.
Leave the chips in the oven for two hours; turn them over after the first hour.
Let the chips cool before eating.
Keep the chips in an airtight container in the fridge for up to a week
Nutrition
Per Serving: 40 calories; 0 g fat; 11 g carbohydrates; 0 g protein
Equipment
Knife
Chopping board
Mandolin
Baking tray
Baking paper or silicone liner
Nutritional disclaimer
Nutrition information is provided as an estimate based on the ingredients used and available in my area (New Zealand). The nutritional information is here to help you understand the recipe; I use MyFitnessPal to generate my estimates. For more accurate nutritional information, please use a nutritional calculator with the ingredients in your area.
Don’t you just hate it when you get a hard-boiled egg with that green ring inside; I think it has to be the most off-putting thing.
Getting the perfectly boiled egg is not difficult; the secret is that it is just about timing.
Soft or hard, it is all the same.
From much trial and error, I have found that the method for getting perfectly cooked soft and hard-boiled eggs is the same; the only difference is how long you leave the eggs in the water. To get perfect boiled eggs, here are some of the essential things to remember:
Start with cold water
Bring the water to the boil
Take the pan off the heat to let the eggs cook
Everyone has their own version of the “perfect egg”, but some guide times are a good place to start.
White just set and yolk runny 3 minutes
White set and yolk slightly runny 4 minutes
White set and yolk custard consistency 6 minutes
White set and yolk creamy consistency 10 minutes
Firm white and firm yolk 15 minutes
For the perfect boiled eggs, every time, here is what you need to do.
Place your eggs in a saucepan and fill the pan with cold water; you want at least 3cm of water over the top of the eggs.
Set the pan over high heat and bring the water to a boil.
Set the pan over high heat and bring the water to a boil.
You don’t need to cover the pan at this point.
Wait for the water to come to a boil.
Remove the pan from the heat and put a lid on the pan.
Wait for the water to come to a boil.
Remove the pan from the heat and put a lid on the pan.
Start the timer.
Remove the pan from the heat and put a lid on the pan.
When the timer goes off, remove the eggs from the pan.
Gently tap the egg with a spoon to break the shell; don’t crack the shells if you have 3-minute eggs.
Place the eggs into a bowl of cold water; this will stop the eggs from cooking.
Let them sit in the cold water for at least 1 minute (and stop the green ring).
The eggs will then be ready to eat, peel off the shells, and you are ready to go.
Perfect eggs peeled and ready to eat
If you have any eggs that you will not use straight away, leave them in their shells and store them in the fridge.
Instant Pot / Pressure Cooker option
Equipment
Instant Pot
Trivet for the Instant Pot
Long-handled tongs
Instructions
Pour one cup of water into the bottom of the Instant Pot.
Place the trivet inside the pot.
Place the trivet inside the pot.
Place the eggs on the top of the trivet, leave space between them.
Place the eggs on the top of the trivet, leave space between them.
The eggs will be steamed during cooking.
Add the pressure cooking lid to the Instant Pot and make sure the lock is closed.
Set the timer for your desired consistency on the high pressure setting.
Set the timer for your desired consistency on the high pressure setting.
Soft-boiled eggs: 3 to 4 minutes at high pressure.
Medium-boiled eggs: 5 to 6 minutes at high pressure.
Hard-boiled eggs: 8 to 10 minutes at high pressure.
These times work for up to 10 eggs in an 8-quart Instant pot.
When the timer beeps, release the pressure immediately.
As soon as the pressure has dropped, remove the eggs from the pressure cooker using the tongs.
As soon as the pressure has dropped, remove the eggs from the pressure cooker using the tongs.
Place the eggs into an ice bath as quickly as possible.
Place the eggs into an ice bath as quickly as possible.Perfect eggs peeled and ready to eat
Pour one cup of water into the bottom of the Instant Pot.
Place the trivet inside the pot.
Place the eggs on the top of the trivet, leave space between them.
The eggs will be steamed during cooking.
Add the pressure cooking lid to the Instant Pot and make sure the lock is closed.
Set the timer for your desired consistency on the high pressure setting.
Soft-boiled eggs: 3 to 4 minutes at high pressure.
Medium-boiled eggs: 5 to 6 minutes at high pressure.
Hard-boiled eggs: 8 to 10 minutes at high pressure.
These times work for up to 10 eggs in an 8-quart Instant pot.
When the timer beeps, release the pressure immediately.
As soon as the pressure has dropped, remove the eggs from the pressure cooker using the tongs.
Place the eggs into an ice bath as quickly as possible.
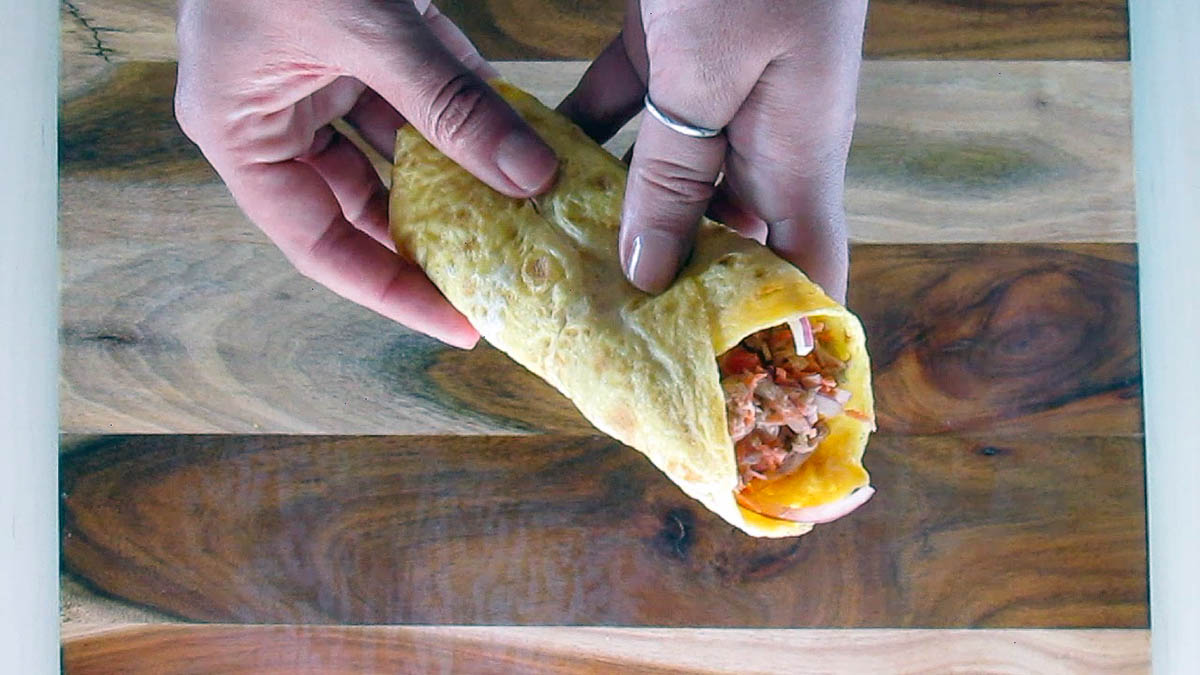
Egg wraps are a great option for breakfast lunch and dinner; you get to replace your standard wrap which is made with grains and chemicals with something that is just protein and healthy fats.
I love eggs because they are so versatile and these wraps just reinforce how versatile they can be.
Egg wraps ready for eating
The key to good egg wraps is using a flat non-stick pan, I have a crepe pan that I use to make my wraps, but any good quality non-stick frying pan will do.
Egg wrap recipe
Egg wraps ingredient
Ingredients
1 egg per wrap
The key to good egg wraps is using a flat non-stick pan, I have a crepe pan that I use to make my wraps, but any good quality non-stick frying pan will do.
Lightly oil the bottom of the pan and preheat the pan over a low to medium heat.
Lightly oil the bottom of the pan and preheat the pan over a low to medium heat.
In a bowl, whisk your egg with a fork until the egg is smooth.
In a bowl, whisk your egg with a fork until the egg is smooth.
Pour the egg into the centre of your pan and use the back of your fork to distribute the egg evenly in the pan. You want the egg as thin as possible without creating holes.
Pour the egg into the centre of your pan You want the egg as thin as possible without creating holes. When the edges of the wrap start to lift, use a spatula to turn the wrap over.
When the edges of the wrap start to lift, use a spatula to turn the wrap over.
When the edges of the wrap start to lift, use a spatula to turn the wrap over.
Cook for about 45 seconds on the other side.
Cook for about 45 seconds on the other side.
That is it; just repeat those steps for each wrap.
That is it; just repeat those steps for each wrap. Place the wrap on a flat surfaceAdd the fillingWrap and eat
Egg wraps are an amazing low carb option that are quick and easy to make
Credit: Cath @ easycleaneats
Ingredients
1 egg per wrap
Directions
Instructions
The key to good egg wraps is using a flat non-stick pan, I have a crepe pan that I use to make my wraps, but any good quality non-stick frying pan will do.
Lightly oil the bottom of the pan and preheat the pan over a low to medium heat.
In a bowl, whisk your egg with a fork until the egg is smooth.
Pour the egg into the centre of your pan and use the back of your fork to distribute the egg evenly in the pan. You want the egg as thin as possible without creating holes.
When the edges of the wrap start to lift, use a spatula to turn the wrap over.
Cook for about 45 seconds on the other side.
That is it; just repeat those steps for each wrap.That is it; just repeat those steps for each wrap.
Nutrition
Per Serving: 72 calories; 4.8 g fat; 0.4 g carbohydrates; 6.3 g protein
Equipment
Mixing bowl
Whisk
Frying pan
Spatula
Nutritional disclaimer
Nutrition information is provided as an estimate based on the ingredients used and available in my area (New Zealand). The nutritional information is here to help you understand the recipe; I use MyFitnessPal to generate my estimates. For more accurate nutritional information, please use a nutritional calculator with the ingredients in your area.
Fudge, yes, it is an excellent replacement word when you are around the kids, but I have another fudge alternative for you to enjoy.
Fudge is one of those fantastic sweet treats I remember from childhood, my Dandy often had fudge and toffee for Christmas, and I loved to share it with him.
In the past I probably could have happily munched a packet of fudge easily, nowadays I do not think I could deal with the sugar coma.
Sweet without the sugar
This recipe was born from a desire to enjoy the flavour of fudge without the truckload of sugar. When we made a move to remove sugar from our lives as much as possible, I noticed a change in my taste buds. What once was just a sweet treat is now so sickly sweet, I can’t eat it.
I like to look for alternatives that mean I get all the flavour without any of the adverse effects of ingredients that don’t agree with me. For this recipe I swapped out the sugar for honey, this created a delicate balance of sweet but not too sweet with all the rich flavour you get with original fudge.
Kid approved
The final hurdle I usually have any new recipe is if the kids will like it. Sometimes they like a recipe, but the response can be lukewarm, they eat what I have made, but it takes a few days for them to work their way through everything.
This is not one of those recipes. This fudge didn’t last the weekend; the fudge was nabbed out of the fridge after lunch, as a refuel when they got back from the play park and after dinner. These treats are little boy (and big boy) approved.
Primal fudge recipe
Primal fudge ingredients
Ingredients
1/2 cup coconut oil
1/2 cup cacao powder
1/2 cup seed butter
1/4 cup honey or maple syrup
1/2 tsp. vanilla bean powder
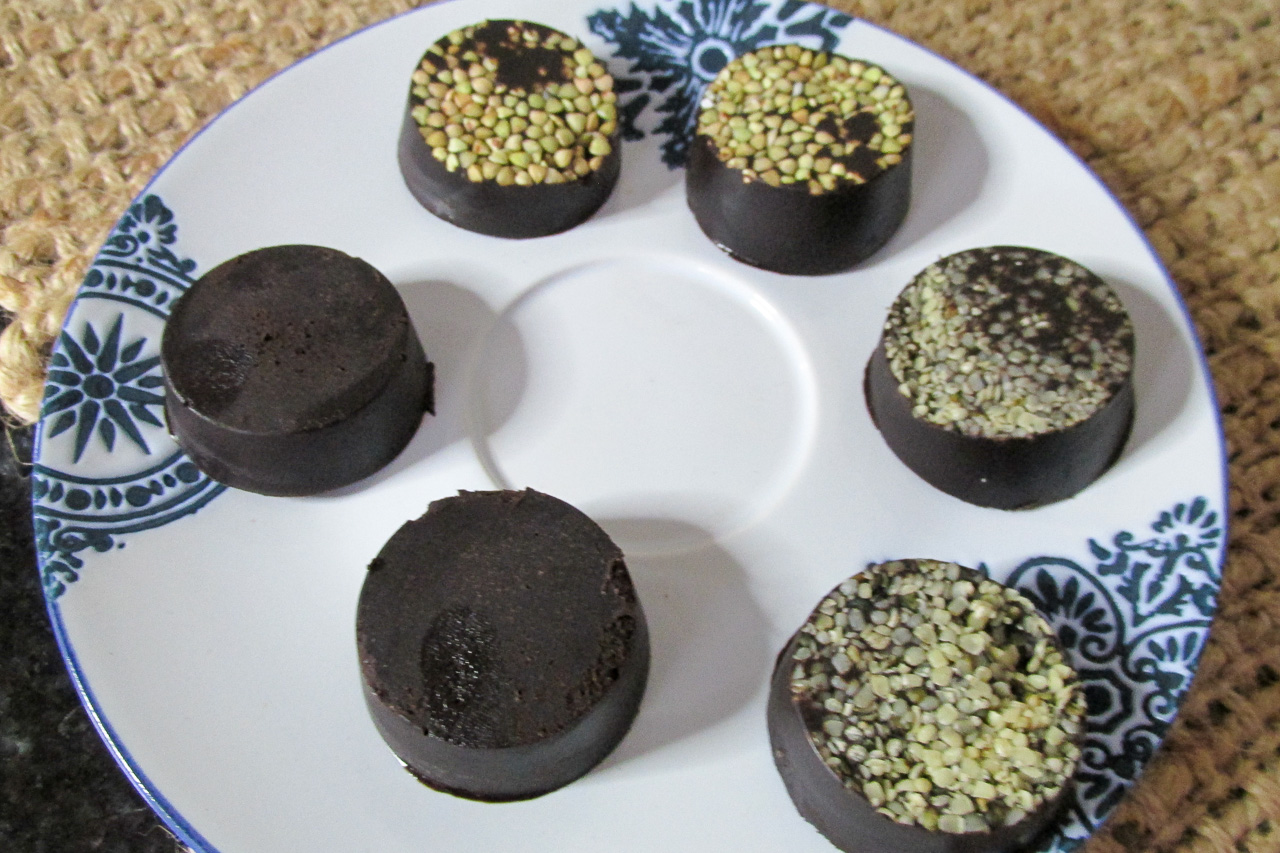
Place the cacao powder in a large bowl.Add the melted coconut oil and honey to the bowl.Mix well with a spatula.Add the seed butter to the bowl.Mix well.Take a silicone cupcake pan.Pour the mix into the cupcake pan.If you want to add something for some crunch put it in the bottom of the cupcake pan.Primal fudge ready for eating.
Fudge, yes it is an excellent replacement word when you are around the kids, but I have another fudge alternative for you to enjoy.
Credit: Cath @ easycleaneats
Ingredients
1/2 cup coconut oil
1/2 cup cacao powder
1/2 cup seed butter
1/4 cup honey or maple syrup
1/2 tsp. vanilla bean powder
Directions
Melt coconut oil either in the microwave or in a saucepan.
Don’t overheat the coconut oil, it should be liquid not bubbling.
Place all of the ingredients in a food processor and blend them together.
Alternatively you can mix by hand.
Add the cacao powder in a large mixing bowl
Add the melted coconut oil and mix with a spatula.
Add the seed butter to the bowl.
Mix well.Mix well.
Pour the mix into paper-lined muffin tin cups /silicone muffin cups.
Fill each cup halfway.
Place the muffin cups in the fridge for 30 minutes or freeze for 10 minutes.
Pop the fudge out once it is set.
Store in a sealed container in the fridge.
Nutrition
Per Serving: 89 calories; 7 g fat; 5 g carbohydrates; g protein
Equipment
Saucepan
Food processor
Muffin tin or silicone muffin cups
Measuring cups
Measuring spoons
Spoon
Nutritional disclaimer
Nutrition information is provided as an estimate based on the ingredients used and available in my area (New Zealand). The nutritional information is here to help you understand the recipe; I use MyFitnessPal to generate my estimates. For more accurate nutritional information, please use a nutritional calculator with the ingredients in your area.
You may have already figured out that meat is a huge deal in our house; our family motto may need to be meat with everything. Protein-rich snacks are a firm favourite for everyone including the cat.
We all know chips and dips are awesome, the downside is the bloating and carb coma. Enter the salty alternative to standard chips – porkips.
Pork whats?
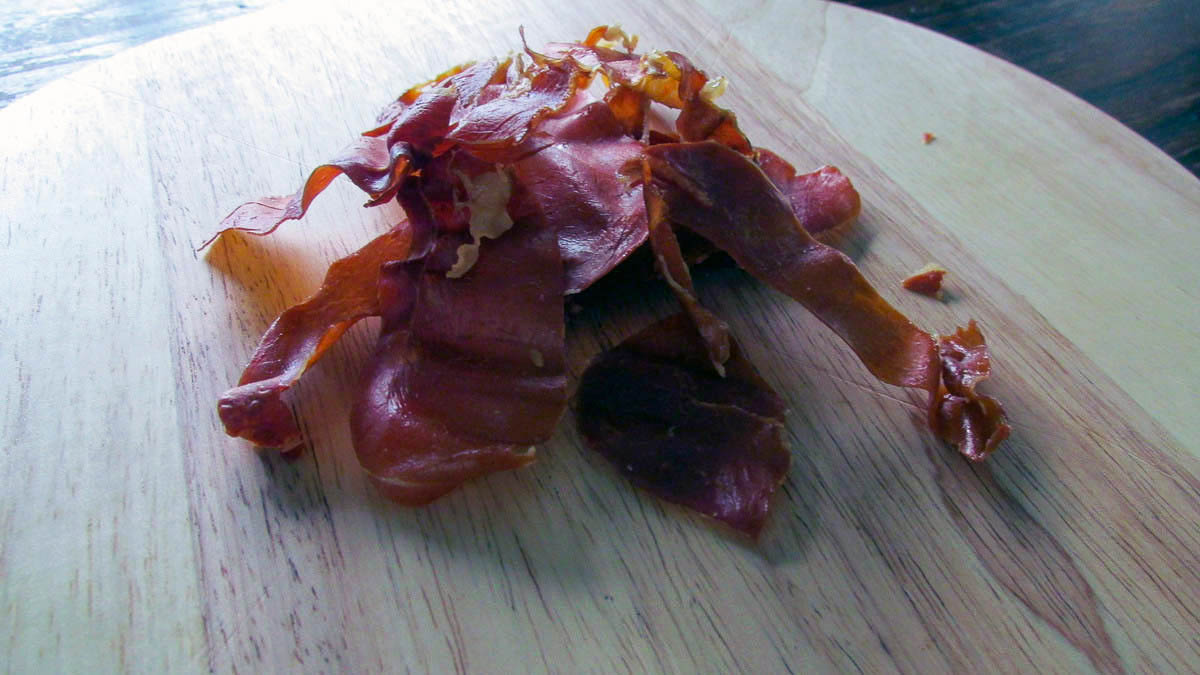
These chips are just meat. They are crunchy and salty goodness. I usually break out these bad boys for special occasions like birthdays and Christmas. They last about 5 minutes once they are done, they are easy to make and if you can stop them being eaten as is go great with dips.
Line a baking tray with baking paper; layout slices on the baking paper
Bake for 10/15 minutes until crunchy then allow them to cool (if you can)
If they get to a point where they have cooled they are good to eat (you have also managed to get much further than we do), if they survive the day you can store them in an airtight container for about 4 days in the fridge.
Nutrition
Per Serving: 122 calories; 7.5 g fat; 0 g carbohydrates; 13.5 g protein
Equipment
Baking tray
Baking paper or a silicone liner
Cooling rack
Nutritional disclaimer
Nutrition information is provided as an estimate based on the ingredients used and available in my area (New Zealand). The nutritional information is here to help you understand the recipe; I use MyFitnessPal to generate my estimates. For more accurate nutritional information, please use a nutritional calculator with the ingredients in your area.
One of my biggest challenges is eating enough food, crazy but true. I do a lot of activity, and that often means I need to get more calories in to make sure I have enough energy for the day. When you don’t eat processed foods, it can be hard to cram in calories that, you need to keep your body ticking over. Having snacks that I can keep in my bag and eat on the go have been vital in keeping me going recently.
Protein bars that don’t taste like cardboard
I’ve tried some protein bars and have to say most of them taste like cardboard, snacking on cardboard isn’t something I want to make a habit of so I came up with my own bars. These bars are a perfect mix of protein, fat and carbs without too much of any one thing; they are the ideal pre or post workout bars.
No fridge needed
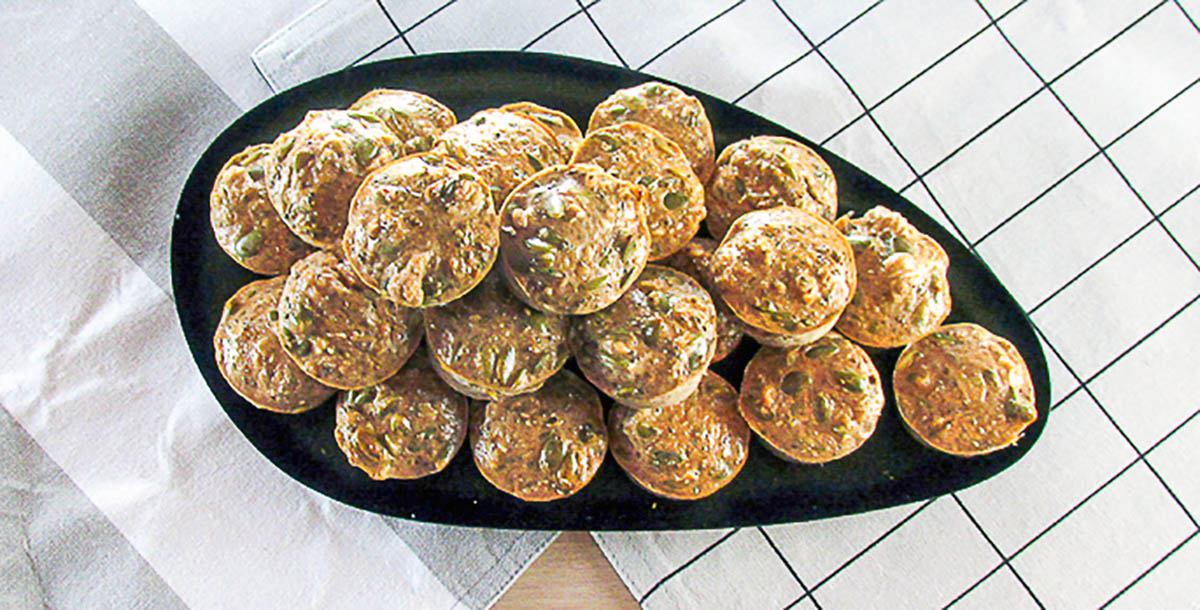
It might be winter down here in New Zealand, but winter in Auckland isn’t freezing, which means keeping snacks safe to eat can be a challenge. I like to keep my snacks in my bag, so they are always close by and ready to be munched. This can be an issue when you use eggs in baking, that was a primary driver for using chia seeds in this recipe. These bars don’t need to be kept in the fridge, I pop one in my bag in the morning, and it is still perfect for eating on my way to yoga after work. I keep the batch in the fridge to make sure they don’t get funky, but they survive nicely for a day in my gym bag.
They are easy to make; don’t have any added nasties and they even pass the little boy taste test. If you want a balanced snack that will keep you going gives these bars a go.
bars. These bars are a perfect mix of protein, fat and carbs without too much of any one thing; they are the ideal pre or post workout bars.
Credit: Cath @ easycleaneats
Ingredients
2 cup cooked steel cut oats
1 cup ground pumpkin seeds
2 scoops protein powder
1/4 cup chia seeds, soaked
2 tbsp. cacao powder
1/4 tsp. salt
Directions
Preheat the oven to 160 degrees C/ 320 degrees F.
In a large bowl mix together, all of the ingredients to form a thick paste, if the mixture is too dry add a little coconut water to bring it all together.
Line a baking pan with some baking paper, add the mix to the pan and press it down.
Alternatively use a muffin pan and divide the mixture between the muffin pan.
Bake the mixture for 20 minutes.
Cut into bars or remove them from the muffin tin.
Allow the bars to cool on a cooling rack.
Store them in the fridge in an airtight container.
Nutrition
Per Serving: 128 calories; 5 g fat; 13 g carbohydrates; 8 g protein
Equipment
Bowl
Spoon
Spatula
Baking pan/ Muffin tin
Cooling rack
Measuring cups
Measuring spoons
Nutritional disclaimer
Nutrition information is provided as an estimate based on the ingredients used and available in my area (New Zealand). The nutritional information is here to help you understand the recipe; I use MyFitnessPal to generate my estimates. For more accurate nutritional information, please use a nutritional calculator with the ingredients in your area.
My family love chocolate, when I say love I mean it, they will eat chocolate multiple times a day if I let them. I don’t mind them eating chocolate but like to make the chocolate as healthy as possible.
Chocolate drops ready to eat.
Slightly better for you
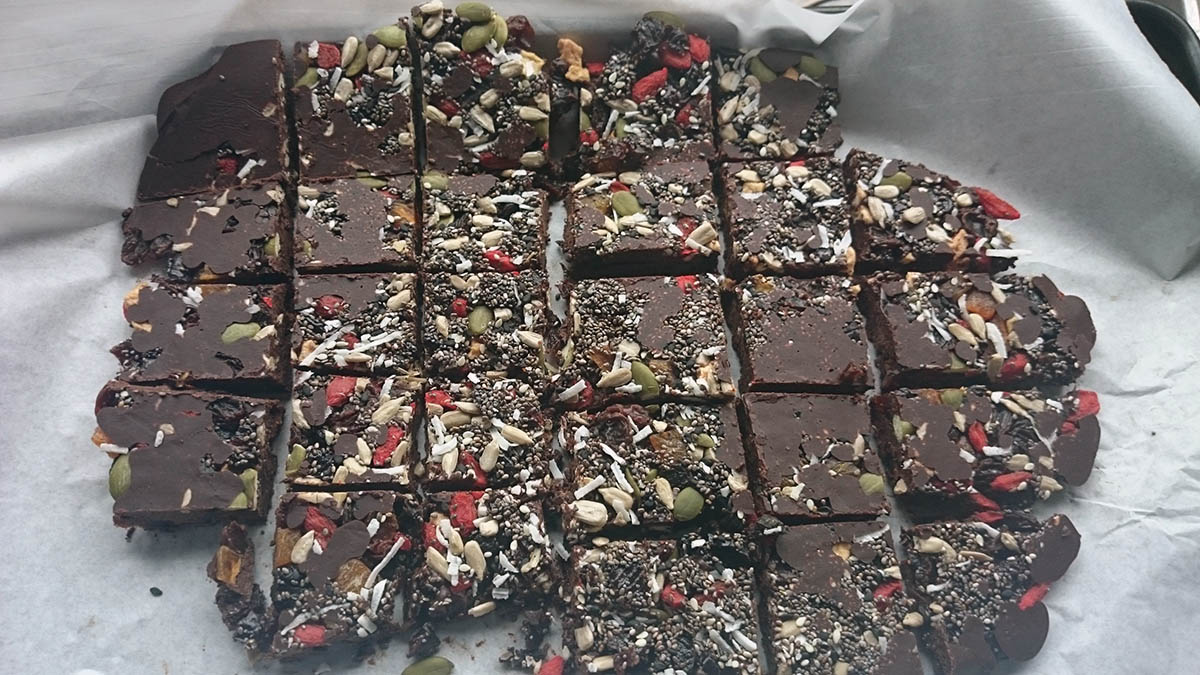
If you are looking for a sweet treat that doesn’t leave you feeling guilty, this could be the treat for you. The combination of chocolate, seeds and berries is perfect. You can make these up and keep them in the fridge (if they last that long), so you have a treat on hand when you need one.
Chocolate drops recipe
Chocolate drops ingredients
Ingredients
2 tbsp. chia seeds
3 tbsp. sunflower seeds
3 tbsp. pumpkin seeds
3 tbsp. goji berries
2 tbsp. coconut chips
1/4 cup homemade chocolate
Chocolate drops with some white chocolate drizzle.
Melt the chocolate so that it is easy to pour, I like to use a saucepan.
In a bowl mix the seeds and dried fruit.
Line a baking tray with baking paper or a silicone liner.
Pour the chocolate onto the baking tray.
Sprinkle the seed and fruit mix over the top of the chocolate and press it in slightly.
Put the chocolate into the fridge and allow it to set.
Once the chocolate is set cut it into squares.
Store the chocolate in a jar or an airtight container in the fridge.Store the chocolate in a jar or an airtight container in the fridge.
Nutrition
Per Serving: 90 calories; 6 g fat; 8.5 g carbohydrates; 3.9 g protein
Equipment
Mixing bowl
Saucepan
Spatula
Baking paper
Baking paper or a silicone liner
Knife
Chopping board
Nutritional disclaimer
Nutrition information is provided as an estimate based on the ingredients used and available in my area (New Zealand). The nutritional information is here to help you understand the recipe; I use MyFitnessPal to generate my estimates. For more accurate nutritional information, please use a nutritional calculator with the ingredients in your area.
I’ve been revisiting recipes that have been some of my old school recipes and family favourites that were our staples when we got started as clean eaters. I first posted this recipe in 2015, at that time, the kids were fussy, vegetables had to be hidden and disguised, and there was no potential for intense flavours or spice. Times (thankfully) have changed, the kids have grown (like man-sized grown), and they now enjoy a wide range of foods. Things like vegetables are enjoyed, spice and chilli are consumed without complaint, and new ingredients are tried without tantrums. As the kids have grown my recipes have changes organically to meet their palates and preferences, I’ve updated this recipe because of that, but fear not, all I have done is make it a little bit better.
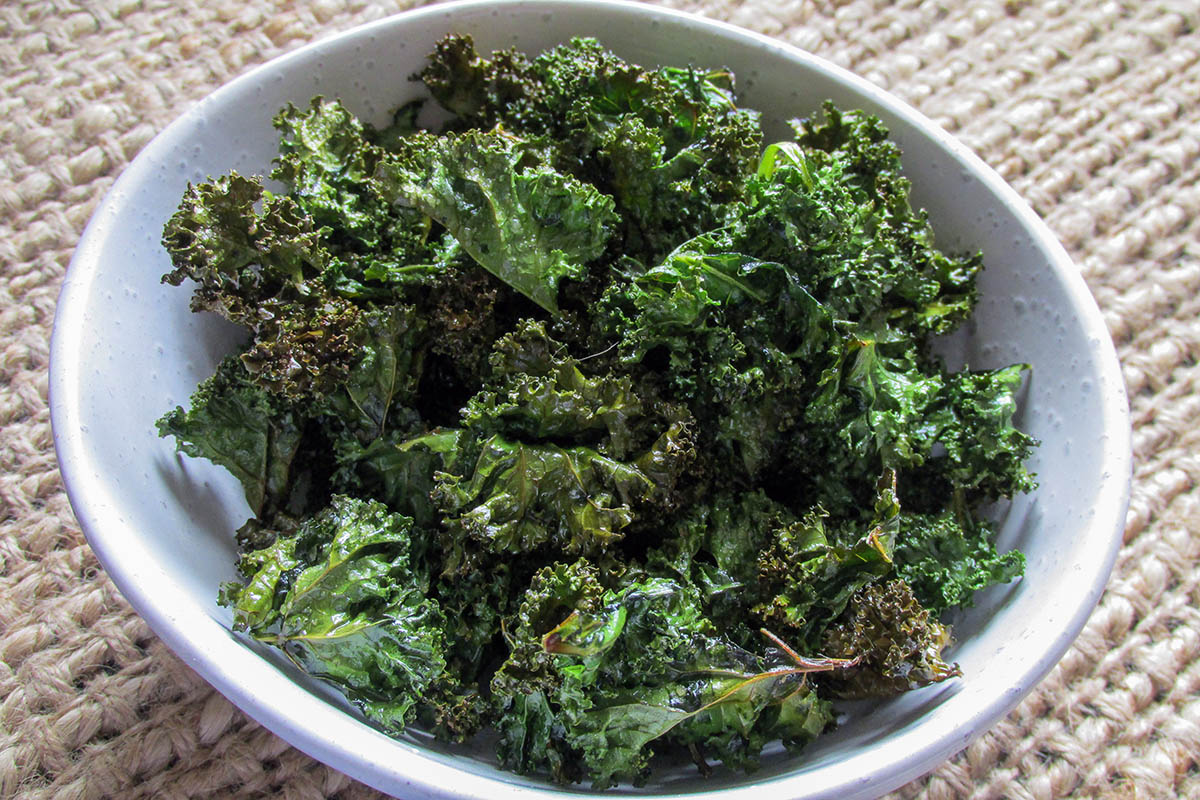
Kale chips fresh from the oven and ready for eating
A surprise request
I like kale, I have for a very long time, but green vegetables haven’t always been a favourite in our house. Can you imagine my surprise when Liam, the child that hated all vegetables, one weekend asked out of the blue if he could have some kale chips? I was glad I was sitting down when he asked otherwise I may have fallen over. When Liam asked for them, I was more than happy to make him a nice healthy snack.
A family staple
Since that first request, kale chips have been something of a staple when it comes to snacking. Over the years we have experimented with different flavours for the family, here are a few of our favourites
These kale chips are a healthy snack option that will keep the entire family happy.
Credit: Cath @ easycleaneats
Ingredients
1 bunch of kale, washed and dried
2 tbsp. olive oil
Salt to taste
Directions
Preheat the oven to 150 degrees C/ 300 degrees F
Line a tray with baking paper or a silicone liner.
Remove the centre stems and either tear or cut up the leaves.
In a bowl put the oil and salt then add the kale.
Toss everything together in the bowl, so all the leaves are coated in oil.
Spread on a baking tray, you may need to use two, depending on the amount of kale.
Bake at 150 degrees for 15 minutes or until crisp.
Eat them when they are fresh out of the oven otherwise, they get a bit chewy.Eat them when they are fresh out of the oven otherwise, they get a bit chewy.
Nutrition
Per Serving: 94 calories; 7.3 g fat; 6.7 g carbohydrates; 2.2 g protein
Flavours
Here are the ingredient for some alternatives. You can add the extra flavours when you toss the kale in the oil.
1 tsp. paprika and 1/2 tsp. ground chill
1 tsp. ground ginger and 1 tbsp. lime juice
1 tsp. ground coriander and 1/2 tsp. ground chipotle
Equipment
Knife
Chopping board
Mixing bowl
Baking tray
Baking paper or silicone liner
Tongs
Nutritional disclaimer
Nutrition information is provided as an estimate based on the ingredients used and available in my area (New Zealand). The nutritional information is here to help you understand the recipe; I use MyFitnessPal to generate my estimates. For more accurate nutritional information, please use a nutritional calculator with the ingredients in your area.
I am one of those unfortunate people that is allergic to not only peanuts but also tree nuts. When it comes to food options, not having nuts on the menu can be challenging at times and frustrated at others. There are so many foods I would love to try or eat regularly but won’t get the chance thanks to nuts. Not eating nuts doesn’t have to be the end of the world; there are always replacements and alternatives that mean you can have a nut-free option. This recipe is my attempt to create a nut-free version of a usually nut packed recipe.
Nut-free breakfast crunch
My take on granola
I don’t always want a protein shake or eggs for breakfast, at times I want something with a bit more texture and some crunch to start my day. This recipe is ben a staple in our fridge for a long time now, I recently updated this recipe to add in some more variety with the addition of hemp hearts and buckwheat groats. I like to add it to the top of my smoothie bowl or some coconut yoghurt.
Nut-free breakfast crunch
Nut-free breakfast crunch ingredients
Ingredients
1 cup pumpkin seeds
1 cup coconut threads
1 cup sunflower seeds
1 cup buckwheat groats
1/2 cup hemp hearts
1/4 cup figs, chopped
2 tbsp. honey
2 tbsp. coconut oil
Toast the hemp heartsToast the coconutToast the buckwheat groatsAdd the toasted seeds to the chopped figsToast the sunflower seedsAdd the sunflower seedsToast the pumpkin seedsMix everything together with the melted coconut oil and honeySpread the mixture out on a baking trayTransfer the mixture to an airtight jar.
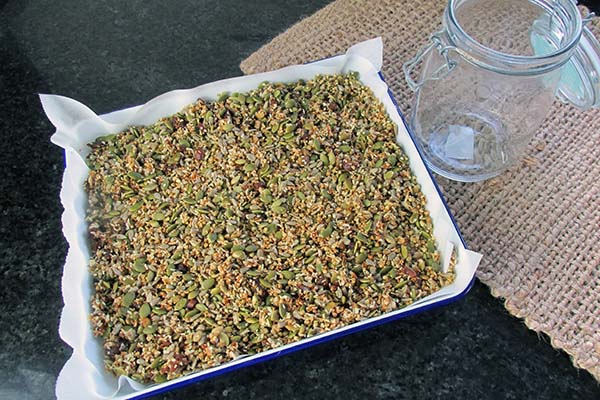
This seed packed breakfast crunch is an ideal option for breakfast or sprinkled on top of ice cream.
Credit:Cath @ easycleaneats
Ingredients
1 cup pumpkin seeds
1 cup coconut threads
1 cup sunflower seeds
1 cup buckwheat groats
1/2 cup hemp hearts
1/4 cup figs, chopped
2 tbsp. honey
2 tbsp. coconut oil
Directions
Over a medium heat lightly toast the seeds and coconut.
In a small pan heat the coconut oil and honey and mix them together.
While the honey and oil are warming start toasting the seeds.
Take a frying pan and warm it over a medium heat.
Toast each kind of seed individually so you get an even toasting.
Add the toasted seeds and coconut to the oil and honey mixing well.
Add the figs and stir well.
Pour the mix onto a lined baking tray and let it cool.
Break into chunks and store in an airtight container.
Nutrition
Per Serving: 204 calories; 11 g fat; 21 g carbohydrates; 7 g protein
Equipment
Saucepan
Frying pan
Whisk
Spatula
Baking tray
Nutritional disclaimer
Nutrition information is provided as an estimate based on the ingredients used and available in my area (New Zealand). The nutritional information is here to help you understand the recipe; I use MyFitnessPal to generate my estimates. For more accurate nutritional information, please use a nutritional calculator with the ingredients in your area.
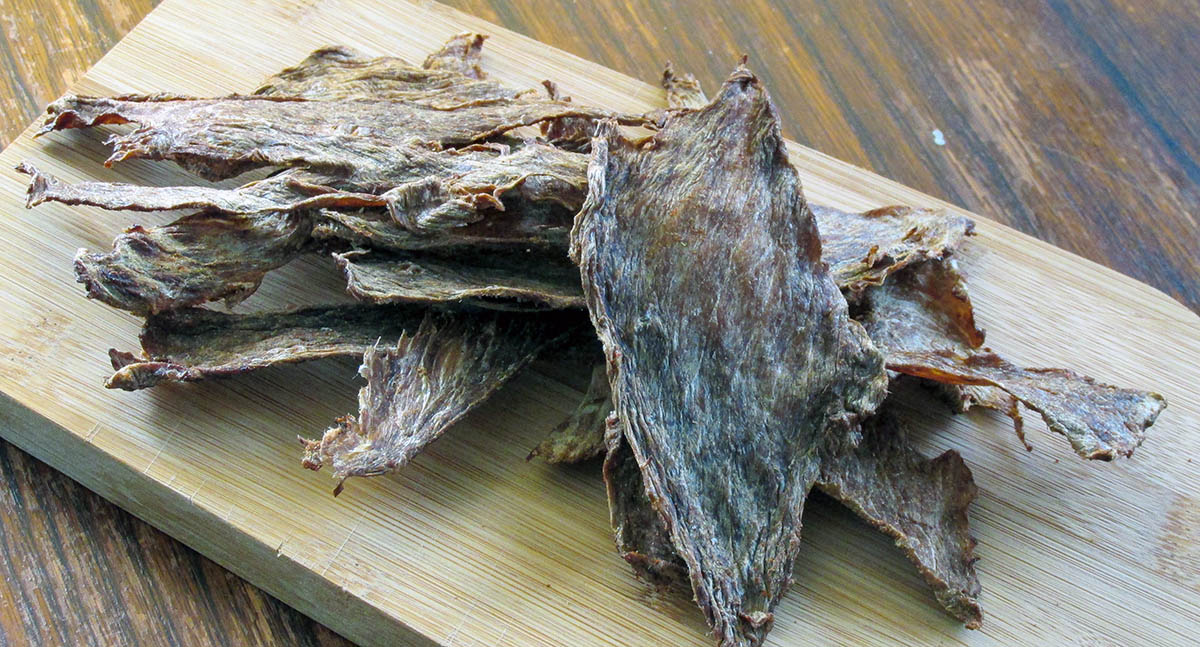
As snacks go, I don’t think you can get better than beef jerky. The little meaty treat is hard to say no to and more so when the alternative snacks are loaded with sugar or soy. I initially decided to make my own beef jerky because the store-bought stuff didn’t agree with me. The beauty of homemade jerky is the different flavours you can make in one go and that it is so much cheaper.
Simple to make
You don’t need any special equipment to make your own jerky. If you have a sharp knife and an oven with a low heat setting, you have everything you need. If you have access to a dehydrator, it is an easier tool to use, and you can make more jerky in one go.
More meat-lovers
Recently the youngest member of our house joined the beef jerky lover group with a vengeance. My coconut amino teriyaki jerky seems to be a firm favourite with him (and the cat). The big bag of beef jerky that we get out of each beef roast is impressive. Keeping it in glass jars in a cool, dry place means that we have beefy treats on hand for a couple of weeks.
Beef jerky recipe
Ingredients
1kg Beef roast
5 tsp. paprika
2 tsp. garlic powder
1 tsp. salt
4 tsp. basil
2 tsp. thyme
300ml water
Thinly slice your meat; you want it to be no more than 5 mm in thickness.
Take a large sandwich bag you can seal up and place the meat inside or a bowl that can be covered.
In a bowl mix together the ingredients for your marinade, whisk to make sure it is well combined.
Pour the marinade over the meat and massage it around in the bag or in the bowl.
Seal the bag or cover the bowl and put it in the fridge for at least 12 hours but preferably 24 hours.
There are two ways you can dry the meat to make into jerky, you can use your oven or a dehydrator.
Lay out all of the meat onto the dehydrator trays making sure the pieced of meat don’t overlap.
Once the meat has dried out it is ready to be stored, I keep my in bags in the fridge or in an airtight jar.
The time it takes for the meat to dry will depend on how thick it has been sliced, the temperature you are drying the meat at.
Thinly slice your meat; you want it to be no more than 5 mm in thickness.
Take a large sandwich bag you can seal up and place the meat inside.
In a bowl mix together the ingredients for your marinade, whisk to make sure it is well combined.
Pour the marinade over the meat and massage it around in the bag.
Seal the bag and put it in the fridge for at least 12 hours but preferably 24 hours.
When it’s ready drain the marinade off the meat and remove any excess moisture with a clean tea towel.
There are two ways you can dry the meat to make into jerky, you can use your oven or a dehydrator.
If your using the oven you need to have it set around 50 degrees C/ 120 degrees F.
Lay out all of the meat onto wire trays, you need to make sure that the pieces of meat don’t overlap, you can put multiple wire trays on top of each other but the needs to be space for the air to get between each tray.
Put it in the oven on the low heat with the oven door slightly open if you can, if not just open the door every now and then to allow the moisture to escape.
If you are using a dehydrator it needs to be set to around 65 degrees C/ 150 degrees F.
Lay out all of the meat onto the dehydrator trays making sure the pieced of meat don’t overlap.
The time it takes for the meat to dry will depend on how thick it has been sliced, the temperature you are drying the meat at.
14.Once the meat has dried out it is ready to be stored, I keep my in bags in the fridge or in an airtight jar.
Nutrition
Per Serving: 64 calories; 2.1g fat; 0g carbohydrates; 10.4g protein
Equipment
Scales
Measuring jug
Measuring spoons
Knife
Chopping board
Ziplock bag
Mixing bowl
Whisk
Dehydrator or wire racks
Nutritional disclaimer
Nutrition information is provided as an estimate based on the ingredients used and available in my area (New Zealand). The nutritional information is here to help you understand the recipe; I use MyFitnessPal to generate my estimates. For more accurate nutritional information, please use a nutritional calculator with the ingredients in your area.