Here is another quick, easy and practical post to add to your kitchen skill toolbox.
Meatballs are an easy weeknight option, they are easy to make, and each one can be made into a little flavour bomb.
Making meatballs is easy, a little messy but easy. You can follow these key steps to make tender meatballs every time no matter what flavours you put in the mix. Remember that meatballs are comfort food, so it is ok to keep it simple.
Homemade meatballs
Picking the right meat
The most important thing about your meatballs is the meat (obviously). It doesn’t matter what meat you want to use for your meatballs, what is important is fat. The fat content of the meat is what will give you tender meatballs; if you use lean meat make sure you keep an eye on the meatballs while they cook. Without fat, you get dry, chewy meatballs.
Remember that you can mix and match your meat.
Beef mince
Do you need to bind it?
Traditionally people add eggs and breadcrumbs to meatballs; I have never actually seen the need to add a binder to meatballs. Depending on what meat you use will generally dictate if you need to add anything to keep the meatballs together. I often find that sticker meats (sausage meat, chicken mince, or turkey) benefit from having something added to keep in some of the moisture. If you are looking to add a binder, look at adding coconut flour and egg. Just remember a little coconut flour goes a long way.
Coconut flourEgg
Don’t handle the meat too much
Another key thing to remember is not to overwork the meat. You want to work the meat as little as possible. The best tool you have for mixing ingredients in your hands, and this makes it easier to feel when everything is combined well. I know that working meat with your hands can feel a little gross, but your hands are the best tools for mixing and rolling.
Making meatballs
Add the dry ingredients to the bowlAdd the herbs and egg if you are using lean meat.Add the meat to the bowlUse your hands to mix together the meat.Don’t overwork the meatMake sure everything is well combinedDivide the meat mix into portionsRoll the portions into balls
Add the dry ingredients to the bowl.
Add the herbs and egg if you are using lean meat.
Add the meat to the bowl.
Use your hands to mix together the meat.
Don’t overwork the meat.
Make sure everything is well combined
Divide the meat mix into portions
Roll the portions into balls
How should you cook them?
There are two options for cooking meatballs, roast them or cook them in a sauce.
If you intend to freeze the meatballs or to serve them without sauce roasting is the best option. You can grill or roast the meatballs, make sure you let them cool before freezing.
If your meatballs are going to be served with sauce, the best option is to cook the meatballs in the sauce, which will add flavour to the meat and keep it tender.
When you start to spend more time in your kitchen, you start to realise that high-quality equipment makes a big difference to the effort required from you.
I’ve found that spending a little bit more on some things has a huge benefit; the key is knowing what to buy and what you get out of it in the long run.
Here are the things I recommend spending a little more on when you are ready
Food processor
Blender
Cast iron pan
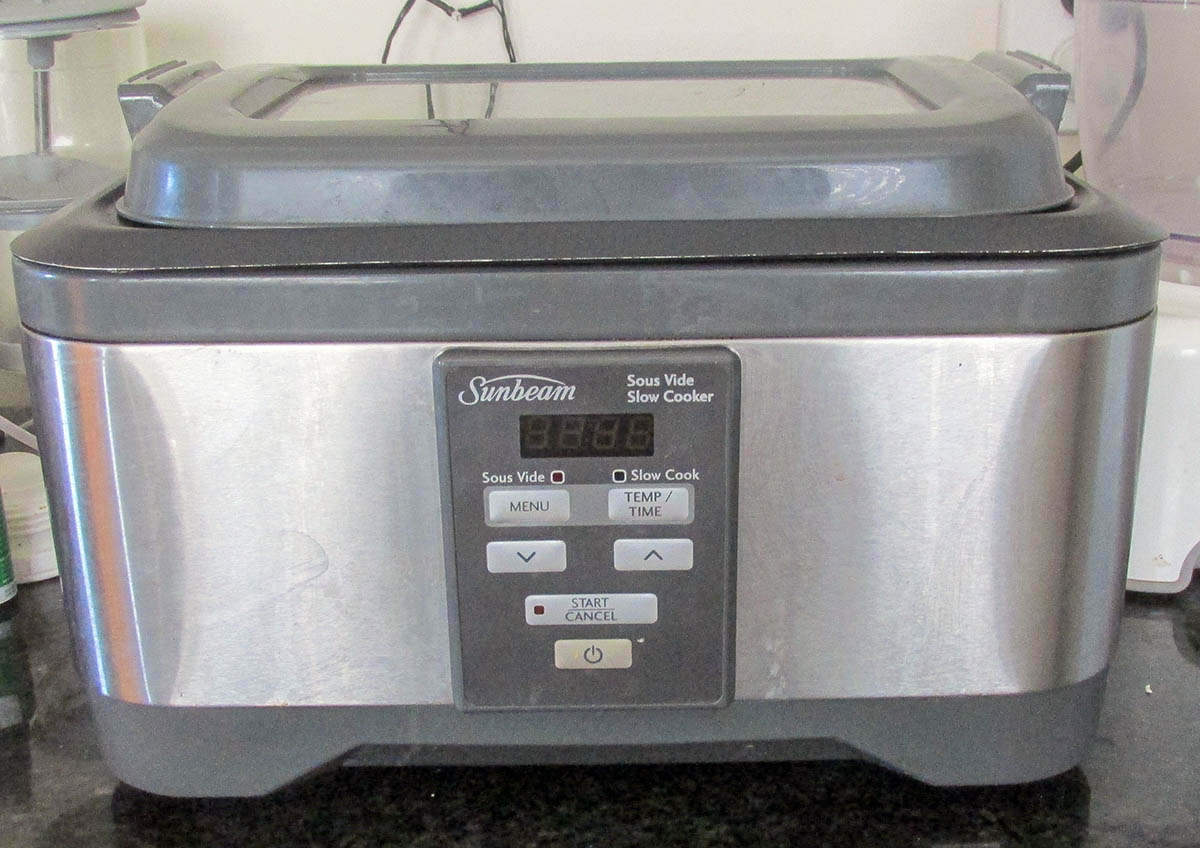
Slow cooker
A quick reminder I’m based in New Zealand, so the products I specifically recommend are available here, if you live in the northern hemisphere you will have different products available.
Food processor
Best investment ever
For me investing in a good quality food processor was the best investment I have made in the kitchen. A good food processor will have multiple attachments that will cut down the time and effort significantly. If I used my processor for nothing but grating Cauliflower for Cauliflower rice then the processor would have paid for itself in 2 months (trust me band-aids are expensive).
Before buying a food processor, it would take an hour to cut up then grate one Cauliflower (and at least one grated knuckle). Now I can cut up and grate 3 cauliflowers in 20 minutes, and it is no longer seasoned with human skin.
Other uses
That is just one of the things I use my food processor for, consider other uses
Ice cream
Seed or nut butter
Shredding vegetables
Grating vegetables
Making cake batters
Making mousse
Mincing meat
Slicing vegetables
What I can personally recommend is the Kenwood multi pro unit, this is the model that I bought and can say it is a great all-rounder. It is a little bit more than some of the other models on the market. What I can say is that you should look for a processor that meets your needs, suits your budget and will be an excellent investment in your kitchen.
Here are a few general things to consider when looking for a food processor
Power
Look for a processor that has a high watt motor, at a minimum you want a 500w motor, any lower than that and it will likely struggle. When you look at the motor size, also take a look at the speed settings, the more settings, the longer your machine will last as it doesn’t need to go flat out for everything it does.
Warranty
Most of the well-known brands offer a 12-month manufacturer’s warranty; I do recommend you look for a processor that has one.
Bowl size
This is a critical thing to consider when shopping for a processor if you want to make cauliflower rice you need a bowl with a large capacity, believe me, it is not fun having to stop grating and empty the bowl when you are only halfway through a cauliflower. I would recommend that you look for something that has a bowl with a 1 litre capacity as a minimum.
Attachments
I could say that the best idea is to look for a processor that has as many as possible, the truth is that this isn’t the best approach. I think a better way is to figure out what you want the processor to do and what functionality is essential for you. To get the best bang for your buck, I would recommend that you look for a processor that has a minimum of a processing blade, shredding discs and slicing discs. If additional attachments are on your wish list, you can find processors with attachments such as
Very much like the investment in a food processor, I made sure I bought the best blender I could afford. A blender may not be as versatile a piece of kit as a food processor, but I believe in having the right tool for the job. In the case of my blender I actually saved some money because I bought a food processor and blender combo, it was a great deal, I got one base that the blender and processor fit onto.
Do you need both?
You may ask yourself why you need a blender when you have a food processor, trust me you do. A blender is a much better tool when you are making sauces, smoothies, or soups than a food processor is. Once you start making your own mayonnaise, hollandaise, and tomato sauce, you will want to have a good quality blender to make your life easy.
As with buying a food processor, you want to be sure to look for the right qualities including a good size motor with multiple speed settings, a manufacturer warranty, and a jug that will hold at least 1 litre.
Cast iron pan
I’ll be honest here, cast iron pans are not the easiest option, they take a little bit of care and take some getting used to when you start cooking with them. That being said when you find your feet with cast iron you never want a non-stick frying pan again.
Facts not fiction
Let’s get a few things clear about cast iron
It is not difficult to look after you just need to know the basics for looking after cast iron
It needs to be seasoned when you get a cast iron pan you need to season it, even the pre-seasoned cast iron pans need to be seasoned
Re-season every time you use the pan when you have rinsed the pan out re-season.
Use it a lot the more you use the pan, the better the pan will get
Don’t let it stay wet once you have cleaned the pan dry it off and re-season it straight away, wet pans rust no matter how good your seasoning is
Follow these simple rules are a cast iron pan will be a perfect piece of kit for your kitchen.
Budget
When it comes to cast iron pans, you are going to spend a fair amount of money, there are a few brands available with prices ranging from $40 to $200, and the quality of pan differs from brand to brand.
Here are some of the things to consider when looking for a cast iron pan.
The weight of the pan will have a huge impact on your experience with cast iron. Generally, the heavier pans tend to hold heat more, but you want something you can hold in one hand without feeling like it’s a workout.
How it feels in your hand it’s important when you get a pan that you can lift. You also want something that has a user-friendly handle, when you look at the handle you should check if it is heat resistant or has a place suitable to use a potholder, some pans have two handles to make it easier.
Just because it is expensive doesn’t mean it’s good- don’t use price as the real guide, cheaper doesn’t always mean less efficient, do your homework on the brands available and knowing what you want the pan for.
Slow cooker
I love my slow cooker, it is a lifesaver when it comes to dinner during the week, I love the simplicity of taking food out of the freezer, putting in the slow cooker, turning it on, and coming home to a meal that is ready to eat. You don’t need to invest a heap in a slow cooker, there are a lot of good quality ones out there.
What to look for
When shopping for a slow cooker, these are some of the things to consider
How is the bowl heated
Different slow cookers have a different configuration for the heating elements, look for a slow cooker that has heating elements that come up around the side of the bowl, this will help with even cooking.
What is the bowl made of
There are a few different materials that bowls are made of including ceramic, porcelain and metal, you want a bowl that is easy to remove and clean. Don’t buy a cooker that has a bowl that is fused to the heating unit. If you can get a metal or ceramic bowl as they are durable and will conduct heat very well.
What is the lid made of
We could discuss the options, but the truth is a glass top is the best material for the lid of a slow cooker. It allows you to look inside the bowl without having to remove the lid, it is easy to clean, and durable, the same cannot be said about plastic covers.
What shape is best
There are three main shapes available; oval, round and square. What you want to cook in your slow cooker will help make the decision of which shape to buy, chickens and roasts will do better in an oval or square than in a round pot.
What is the bowl capacity
There are a variety of bowl sizes out there you can get a slow cook that will hold 1 litre of food all the way up to 10 litres, which is best will depend on how many people you are cooking for, the more people, the bigger capacity you need. I would recommend that you look for something that is big enough to hold a chicken; you will feel the benefits of cook once eat twice.
What buttons does it have
There is a large range of options when it comes to buttons and functions on slow cookers. These include the timers, heat setting, and warming settings. Different brands have various options, so really it’s all about what functions you think would be useful to you. Most slow cookers come with the settings of off/on/low/high as a standard. Some come with a timer that lets you programme or set the time you want the cooker to be on for at one of the standard heat settings. A timer is a great option if you are not likely to be home exactly 8 hours after you put it on, it is an excellent way to prevent mushy vegetable and overdone meat issues.
Let me know in the comments what items you think everyone should invest in for the kitchen
I don’t know about you, but I’m always looking to learn new skills that make life easy in the kitchen. Sharing is caring so I’m sharing my little tips, tricks and hacks with you.
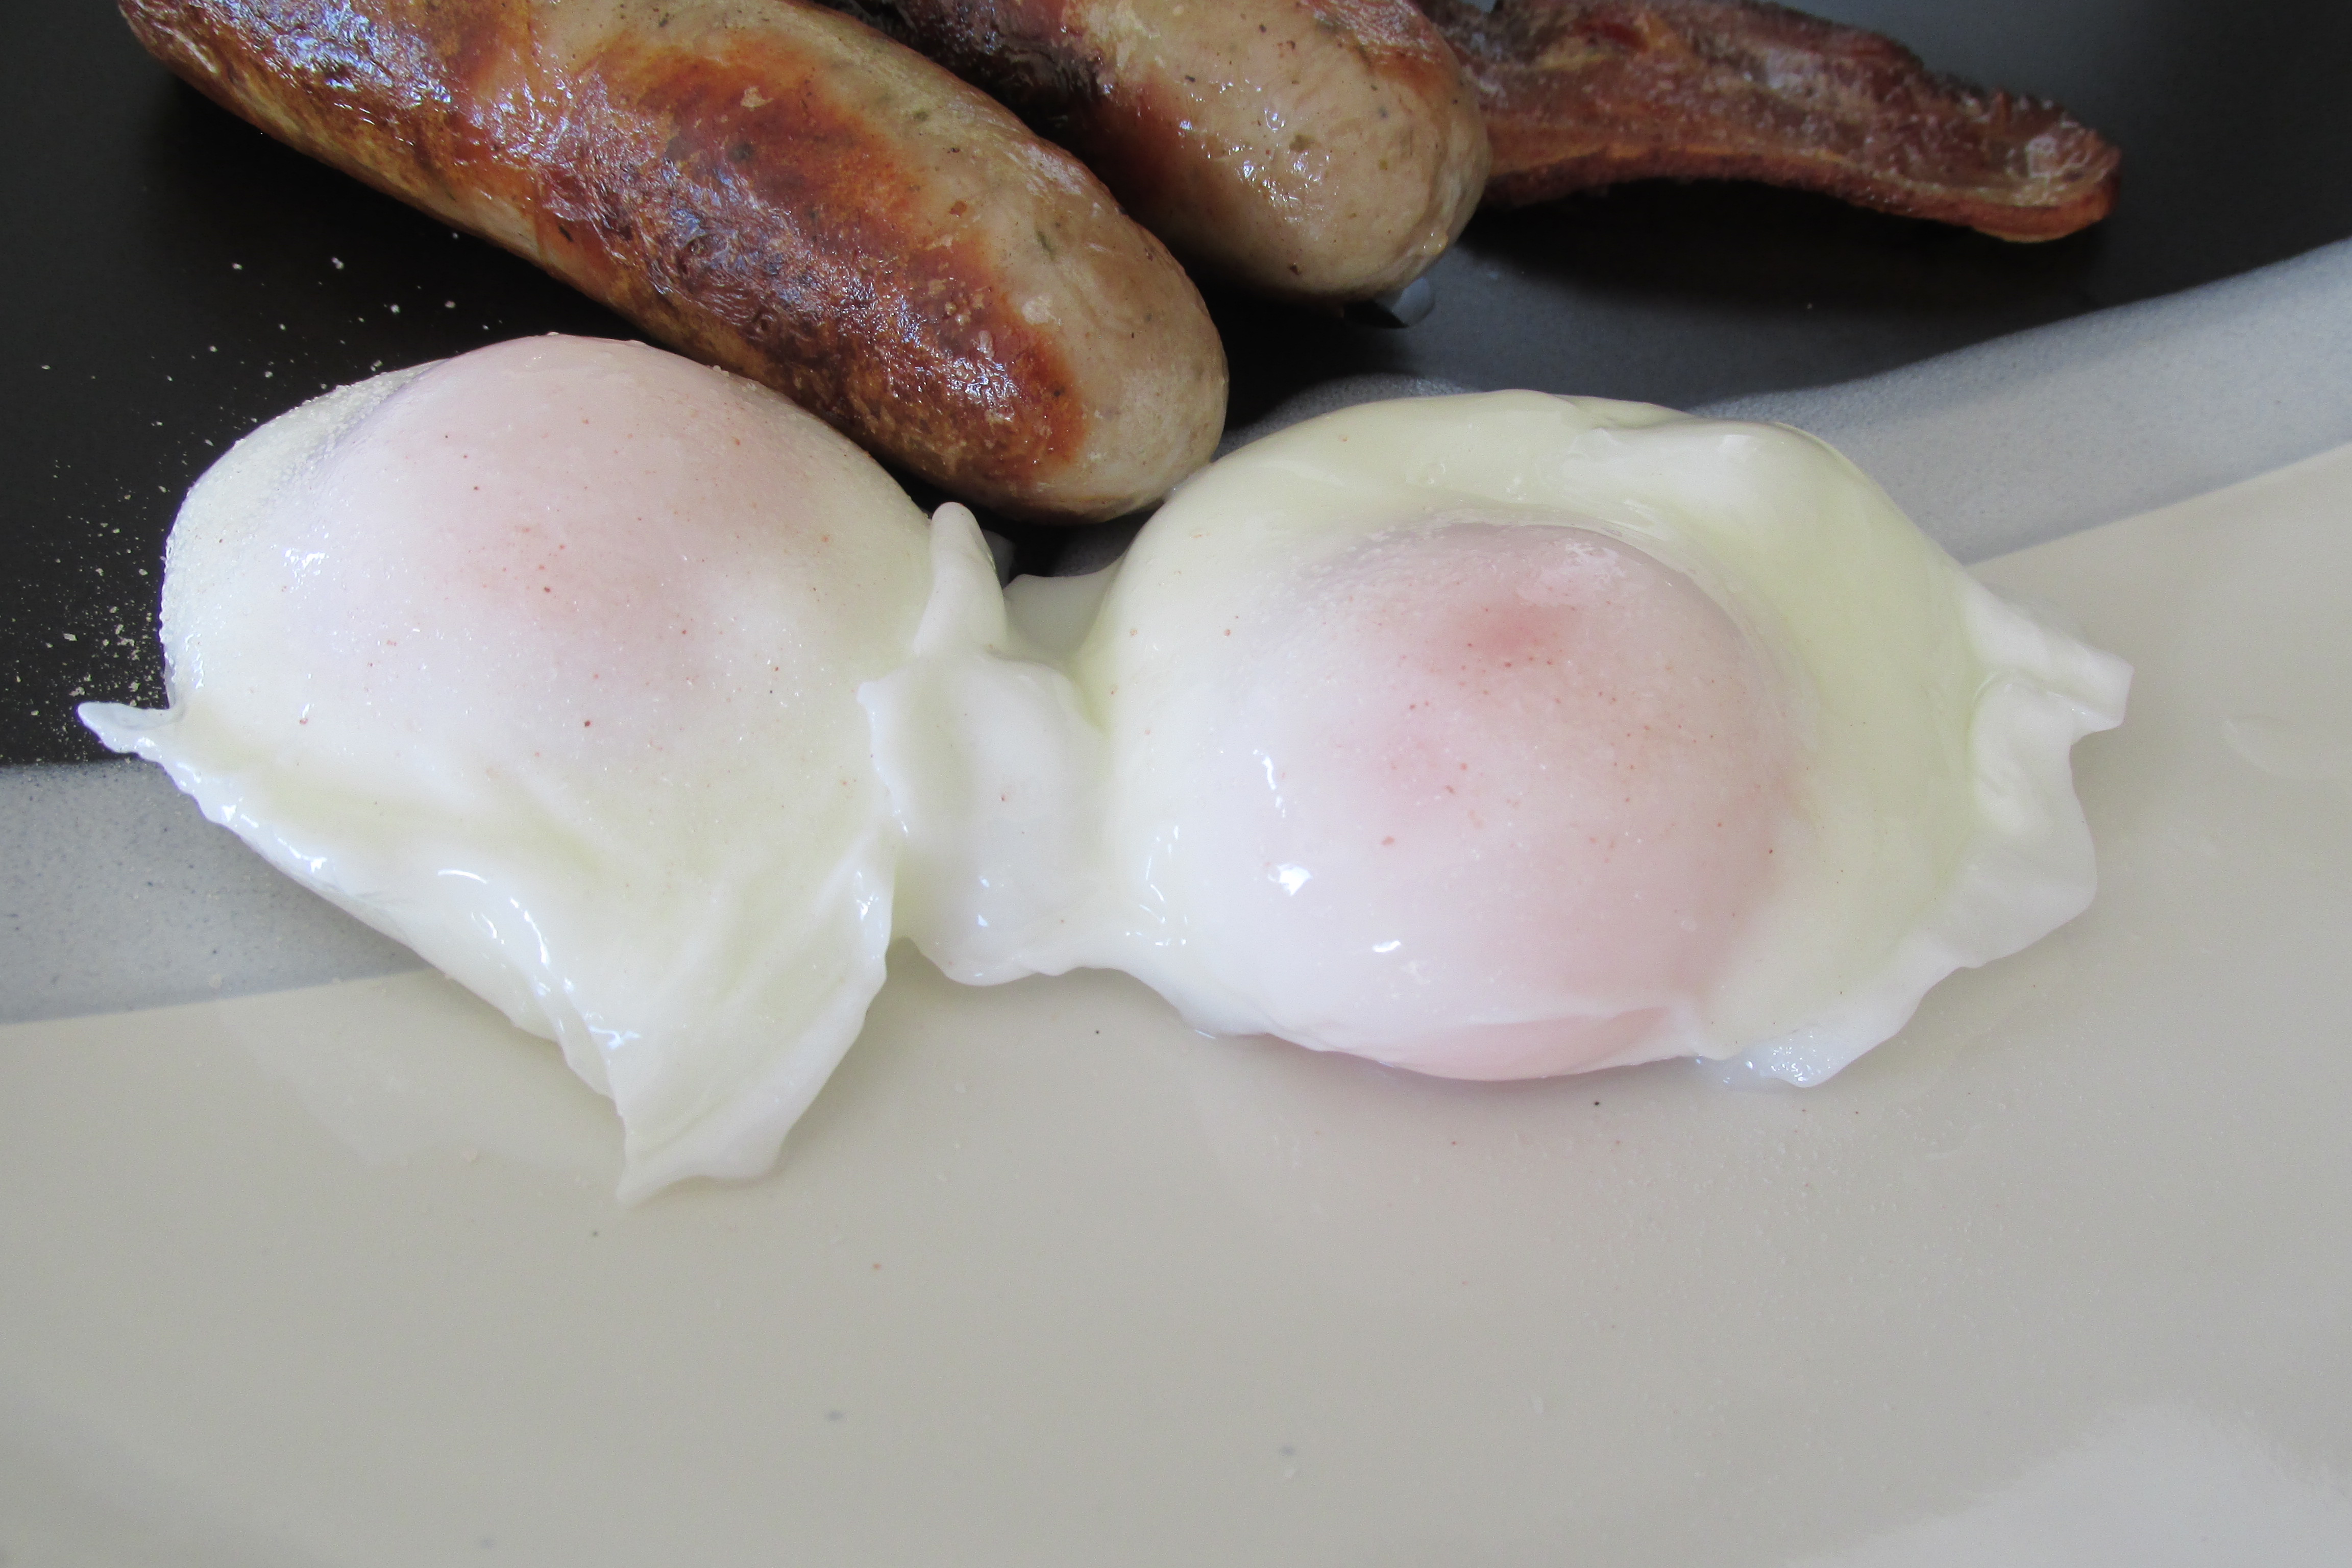
When you talk about making poached eggs lots of people think poaching eggs is impossible to get right; some count it in the same category as higher-level mathematics. I can understand why most people believe that poached eggs are difficult, there are so many different methods out there, with vinegar, without, boiling water, simmering water and the whirlpool method, and it’s a little overwhelming.
I’ve tried every method out there, and after lots of trials and plenty of error, I’ve found a way to get consistently good poached eggs. Most weekends I have to poach 6 eggs at the same time, and they all need to have a solid white and runny yolk.
I’ve found that the secret to success is a frying pan here is the method is how I get good poached eggs every time.
Here is what you need
Frying pan
Water
Slotted Spoon
Eggs
What to do
Take large frying pan.
Take a large frying pan.
Fill the frying pan with about 3cm of water, this will depend on the depth of your pan; make sure there is space for the eggs.
Fill the frying pan with about 3cm of water, this will depend on the depth of your pan; make sure there is space for the eggs.
Bring the water to the boil
Bring the water to the boil
Once the water is at a rolling boil, turn off the heat.
Once the water is at a rolling boil, turn off the heat.
Crack the egg and drop it into the water from just above the surface of the water.
Crack the egg and drop it into the water from just above the surface of the water.
If you have trouble keeping the egg intact, crack the egg into a small bowl or ramekin and use that to pour the egg into the water.
Crack all the eggs you want into the water.
Once you have your eggs in the water, leave them alone until the white is set.
Once you have your eggs in the water, leave them alone until the white is set.
Use the slotted spoon to remove the egg from the water
Use the slotted spoon to remove the egg from the water
Serve
As simple as that
As simple as that
What to do
Fill the frying pan with about 3cm of water, this will depend on the depth of your pan; make sure there is space for the eggs.
Bring the water to the boil
Once the water is at a rolling boil, turn off the heat.
Crack the egg and drop it into the water from just above the surface of the water.
If you have trouble keeping the egg intact, crack the egg into a small bowl or ramekin and use that to pour the egg into the water.
Once you have your eggs in the water, leave them alone until the white is set.
Use the slotted spoon to remove the egg from the water
Here is another quick, easy and practical post to add to your kitchen skill toolbox.
What is stir fry?
Stir fry (stir-fry) is what can only be described as a quick, easy and tasty way to get dinner on the table.
Stir-frying is a Chinese cooking method that has been around for approximately 1,500 years. It is basically using high heat to quickly cook meat and vegetables using oil in a wok or large pan. No fancy skills, tools or knowledge are needed.
Preparation is the key to success
As with all things in life, the key to success is preparation. For meat and vegetables to cook quickly, you need them to be cut into small strips. The matchstick or baton cut is the best option for vegetables and meat. Chopping vegetables and meat into thin strips does take time, but it does mean that the cooking process is easier. Consistency in the size of your ingredients will ensure that everything is cooked evenly and quickly. My top tip is to make sure that you have everything sliced and ready before you start cooking
What meat and veg to use
The meat and vegetables you use in a stir-fry will contribute to the success of your meal, not all vegetables or meat are suitable for a stir-fry. Meat with bones is not going to cook quickly or evenly in a wok, so those chicken thighs are not the best option. Here are my recommended meats and vegetables for the perfect stir-fry
Meat
Chicken breast
Steak
Pork loin
Vegetables
Peppers
Onions
Carrots
Broccoli
Snow peas
Baby corn
Courgette
Green beans
Bean sprouts
Mushrooms
Sauces and seasoning
Minced garlic
Mined chilli
Coconut aminos
Fish sauce
Teriyaki sauce
Ginger
Chilli flakes
Oyster sauce
Oils
Coconut oil
Sesame oil
Peanut oil (if you don’t have allergies)
Which wok?
It doesn’t matter what kind of wok you use as long as it is made of sturdy metal that can stand high heat and hold all of the ingredients you want to cook. You can pick up a good quality wok from your local Chinese supermarket for around $30. A good quality wok will need to be seasoned and cared for in a very similar way to a cast iron pan. For more information on looking after a wok or cast iron pan check out this blog why cast iron is king
How to Stir Fry
Put your wok or pan over medium to high heat, let it heat up for 1 to 2 minutes. A good sign your pan is hot enough is that it should start smoking. To test the temperature add a drop of water to the wok, if it boils off immediately it is good to go.
Add a tablespoon of oil to the wok. You don’t need a lot of oil but use one with a high smoke point.
Add any seasoning to the oil and fry for a few seconds.
Add your meat.
Stir the meat frequently, the heat from the wok will sear the meat quickly. Once the meat is seared, keep it moving. Let the meat cook through, this will usually take around 5 minutes. If you have a lot of meat cook it off in batches.
Add the vegetables that are slow cooking such as broccoli, carrots and onions. Keep the veg moving as it cooks, let these cook for 3 5 minutes.
Add the faster cooking vegetables next such as mushrooms, bean sprouts and courgette. Keep the veg moving as it cooks, let these cook for 3 5 minutes.
Add any sauce to the pan last.
Reduce the heat. Make sure all of the ingredients are coated in the sauce warmed, let the sauce cook for 2 4 minutes.
Here is another quick, easy and practical post to add to your kitchen skill toolbox.
Avocado
I love Avocado; everyone should love them.
They are fantastic and green!
They are perfect for dips, smoothies and salads.
Everyone knows it
Probably the most recognisable fruit and by far the most versatile. You can find it in guacamole, salsas, brownies, cookies, smoothies and salads. The perfect avocado is a little food gift that I find great joy in opening. Knowing how to liberate the beautiful flesh from the stone and the skin is not always easy. That is why I have put together a quick guide on working with avocado and making something pretty out of it, too.
Preparing avocados is easy once you know how.
Take a medium-large knife and cut the avocado in half. The easiest way is to roll the avocado around the blade to get a clean cut in half
Twist the two halves to separate them
Take the half with the stone in it and place it on a countertop.
Take a knife and tap it in the bottom of the stone.
Take a tablespoon and run it around the inside of the skin to remove the avocado.
To stop the avocado from going brown, you just need to sprinkle some lemon juice or a dash of vinegar.
Something fancy
Avocado roses are so elegant looking and surprisingly easy to create. If you want to add a special touch to your breakfast for salad, an avocado rose is a way to go.
Place the avocado half on the board, so the length of the fruit is horizontal on the board
Using a sharp knife cut thin slices vertically in the fruit, you want them as close together as possible
Using your fingers gently elongate the slices to create a long line out of the slices.
Using your fingers gently elongate the slices to create a long line out of the slices.
Take the smallest end and gently roll them in on themselves.
Continue to roll the slices in to create an avocado circle
Gently push down the top of some slices to form the petals of the rose
Use a knife to lift the rose off the chopping board and place it on top of your salad
Cast iron pans are fantastic but they take a little bit of care and take some getting used to when you start cooking with them. That being said when you find your feet with cast iron you never want a non-stick frying pan again.
Let’s get a few things clear about cast iron
ïIt’s not difficult to look after you just need to know the basics for looking after cast iron.
ïSeason it when you get a cast iron pan you need to season it, even the pre-seasoned cast iron pans need to be seasoned.
ïRe-season every time you use the pan when you have rinsed the pan out re-season.
ïUse it a lot the more you use the pan, the better the pan will get.
ïDon’t let it stay wet once you have cleaned the pan dry it off and re-season it straight away, wet pans rust no matter how good your seasoning is.
So with all that said let’s look at cast iron pans. There is a strange misconception that cast iron is high maintenance, needs to be handled carefully and will be ruined if you don’t look after it right. The truth is that cast iron pans are the kitchen equivalent to the terminator. Some people have the cast iron pan their grandmother got as a wedding gift, 40 plus years of use and they are still going strong. Cast iron is built to last, unlike most new pans. The most difficult thing with cast iron is seasoning the pan, it is also the most important part of using a cast iron pan. Seasoning is not that hard because you can buy them pre-seasoned now, so it’s not really a big problem. As long as your pan is well seasoned, you should never need to worry about chipping or rust.
It’s non-stick
Cast iron is non-stick, in the right circumstances. When it comes to cast iron how well it is seasoned has a great deal to do with how non-stick the surface is, the better the seasoning, the less your food sticks. Another important part is the heat of the pan, unlike new material pans you can’t add food to a cold pan and expect it not to stick. Your cast iron pan needs to be hot before you put food near it.
Washing the pan with soap will not ruin it
People think that washing a cast iron pan with dishwashing soap will remove the seasoning and ruin the pan. This isn’t true, I’m not a boffin so here’s my understanding of the science (think of this as my bro science). You heat oil in the pan and coat the pan, you do this repeatedly. The repeated application of oil and then exposure to heat changes the properties of the oil, it turns it into a plastic-like coating that sticks to the pan. Like the oil, you used to coat the pan is no longer technically an oil, so dishwashing soap doesn’t impact or remove the seasoning. So washing your pan with soap won’t ruin it, but letting it soak in water will.
Keep the pans exposure to water to a minimum, wash and dry the pan in one go then re-season as soon as it is dry.
Not all cast iron is made equal
As with most things in life you get what you pay for, this applies to cast iron pans. The quality of the modern cast iron pan is not the same as the quality of pans made in the early 20th century. This has more to do with the way pans were made back then vs. how they are made now. The truth is I don’t want to bore you with a bunch of information about casting that you won’t care about. What you will care about is how the different pans available now have different finishes and which one is best. Basically, there are 3 finishes available for cast iron pans
Smooth
Bumpy
Coated
Here are the key differences
Smooth
These pans have been cast and then polished, this removes the uneven surface of the pan. It still needs to be seasoned and looked after. Generally speaking, pans that have been polished are not as heavy so are a good option if you aren’t seeking to increase your upper body strength while you make dinner. Other than the weight they are no different than the bumpy pans.
Bumpy
These pans have been cast and retain what is basically the imprint of the mould, the surface of the pan will always be uneven. They generally have more weight to them but have all the same properties as the smooth pans.
Coated
These pans are cast and then typically covered in enamel, the coating acts as a skin for the cast iron, you get the benefits of using cast iron without the need to constantly re-season. These pans are just as good as the bumpy and smooth pans and have very similar properties.
So what is cast iron good for? what can you cook in your cast iron pan?
Answer
Pretty much whatever you want. My cast iron pans get regular use when cooking things like
Bacon
Fried eggs
Frittata
Burgers
Sausage
Steak
Meatballs
Buttered greens
Searing seafood
I’ve even been known to make pancakes in there.
I love using my cast iron pans for anything that needs a high heat to cook, a crisp skin or that needs to start on the stovetop and finish off in the oven. It’s a versatile tool that deserves a little bit of love and attention. Once you adjust to the way it heats up, how to wash it and how to season it, it is hard to go back to the Teflon coated pan in the back of the cupboard.
If you are ready to migrate over to a cast iron pan, there are only a few rules you need to know that will ensure a successful and lifelong relationship with your cast iron pans.
Season it when you get it
Seasoning is critical and should be done as soon as you get it, even a pre-seasoned cast iron pan can do with some additional protection.
Clean it after each use
Clean your pan thoroughly after each use. Washing it with soap, water and scrubbing out any debris from the bottom. I use the scrubby side of a sponge for this.
Clean it while it is still hot, it will make it easier to clean.
Re-season it.
When you have cleaned your pan, make sure you have rinsed out all soap with water.
Place the skillet over high heat.
When the water inside the skillet has dried out, add a half teaspoon of oil.
Rub it around with a kitchen towel.
Keep heating the pan until it starts to smoke, give it one more good rub.
Let it cool, and you’re done.
Fry and Sear in it
The best way to keep your pan well seasoned is to use it a lot. The more you fry, sear, or bake in it, the better that seasoning will become.
Don’t let it stay wet.
Water and iron equal rust.
Treat water like the enemy of your iron pan, don’t let a drop of water sit in your pan, even one drop can lead to a rust spot. It isn’t the end of the world, but rust will require a little scrubbing and re-seasoning. A good rule is to dry the pan and coat with a little oil before storing it.
How to season
Heat it up on the stovetop until it’s smoking hot.
With a paper towel rub a little oil into the pan
Remove the pan from the heat, let it cool.
Repeat this process a few times, and you’re ready to go.
Don’t you just hate it when you get a hard-boiled egg with that green ring inside; I think it has to be the most off-putting thing.
Getting the perfectly boiled egg is not difficult; the secret is that it is just about timing.
Soft or hard, it is all the same.
From much trial and error, I have found that the method for getting perfectly cooked soft and hard-boiled eggs is the same; the only difference is how long you leave the eggs in the water. To get perfect boiled eggs, here are some of the essential things to remember:
Start with cold water
Bring the water to the boil
Take the pan off the heat to let the eggs cook
Everyone has their own version of the “perfect egg”, but some guide times are a good place to start.
White just set and yolk runny 3 minutes
White set and yolk slightly runny 4 minutes
White set and yolk custard consistency 6 minutes
White set and yolk creamy consistency 10 minutes
Firm white and firm yolk 15 minutes
For the perfect boiled eggs, every time, here is what you need to do.
Place your eggs in a saucepan and fill the pan with cold water; you want at least 3cm of water over the top of the eggs.
Set the pan over high heat and bring the water to a boil.
Set the pan over high heat and bring the water to a boil.
You don’t need to cover the pan at this point.
Wait for the water to come to a boil.
Remove the pan from the heat and put a lid on the pan.
Wait for the water to come to a boil.
Remove the pan from the heat and put a lid on the pan.
Start the timer.
Remove the pan from the heat and put a lid on the pan.
When the timer goes off, remove the eggs from the pan.
Gently tap the egg with a spoon to break the shell; don’t crack the shells if you have 3-minute eggs.
Place the eggs into a bowl of cold water; this will stop the eggs from cooking.
Let them sit in the cold water for at least 1 minute (and stop the green ring).
The eggs will then be ready to eat, peel off the shells, and you are ready to go.
Perfect eggs peeled and ready to eat
If you have any eggs that you will not use straight away, leave them in their shells and store them in the fridge.
Instant Pot / Pressure Cooker option
Equipment
Instant Pot
Trivet for the Instant Pot
Long-handled tongs
Instructions
Pour one cup of water into the bottom of the Instant Pot.
Place the trivet inside the pot.
Place the trivet inside the pot.
Place the eggs on the top of the trivet, leave space between them.
Place the eggs on the top of the trivet, leave space between them.
The eggs will be steamed during cooking.
Add the pressure cooking lid to the Instant Pot and make sure the lock is closed.
Set the timer for your desired consistency on the high pressure setting.
Set the timer for your desired consistency on the high pressure setting.
Soft-boiled eggs: 3 to 4 minutes at high pressure.
Medium-boiled eggs: 5 to 6 minutes at high pressure.
Hard-boiled eggs: 8 to 10 minutes at high pressure.
These times work for up to 10 eggs in an 8-quart Instant pot.
When the timer beeps, release the pressure immediately.
As soon as the pressure has dropped, remove the eggs from the pressure cooker using the tongs.
As soon as the pressure has dropped, remove the eggs from the pressure cooker using the tongs.
Place the eggs into an ice bath as quickly as possible.
Place the eggs into an ice bath as quickly as possible.Perfect eggs peeled and ready to eat
Pour one cup of water into the bottom of the Instant Pot.
Place the trivet inside the pot.
Place the eggs on the top of the trivet, leave space between them.
The eggs will be steamed during cooking.
Add the pressure cooking lid to the Instant Pot and make sure the lock is closed.
Set the timer for your desired consistency on the high pressure setting.
Soft-boiled eggs: 3 to 4 minutes at high pressure.
Medium-boiled eggs: 5 to 6 minutes at high pressure.
Hard-boiled eggs: 8 to 10 minutes at high pressure.
These times work for up to 10 eggs in an 8-quart Instant pot.
When the timer beeps, release the pressure immediately.
As soon as the pressure has dropped, remove the eggs from the pressure cooker using the tongs.
Place the eggs into an ice bath as quickly as possible.
Here is another quick, easy and practical post to add to your kitchen skill toolbox.
Let’s talk about peppers
Today I want to talk about peppers. It might not seem important, but the ability to roast your own peppers is not only a must but also super easy to do. As with most ingredients how you prepare them can enhance the flavour. This holds very true for roasting peppers. The roasting process brings out their sweetness.
Yes, you can go to the supermarket and buy roasted peppers in a jar, but you miss out on the freshly roasted flavours. Plus you have to figure out what that firming agent is.
Roasted peppers can be used in a range of recipes; you can replace that tomato sauce for a pizza, add them to a salad or blend them down into soup.
Three ways to roast
There are a few methods you could use to roast your peppers
Oven roasting
Grill
Stovetop roasting
Stovetop Roasting
If you are fortunate enough to have a gas cooker this method is the perfect option for roasting one or two peppers at a time. This method requires a little more effort from you but is still great.
Turn your gas flame on to a low to medium heat.
Place the pepper over the flame; I lean the pepper against the metal for pans.
When the skin of the pepper starts to colour rotate the pepper so that a new part of the skin is over the flame. Keep turning the pepper when the skin begins to colour.
Keep turning the pepper when the skin begins to colour.
When the pepper is charred take it off the heat, put them in a bowl, cover the bowl with cling film and let the peppers steam for 10 minutes
After 10 minutes take the peppers out of the bowl and use your fingers to peel the skin away
Use your fingers to peel the skin away
Pull the stem out of the pepper and use a knife to scrape out the seeds.
Turn your gas flame on to a low to medium heat.
Place the pepper over the flame; I lean the pepper against the metal for pans.
When the skin of the pepper starts to colour rotate the pepper so that a new part of the skin is over the flame. Keep turning the pepper when the skin begins to colour.
Keep turning the pepper when the skin begins to colour.
When the pepper is charred take it off the heat, put them in a bowl, cover the bowl with cling film and let the peppers steam for 10 minutes
After 10 minutes take the peppers out of the bowl and use your fingers to peel the skin awayUse your fingers to peel the skin away
Pull the stem out of the pepper and use a knife to scrape out the seeds.
Oven roasting
This is the easiest method because you can roast lots of peppers at the same time and the clean-up is a lot easier.
Preheat your oven to 200 degrees C/ 400 degrees F
Start with some fresh peppers
Line a baking tray with some aluminium foil
Place the peppers on the baking sheet
Place the peppers on the baking sheet
Roast the peppers for 20 minutes then turn them and roast for another 20 minutes. When the peppers are soft and have collapsed in on themselves, they are ready.
When the peppers are soft and have collapsed in on themselves, they are ready.
Remove the peppers from the oven and put them in a bowl, cover the bowl with cling film and let the peppers steam for 10 minutes
Remove the peppers from the oven and put them in a bowl,
After 10 minutes take the peppers out of the bowl and use your fingers to peel the skin away
Use your fingers to peel the skin away
Pull the stem out of the pepper and use a knife to scrape out the seeds.
Grilling
This method is similar to the oven roasting method, you can’t roast as many under a grill, but it is still an easy cleanup.
Preheat your oven grill to its highest setting
Line a baking tray with some aluminium foil
Place the peppers on the baking sheet
Grill the peppers for until the skin starts to colour, turn the peppers and continue to grill and turn until all parts of the pepper are coloured.
When the peppers are soft and have collapsed in on themselves, they are ready.
Remove the peppers from the oven and put them in a bowl, cover the bowl with cling film and let the peppers steam for 10 minutes
After 10 minutes take the peppers out of the bowl and use your fingers to peel the skin away
Pull the stem out of the pepper and use a knife to scrape out the seeds.
Ready to use
Once the peppers have been skinned and deseeded they are ready to slice and use. If you plan to keep them sort a while you can store the peppers on oil in the fridge, they should last for about a week.
Sliced peppers ready to use
How do you eat yours?
If you roast peppers what do you eat them with, let me know in the comments below
Steaming vegetables is a quick and easy option for getting vegetables onto your plate.
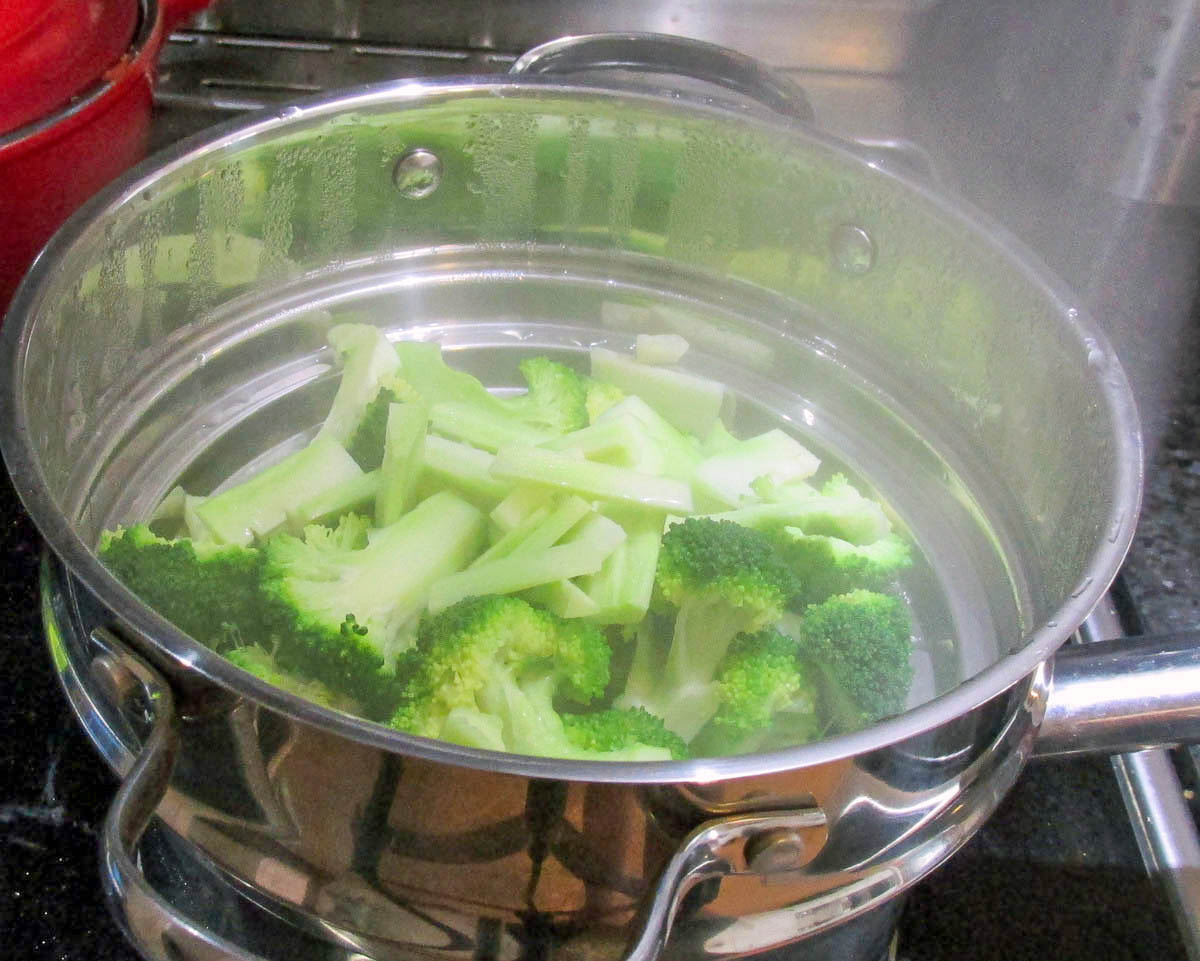
Steaming your vegetables is a great way of keeping some of the crunch in your vegetables, none of us likes soggy broccoli with dinner.
Here are some things you may need to know about how you can get perfect steamed vegetables every time.
One important factor in steaming vegetables is keeping your vegetables the same size, if vegetables are cut to the same size they will cook at the same rate, this means you will be getting consistent texture in the finished vegetables.
Do not overfill the steamer, too much in one batch will mean some vegetables will overcook and others will barely be heated through.
Steam the dense vegetables first; things like carrots take slightly longer to cook than things like broccoli, if you are steaming a mix of vegetables try adding the dense first and tender vegetables towards the end.
If you do not want mushy vegetables set a timer, steaming is quick so try checking your veggies after 3 minutes; you should be able to tell how much longer they need to cook.
Take the vegetables out just before they are done, this means you will not overcook them and end up with a mushy mess but perfectly cooked vegetables.
Different vegetables take different lengths of time to steam; this is a rough idea of how long some commonly used vegetables take to steam
Spinach and Rocket: 3 minutes
Peas: 3 minutes
Broccoli Florets, Cauliflower Florets, Green Beans: 5 to 7 minutes
Carrots, Potatoes, Turnips, Squash: 8 to 20 minutes
Kale and Collards: 10 minutes
How to Steam Vegetables
Ingredients
Any vegetables you want to steam
Equipment
Chopping board
Chef’s knife
Small saucepan with lid
Steamer basket or colander
Instructions
Cut the vegetables into uniformly sized pieces. The smaller the pieces the faster they will cook.
Add 2-3cm of water to the pan and place the steamer basket or colander on top of the pan, the basket or colander should not touch the water.
Bring the water to a boil, when you can see steam rising from the pot it is ready to use.
Add your vegetables to the steamer basket or colander and cover with a lid.
Check on the vegetables after approximately 3 minutes, vegetables will be ready when they are just tender and often look vibrantly and brightly coloured when they are ready.
Remove the vegetables when they have a little crunch left, they will continue to cook even when they come out of the steamer
Freshly steamed vegetables are great served with a little olive oil or some butter.
Instructions
Cut the vegetables into uniformly sized pieces. The smaller the pieces the faster they will cook.
Add 2-3cm of water to the pan and place the steamer basket or colander on top of the pan, the basket or colander should not touch the water.
Bring the water to a boil, when you can see steam rising from the pot it is ready to use.
Add your vegetables to the steamer basket or colander and cover with a lid.
Check on the vegetables after approximately 3 minutes, vegetables will be ready when they are just tender and often look vibrantly and brightly coloured when they are ready.
Remove the vegetables when they have a little crunch left, they will continue to cook even when they come out of the steamer
Freshly steamed vegetables are great served with a little olive oil or some butter.
Egg wraps are a great option for breakfast lunch and dinner; you get to replace your standard wrap which is made with grains and chemicals with something that is just protein and healthy fats.
I love eggs because they are so versatile and these wraps just reinforce how versatile they can be.
Egg wraps ready for eating
The key to good egg wraps is using a flat non-stick pan, I have a crepe pan that I use to make my wraps, but any good quality non-stick frying pan will do.
Egg wrap recipe
Egg wraps ingredient
Ingredients
1 egg per wrap
The key to good egg wraps is using a flat non-stick pan, I have a crepe pan that I use to make my wraps, but any good quality non-stick frying pan will do.
Lightly oil the bottom of the pan and preheat the pan over a low to medium heat.
Lightly oil the bottom of the pan and preheat the pan over a low to medium heat.
In a bowl, whisk your egg with a fork until the egg is smooth.
In a bowl, whisk your egg with a fork until the egg is smooth.
Pour the egg into the centre of your pan and use the back of your fork to distribute the egg evenly in the pan. You want the egg as thin as possible without creating holes.
Pour the egg into the centre of your pan You want the egg as thin as possible without creating holes. When the edges of the wrap start to lift, use a spatula to turn the wrap over.
When the edges of the wrap start to lift, use a spatula to turn the wrap over.
When the edges of the wrap start to lift, use a spatula to turn the wrap over.
Cook for about 45 seconds on the other side.
Cook for about 45 seconds on the other side.
That is it; just repeat those steps for each wrap.
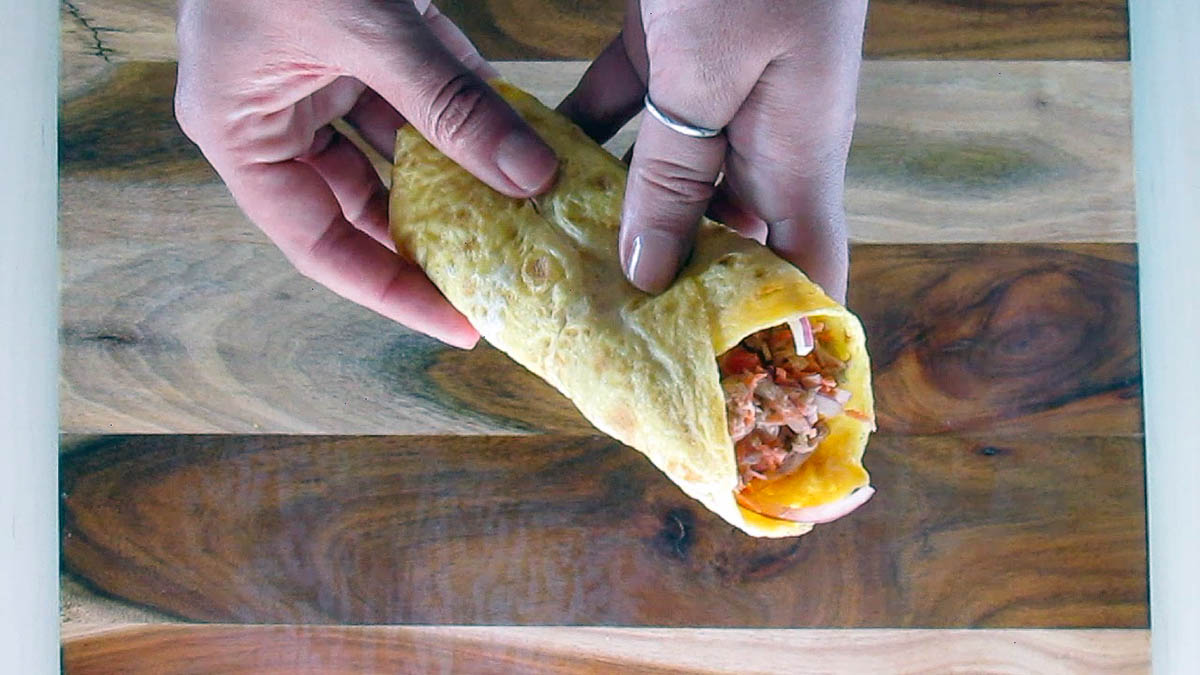
That is it; just repeat those steps for each wrap. Place the wrap on a flat surfaceAdd the fillingWrap and eat
Egg wraps are an amazing low carb option that are quick and easy to make
Credit: Cath @ easycleaneats
Ingredients
1 egg per wrap
Directions
Instructions
The key to good egg wraps is using a flat non-stick pan, I have a crepe pan that I use to make my wraps, but any good quality non-stick frying pan will do.
Lightly oil the bottom of the pan and preheat the pan over a low to medium heat.
In a bowl, whisk your egg with a fork until the egg is smooth.
Pour the egg into the centre of your pan and use the back of your fork to distribute the egg evenly in the pan. You want the egg as thin as possible without creating holes.
When the edges of the wrap start to lift, use a spatula to turn the wrap over.
Cook for about 45 seconds on the other side.
That is it; just repeat those steps for each wrap.That is it; just repeat those steps for each wrap.
Nutrition
Per Serving: 72 calories; 4.8 g fat; 0.4 g carbohydrates; 6.3 g protein
Equipment
Mixing bowl
Whisk
Frying pan
Spatula
Nutritional disclaimer
Nutrition information is provided as an estimate based on the ingredients used and available in my area (New Zealand). The nutritional information is here to help you understand the recipe; I use MyFitnessPal to generate my estimates. For more accurate nutritional information, please use a nutritional calculator with the ingredients in your area.