I don’t know about you, but I’m always looking to learn new skills that make life easy in the kitchen. Sharing is caring so I’m sharing my little I don’t know about you, but I always want to learn new skills that make life easy in the kitchen. Sharing is caring, so I’m sharing my little tips, tricks and hacks with you.
It may surprise you, but blunt knives are dangerous. Why? Dull knives require more pressure to cut and are far more likely to slip and end up cutting you.
Keeping your knives sharp is important, and so is investing in a sharpener to keep your knives in top condition.
Firstly, let’s talk about honing and sharpening.
Honing involves steel. It is how you straighten and centre the edge of your knife. It doesn’t sharpen the knife; it just corrects it.
Sharpening involves filing the knife’s edge to create a sharp edge; you can use a water stone or a sharpener.
So why do you need a sharp knife? Are blunt knives really more dangerous?
The answer is yes and yes. Sharp knives cut into food, so it will not slide off, so you need less pressure to cut, which also means the blade won’t move around and is far less likely to end up needing a plaster or stitches.
Keeping the edge of your blades sharp means that you need less force to cut, which is excellent.
Which sharpener is best for you?
When you choose a sharpener, you should look for the best one you can afford, find one that suits your needs and is easy to use. If you are like me and use your knives daily, having an easy and fast sharpener is important.
Before you choose a sharpener, knowing what options are available to you is good.
Manual knife sharpeners
Electric knife sharpeners
Sharpening stones
Manual knife sharpeners
These come in many different shapes and sizes; some are used horizontally or vertically, and they generally require little effort. You only need to pull the knife through the sharpener to straighten the blade and leave the knife edge sharp.
Electric knife sharpeners
Some people believe that electric sharpeners are the best option for sharpeners. Here in New Zealand, most of the electric sharpeners are expensive and can be found in hunting and fishing stores. Electric sharpeners are a great option if you have a little more money to spend and want a hassle-free sharpening experience.
Whet stone
There is a broad range of sharpening stones available; they are like sandpaper, and different grits give you different finishes. Using a stone to sharpen your knives takes some skill, so it will take time and practice to sharpen your knives.
Before you buy a sharpener, make sure you are getting something that will suit your needs and your budget.
Here are some of the options available here in New Zealand:
So what else do you need to know about caring for your knives?
Cut on the right surface
Another important thing to remember about keeping your knives in good condition is to make sure you use them on the right surfaces. Never use glass, metal, or hard plastic cutting boards, and never chop directly on your countertop. That is a sure way to ruin your knives. Using the right surface will protect the edge of your blades and prevent damage to your countertop.
Washing and drying your knives
After using your knives, washing and drying them is a significant step. If you have gone through the effort to protect your knife-edge and ensure it is sharp, you don’t want your knives bashing around in the dishwasher or rolling around in the sink with the dishes. I recommend you hand wash each of your knives in hot, soapy water and dry them straight away; this will prevent the blades from getting bashed around in the sink or the handles from warping in the dishwasher. If you use a dishwasher to clean your knives, put them in the top of the dishwasher, and make sure that they will not bang around while the dishwasher is running.
How to store them
Whatever you do, don’t put your knives next to other utensils; this will damage them. I recommend that you store your knives in a knife block to keep them separated and protected. If you are going to store your knives in a drawer, it is a good idea to put them in protective sheaths. You can buy these or make your own from cardboard.
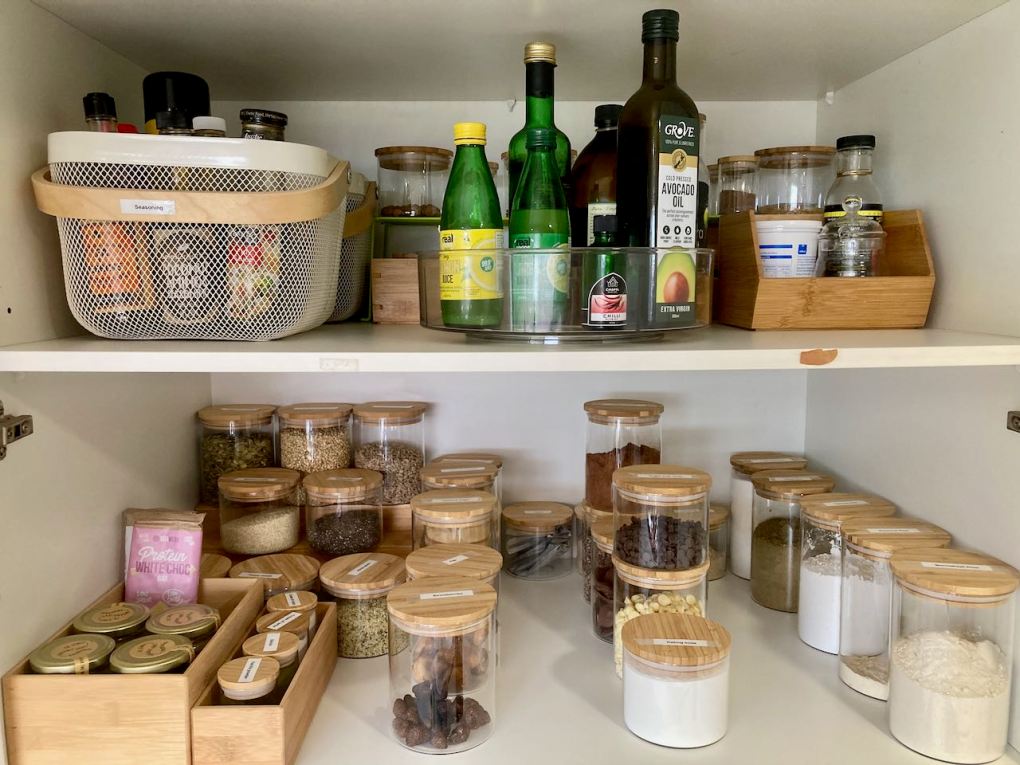
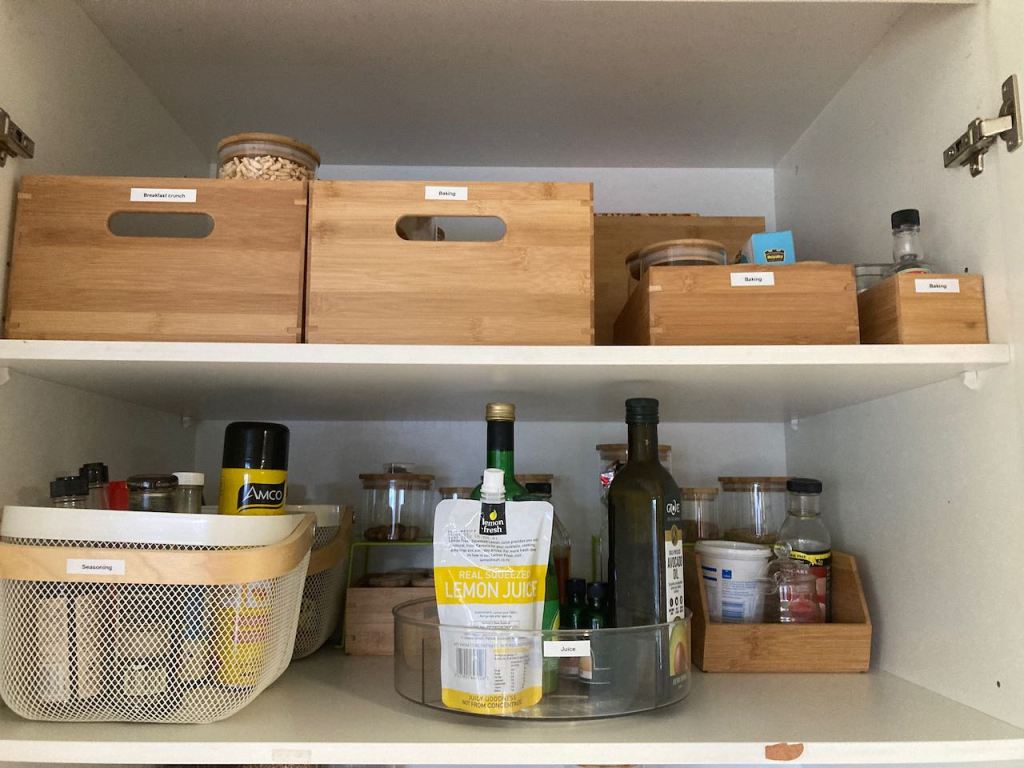
A well-stocked pantry is a key element that can help turn boring weeknight meals into something special.
Stocking your pantry is something that is achieved over time; I built up my pantry over months, adding something to my shopping list every couple of weeks to get started and then just topping up empty items as and when they are needed. The list of items below is what I make sure I always have in the house, or items that I would recommend for your pantry as well as my go-to items to spice things up.
Oils, Vinegars and Condiments
Extra-virgin olive oil this is generally used for cooking and salad dressings
Sunflower oil this is commonly used for cooking and baking
Sesame oil this is usually used for stir-frying
Coconut oil this is generally used for baking and eating
Avocado oil this is typically used for cooking and salad dressings
Balsamic vinegar
Apple cider vinegar raw if you can get it
Coconut aminos
Fish sauce
Dijon mustard
Worcestershire sauce
Flavourings
Salt, whichever you want, sea salt, coarse salt, fine salt
Black peppercorns
Onions
Fresh garlic
Fresh ginger
Anchovies for flavouring sauces and salad dressings
I’d like to think that I’ve moved along my cooking learning curve enough to offer some advice on what a good kitchen should have in it.
For the most part, I started by doing things the hard way and then justified to myself the need to buy individual items for my kitchen. This is a list of all of the things in my kitchen I now know I couldn’t (and wouldn’t) live without if you want to make real food a part of your life these items are must haves.
Good tools
One thing to keep in mind is that good tools make all the difference when it comes to buying things for your kitchen always look at it as an investment and buy the best you can afford.
Good knives
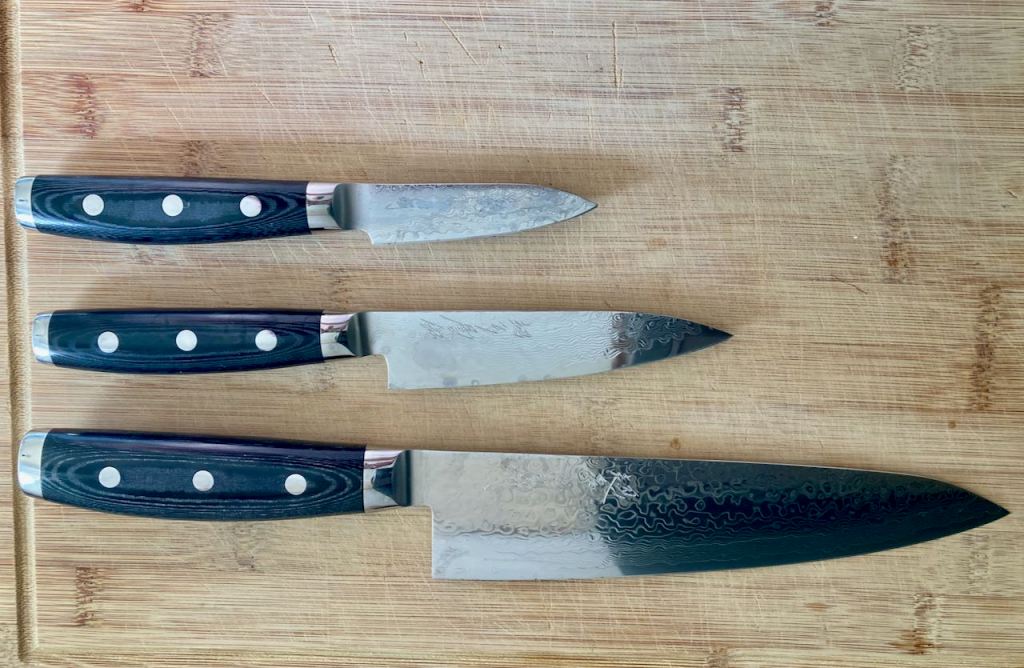
Trust me when I say that having good knives is a must, a good and sharp knife makes preparation work simple and fast. Start out with a simple set of knives and add to them as you go. Essential knives I would recommend are;
a paring knife, this is a small knife you can use for peeling, coring and slicing fruits and vegetables. The knife is small and versatile; it will likely become one of your favourite tools in the kitchen.
a utility knife, similar looking to a paring knife but with a larger blade, I tend to use my utility knife for cutting cheeses and meat, you can get utility knives with serrated edges that can be utilised for cutting things like crusty bread.
a Chef’s knife, this knife has a much larger blade and is evenly proportioned, I use my chef’s knife for most things, and it is my go-to tool in the kitchen, the shape of the blade makes chopping, mincing and slicing easy and efficient
If you have no other knives in your kitchen, these three are a must.
The right fit
The way the knife feels in your hand is crucial, don’t buy a knife until you have held it, make sure the knife sits comfortably in your hand and feels right, the balance of and weight of the knife should feel good for you. Remember that the handle is going to be just as important as the blade.
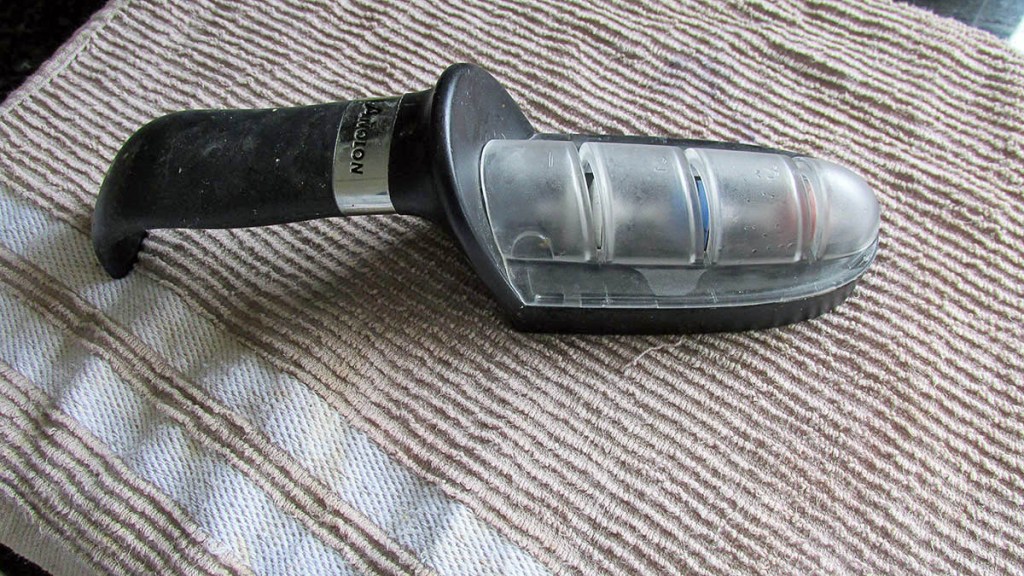
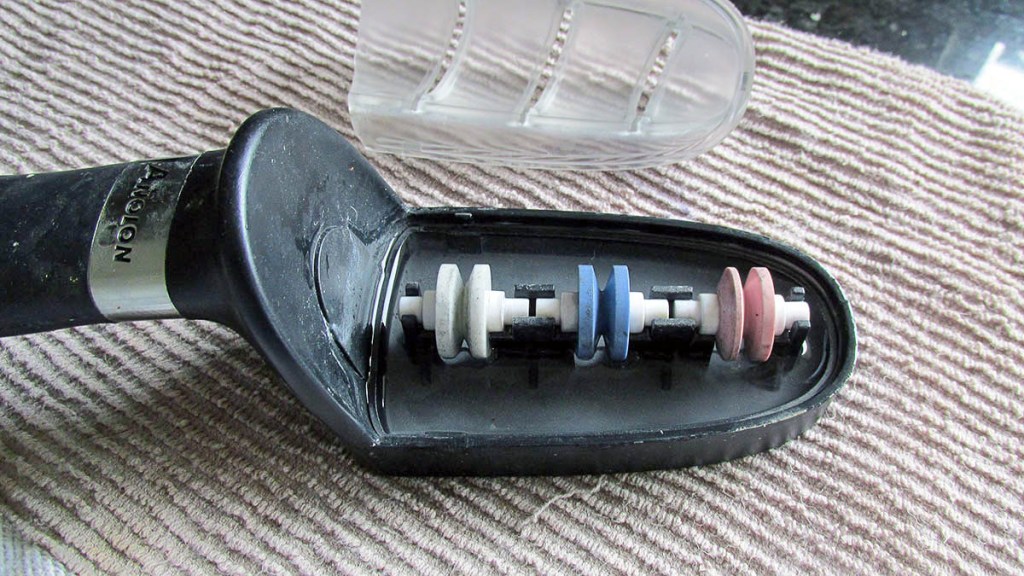
Sharp is safe
When it comes to knives, it is important to keep in mind that sharp is safe, no I haven’t lost my mind if your knife is sharp it will cut as it should. A blunted knife is more likely to slip and cut you instead of your food. Buying a sharpener for your knives is also an investment (otherwise, you may need to invest in medical insurance), I would recommend getting a sharpener that suits your needs and comfort level with knives. I bought a 3-grain stone sharpener, it allows you to sharpen most knives with minimal effort, but there are plenty of other sharpeners out there.
Vegetable peeler
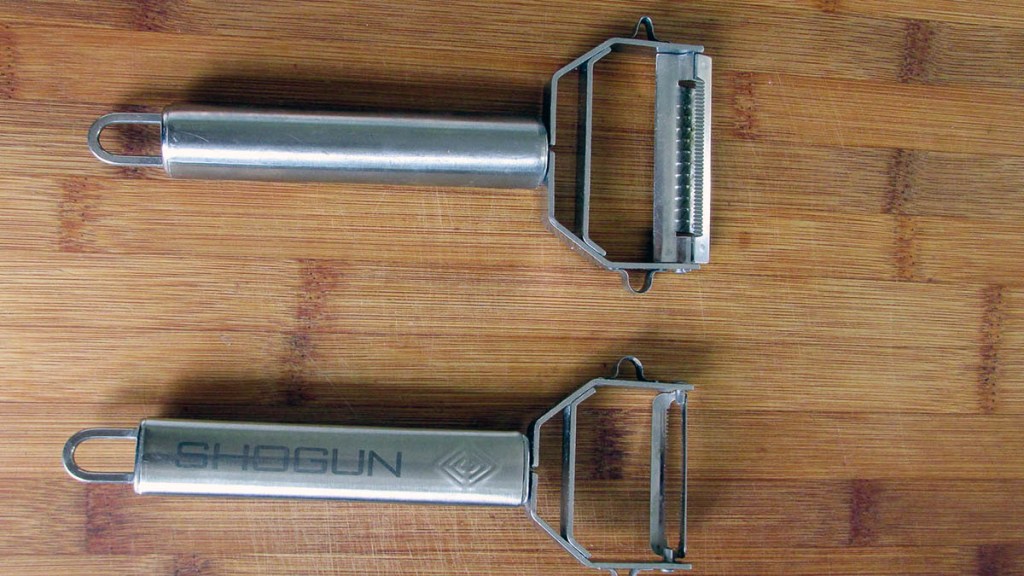
I’ve had a few unimpressive vegetable peelers in my time, so I appreciate the presence of a good peeler in my kitchen draw. I cannot claim any credit for the great peeler that I have, I got mine as a gift about two years ago and have loved it every day since. Mine is called the Shogun Power Peeler, and it is from South Africa, and I can highly recommend it.
If you cannot get your hands on one, do not worry there will be a peeler out there that is right for you. I find that the Y-shaped peeler is better than the traditional potato peeler; each has pros and cons. The range of Y-shaped peelers available should make it easy to find one you like if you are a fan of the more traditional potato peeler, I can recommend the Good Grips peeler.
Mixing bowl
A big mixing bowl is everything; this is serious when looking for a bowl, find the biggest one you can get your hands on when it comes to mixing bowls bigger is always better. I would recommend finding a stainless-steel bowl as they are easier to clean and don’t discolour the way plastic ones do and will not react with food.
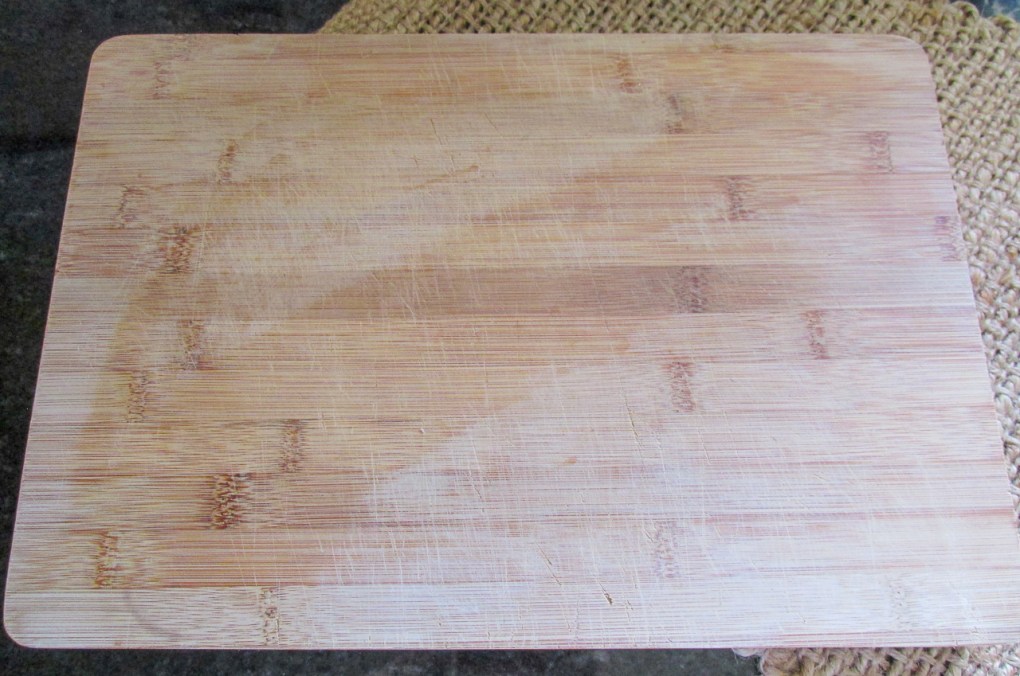
Chopping board
Easy to clean and a great way to protect your knives, I recommend you stay away from ones made of marble and glass as they will make your knives dull. Wooden chopping boards come in a range of materials and sizes, bamboo boards are generally a good choice and reasonably priced. Always be sure to clean your board after each use and store it away from moisture and heat to prolong its life.
Stockpot and saucepans
A good-sized stockpot and good quality pans are great additions to the kitchen cupboard. Stockpots are very useful for making stocks, soups and broths, I also use mine for making large batches of tomato sauces. I have two saucepans, one large and one small, these are ideal for making sauces, cooking coodles or warming soups. There are lots of different kinds of pans available, stainless steel is usually a pretty good option and one of the cheaper options, depending on your budget and needs you can also choose from aluminium clad stainless steel, copper, bonded copper, non-stick cookware, anodised aluminium and enamelled cast iron.
Frying pan
Much like your saucepans, there are lots of options out there, your budget and needs will play a huge part in picking your pan. I find that having two pans, one large and one small is useful, at least one being non-stick is an excellent idea. I’ve recently started using a large cast iron pan as my frying pan, cast iron is great but takes some getting used to and some serious seasoning before it is non-stick enough to use for some foods.
Food Processor
I know it may not seem like a kitchen essential, but trust me when I say this one piece of equipment can change your life when it comes to preparation. I only added a food processor to my kitchen a year ago, I got a small one so that I could make my own seed and coconut butter. It is now my most used piece of kitchen equipment, and I’m saving to upgrade to a larger model. Investing in a food processor with some grating and shredding attachments will save you time and skin (yes you read that right). Grating heads of cauliflower takes minutes not hours, shredding cabbage for coleslaw, making mayo and pancake batter all done with minimal effort. If you only buy one kitchen gadget make it this one, I would not be able live without mine now….. well I would, but I would be missing most of the skin on my right hand and have one arm that would make Popeye jealous.
Slow Cooker
Anyone that has to juggle a job, family, gym and real food will both love and appreciate the excellent addition of a slow cooker to their kitchen. Load in the morning with your meal, turn it on, and then come home to a lovely meal ready for eating. Soups, stews, curries, ribs, pulled pork and steaks are just some of the things I have come home to. It is a great tool that allows for safe unattended cooking.
Other essential items to have in your kitchen include
a good size Pyrex jug, try to get 500ml at least it comes in useful for measuring liquids like stocks and milk
a set of measuring spoons usually required for measuring ingredients for baking or sauces
good kitchen scissors, I like the ones that are good for cutting everything from meat to food bags
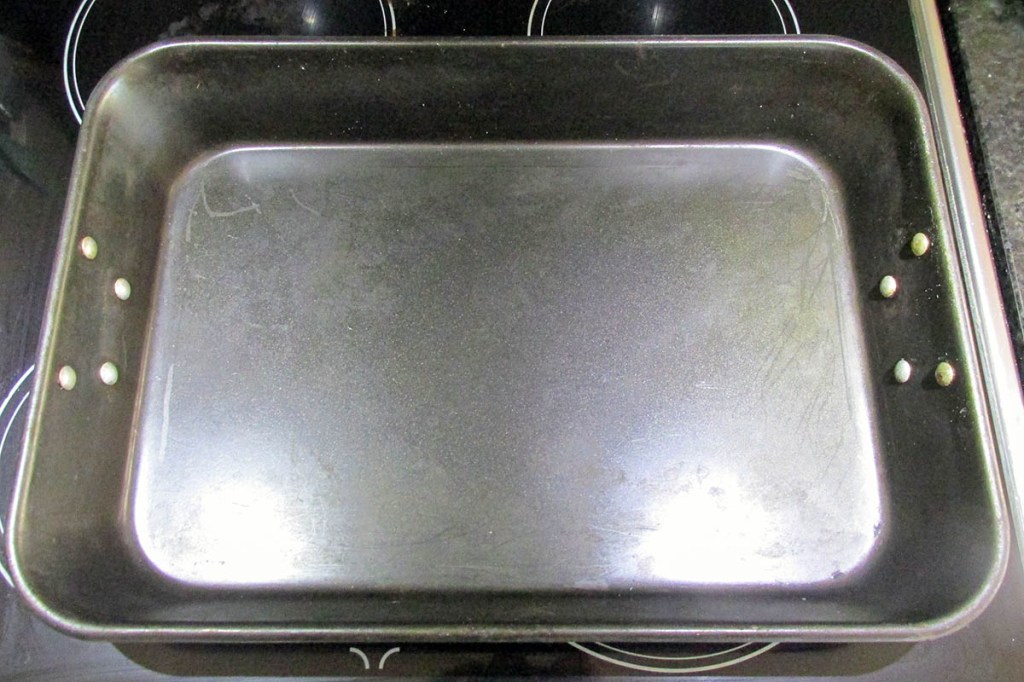
a large size baking sheet one with a lip will serve you well, look for one that is the perfect size for cooking bacon
a muffin pan in this instance a silicone one is usually preferable, I find mine comes in very useful for baking snacks but also good for cakes
a large wooden rolling pin, well sometimes it’s good to beat the crap out of something, I like to use mine to flatten out chicken
slotted spoon, a must for poached egg goodness
solid spoon, ideal for serving meals
wooden spoon, always better than metal spoons as they are less likely to scratch your pans
ladle, perfect for serving curries and soups
spatulas, I have a few silicone spatulas that I find are ideal for working with batters and protect the non-stick coating on frying pans
potato masher, not just good for potatoes
tongs
balloon whisk
colander
and a sieve.
It may seem like a lot, but these are the key items that I use all the time, trust me when I say you can start to fill your kitchen up with a much wider range of tools and toys as you get more interested and excited by cooking.
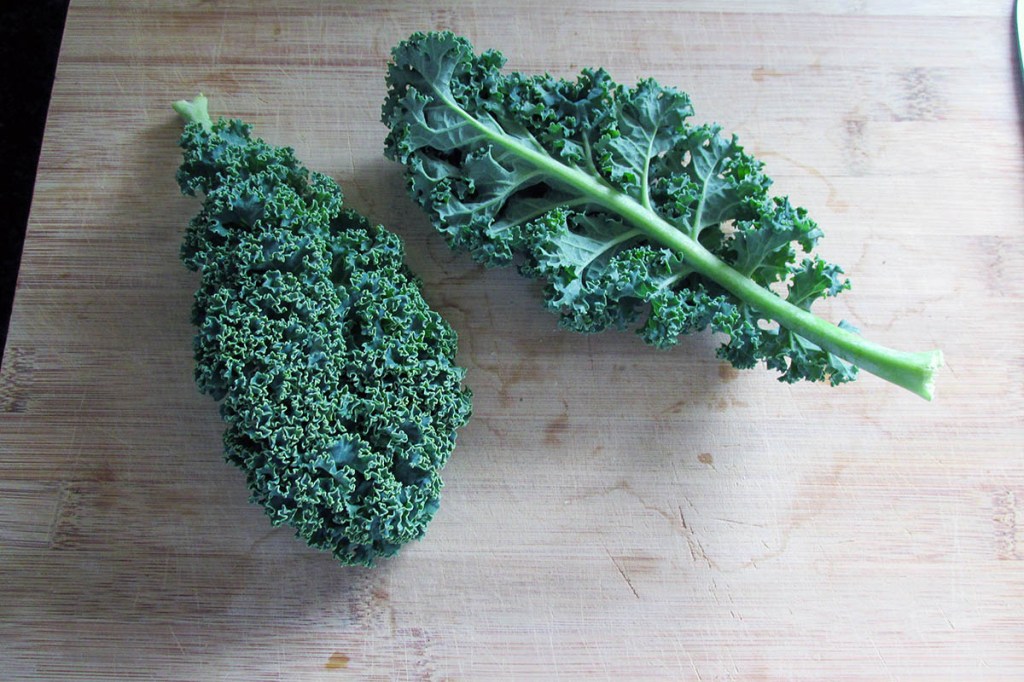
Kale is very popular at the moment which is a good thing as it is packed with beneficial nutrients. Kale is easy to grow and a versatile leaf, it grows year-round in Auckland and is available in many varieties.
Preparing kale is easy enough you just need to follow some simple steps
Wash the kale before you use it, make sure you get rid of all the slugs. Use cold running water to clean the kale then let it sit on some kitchen towel to get rid of any excess water
Place the kale onto a chopping board flat.
Place the leaf flat
Using a sharp knife slice along the stem of the leaf.
Repeat with the other side of the leaf.
Slice along the stem
This will remove the stem and give you two kale leaves
Repeat with the other side of the leaf
You now have the option of using the leaves as they are or cutting them up into strips.
Roll the leaf
If you are cutting the leaves up further, you can roll the leaves up into a cigar before slicing them.
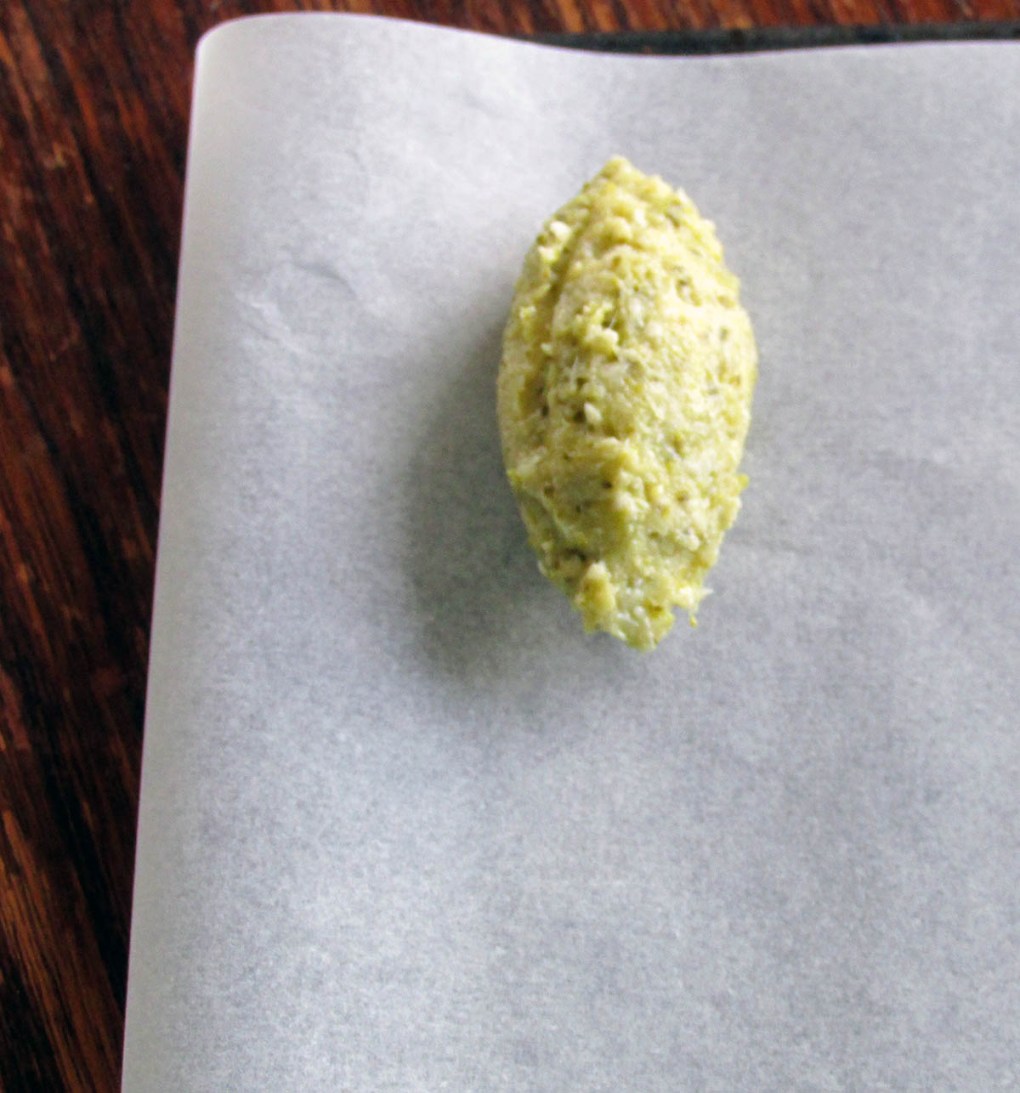
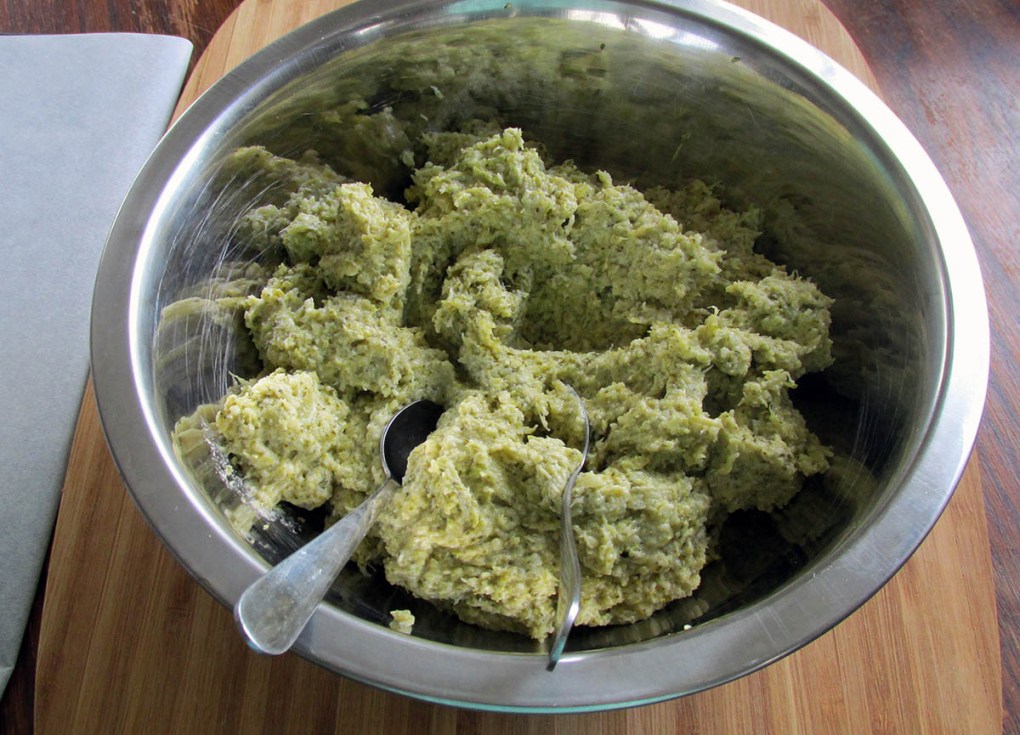
Quenelle- The term is also used to describe the beautiful shape of the portions a neat, three-sided oval (resembling a mini rugby ball) that is formed by gently smoothing the mixture between two dessert spoons. A quenelle shape can also be formed from other foods such as chocolate mousse.
Simple steps to create a Quenelle
Follow the simple steps below to create a perfect Quenelle
Simple oval
Take a tablespoon and scoop a heaped spoon portion of the mixture.
Roll the mixture into an oval using your hands.
If the mixture sticks to your hands, you can use a little water to help.
Quenelle
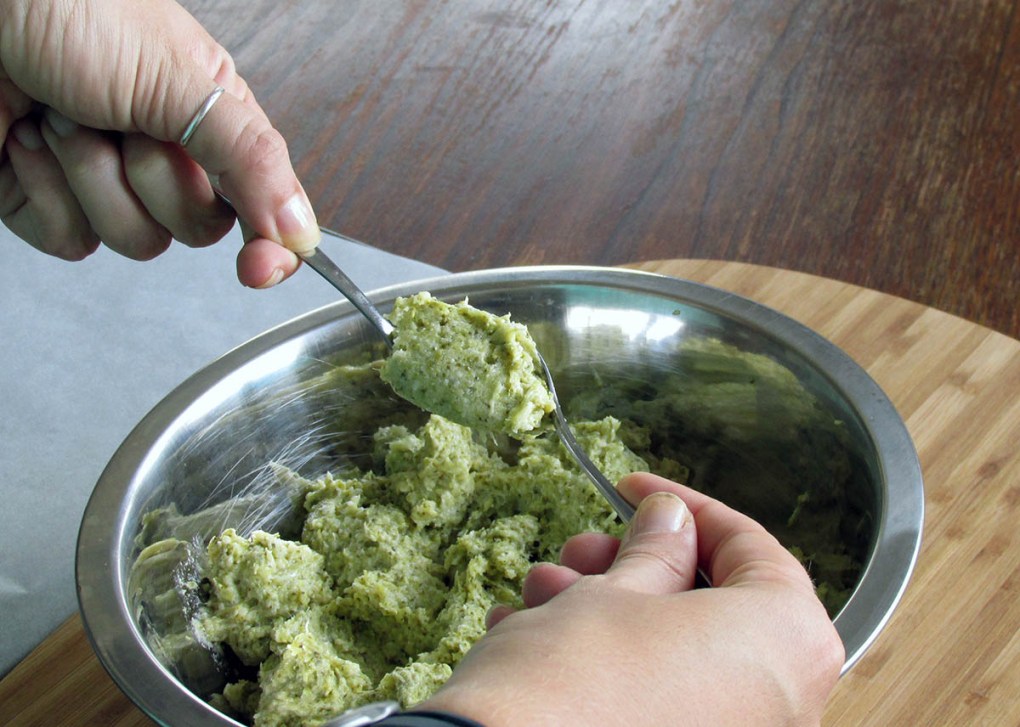
Take two teaspoons.
Take two teaspoons.
With one of the teaspoons scoop up a heaping portion of the mixture.
With one of the teaspoons scoop up a heaping portion of the mixture.
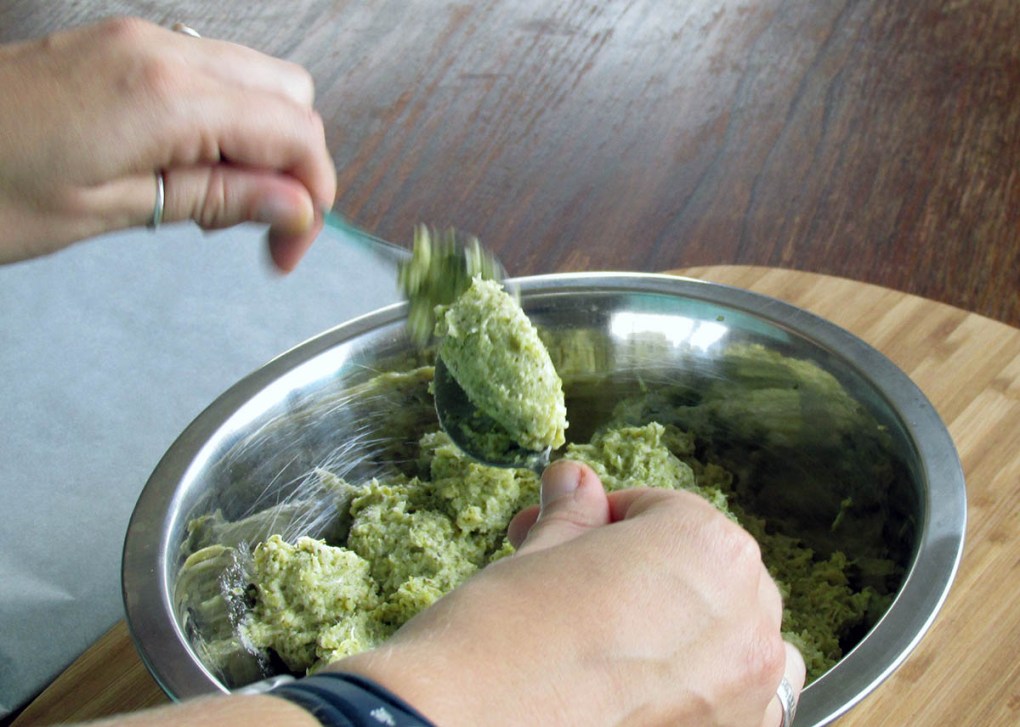
Taking the second spoon, push the portion off the first spoon.
Taking the second spoon, push the portion off the first spoon.
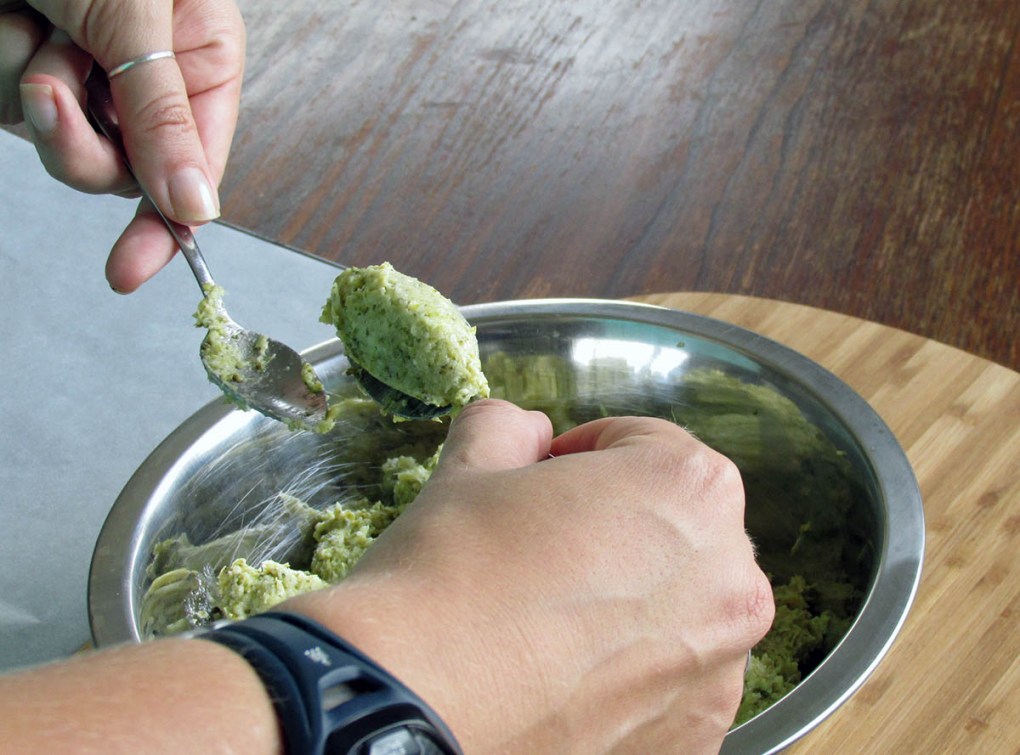
Repeat the transfer of the portion from one spoon to the other gently smoothing the mixture into an oval shape.
Repeat the transfer of the portion from one spoon to the other gently smoothing the mixture into an oval shape.Quenelle
Take two teaspoons.
With one of the teaspoons scoop up a heaping portion of the mixture.
Taking the second spoon, push the portion off the first spoon.
Repeat the transfer of the portion from one spoon to the other gently smoothing the mixture into an oval shape.
Here is another quick, easy and practical post to add to your kitchen skill toolbox.
Meatballs are an easy weeknight option, they are easy to make, and each one can be made into a little flavour bomb.
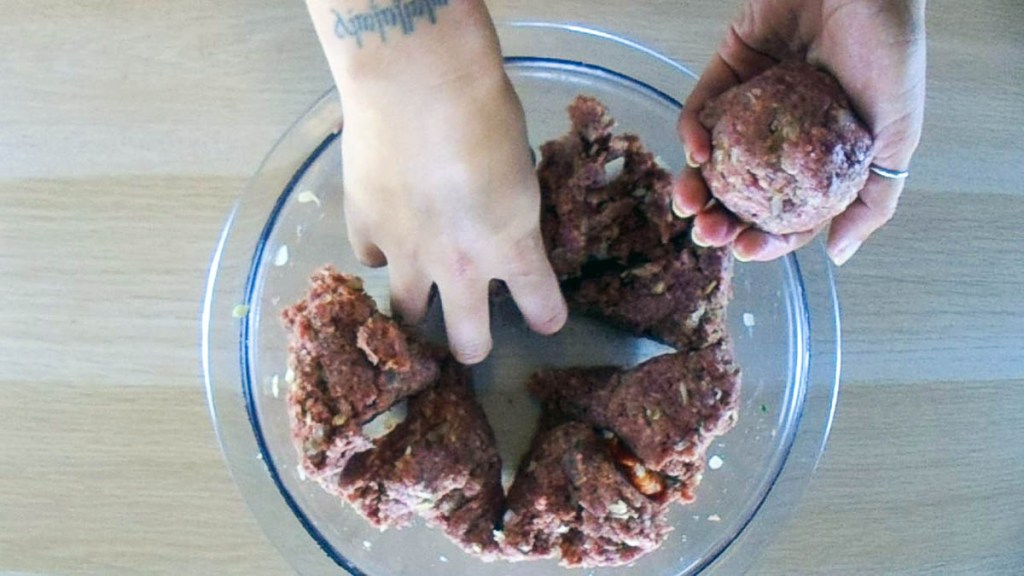
Making meatballs is easy, a little messy but easy. You can follow these key steps to make tender meatballs every time no matter what flavours you put in the mix. Remember that meatballs are comfort food, so it is ok to keep it simple.
Homemade meatballs
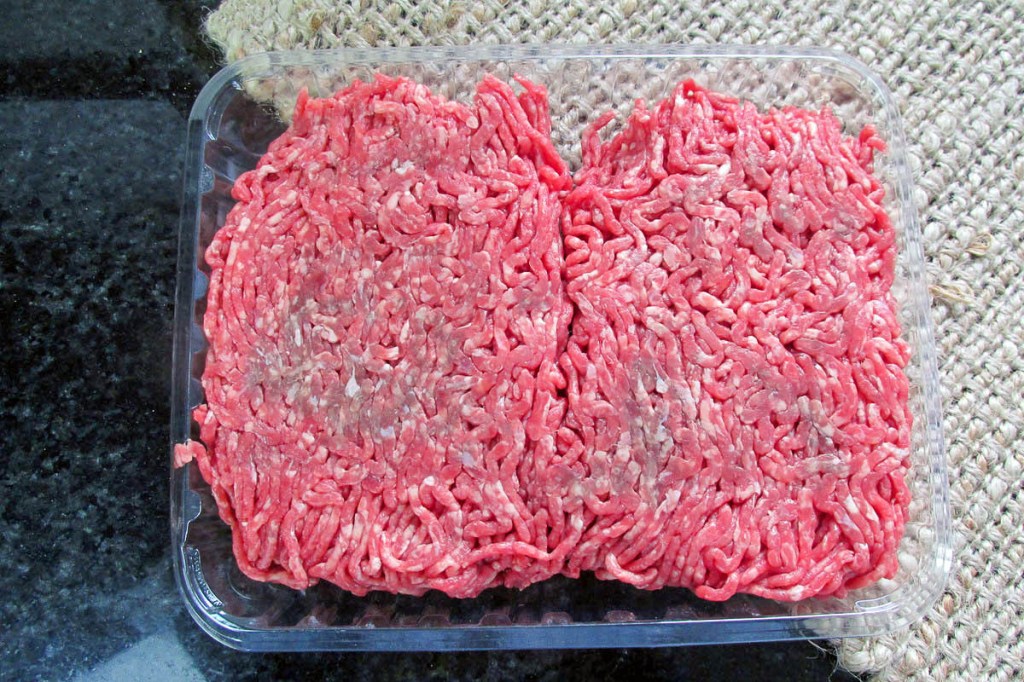
Picking the right meat
The most important thing about your meatballs is the meat (obviously). It doesn’t matter what meat you want to use for your meatballs, what is important is fat. The fat content of the meat is what will give you tender meatballs; if you use lean meat make sure you keep an eye on the meatballs while they cook. Without fat, you get dry, chewy meatballs.
Remember that you can mix and match your meat.
Beef mince
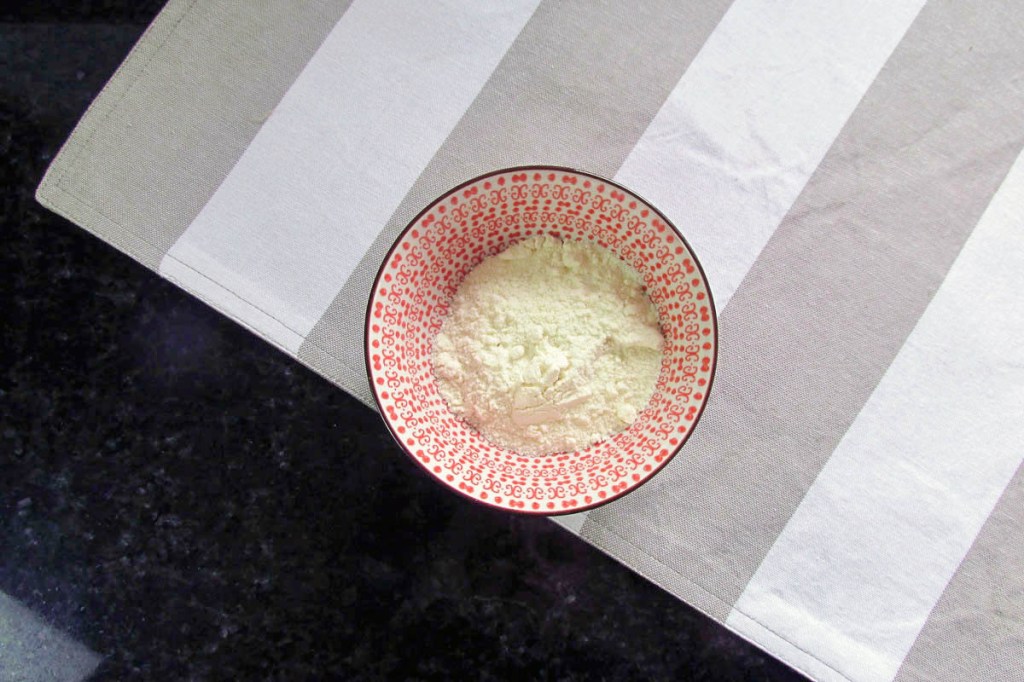
Do you need to bind it?
Traditionally people add eggs and breadcrumbs to meatballs; I have never actually seen the need to add a binder to meatballs. Depending on what meat you use will generally dictate if you need to add anything to keep the meatballs together. I often find that sticker meats (sausage meat, chicken mince, or turkey) benefit from having something added to keep in some of the moisture. If you are looking to add a binder, look at adding coconut flour and egg. Just remember a little coconut flour goes a long way.
Coconut flourEgg
Don’t handle the meat too much
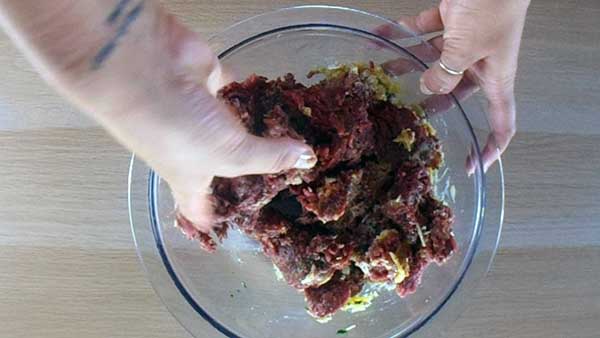
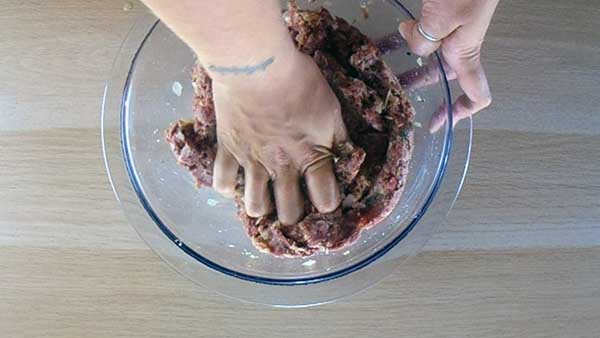
Another key thing to remember is not to overwork the meat. You want to work the meat as little as possible. The best tool you have for mixing ingredients in your hands, and this makes it easier to feel when everything is combined well. I know that working meat with your hands can feel a little gross, but your hands are the best tools for mixing and rolling.
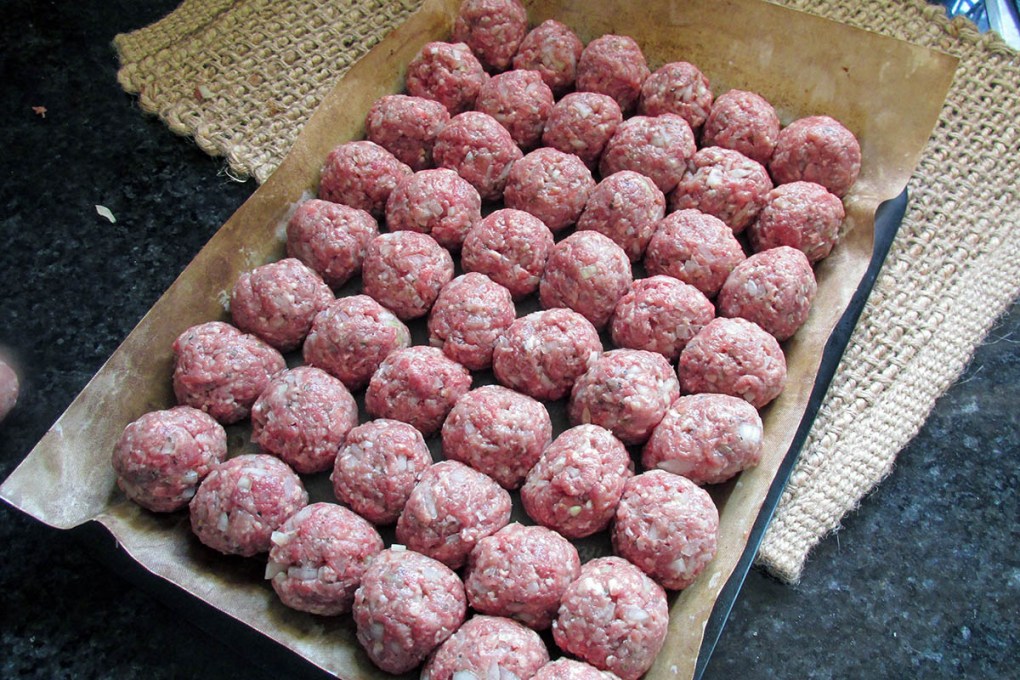
Making meatballs
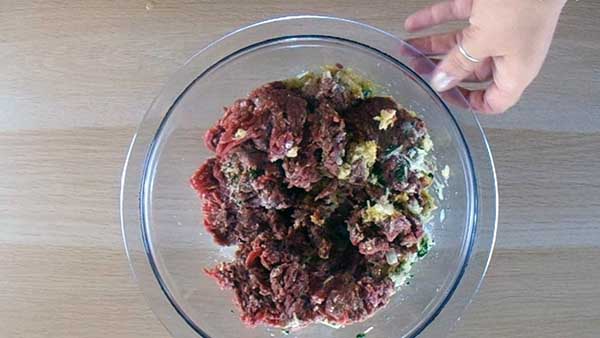
Add the dry ingredients to the bowlAdd the herbs and egg if you are using lean meat.Add the meat to the bowlUse your hands to mix together the meat.Don’t overwork the meatMake sure everything is well combinedDivide the meat mix into portionsRoll the portions into balls
Add the dry ingredients to the bowl.
Add the herbs and egg if you are using lean meat.
Add the meat to the bowl.
Use your hands to mix together the meat.
Don’t overwork the meat.
Make sure everything is well combined
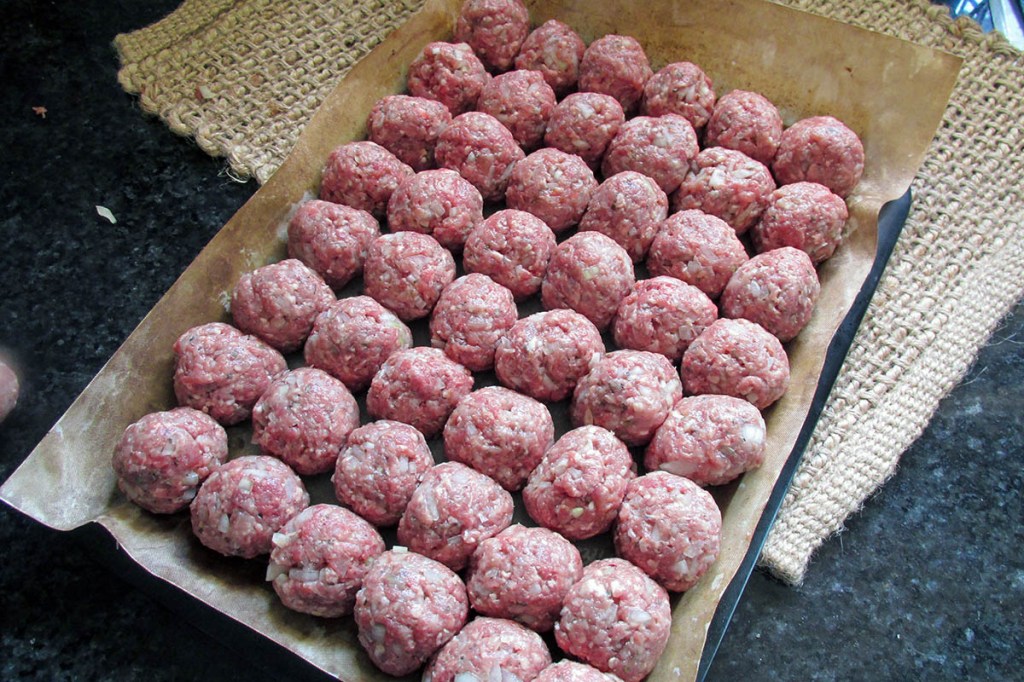
Divide the meat mix into portions
Roll the portions into balls
How should you cook them?
There are two options for cooking meatballs, roast them or cook them in a sauce.
If you intend to freeze the meatballs or to serve them without sauce roasting is the best option. You can grill or roast the meatballs, make sure you let them cool before freezing.
If your meatballs are going to be served with sauce, the best option is to cook the meatballs in the sauce, which will add flavour to the meat and keep it tender.
When you start to spend more time in your kitchen, you start to realise that high-quality equipment makes a big difference to the effort required from you.
I’ve found that spending a little bit more on some things has a huge benefit; the key is knowing what to buy and what you get out of it in the long run.
Here are the things I recommend spending a little more on when you are ready
Food processor
Blender
Cast iron pan
Slow cooker
A quick reminder I’m based in New Zealand, so the products I specifically recommend are available here, if you live in the northern hemisphere you will have different products available.
Food processor
Best investment ever
For me investing in a good quality food processor was the best investment I have made in the kitchen. A good food processor will have multiple attachments that will cut down the time and effort significantly. If I used my processor for nothing but grating Cauliflower for Cauliflower rice then the processor would have paid for itself in 2 months (trust me band-aids are expensive).
Before buying a food processor, it would take an hour to cut up then grate one Cauliflower (and at least one grated knuckle). Now I can cut up and grate 3 cauliflowers in 20 minutes, and it is no longer seasoned with human skin.
Other uses
That is just one of the things I use my food processor for, consider other uses
Ice cream
Seed or nut butter
Shredding vegetables
Grating vegetables
Making cake batters
Making mousse
Mincing meat
Slicing vegetables
What I can personally recommend is the Kenwood multi pro unit, this is the model that I bought and can say it is a great all-rounder. It is a little bit more than some of the other models on the market. What I can say is that you should look for a processor that meets your needs, suits your budget and will be an excellent investment in your kitchen.
Here are a few general things to consider when looking for a food processor
Power
Look for a processor that has a high watt motor, at a minimum you want a 500w motor, any lower than that and it will likely struggle. When you look at the motor size, also take a look at the speed settings, the more settings, the longer your machine will last as it doesn’t need to go flat out for everything it does.
Warranty
Most of the well-known brands offer a 12-month manufacturer’s warranty; I do recommend you look for a processor that has one.
Bowl size
This is a critical thing to consider when shopping for a processor if you want to make cauliflower rice you need a bowl with a large capacity, believe me, it is not fun having to stop grating and empty the bowl when you are only halfway through a cauliflower. I would recommend that you look for something that has a bowl with a 1 litre capacity as a minimum.
Attachments
I could say that the best idea is to look for a processor that has as many as possible, the truth is that this isn’t the best approach. I think a better way is to figure out what you want the processor to do and what functionality is essential for you. To get the best bang for your buck, I would recommend that you look for a processor that has a minimum of a processing blade, shredding discs and slicing discs. If additional attachments are on your wish list, you can find processors with attachments such as
Very much like the investment in a food processor, I made sure I bought the best blender I could afford. A blender may not be as versatile a piece of kit as a food processor, but I believe in having the right tool for the job. In the case of my blender I actually saved some money because I bought a food processor and blender combo, it was a great deal, I got one base that the blender and processor fit onto.
Do you need both?
You may ask yourself why you need a blender when you have a food processor, trust me you do. A blender is a much better tool when you are making sauces, smoothies, or soups than a food processor is. Once you start making your own mayonnaise, hollandaise, and tomato sauce, you will want to have a good quality blender to make your life easy.
As with buying a food processor, you want to be sure to look for the right qualities including a good size motor with multiple speed settings, a manufacturer warranty, and a jug that will hold at least 1 litre.
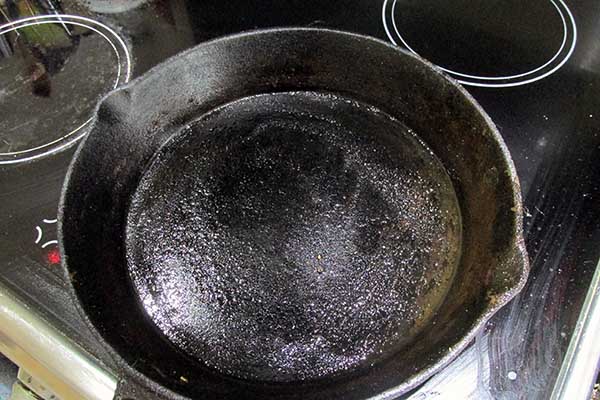
Cast iron pan
I’ll be honest here, cast iron pans are not the easiest option, they take a little bit of care and take some getting used to when you start cooking with them. That being said when you find your feet with cast iron you never want a non-stick frying pan again.
Facts not fiction
Let’s get a few things clear about cast iron
It is not difficult to look after you just need to know the basics for looking after cast iron
It needs to be seasoned when you get a cast iron pan you need to season it, even the pre-seasoned cast iron pans need to be seasoned
Re-season every time you use the pan when you have rinsed the pan out re-season.
Use it a lot the more you use the pan, the better the pan will get
Don’t let it stay wet once you have cleaned the pan dry it off and re-season it straight away, wet pans rust no matter how good your seasoning is
Follow these simple rules are a cast iron pan will be a perfect piece of kit for your kitchen.
Budget
When it comes to cast iron pans, you are going to spend a fair amount of money, there are a few brands available with prices ranging from $40 to $200, and the quality of pan differs from brand to brand.
Here are some of the things to consider when looking for a cast iron pan.
The weight of the pan will have a huge impact on your experience with cast iron. Generally, the heavier pans tend to hold heat more, but you want something you can hold in one hand without feeling like it’s a workout.
How it feels in your hand it’s important when you get a pan that you can lift. You also want something that has a user-friendly handle, when you look at the handle you should check if it is heat resistant or has a place suitable to use a potholder, some pans have two handles to make it easier.
Just because it is expensive doesn’t mean it’s good- don’t use price as the real guide, cheaper doesn’t always mean less efficient, do your homework on the brands available and knowing what you want the pan for.
Slow cooker
I love my slow cooker, it is a lifesaver when it comes to dinner during the week, I love the simplicity of taking food out of the freezer, putting in the slow cooker, turning it on, and coming home to a meal that is ready to eat. You don’t need to invest a heap in a slow cooker, there are a lot of good quality ones out there.
What to look for
When shopping for a slow cooker, these are some of the things to consider
How is the bowl heated
Different slow cookers have a different configuration for the heating elements, look for a slow cooker that has heating elements that come up around the side of the bowl, this will help with even cooking.
What is the bowl made of
There are a few different materials that bowls are made of including ceramic, porcelain and metal, you want a bowl that is easy to remove and clean. Don’t buy a cooker that has a bowl that is fused to the heating unit. If you can get a metal or ceramic bowl as they are durable and will conduct heat very well.
What is the lid made of
We could discuss the options, but the truth is a glass top is the best material for the lid of a slow cooker. It allows you to look inside the bowl without having to remove the lid, it is easy to clean, and durable, the same cannot be said about plastic covers.
What shape is best
There are three main shapes available; oval, round and square. What you want to cook in your slow cooker will help make the decision of which shape to buy, chickens and roasts will do better in an oval or square than in a round pot.
What is the bowl capacity
There are a variety of bowl sizes out there you can get a slow cook that will hold 1 litre of food all the way up to 10 litres, which is best will depend on how many people you are cooking for, the more people, the bigger capacity you need. I would recommend that you look for something that is big enough to hold a chicken; you will feel the benefits of cook once eat twice.
What buttons does it have
There is a large range of options when it comes to buttons and functions on slow cookers. These include the timers, heat setting, and warming settings. Different brands have various options, so really it’s all about what functions you think would be useful to you. Most slow cookers come with the settings of off/on/low/high as a standard. Some come with a timer that lets you programme or set the time you want the cooker to be on for at one of the standard heat settings. A timer is a great option if you are not likely to be home exactly 8 hours after you put it on, it is an excellent way to prevent mushy vegetable and overdone meat issues.
Let me know in the comments what items you think everyone should invest in for the kitchen
I don’t know about you, but I’m always looking to learn new skills that make life easy in the kitchen. Sharing is caring so I’m sharing my little tips, tricks and hacks with you.
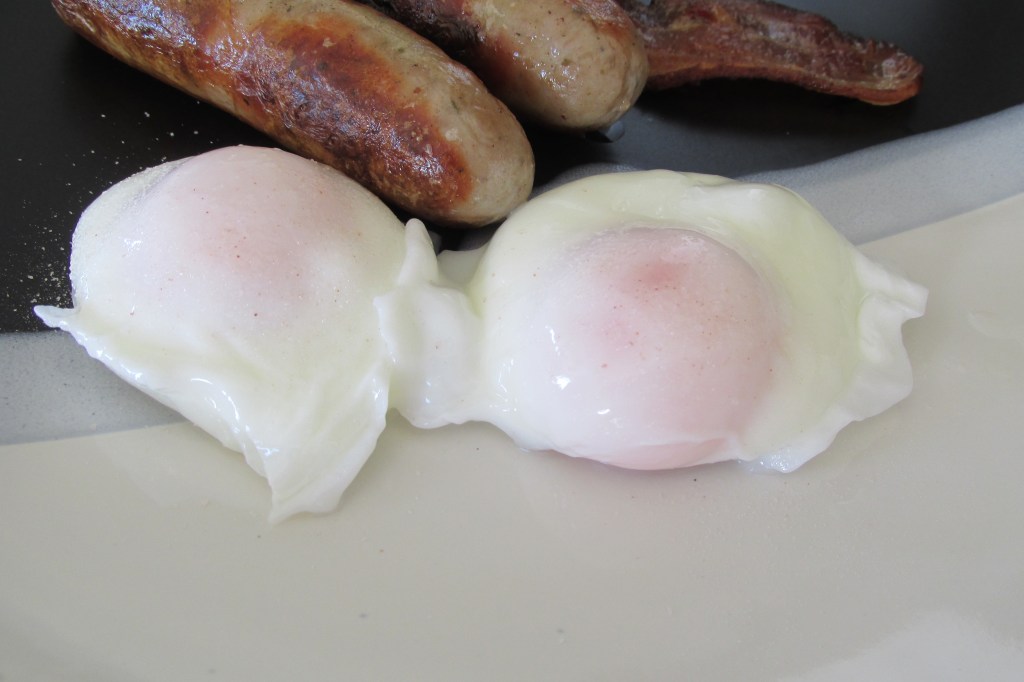
When you talk about making poached eggs lots of people think poaching eggs is impossible to get right; some count it in the same category as higher-level mathematics. I can understand why most people believe that poached eggs are difficult, there are so many different methods out there, with vinegar, without, boiling water, simmering water and the whirlpool method, and it’s a little overwhelming.
I’ve tried every method out there, and after lots of trials and plenty of error, I’ve found a way to get consistently good poached eggs. Most weekends I have to poach 6 eggs at the same time, and they all need to have a solid white and runny yolk.
I’ve found that the secret to success is a frying pan here is the method is how I get good poached eggs every time.
Here is what you need
Frying pan
Water
Slotted Spoon
Eggs
What to do
Take large frying pan.
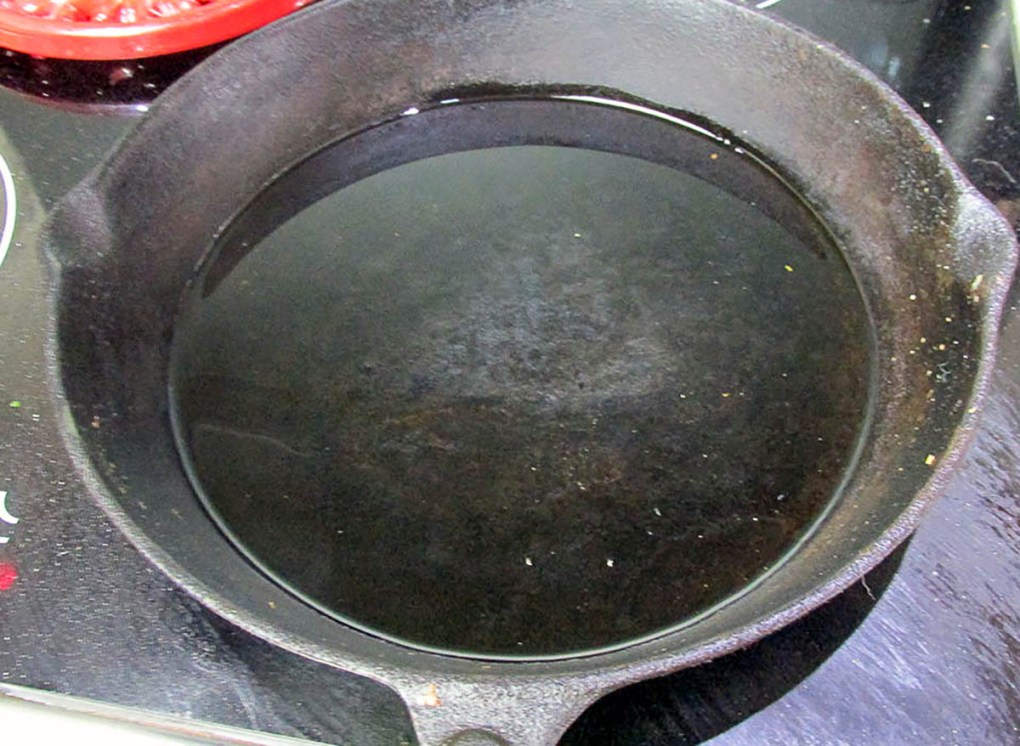
Take a large frying pan.
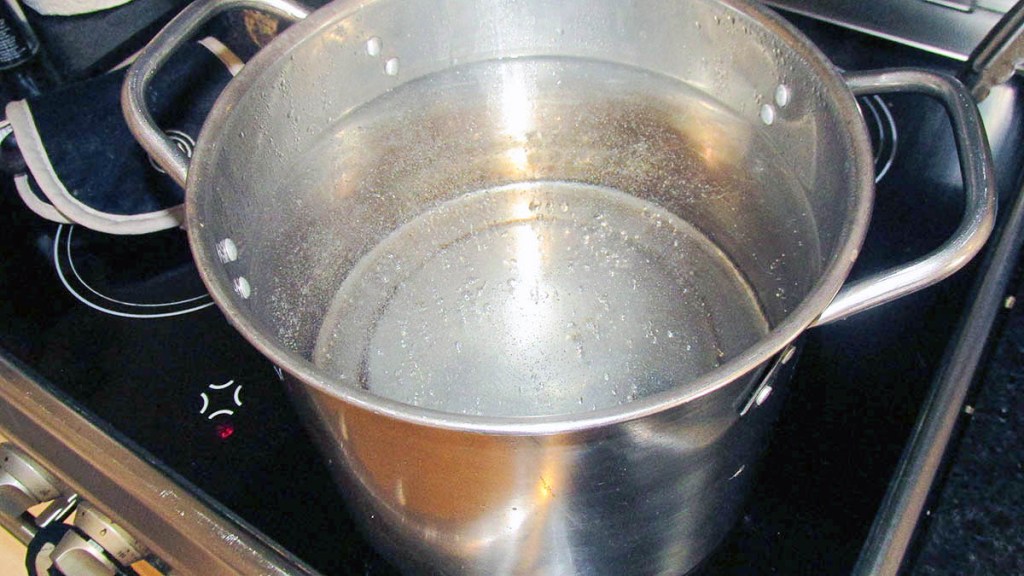
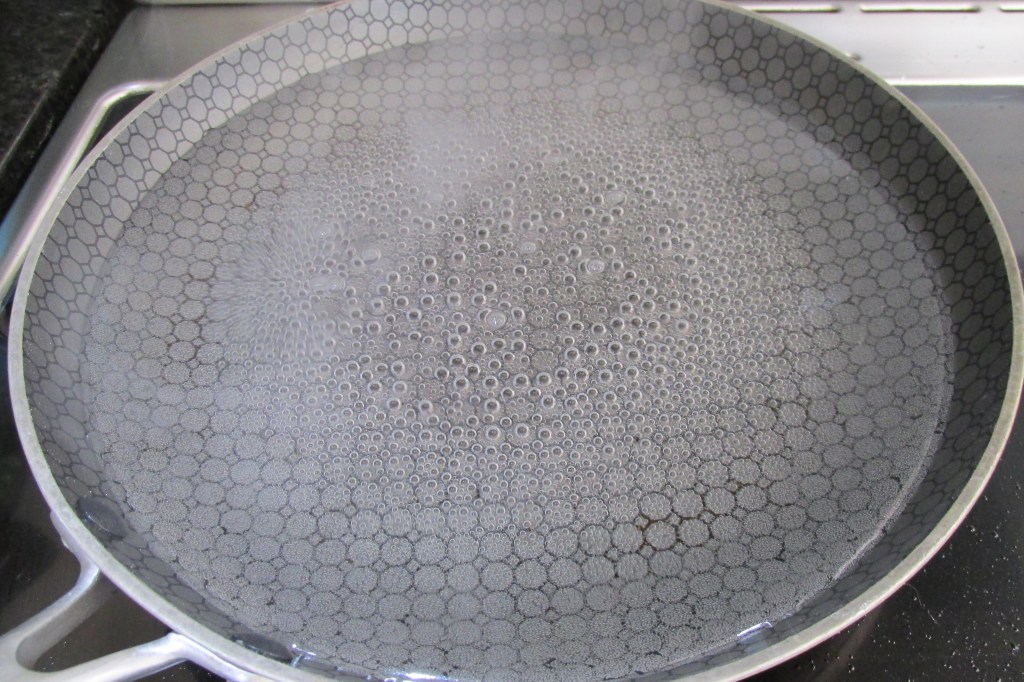
Fill the frying pan with about 3cm of water, this will depend on the depth of your pan; make sure there is space for the eggs.
Fill the frying pan with about 3cm of water, this will depend on the depth of your pan; make sure there is space for the eggs.
Bring the water to the boil
Bring the water to the boil
Once the water is at a rolling boil, turn off the heat.
Once the water is at a rolling boil, turn off the heat.
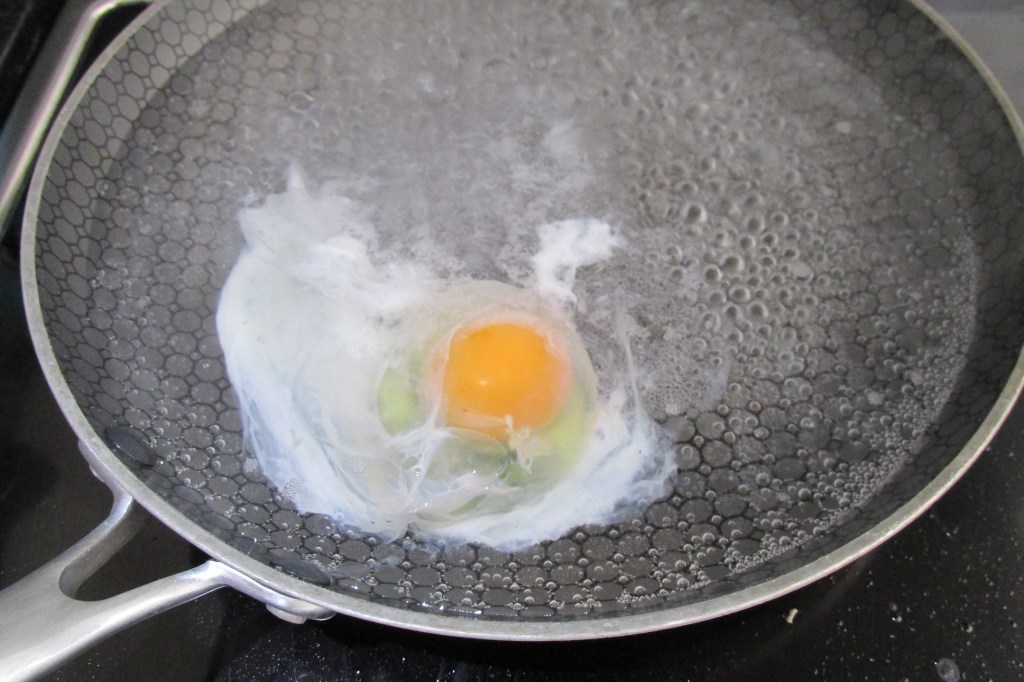
Crack the egg and drop it into the water from just above the surface of the water.
Crack the egg and drop it into the water from just above the surface of the water.
If you have trouble keeping the egg intact, crack the egg into a small bowl or ramekin and use that to pour the egg into the water.
Crack all the eggs you want into the water.
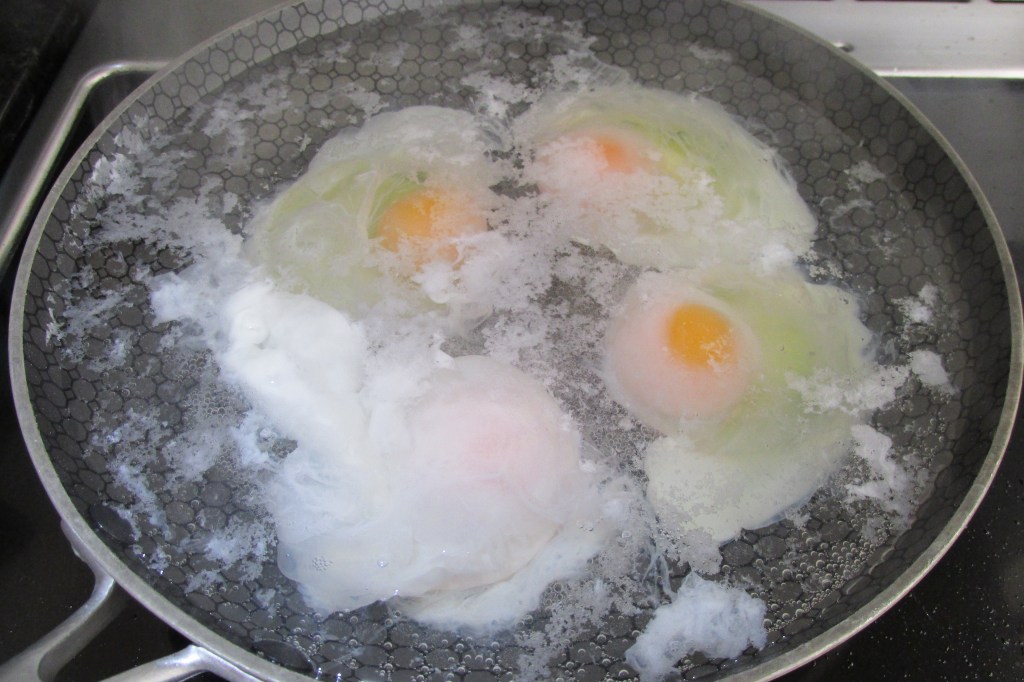
Once you have your eggs in the water, leave them alone until the white is set.
Once you have your eggs in the water, leave them alone until the white is set.
Use the slotted spoon to remove the egg from the water
Use the slotted spoon to remove the egg from the water
Serve
As simple as that
As simple as that
What to do
Fill the frying pan with about 3cm of water, this will depend on the depth of your pan; make sure there is space for the eggs.
Bring the water to the boil
Once the water is at a rolling boil, turn off the heat.
Crack the egg and drop it into the water from just above the surface of the water.
If you have trouble keeping the egg intact, crack the egg into a small bowl or ramekin and use that to pour the egg into the water.
Once you have your eggs in the water, leave them alone until the white is set.
Use the slotted spoon to remove the egg from the water
Here is another quick, easy and practical post to add to your kitchen skill toolbox.
What is stir fry?
Stir fry (stir-fry) is what can only be described as a quick, easy and tasty way to get dinner on the table.
Stir-frying is a Chinese cooking method that has been around for approximately 1,500 years. It is basically using high heat to quickly cook meat and vegetables using oil in a wok or large pan. No fancy skills, tools or knowledge are needed.
Preparation is the key to success
As with all things in life, the key to success is preparation. For meat and vegetables to cook quickly, you need them to be cut into small strips. The matchstick or baton cut is the best option for vegetables and meat. Chopping vegetables and meat into thin strips does take time, but it does mean that the cooking process is easier. Consistency in the size of your ingredients will ensure that everything is cooked evenly and quickly. My top tip is to make sure that you have everything sliced and ready before you start cooking
What meat and veg to use
The meat and vegetables you use in a stir-fry will contribute to the success of your meal, not all vegetables or meat are suitable for a stir-fry. Meat with bones is not going to cook quickly or evenly in a wok, so those chicken thighs are not the best option. Here are my recommended meats and vegetables for the perfect stir-fry
Meat
Chicken breast
Steak
Pork loin
Vegetables
Peppers
Onions
Carrots
Broccoli
Snow peas
Baby corn
Courgette
Green beans
Bean sprouts
Mushrooms
Sauces and seasoning
Minced garlic
Mined chilli
Coconut aminos
Fish sauce
Teriyaki sauce
Ginger
Chilli flakes
Oyster sauce
Oils
Coconut oil
Sesame oil
Peanut oil (if you don’t have allergies)
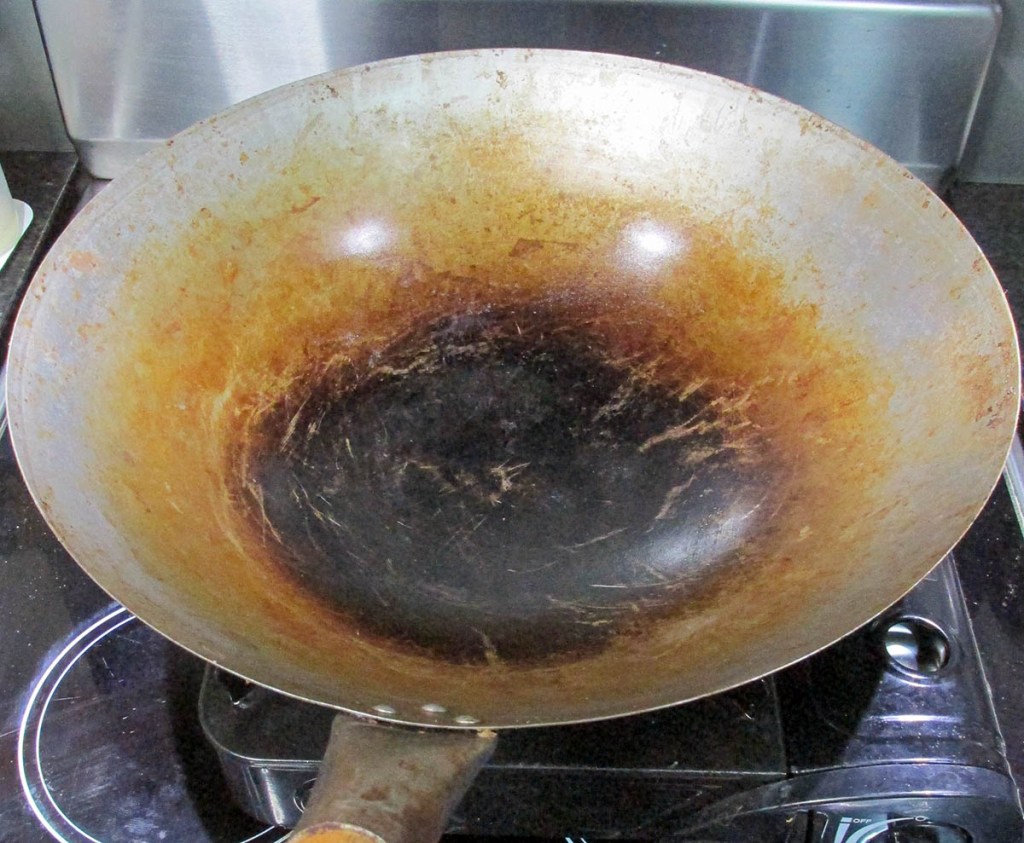
Which wok?
It doesn’t matter what kind of wok you use as long as it is made of sturdy metal that can stand high heat and hold all of the ingredients you want to cook. You can pick up a good quality wok from your local Chinese supermarket for around $30. A good quality wok will need to be seasoned and cared for in a very similar way to a cast iron pan. For more information on looking after a wok or cast iron pan check out this blog why cast iron is king
How to Stir Fry
Put your wok or pan over medium to high heat, let it heat up for 1 to 2 minutes. A good sign your pan is hot enough is that it should start smoking. To test the temperature add a drop of water to the wok, if it boils off immediately it is good to go.
Add a tablespoon of oil to the wok. You don’t need a lot of oil but use one with a high smoke point.
Add any seasoning to the oil and fry for a few seconds.
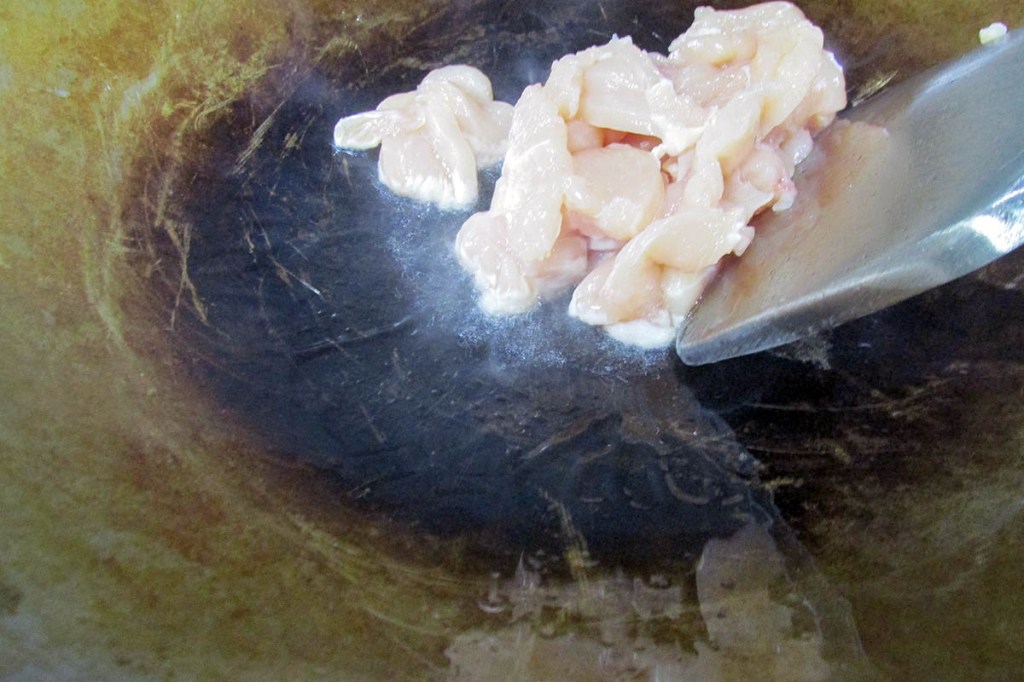
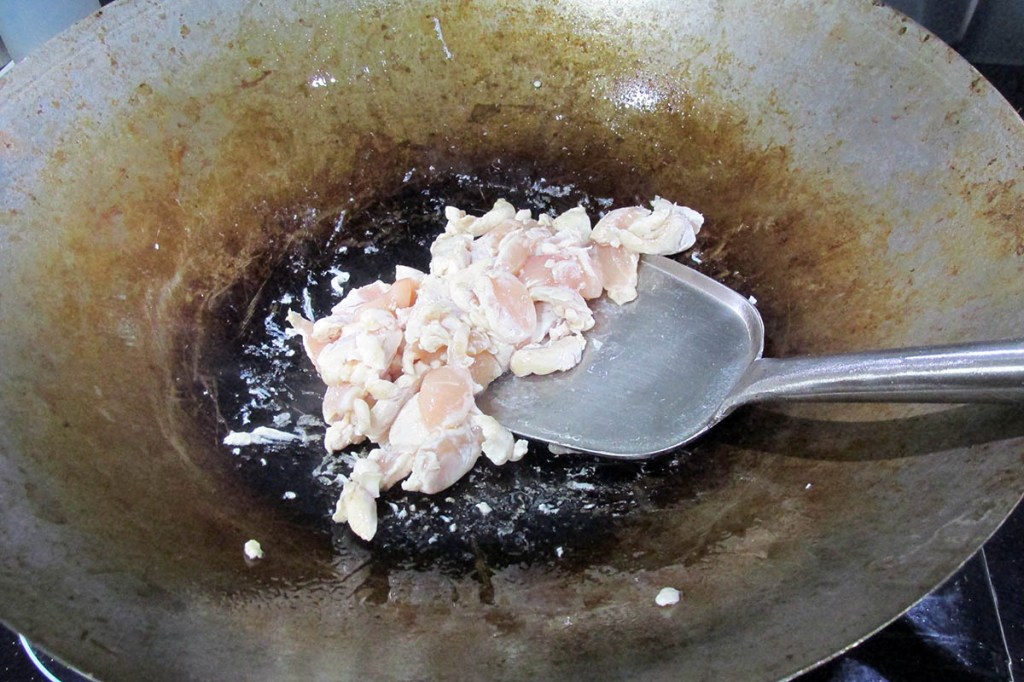
Add your meat.
Stir the meat frequently, the heat from the wok will sear the meat quickly. Once the meat is seared, keep it moving. Let the meat cook through, this will usually take around 5 minutes. If you have a lot of meat cook it off in batches.
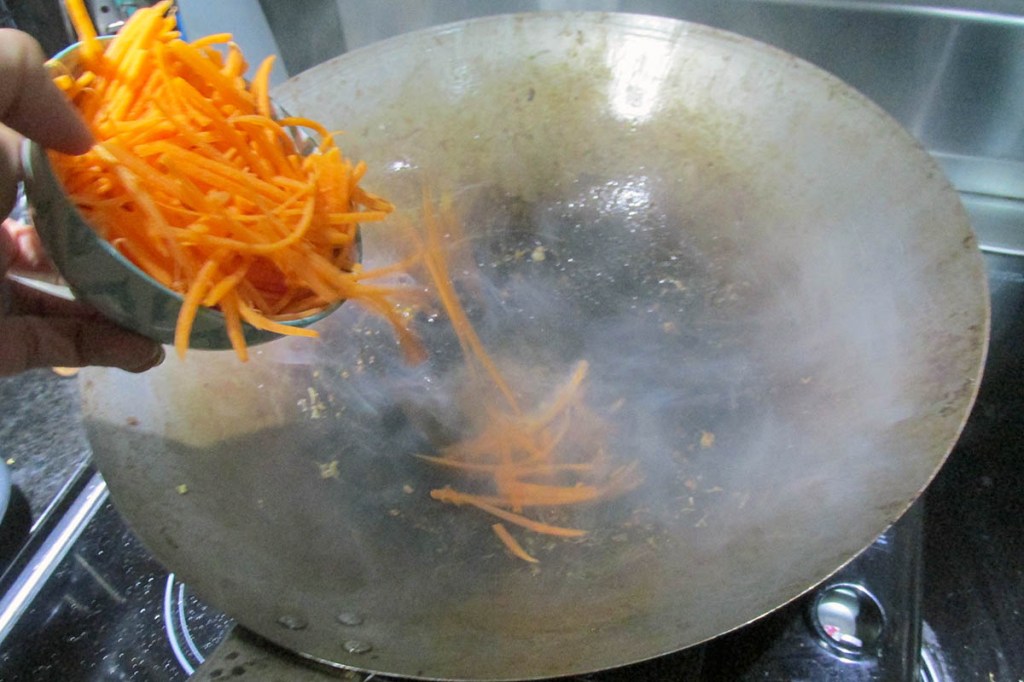
Add the vegetables that are slow cooking such as broccoli, carrots and onions. Keep the veg moving as it cooks, let these cook for 3 5 minutes.
Add the faster cooking vegetables next such as mushrooms, bean sprouts and courgette. Keep the veg moving as it cooks, let these cook for 3 5 minutes.
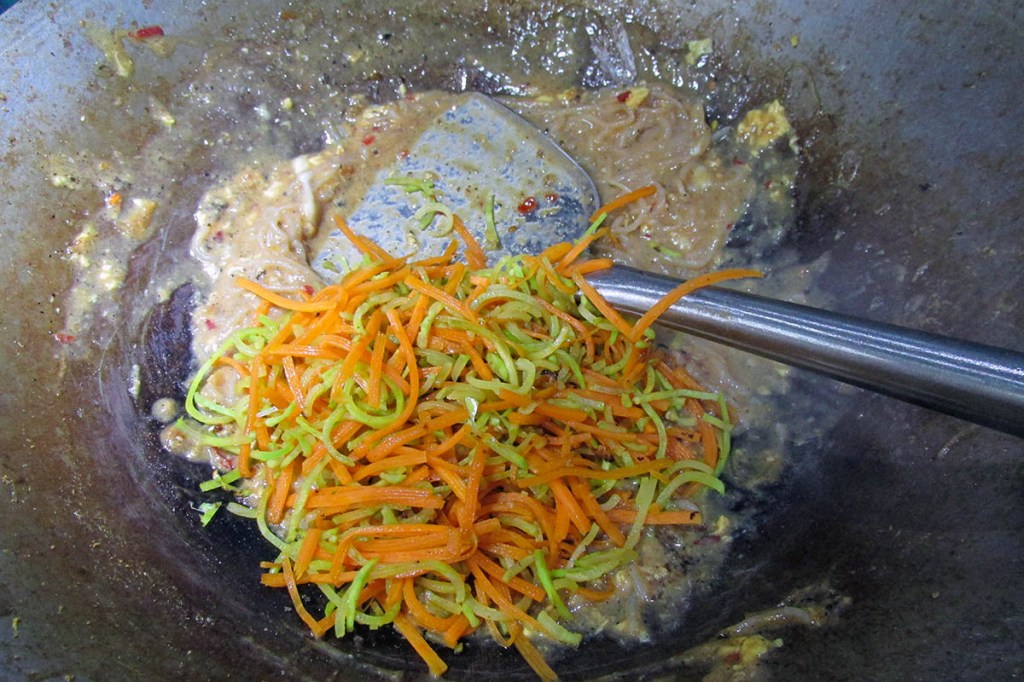
Add any sauce to the pan last.
Reduce the heat. Make sure all of the ingredients are coated in the sauce warmed, let the sauce cook for 2 4 minutes.
Cast iron pans are fantastic but they take a little bit of care and take some getting used to when you start cooking with them. That being said when you find your feet with cast iron you never want a non-stick frying pan again.
Let’s get a few things clear about cast iron
ïIt’s not difficult to look after you just need to know the basics for looking after cast iron.
ïSeason it when you get a cast iron pan you need to season it, even the pre-seasoned cast iron pans need to be seasoned.
ïRe-season every time you use the pan when you have rinsed the pan out re-season.
ïUse it a lot the more you use the pan, the better the pan will get.
ïDon’t let it stay wet once you have cleaned the pan dry it off and re-season it straight away, wet pans rust no matter how good your seasoning is.
So with all that said let’s look at cast iron pans. There is a strange misconception that cast iron is high maintenance, needs to be handled carefully and will be ruined if you don’t look after it right. The truth is that cast iron pans are the kitchen equivalent to the terminator. Some people have the cast iron pan their grandmother got as a wedding gift, 40 plus years of use and they are still going strong. Cast iron is built to last, unlike most new pans. The most difficult thing with cast iron is seasoning the pan, it is also the most important part of using a cast iron pan. Seasoning is not that hard because you can buy them pre-seasoned now, so it’s not really a big problem. As long as your pan is well seasoned, you should never need to worry about chipping or rust.
It’s non-stick
Cast iron is non-stick, in the right circumstances. When it comes to cast iron how well it is seasoned has a great deal to do with how non-stick the surface is, the better the seasoning, the less your food sticks. Another important part is the heat of the pan, unlike new material pans you can’t add food to a cold pan and expect it not to stick. Your cast iron pan needs to be hot before you put food near it.
Washing the pan with soap will not ruin it
People think that washing a cast iron pan with dishwashing soap will remove the seasoning and ruin the pan. This isn’t true, I’m not a boffin so here’s my understanding of the science (think of this as my bro science). You heat oil in the pan and coat the pan, you do this repeatedly. The repeated application of oil and then exposure to heat changes the properties of the oil, it turns it into a plastic-like coating that sticks to the pan. Like the oil, you used to coat the pan is no longer technically an oil, so dishwashing soap doesn’t impact or remove the seasoning. So washing your pan with soap won’t ruin it, but letting it soak in water will.
Keep the pans exposure to water to a minimum, wash and dry the pan in one go then re-season as soon as it is dry.
Not all cast iron is made equal
As with most things in life you get what you pay for, this applies to cast iron pans. The quality of the modern cast iron pan is not the same as the quality of pans made in the early 20th century. This has more to do with the way pans were made back then vs. how they are made now. The truth is I don’t want to bore you with a bunch of information about casting that you won’t care about. What you will care about is how the different pans available now have different finishes and which one is best. Basically, there are 3 finishes available for cast iron pans
Smooth
Bumpy
Coated
Here are the key differences
Smooth
These pans have been cast and then polished, this removes the uneven surface of the pan. It still needs to be seasoned and looked after. Generally speaking, pans that have been polished are not as heavy so are a good option if you aren’t seeking to increase your upper body strength while you make dinner. Other than the weight they are no different than the bumpy pans.
Bumpy
These pans have been cast and retain what is basically the imprint of the mould, the surface of the pan will always be uneven. They generally have more weight to them but have all the same properties as the smooth pans.
Coated
These pans are cast and then typically covered in enamel, the coating acts as a skin for the cast iron, you get the benefits of using cast iron without the need to constantly re-season. These pans are just as good as the bumpy and smooth pans and have very similar properties.
So what is cast iron good for? what can you cook in your cast iron pan?
Answer
Pretty much whatever you want. My cast iron pans get regular use when cooking things like
Bacon
Fried eggs
Frittata
Burgers
Sausage
Steak
Meatballs
Buttered greens
Searing seafood
I’ve even been known to make pancakes in there.
I love using my cast iron pans for anything that needs a high heat to cook, a crisp skin or that needs to start on the stovetop and finish off in the oven. It’s a versatile tool that deserves a little bit of love and attention. Once you adjust to the way it heats up, how to wash it and how to season it, it is hard to go back to the Teflon coated pan in the back of the cupboard.
If you are ready to migrate over to a cast iron pan, there are only a few rules you need to know that will ensure a successful and lifelong relationship with your cast iron pans.
Season it when you get it
Seasoning is critical and should be done as soon as you get it, even a pre-seasoned cast iron pan can do with some additional protection.
Clean it after each use
Clean your pan thoroughly after each use. Washing it with soap, water and scrubbing out any debris from the bottom. I use the scrubby side of a sponge for this.
Clean it while it is still hot, it will make it easier to clean.
Re-season it.
When you have cleaned your pan, make sure you have rinsed out all soap with water.
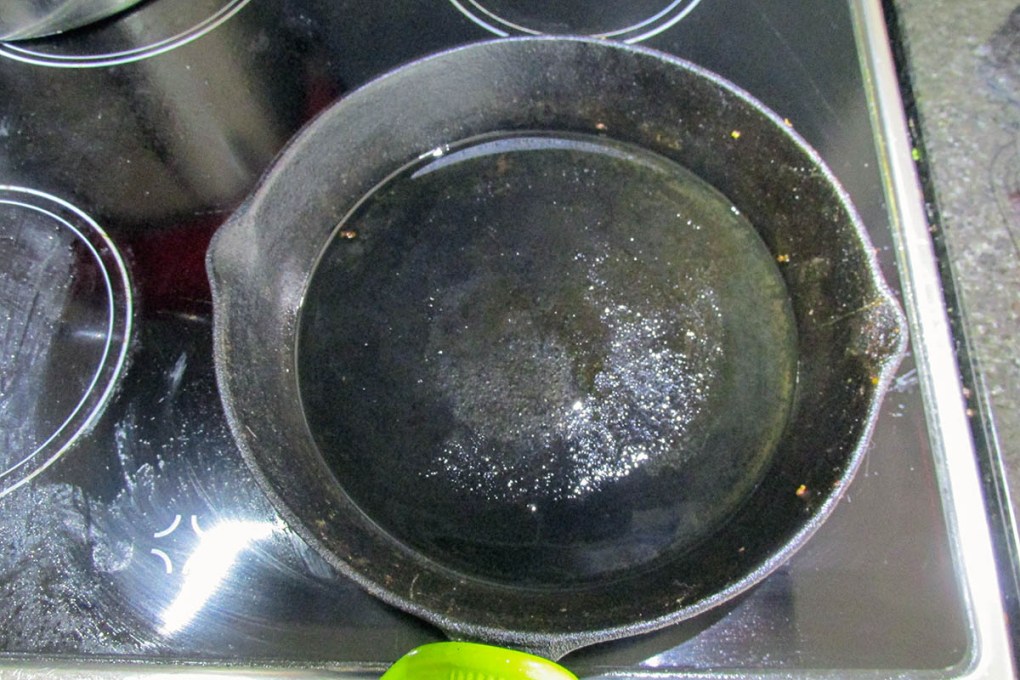
Place the skillet over high heat.
When the water inside the skillet has dried out, add a half teaspoon of oil.
Rub it around with a kitchen towel.
Keep heating the pan until it starts to smoke, give it one more good rub.
Let it cool, and you’re done.
Fry and Sear in it
The best way to keep your pan well seasoned is to use it a lot. The more you fry, sear, or bake in it, the better that seasoning will become.
Don’t let it stay wet.
Water and iron equal rust.
Treat water like the enemy of your iron pan, don’t let a drop of water sit in your pan, even one drop can lead to a rust spot. It isn’t the end of the world, but rust will require a little scrubbing and re-seasoning. A good rule is to dry the pan and coat with a little oil before storing it.
How to season
Heat it up on the stovetop until it’s smoking hot.
With a paper towel rub a little oil into the pan
Remove the pan from the heat, let it cool.
Repeat this process a few times, and you’re ready to go.