An easy to make dressing that is perfect to add a new dimension of flavour to your salad.
Credit: Cath @ easycleaneats
Ingredients
1/2 cup easy mayo
1/2 cup coconut milk
1/2 tsp. onion powder
1 tsp. garlic powder
1 tsp. dill
Directions
Whisk together all of the ingredients and transfer the dressing into a jar.
The dressing will keep in the fridge for up to one week.
Nutrition
Per Serving: 106 calories; 3 g fat; 19 g carbohydrates; g protein
Equipment
Jar
Whisk
Small mixing bowl
Measuring cups
Measuring spoons
Nutritional disclaimer
Nutrition information is provided as an estimate based on the ingredients used and available in my area (New Zealand). The nutritional information is here to help you understand the recipe; I use MyFitnessPal to generate my estimates. For more accurate nutritional information, please use a nutritional calculator with the ingredients in your area.
I don’t like the kids getting older. I still think of them as the 5 and 3-year-olds I first met so many years ago. I struggle to reconcile the man-sized 13-year-old, and almost man-sized 10-year old that rock around the house now. While I struggle to think of the boys getting older, I eagerly embrace the ever-expanding list of foods they will eat and are willing to try.
One meal for all
For many years I would have to make multiple meals which made my weekends busy and annoying. We have finally reached a point that I can make one meal, and every person will eat it. I am sure every parent with fussy children understand how I feel and how much I longed for this day to come. It is so lovely I don’t have words to explain my joy.
This salad was one of the first recipes that I managed to get everyone not only to eat, but enjoy so much they asked for it again. I know right.
Meets everyone’s needs
It might sound like I have it easy now, but it still isn’t simple to come up with a meal that fits the likes and dislikes of the family. New recipes need to meet fall in the small sweet spot that is in the centre of the family requirements
Jaime
Doesn’t like cold food unless the food is wet.
Loves meat, the more animals in a meal the better.
Likes vegetables but not too many vegetables.
This means salads have to be covered in a dressing or sauce before he will consider eating it and the balance of meat to vegetables has to be even.
Elliot
Doesn’t want to eat meat, wants to be a vegan (this is a whole blog post in the making).
He will eat chicken but doesn’t like it.
Likes vegetables but not all vegetables.
Will eat hot or cold food and loves anything that can be smothered in mayo.
Liam
Loves meat.
Will eat hot or cold meals.
Not eats a range of vegetables including broccoli (his favourite), kale, green beans, carrots, onions and lettuce.
He doesn’t like spicy food or mayo.
Allergy to nuts.
Cath
Likes all meat.
Will eat all vegetables except peas (which are legumes anyway).
I don’t care if it is hot or cold.
I like sauce any spicy food and sauces.
Allergy to nuts.
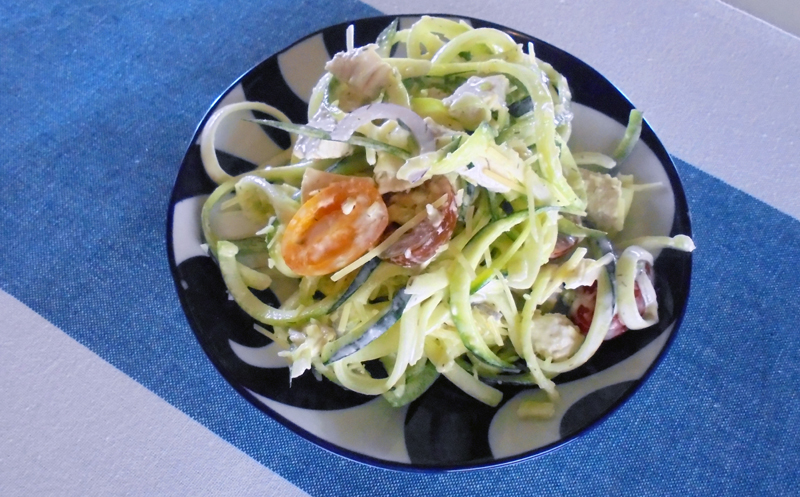
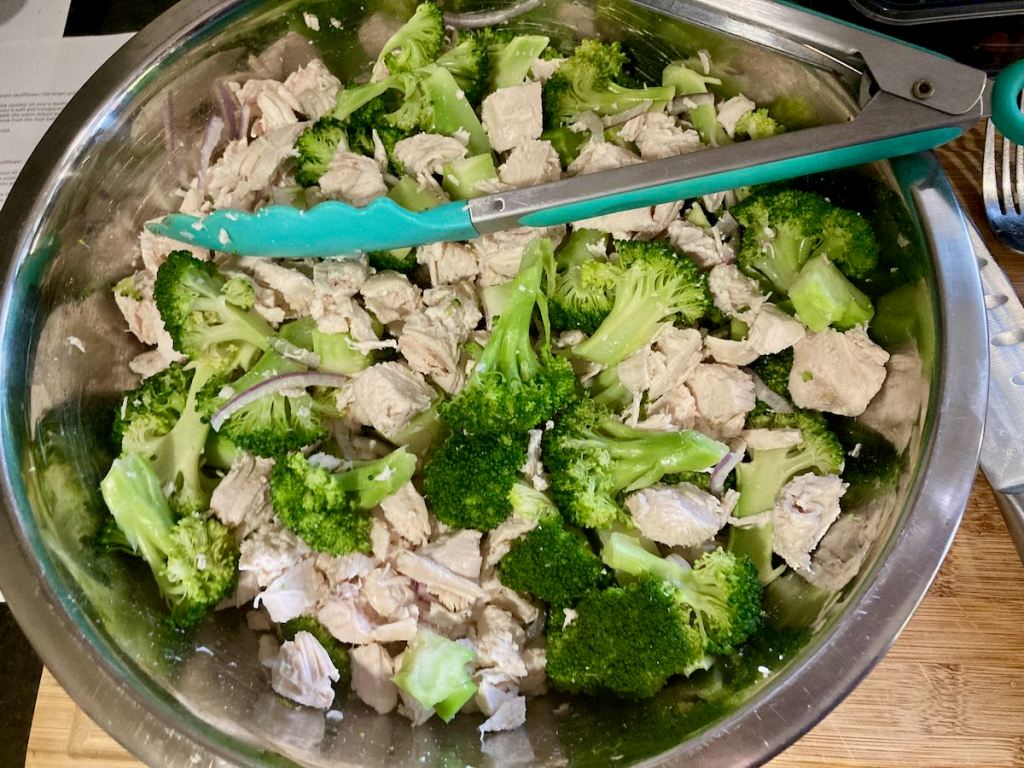
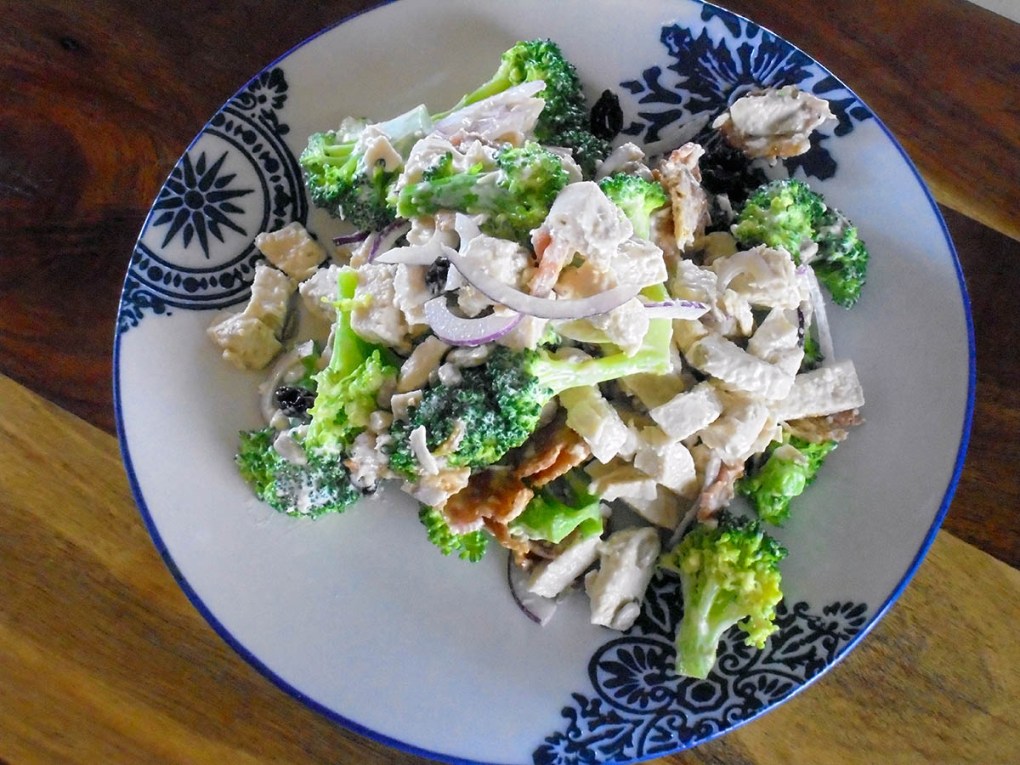
As you can see the space to find a meal that works for everyone is small, but I seem to have found a winner in this recipe.
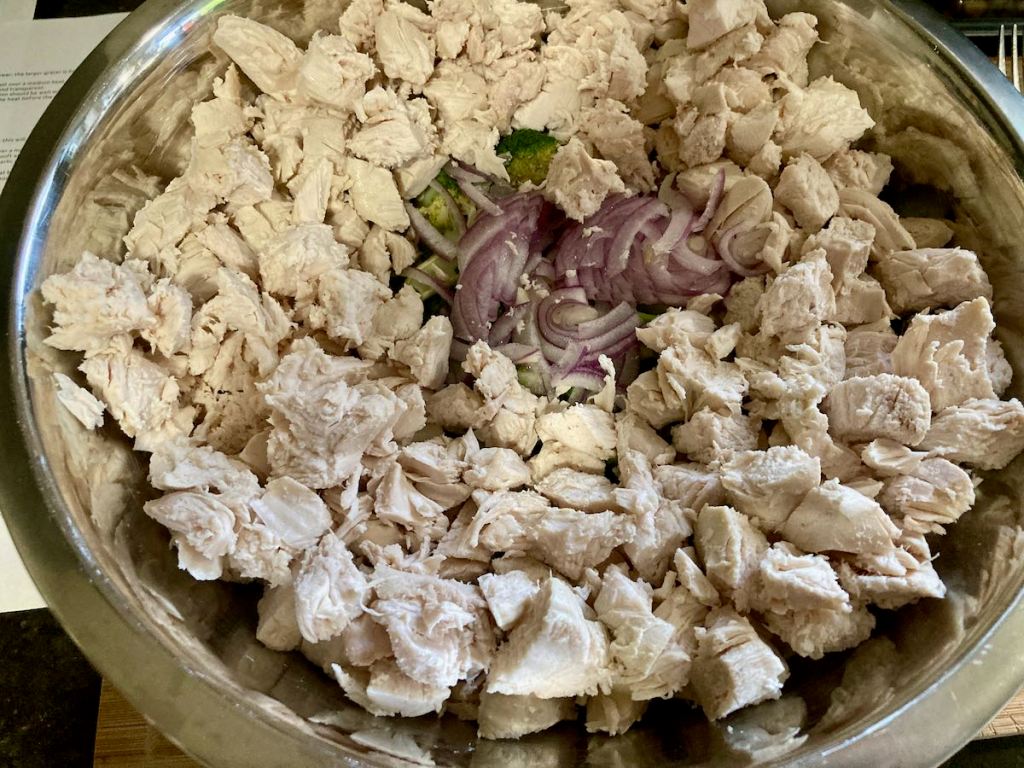
In a bowl, combine all of the ingredients and make sure that everything is well coated.
Nutrition
Per Serving: 375 calories; 18 g fat; 7 g carbohydrates; 43 g protein
Equipment
Knife
Chopping board
Mixing bowl
Spoon
Measuring cups
Measuring spoons
Nutritional disclaimer
Nutrition information is provided as an estimate based on the ingredients used and available in my area (New Zealand). The nutritional information is here to help you understand the recipe; I use MyFitnessPal to generate my estimates. For more accurate nutritional information, please use a nutritional calculator with the ingredients in your area.
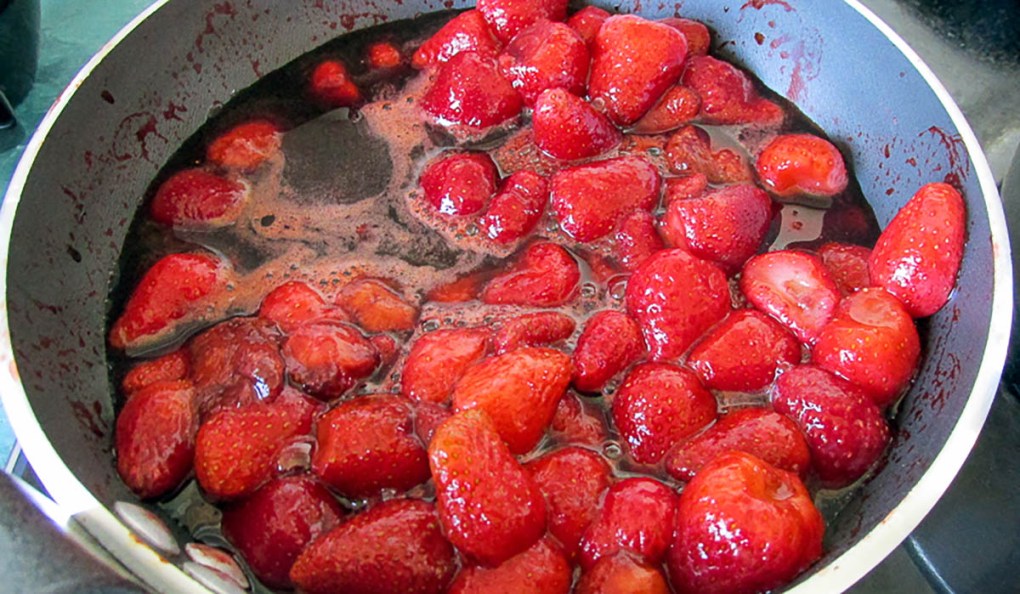
I have a few cups of strawberries in the freezer and the last of the berries off the garden. To make the most of the final berries I am making this strawberry balsamic sauce to capture the taste of summer.
Strawberry balsamic sauce on pancakes.
Sweet and sour
The flavour combination of sweet and sour has been around for a long time. If you can get the balance right, it is incredible. I think the combination of strawberries which are sweet and juicy with the tart flavour of a good quality balsamic vinegar is perfect.
Multi-use sauce
This sauce has many uses and is a great way to keep the taste of summer in the fridge for a few weeks. This sauce is an excellent topping on ice cream, pancakes, a cheesecake, cake, Panna cotta or even added to a smoothie. Alternatively, you can turn this sauce into jellies, if you do be warned the kids won’t want to eat them.
Strawberry balsamic sauce recipe
Ingredients
¼cup balsamic vinegar
2 cups strawberries
2tbsp. honey
1tbsp. fresh lemon juice
1tsp. vanilla extract
¼tsp. salt
Strawberries cooking down.Strawberry balsamic sauce on pancakes.
In a pan heat up the balsamic vinegar over high heat.
When the vinegar begins to bubble, turn the heat down to medium, let it simmer until it has reduced by half.
When the vinegar is thick and syrupy in texture, add the strawberries to the pan.
Then add the honey, lemon, vanilla and salt.
Simmer the mix over a medium heat until the strawberries break down, anywhere from 20 30 minutes.
For a smoother sauce blend it then strain.
Store the sauce in the fridge for up to a week. Store the sauce in the fridge for up to a week.
Nutrition
Per Serving: 16 calories; 0 g fat; 4 g carbohydrates; 0 g protein
Equipment
Saucepan
Spoon
Measuring spoons
Measuring cups
Blender
Sieve
Nutritional disclaimer
Nutrition information is provided as an estimate based on the ingredients used and available in my area (New Zealand). The nutritional information is here to help you understand the recipe; I use MyFitnessPal to generate my estimates. For more accurate nutritional information, please use a nutritional calculator with the ingredients in your area.
Easy meals are what I live for, this salad one of the easiest things to make and so tasty it is ridiculous.
A classic with a spin
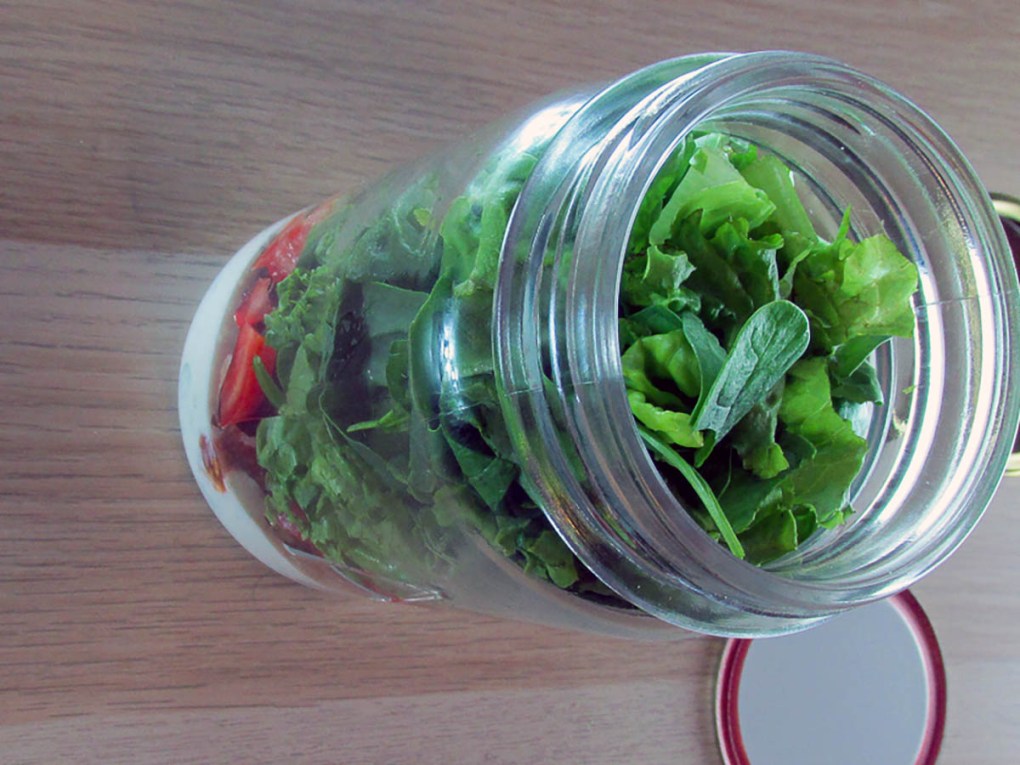
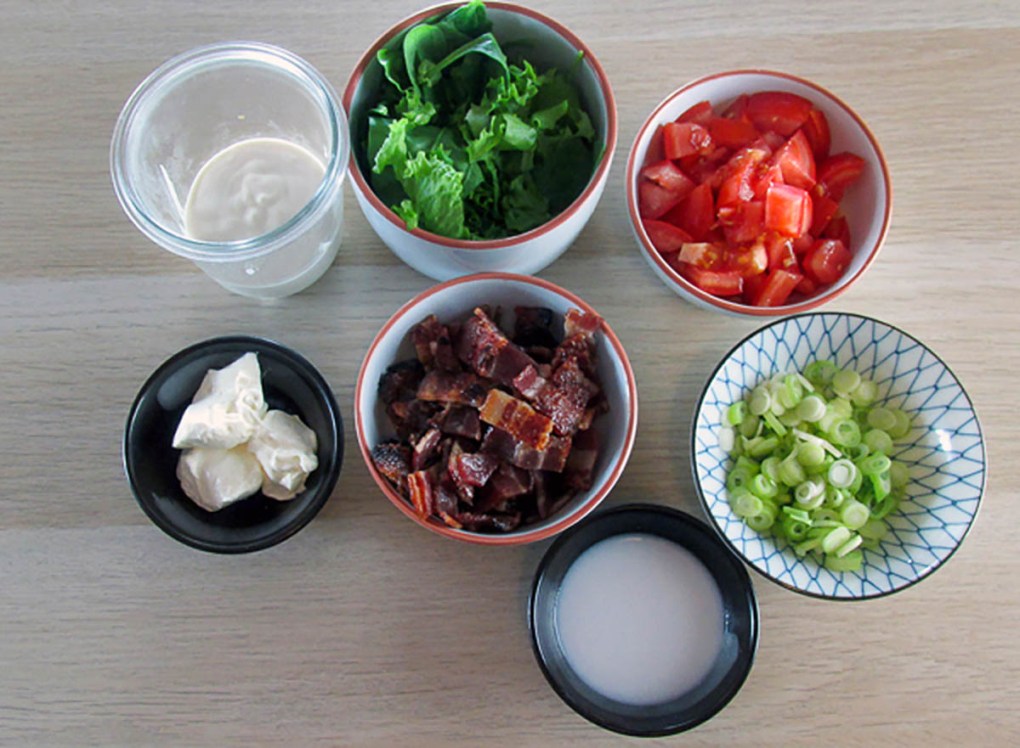
Bacon, lettuce and tomato in a jar with a simple dressing. I love this salad as a take to work lunch option. On the rare occasion that we have bacon leftover from breakfast this is what I use it for. Bonus points for a plastic free meal when you use a big glass jar.
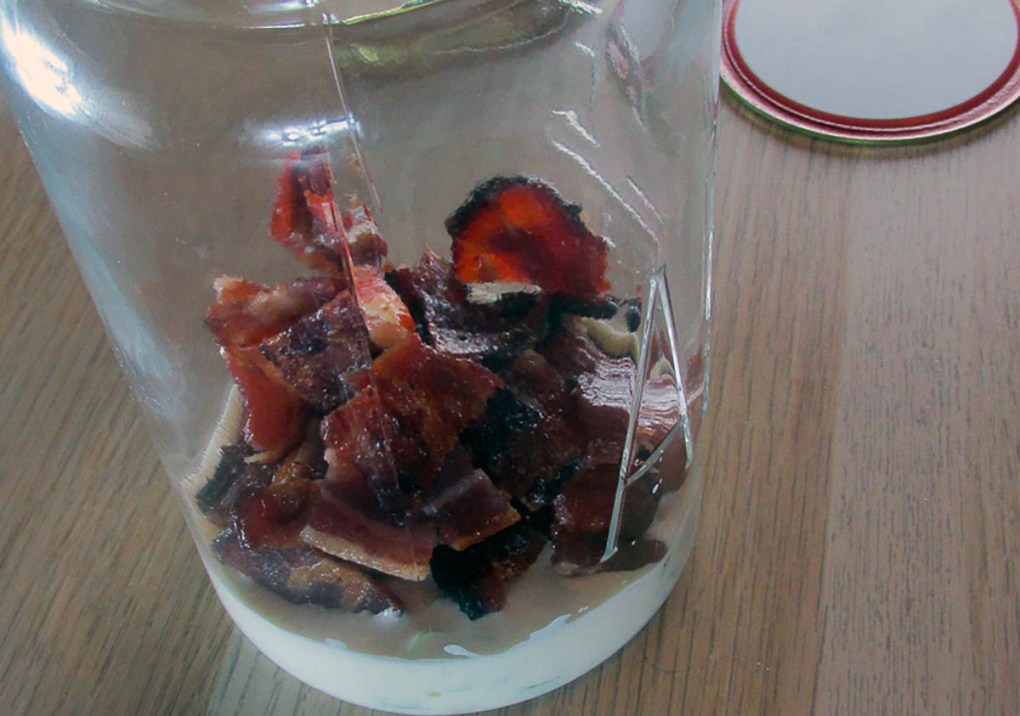
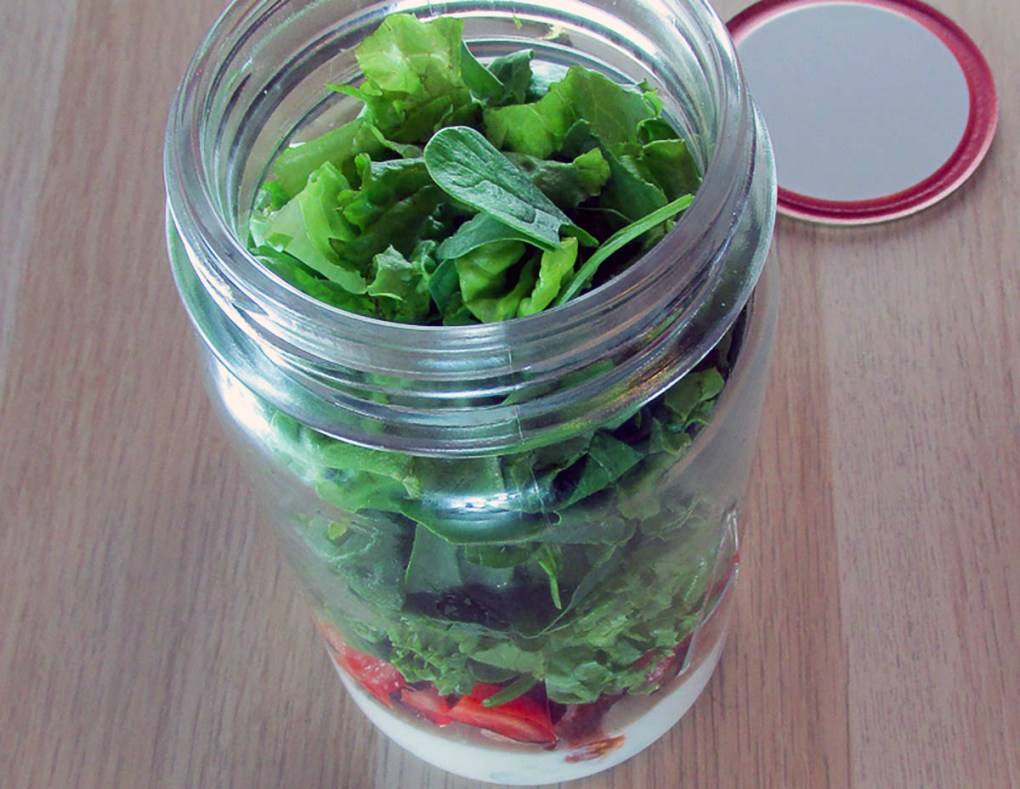
Make the dressing and put some in the bottom of the jarAdd the bacon to the jarNext add the tomatoFinally add the lettuce to the jarSalad ready for a shake and serve
In the bottom of a jar mix together the mayo, milk, sour cream, salt and pepper.
Add the bacon to the jar followed by the spring onions, tomatoes, iceberg lettuce, and then the cos lettuce.
Nutrition
Per Serving: 239 calories; 20 g fat; 11 g carbohydrates; 8 g protein
Equipment
Mason jar
Fork or whisk
Knife
Chopping board
Measuring cups
Measuring spoons
Nutritional disclaimer
Nutrition information is provided as an estimate based on the ingredients used and available in my area (New Zealand). The nutritional information is here to help you understand the recipe; I use MyFitnessPal to generate my estimates. For more accurate nutritional information, please use a nutritional calculator with the ingredients in your area.
Not so long ago there was a little boy that had a very limited diet. If was not a white carbohydrate or a sausage he wasn’t interested. The only vegetable he would eat was a potato. Fast forward a few years and that same boy now has a diet that includes carrots, peas, broccoli, kale and even the odd bit of lettuce. It was not an easy journey from ‘only potato’ to ‘can I try that?’. It took a great deal of patience, honesty and building trust.
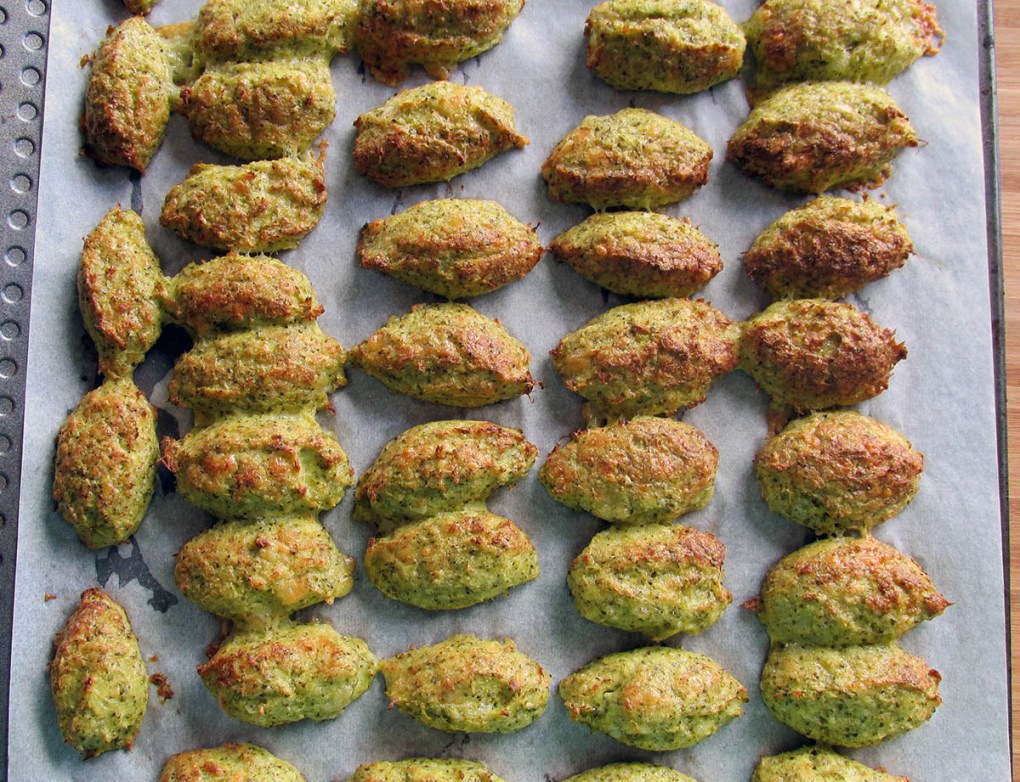
Courgette tots
Broccoli and beyond
Broccoli tots were our first real win on the vegetable front. I don’t know what it was that made them so successful with the little man but every time I made them he (and everyone else) cleared them out. They have been requested and enjoyed on a regular basis since then.
Eat with the seasons
We try to eat with the seasons as much as possible, at the moment we have an abundance of courgettes. There is only so much courgette ravioli a girl can make before losing her mind, so I decided to try making a new variation of broccoli tots.
This recipe kills two birds new veg for the kids to try out and Jaime not having to find a new girlfriend because of ravioli. This recipe is just the same as the original broccoli tots, it is only the preparation of the courgette is the key difference. The high water content in courgettes means that you have to take the extra step of removing the excess liquid, if not you have some soggy tots.
Courgette tots recipe
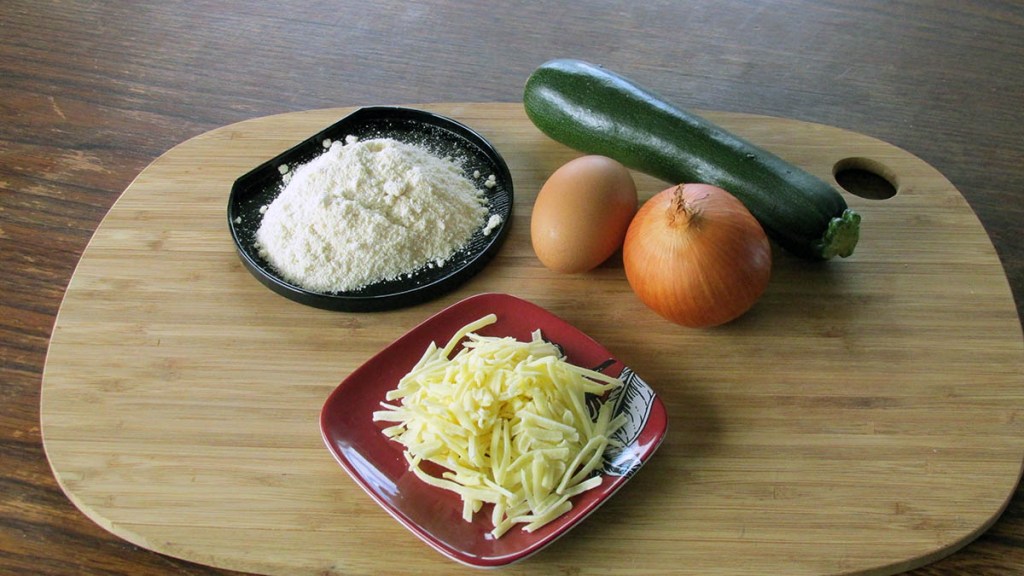
Courgette tots ingredients
Ingredients
1 cup courgette, grated
1 egg
1/4 onion, minced
1/4 cup cheddar cheese, grated
2 tbsp. seasoned coconut flour salt and black pepper to taste
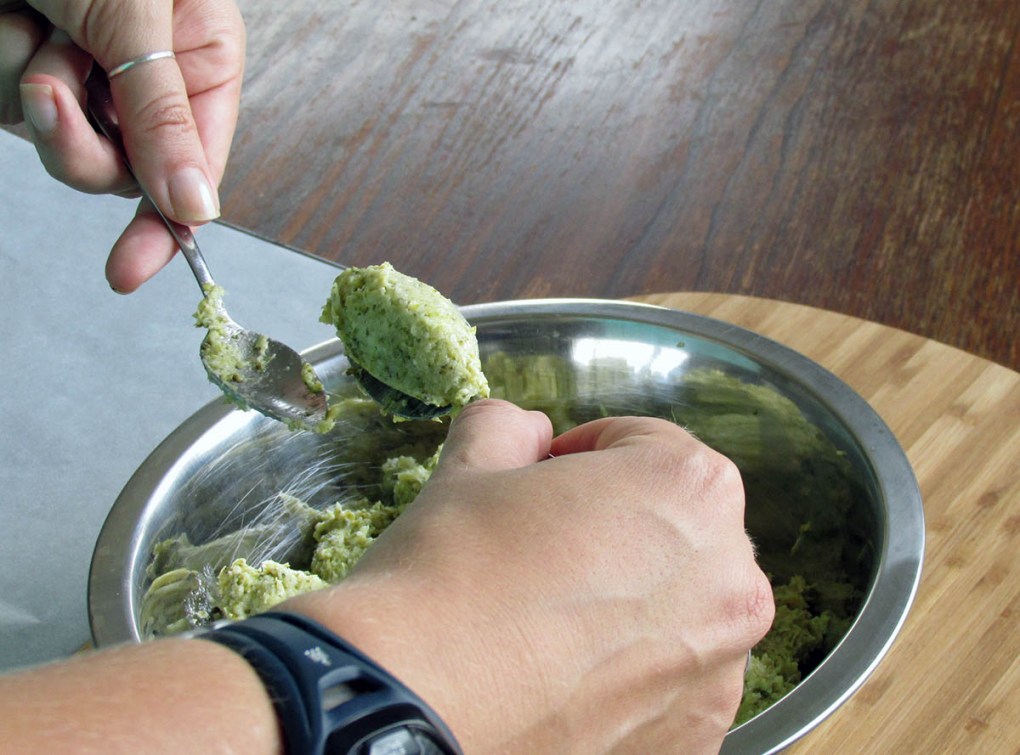
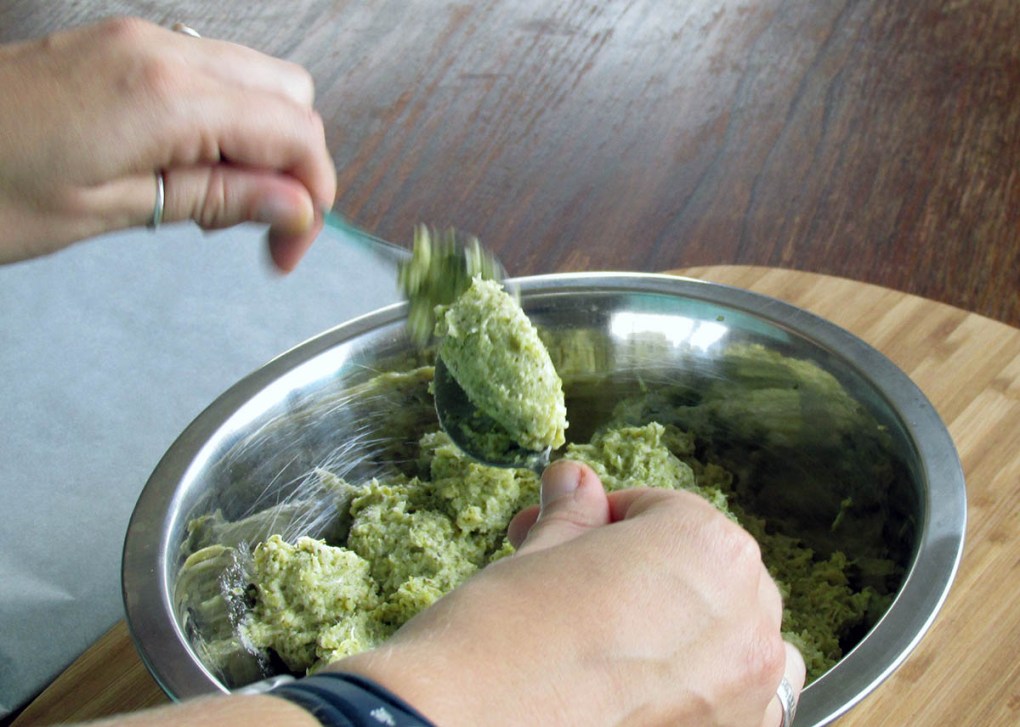
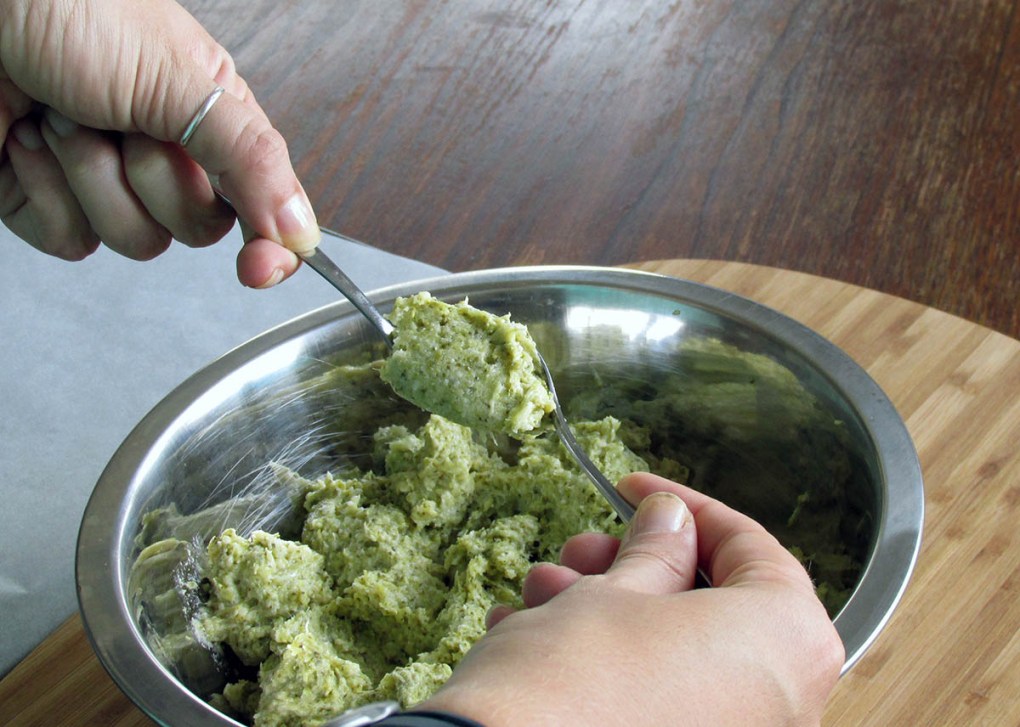
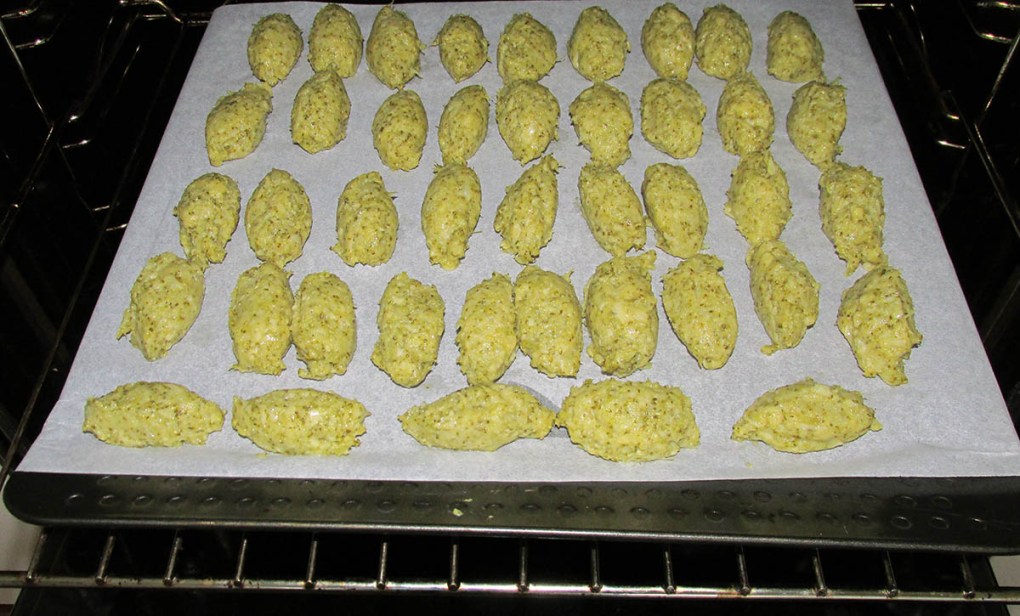
In a medium bowl, combine all of the ingredients and season with salt and pepper to taste.Take two teaspoons and create a Quenelle, scoop up a mound of the mixture,Pass the mixture from one spoon to the other gently smoothing into an oval shape.Pass the mixture from one spoon to the other gently smoothing into an oval shape.Place on the baking trayBake for 16-18 minutes, turning halfway through cooking until golden.Serve hot
These tots last seconds on the plate; truth be told they are a huge hit with everyone. They are a little messy and can take some time to make, but they are worth the effort.
Credit: Cath @ easycleaneats
Ingredients
1 cup courgette, grated
1 egg
1/4 onion, minced
1/4 cup cheddar cheese, grated
2 tbsp. seasoned coconut flour
salt and black pepper to taste
Directions
Preheat the oven to 200 degrees C/ 400 degrees F
Line a baking tray with baking paper or a silicone liner
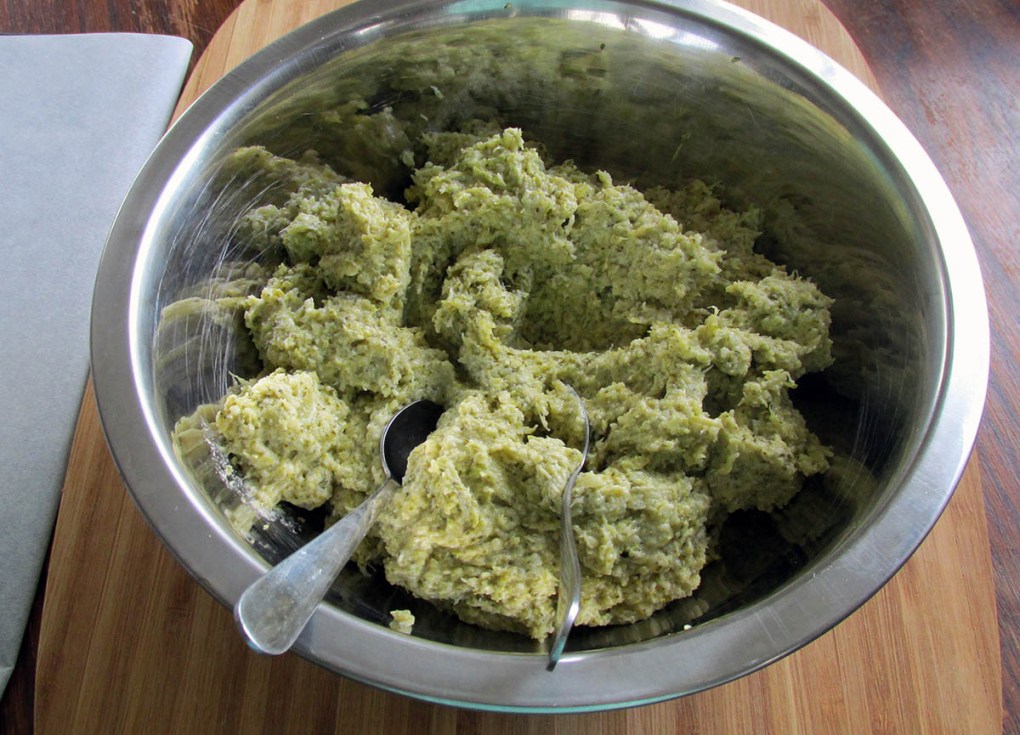
Grate the courgette and press it to remove any excess liquid, I like to use a clean cotton dishtowel.
In a medium bowl, combine all of the ingredients and season with salt and pepper to taste.
There are two ways to make the tots
1. take a tablespoon, get a heaped spoon of the mixture, and roll it into an oval.
2. take two teaspoons and create a Quenelle, scoop up a mound of the mixture, pass the mixture from one spoon to the other gently smoothing into an oval shape.
Place on the baking tray and bake for 16-18 minutes, turning halfway through cooking until golden.Place on the baking tray and bake for 16-18 minutes, turning halfway through cooking until golden.
Nutrition
Per Serving: 38 calories; 2 g fat; 2 g carbohydrates; 2 g protein
Equipment
Baking tray
Baking paper or a silicone liner
Grater
Kitchen towel
Mixing bowl
Tablespoons
Tongs
Nutritional disclaimer
Nutrition information is provided as an estimate based on the ingredients used and available in my area (New Zealand). The nutritional information is here to help you understand the recipe; I use MyFitnessPal to generate my estimates. For more accurate nutritional information, please use a nutritional calculator with the ingredients in your area.
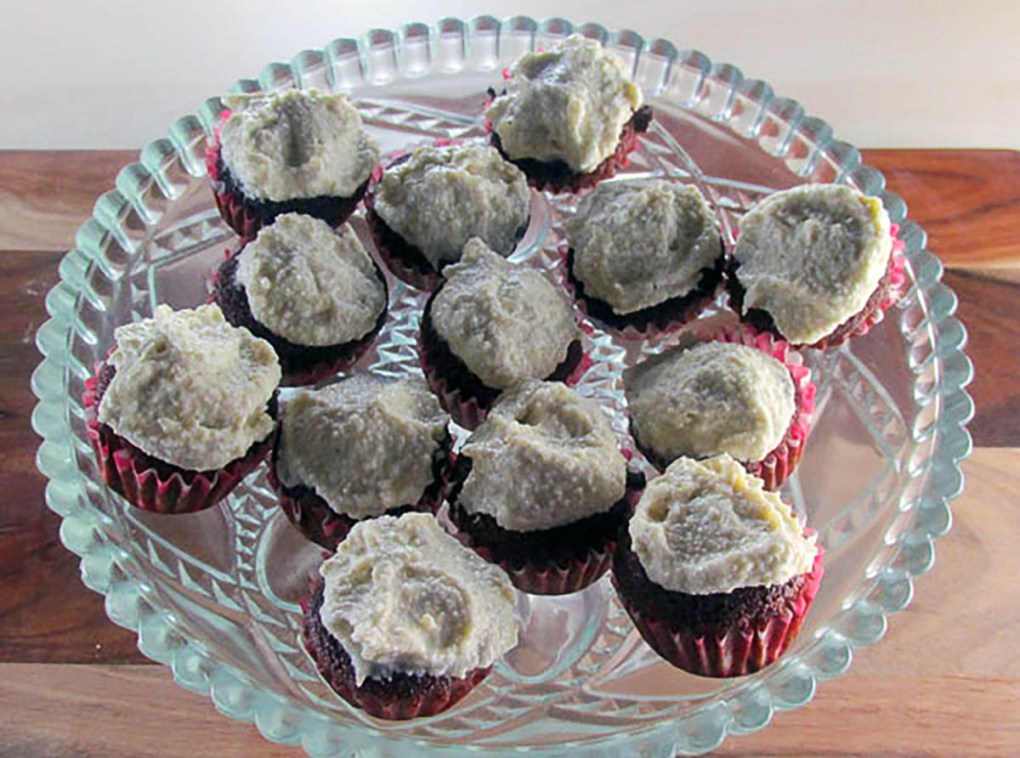
I realised recently that I don’t post a lot of sweet treats so thought I would give your something sweet this week. This is my grain-free vanilla cupcakes with sugar-free frosting. The cake mix is soft and airy which gives these cupcakes a real cake texture and taste without any sugar or grains.
Making it feel like real cake
I often find that making cakes taste like cakes when you aren’t using standard cake ingredients is difficult. The light and fluffy texture are not easy to achieve unless you know that eggs hold the key. It has taken me a while to get the technique right, but I think I have it. Egg whites whisked to stiff peaks that are folded into a cake batter make grain free cakes light, fluffy and airy. You would swear you were biting into a sponge cake.
Coconut flour
Jaime has come to a decision that he doesn’t like coconut flour; he doesn’t like cookies and cakes baked with coconut flour. I didn’t have the heart to tell him that the tray of cupcakes he ate in one afternoon was made from coconut flour, I didn’t want to ruin his afternoon. When you bake with coconut flour, it is a good idea to remember that not all coconut flour is made equally. Sometimes coconut flour can be very dry, it will soak up all the liquid in your recipe and leave you with something difficult to eat. When I bake cakes with a new bag or brand of coconut flour, I like to leave the batter to hang out for 10 minutes. This is to make sure that the flour doesn’t steal all the moisture in my cake. If the flour is super thirsty, you can add a little more liquid and save the cake before you bake.
The cake mix is soft and airy which gives these cupcakes a real cake texture and taste without any sugar or grains.
Credit: Cath @ easycleaneats
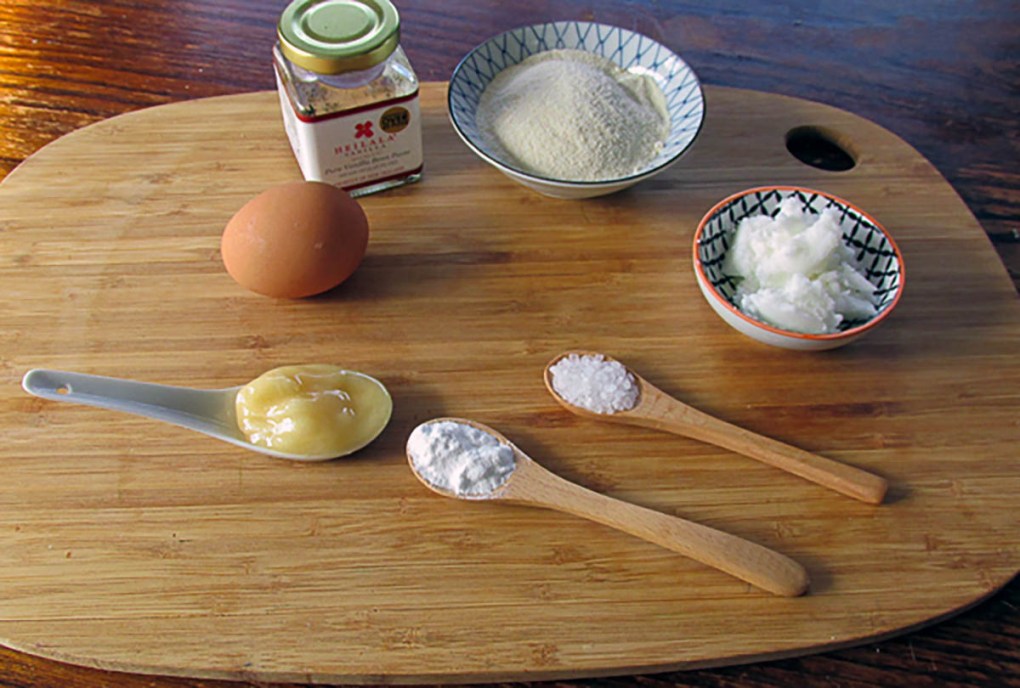
Ingredients
1/4 cup coconut flour
1/8 tsp. salt
1/8 tsp. baking soda
3 eggs
1/4 cup coconut oil
2 tbsp. honey
1 tbsp. vanilla bean paste
Directions
Instructions
Separate the egg whites and yolks.
Put the egg whites in a clean mixing bowl and whisk until they are stiff peaks.
Set the egg whites to one side
Put the remaining ingredients into a food processor and blend together to create a smooth batter.
Gently fold the egg whites into the batter.
Line a 12- cup muffin pan with cupcake wrappers, the number of cakes you get will depend on how large your cake pan is
Pour the batter into the cupcake wrappers, don’t overfill the cupcake wrappersPour the batter into the cupcake wrappers, don’t overfill the cupcake wrappers
Bake at 180 degrees C/ 350 degrees F for 20 minutes
Allow the cakes to cool completely before icing
Nutrition
Per Serving: 80 calories; 6 g fat; 5 g carbohydrates; 2 g protein
Equipment
Whisk
Bowl
Food processor
Muffin tin
Cupcake wrappers
Measuring cups
Measuring spoons
Nutritional disclaimer
Nutrition information is provided as an estimate based on the ingredients used and available in my area (New Zealand). The nutritional information is here to help you understand the recipe; I use MyFitnessPal to generate my estimates. For more accurate nutritional information, please use a nutritional calculator with the ingredients in your area.
It is a summer of salads!! The warm months mean lots of fresh veggies and endless possibilities for salad. Anyone that knows me knows I could eat salad for every meal, I love them, lots. Most of the time I stick with the simple mixture of protein, lettuce leaves, crunchy veg and a simple dressing. On occasion, I like to make something a little fancier.
Classic Waldorf salad
The original version of the Waldorf salad was made with apples, celery and mayonnaise. Later on, chopped walnuts were added to the dish and became integral. Every time I have seen Waldorf on a menu, it had walnuts included, thanks to my stupid nut allergy I have never had the pleasure of enjoying the salad. Until now.
Switch it up
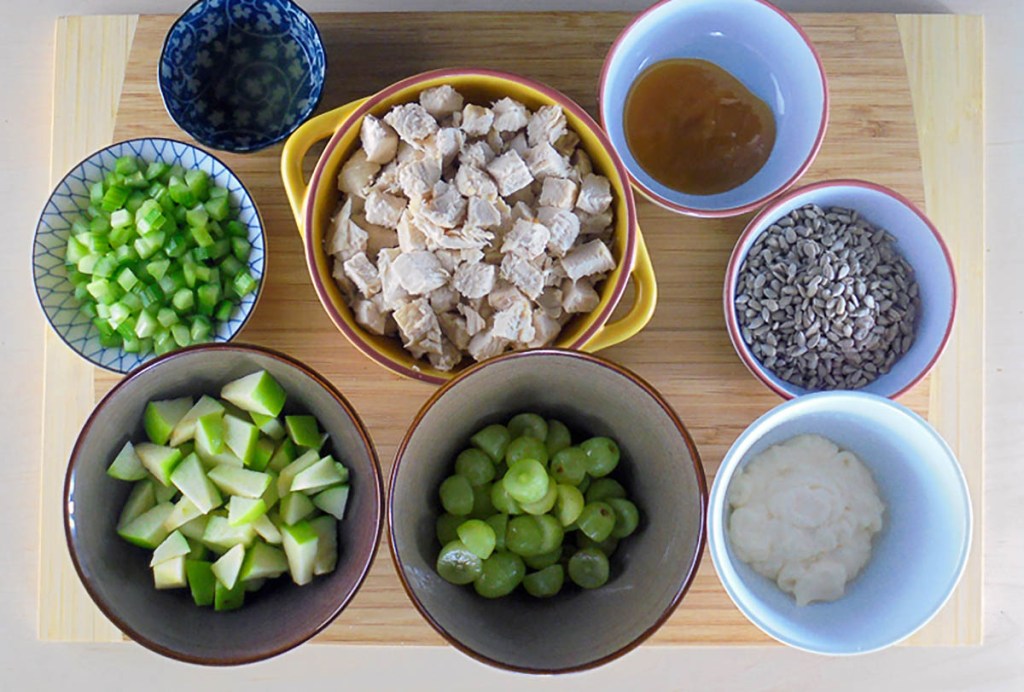
Regular visitors here will know I can’t leave things alone, I have to mess around with recipes and switch out ingredients. The Waldorf salad was a prime candidate for me to mess with. First up was an alternative to walnuts. As with many recipes, I find that switching out nuts with sunflower seeds, this means you get all the crunch with no risk of death. Next up was bumping up the protein. Generally speaking, I have a high protein diet so having meat as part of my salad is essential. In this instance, I went with some cooked and cooled chicken.
Meal prep winner
This salad is one of my favourites for mixing up a big batch and portioning out for meals for the week. I like to make a double batch of the salad and keep it in the fridge ready for lunches, snacks and easy dinners when it is too hot to make a meal.
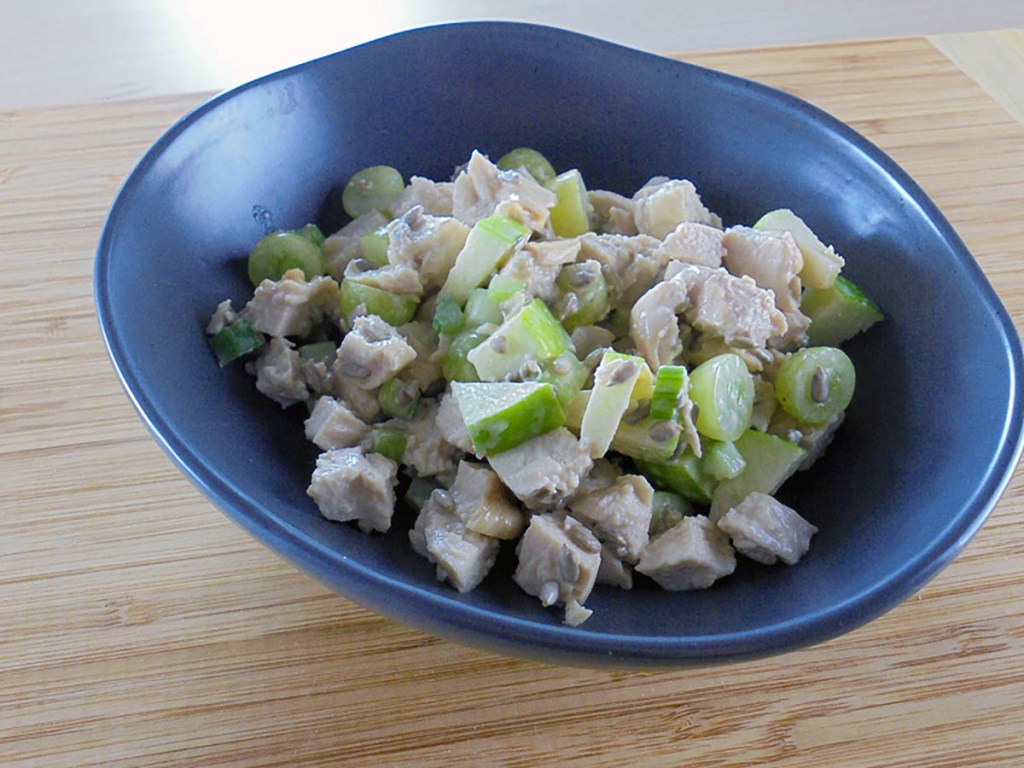
In a bowl, combine chicken, apple, celery, and seeds.
In a bowl, combine the mayonnaise, lime juice, and honey.
Season to taste.
Spoon dressing over chicken salad and toss to coat.
Nutrition
Per Serving: 262 calories; 10.6 g fat; 9.4 g carbohydrates; 11.4 g protein
Equipment
Large mixing bowl
Small mixing bowl
Whisk
Spoon
Measuring cups
Measuring spoons
Nutritional disclaimer
Nutrition information is provided as an estimate based on the ingredients used and available in my area (New Zealand). The nutritional information is here to help you understand the recipe; I use MyFitnessPal to generate my estimates. For more accurate nutritional information, please use a nutritional calculator with the ingredients in your area.
My family love chocolate, when I say love I mean it, they will eat chocolate multiple times a day if I let them. I don’t mind them eating chocolate but like to make the chocolate as healthy as possible.
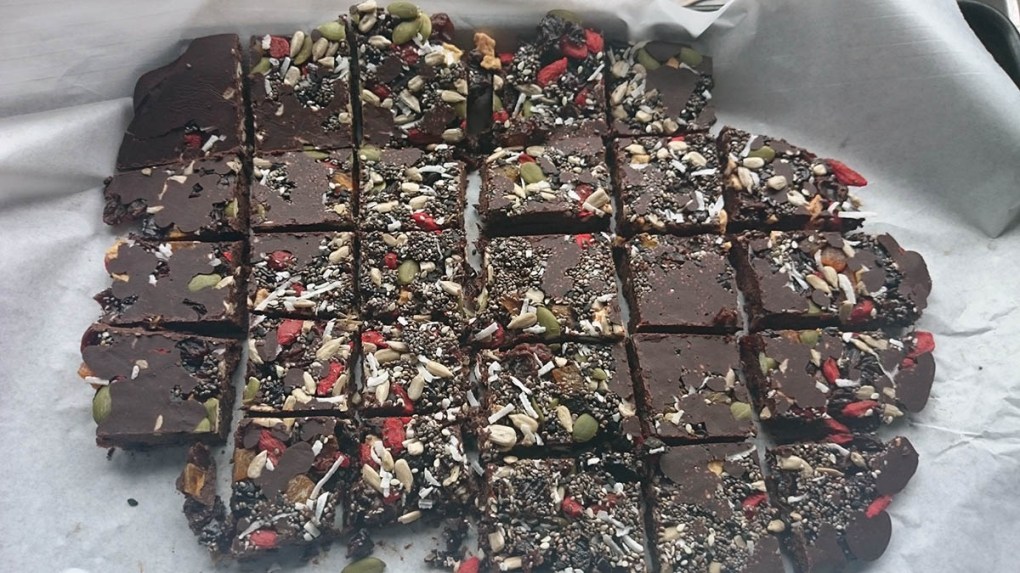
Chocolate drops ready to eat.
Slightly better for you
If you are looking for a sweet treat that doesn’t leave you feeling guilty, this could be the treat for you. The combination of chocolate, seeds and berries is perfect. You can make these up and keep them in the fridge (if they last that long), so you have a treat on hand when you need one.
Chocolate drops recipe
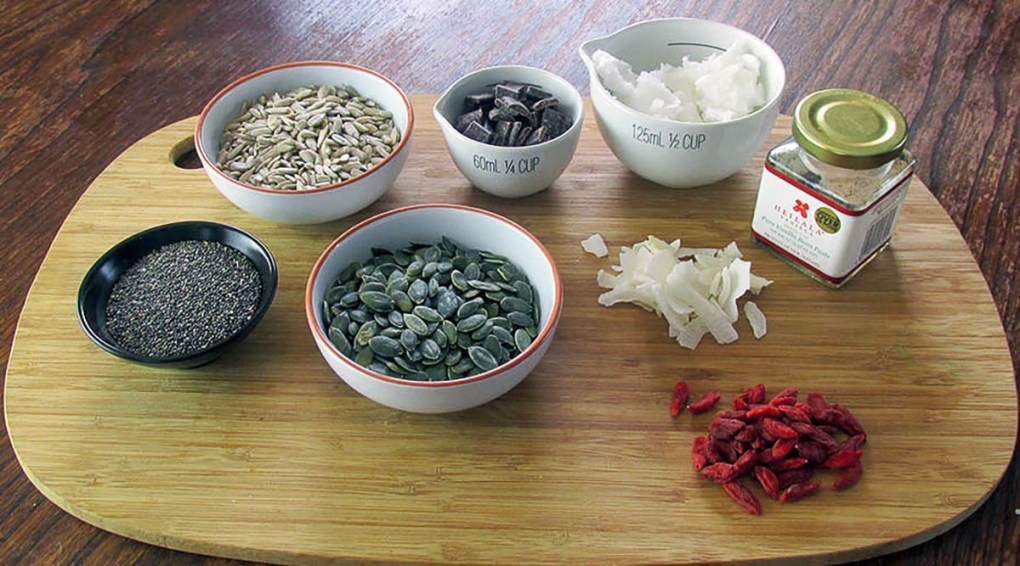
Chocolate drops ingredients
Ingredients
2 tbsp. chia seeds
3 tbsp. sunflower seeds
3 tbsp. pumpkin seeds
3 tbsp. goji berries
2 tbsp. coconut chips
1/4 cup homemade chocolate
Chocolate drops with some white chocolate drizzle.
Melt the chocolate so that it is easy to pour, I like to use a saucepan.
In a bowl mix the seeds and dried fruit.
Line a baking tray with baking paper or a silicone liner.
Pour the chocolate onto the baking tray.
Sprinkle the seed and fruit mix over the top of the chocolate and press it in slightly.
Put the chocolate into the fridge and allow it to set.
Once the chocolate is set cut it into squares.
Store the chocolate in a jar or an airtight container in the fridge.Store the chocolate in a jar or an airtight container in the fridge.
Nutrition
Per Serving: 90 calories; 6 g fat; 8.5 g carbohydrates; 3.9 g protein
Equipment
Mixing bowl
Saucepan
Spatula
Baking paper
Baking paper or a silicone liner
Knife
Chopping board
Nutritional disclaimer
Nutrition information is provided as an estimate based on the ingredients used and available in my area (New Zealand). The nutritional information is here to help you understand the recipe; I use MyFitnessPal to generate my estimates. For more accurate nutritional information, please use a nutritional calculator with the ingredients in your area.
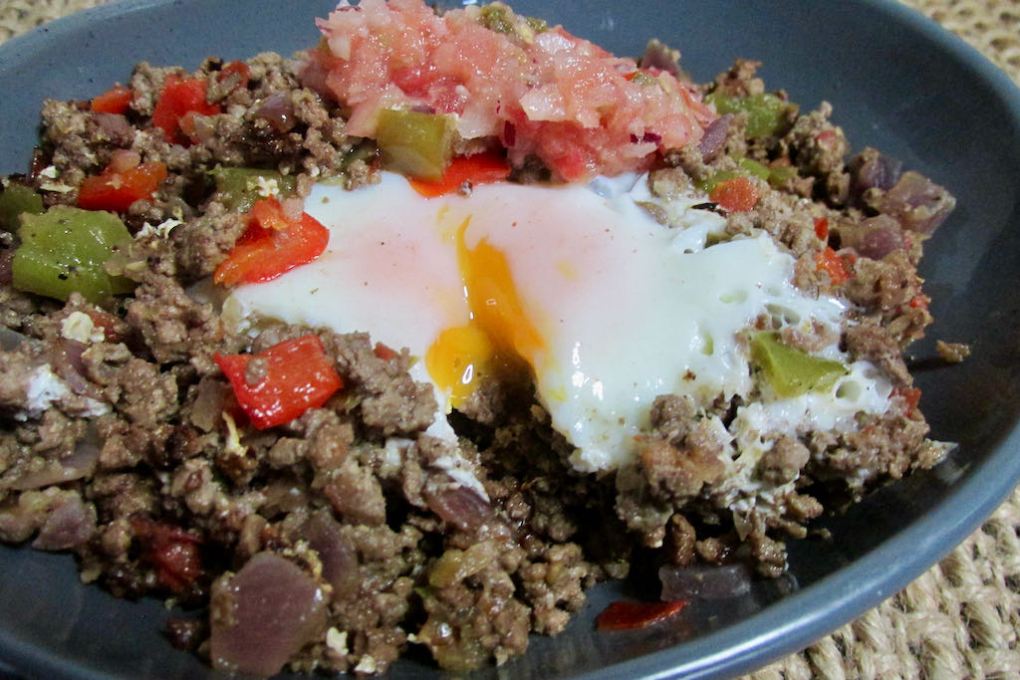
When I came up with this recipe, I wanted something different for breakfast but didn’t have anything specific in mind or much in the fridge. I know that huevous rancheros has a spicy tomato sauce, but I don’t always want a breakfast that has a tomato base. Sometimes I want something without sauce.
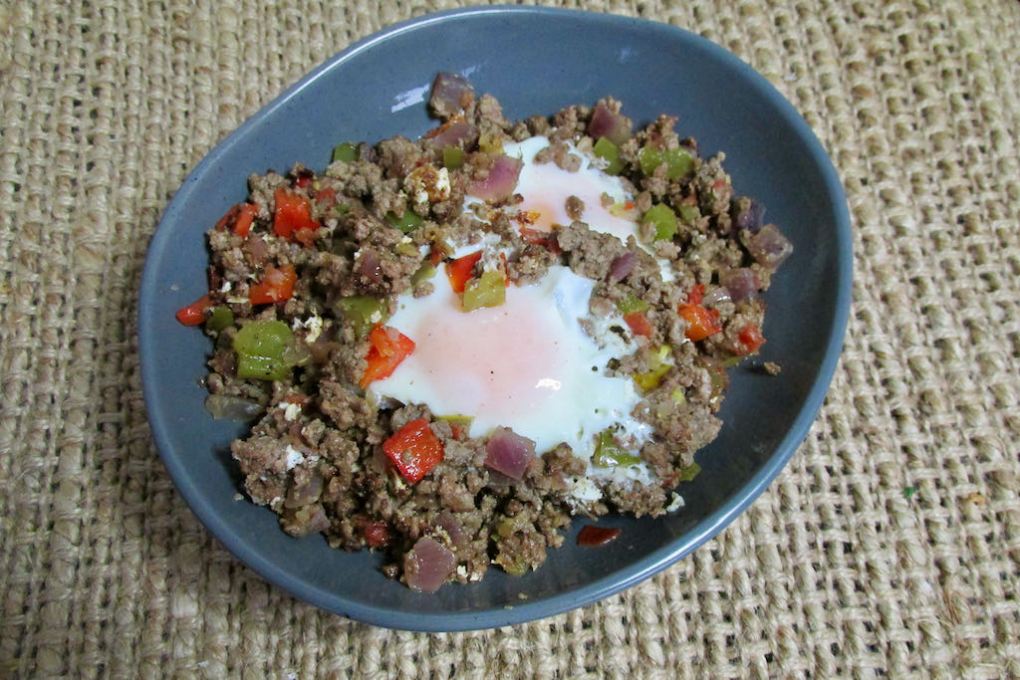
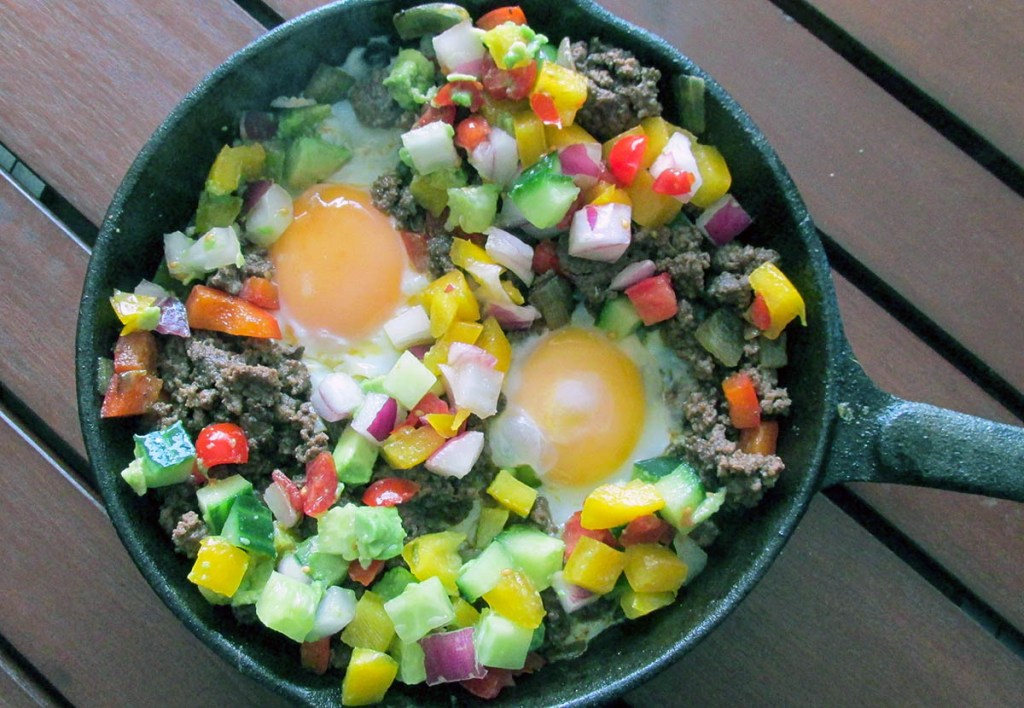
Mexican eggs from the pan
Raid the fridge recipe
The first time I tried to make Mexican eggs for breakfast, l used some leftover taco mince, salsa, and a leftover pepper. Nothing fancy or too complicated, just doing something fun with our taco leftovers. After some experimentation, l landed on a recipe that delivered everything I wanted. The spicy beef mixed with onions and peppers makes this a quick, easy and tasty option for brunch with friends or an easy weeknight meal. I’ve portioned this recipe for two people; if you want to feed more people, just double the recipe.
Mexican style eggs recipe
Mexican eggs ingredients
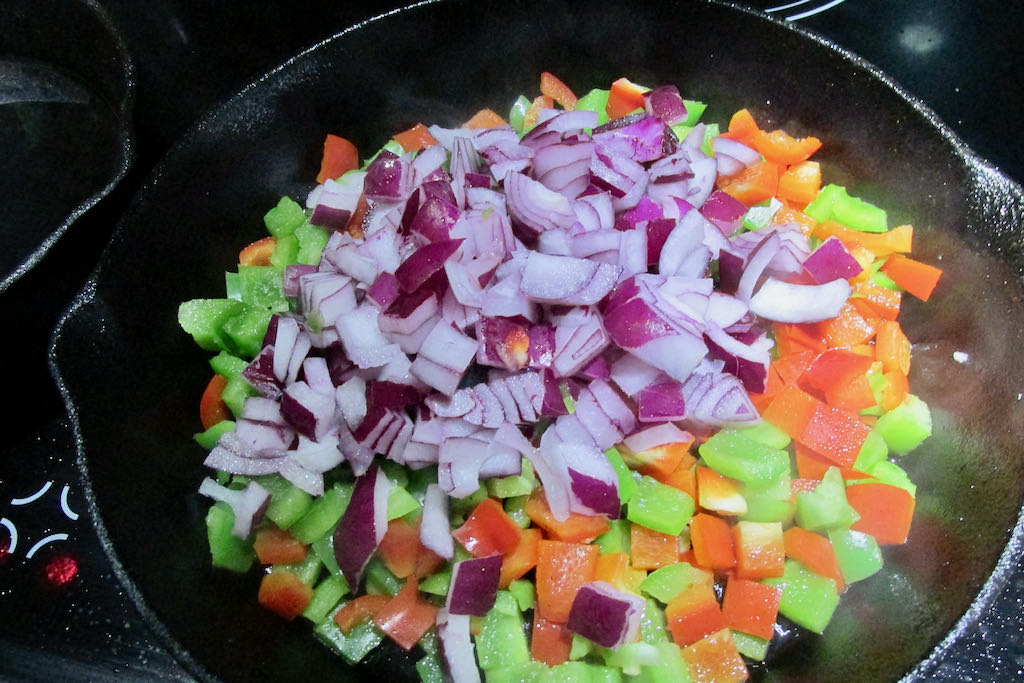
Ingredients
1 onion, chopped
1/2 green pepper, chopped
1/2 red pepper, chopped
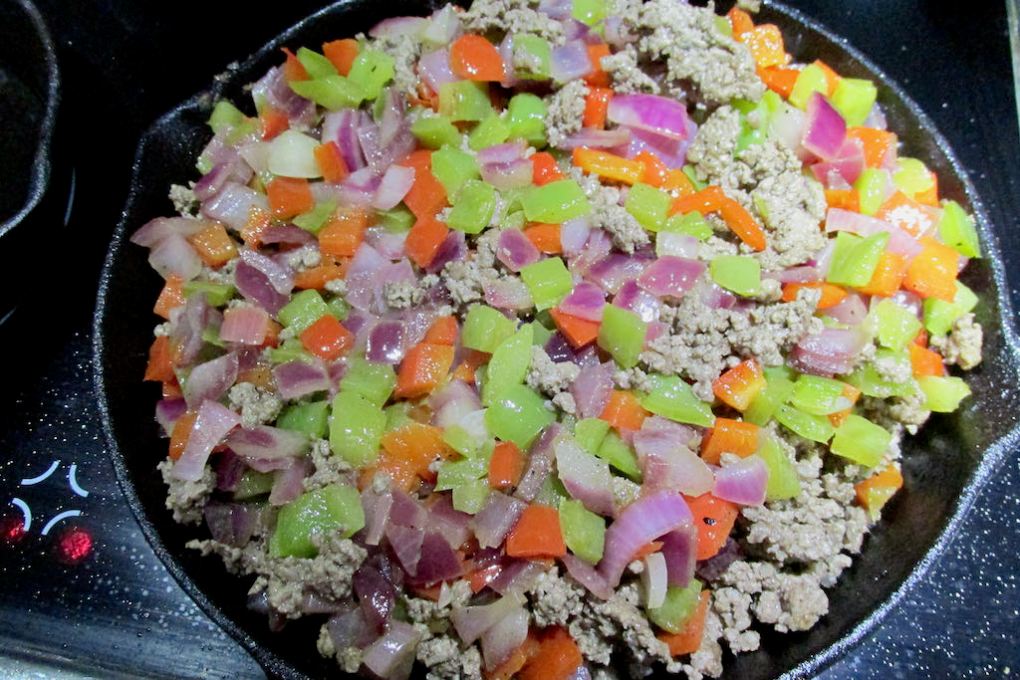
150g minced beef
Salt and pepper
1/4 cup salsa
2 eggs
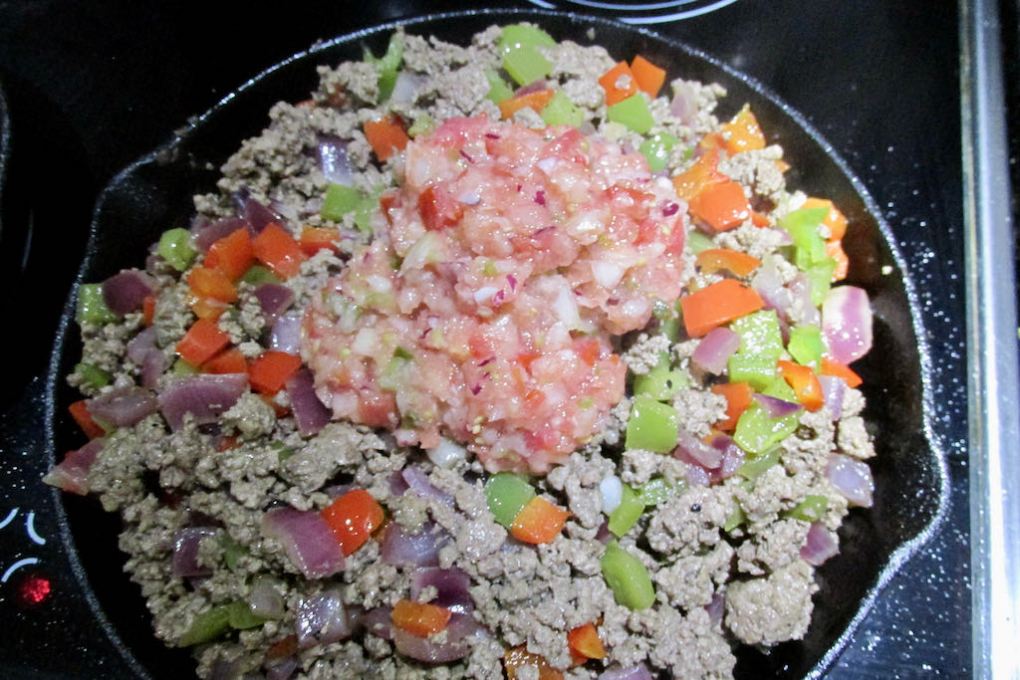
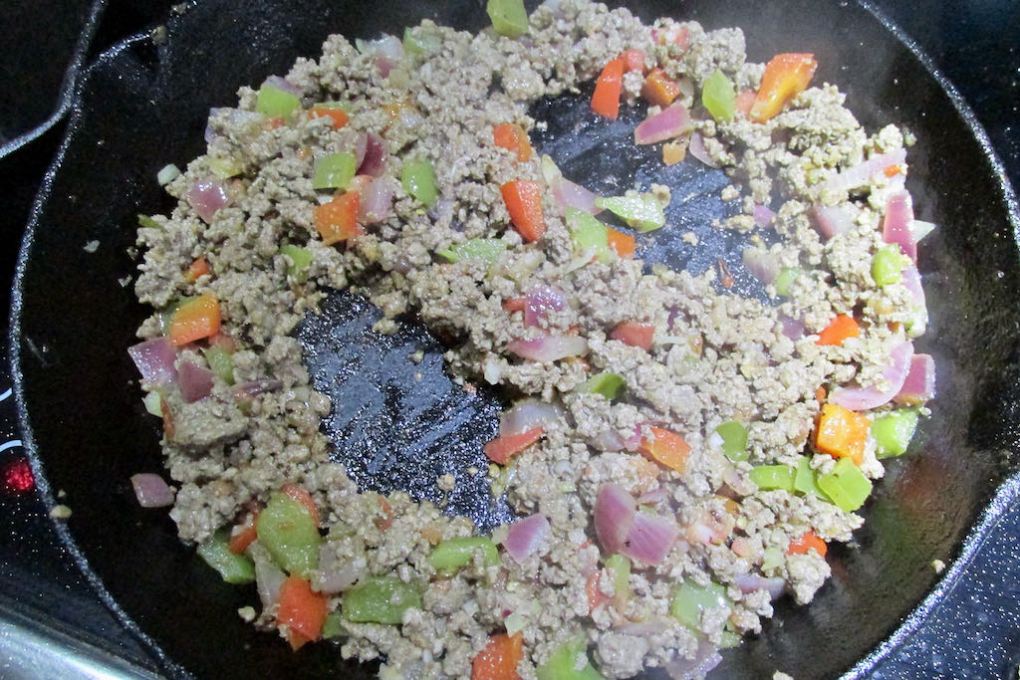
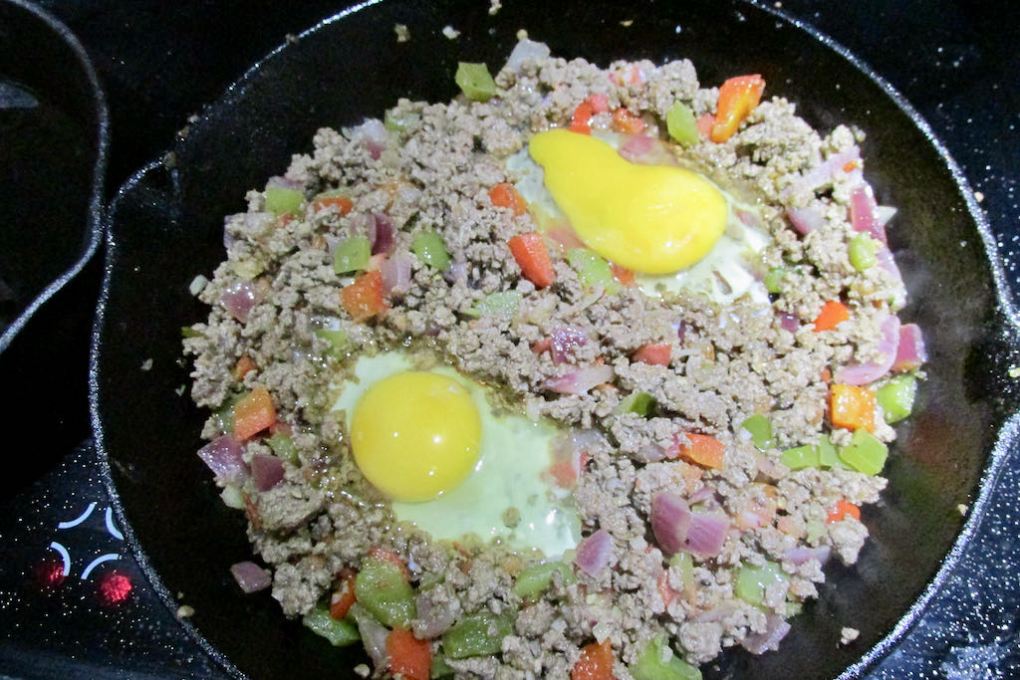
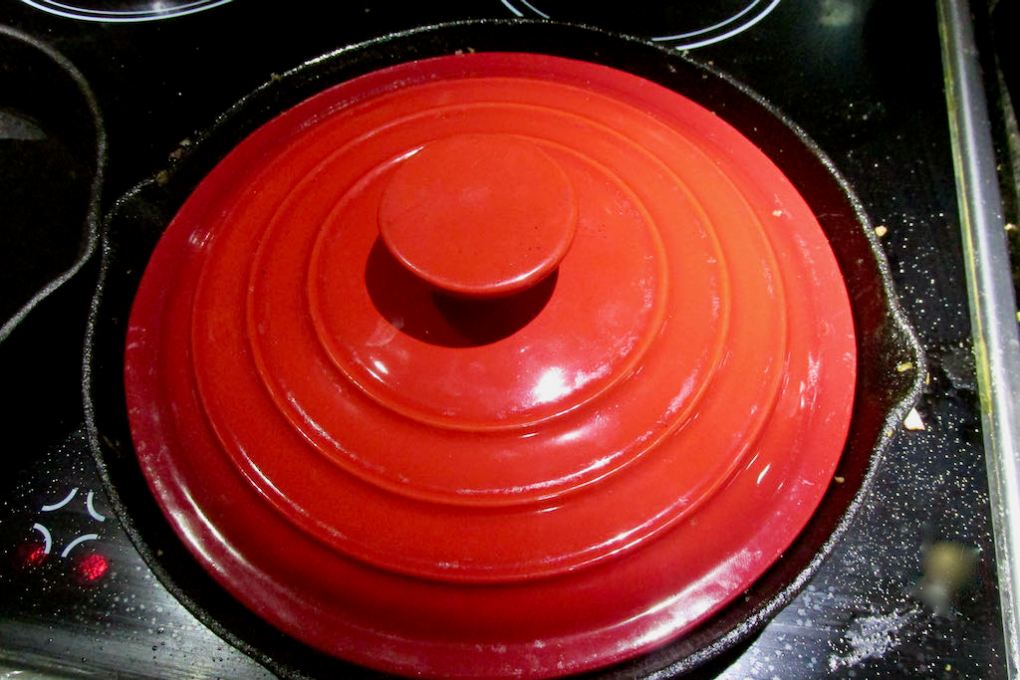
In a pan over a medium heat add the peppers.And the onions to the pan.Sauté over a medium heat.Add the mince and seasoning.Mix well.Add the salsa to the pan.Create two wells in the mixture.Crack in two eggs to the pan.Cover the pan with a lid and cook for a few minutes.When the eggs are cooked to your liking they are ready to serve.Tasty eggs ready to eat.Serve with a little bit of salsa.
In a frying pan sauté the onion and peppers over a medium heat.
Add the minced beef to the pan and season.
Add the salsa to the beef when the meat is browned.
Make two small wells in the meat, use the back of a spoon, this is where you can crack the eggs.
Cover the pan with a lid and cook for a few minutes.
When the eggs are cooked to your liking, it is ready to serve.
Nutrition
Per Serving: 202 calories; 8.1 g fat; 10.9 g carbohydrates; 21.3 g protein
Equipment
Knife
Chopping board
Scales
Measuring cup
Frying pan
Wooden spoon
Tablespoon
Nutritional disclaimer
Nutrition information is provided as an estimate based on the ingredients used and available in my area (New Zealand). The nutritional information is here to help you understand the recipe; I use MyFitnessPal to generate my estimates. For more accurate nutritional information, please use a nutritional calculator with the ingredients in your area.
I’ve been revisiting recipes that have been some of my old school recipes and family favourites that were our staples when we got started as clean eaters. I first posted this recipe in 2018; at that time, the kids were fussy, vegetables had to be hidden and disguised, and there was no potential for intense flavours or spice.
Times (thankfully) have changed, the kids have grown (like man-sized grown), and they now enjoy a wide range of foods. Things like vegetables are enjoyed, spice and chilli are consumed without complaint, and new ingredients are tried without tantrums.
As the kids have grown, they have started to enjoy recipes that they previously turned their noses up at; this is one of those recipes.
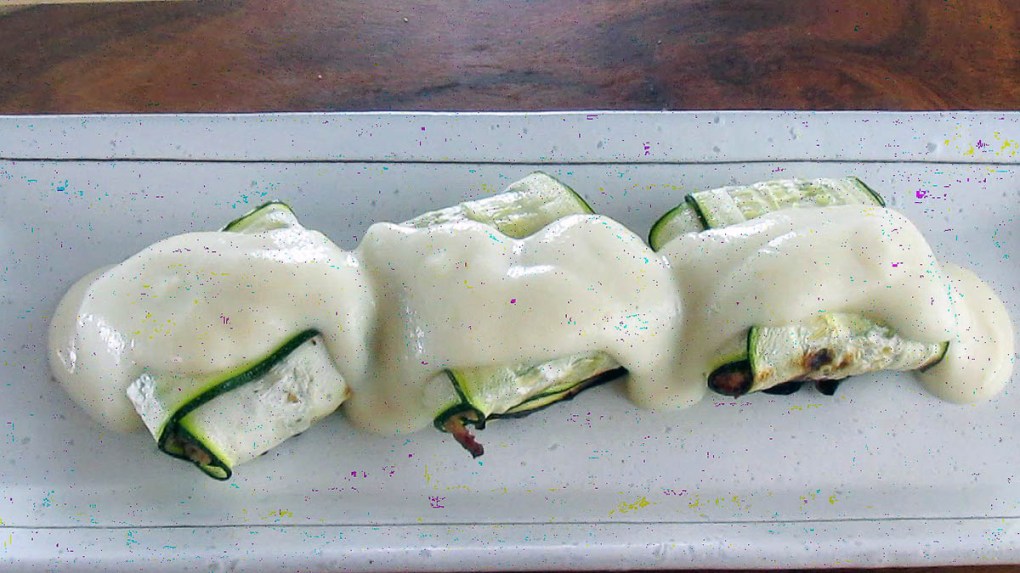
Impasta
Pasta is amazing, it tastes great, but it does come with some unpleasant side effects thanks to the carb overload. If you love ravioli but don’t like all the wheat and carbs that come along with it, you can give this a go. This impasta courgette ravioli takes a little time to make, but it is more than worth the effort.
Freezer meal
Hands up if you are busy. Who is way too tired to get in the kitchen to cook at the end of the day? Definitely not me.
My days are filled with meetings, to-do lists, emails and telling people what to do; by the time I finish work, the last thing I want to do is get stuck into cooking a meal and then cleaning up afterwards. I want to work out and spend some time with Jaime. That is why freezer meals are my favourite solutions to the challenge of a busy life. A few hours on the weekend, and you find yourself with a stack of options for dinner that can be thawed and cooked for a healthy, delicious meal for the family.
Courgette ravioli recipe
Ingredients
4 courgette
300g chicken mince
2 tbsp. olive oil
3 shallots, diced
3 garlic cloves, minced
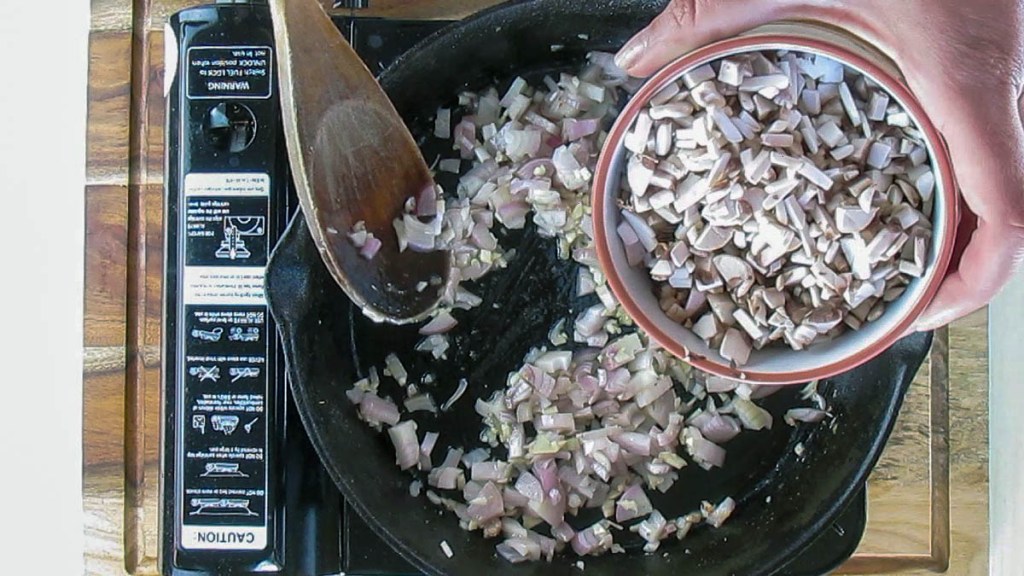
200g mushrooms diced
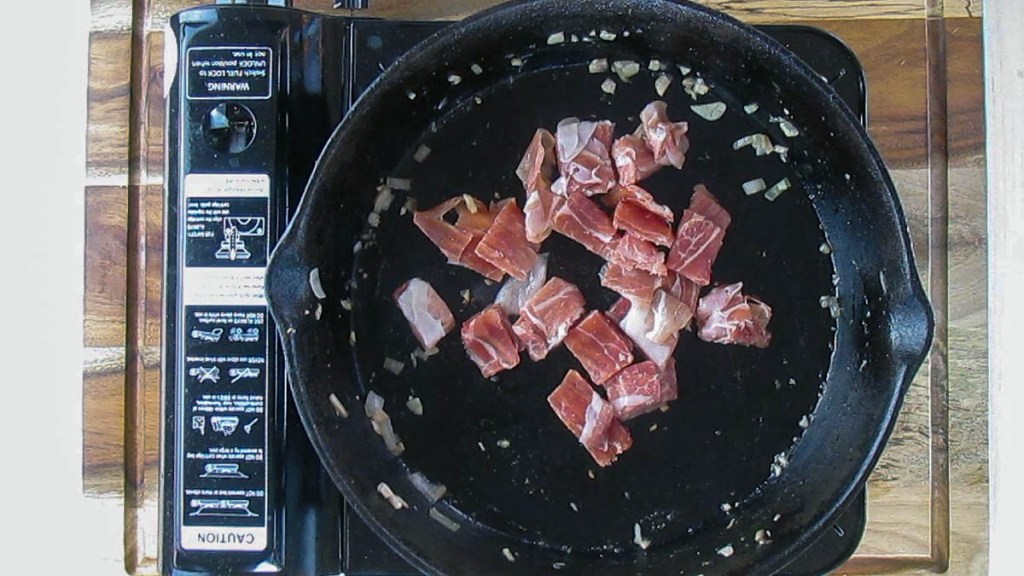
6 slices of prosciutto
1 tsp. garlic powder
1/2 tsp. chicken seasoning
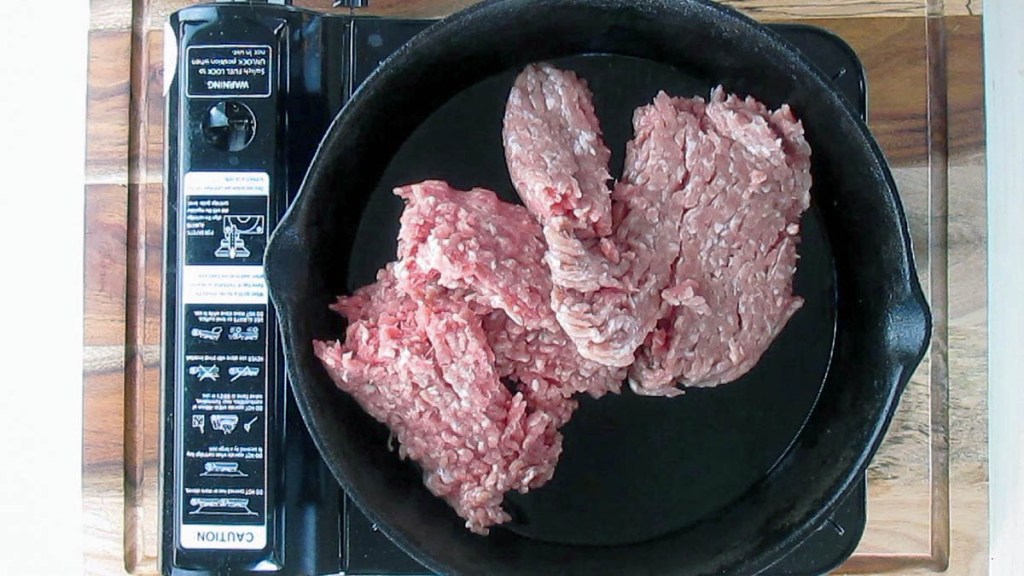
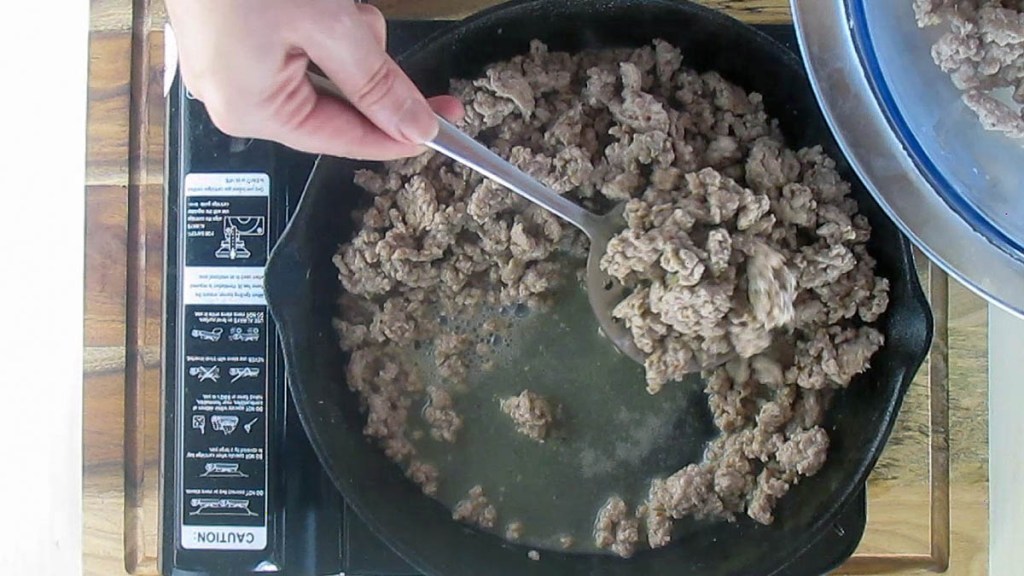
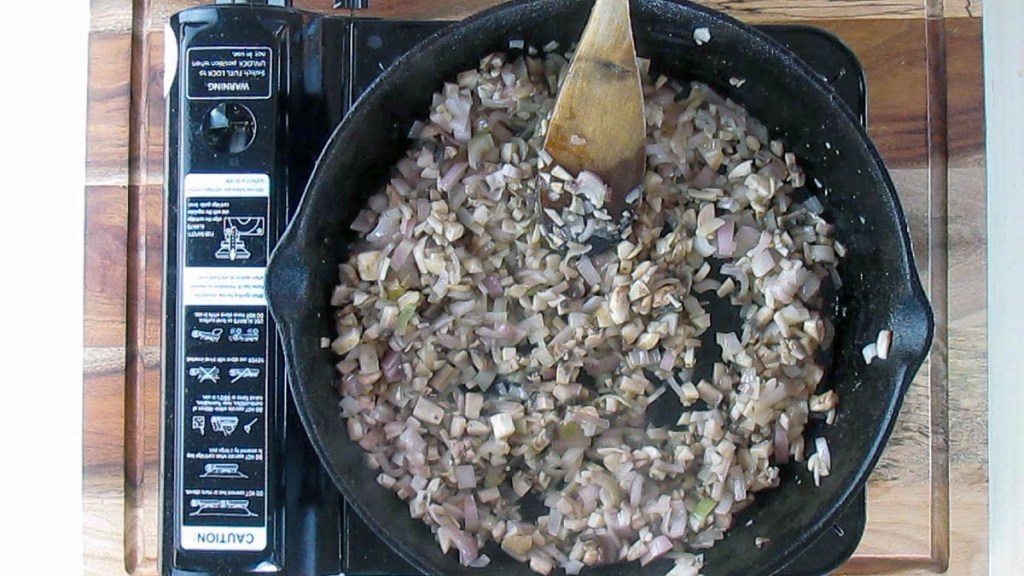
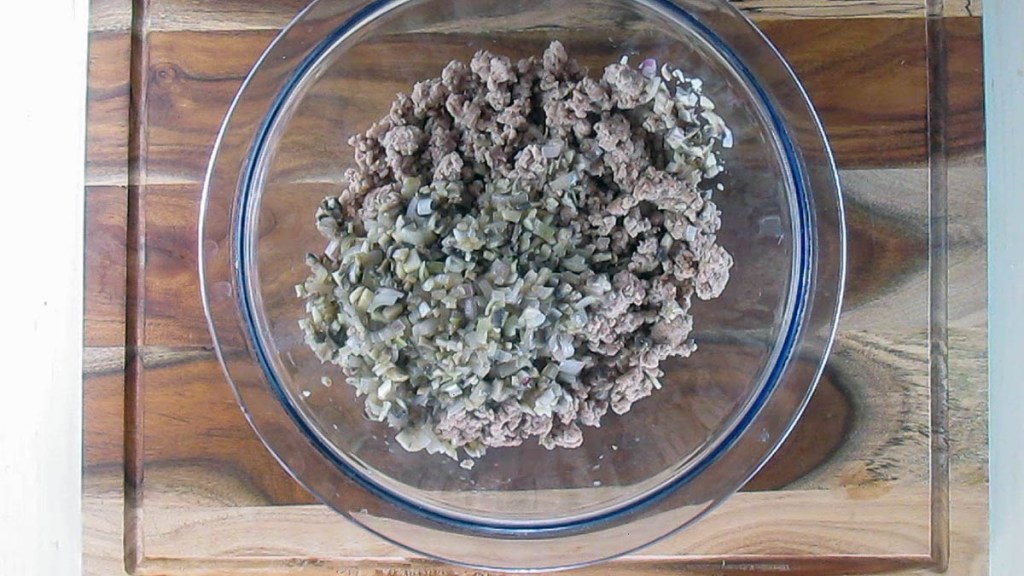
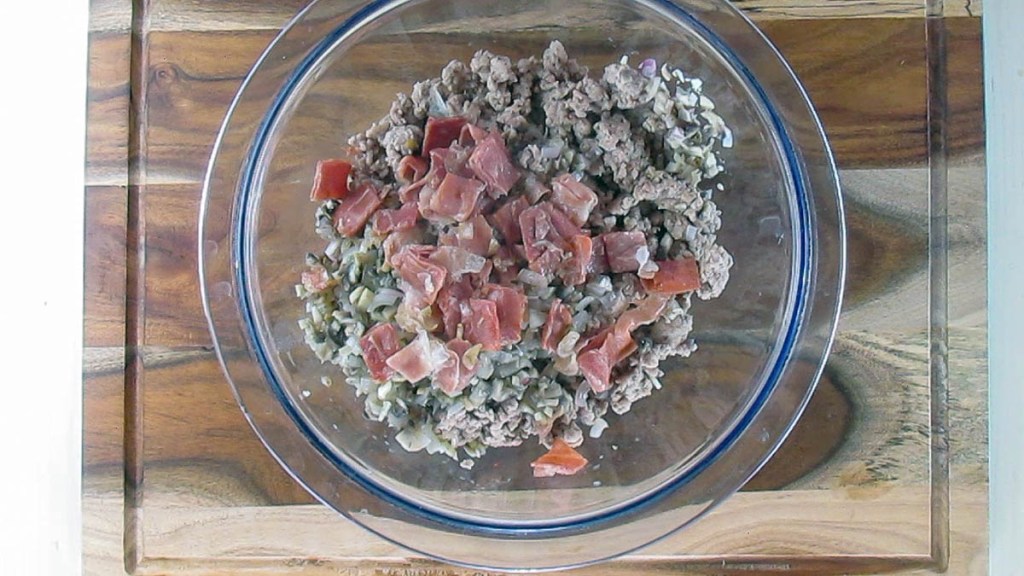
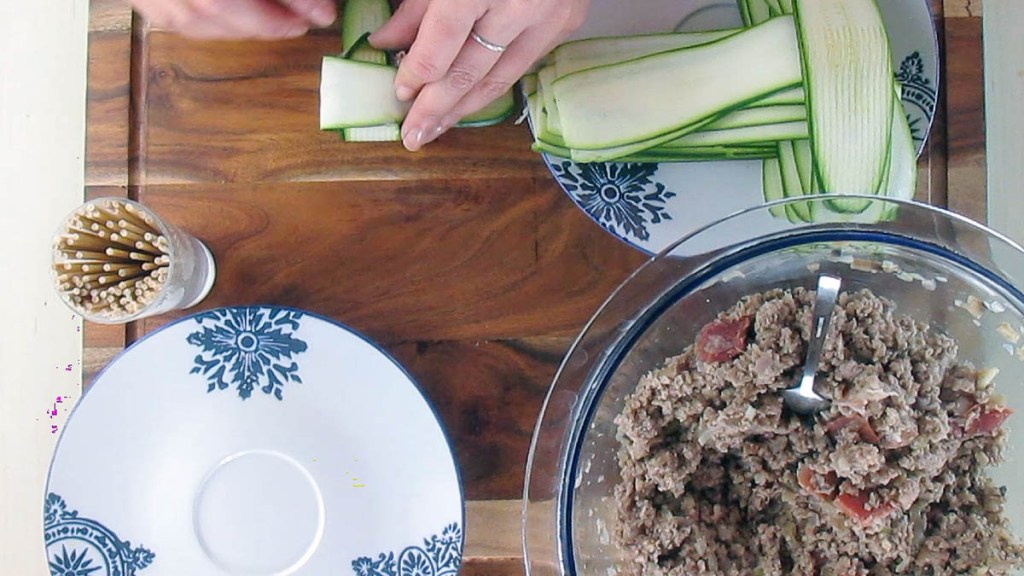
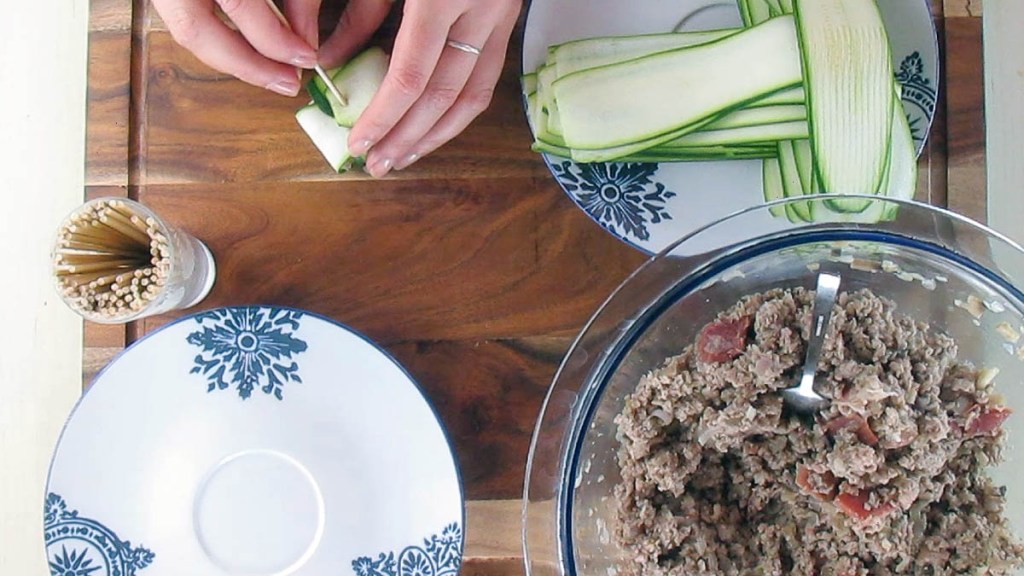
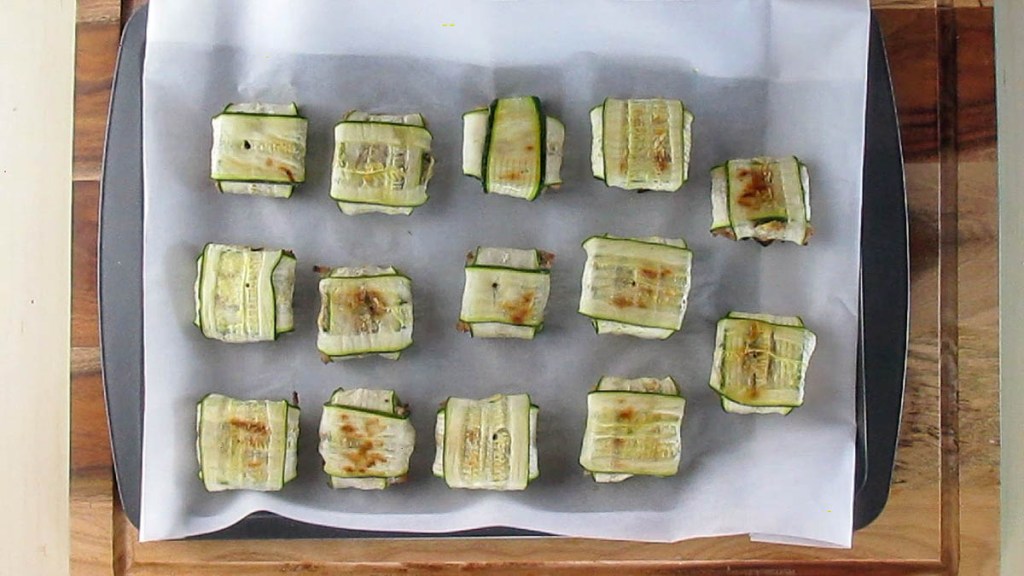
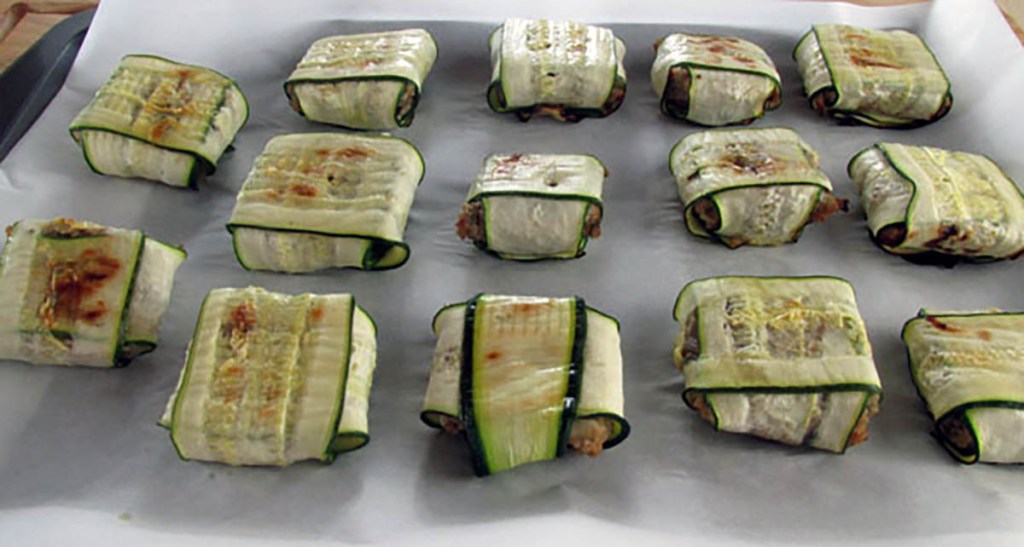
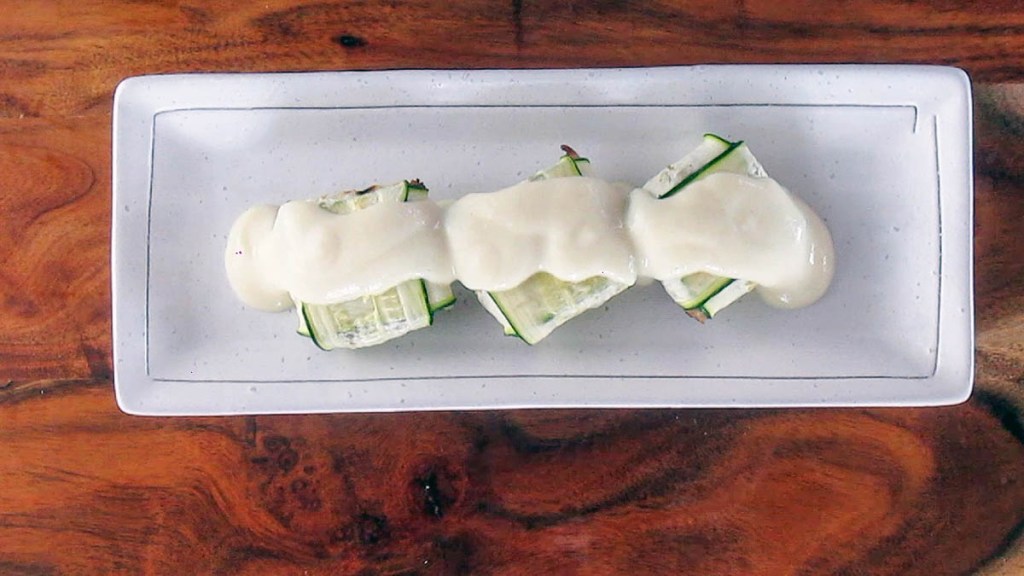
Take a large frying panFry off the chicken mince, garlic powder and chicken seasoningAs the meat cooks break it up.As the meat cooks break it up.When the chicken is cooked, remove it from the pan.Sauté the shallots and garlic cloves over a medium heat until the shallots soften.Add the mushrooms.Let the mushrooms and shallots soften.When the shallots are cooked, add them to the bowl with the chicken.Chicken, mushrooms and shallots.Fry off the prosciutto.When the chicken is crispy move it to the bowl with the chicken.Add the prosciutto to the chicken.Mix well.Use a mandolin to slice the courgettes into long ribbons.Lay down two courgette ribbons in the shape of a cross. Spoon the filling into the centre of the courgettes.Fold the ends of the courgette up to cover the filling.You will need to use a toothpick to secure the ends of the courgette and keep the ravioli closed. Repeat with the remaining filling.Place the ravioli on a baking tray lined with baking paper or a silicone liner.Bake the ravioli for 20-25 minutes at 200 degrees C/ 400 degrees F.Courgette ravioli with cauliflower sauce
If you love ravioli but don't like all the wheat and carbs that come along with it, you can give this a go. This impasta courgette ravioli takes a little time to make but it is more than worth the effort.
Credit: Cath @ easycleaneats
Ingredients
4 courgette
300g chicken mince
2 tbsp. olive oil
3 shallots, diced
3 garlic cloves, minced
200g mushrooms diced
6 slices of prosciutto
1 tsp. garlic powder
1/2 tsp. chicken seasoning
Directions
In a large frying pan fry off the chicken mince, garlic powder and chicken seasoning in the olive oil over a medium heat.
When the chicken is cooked, remove it from the pan.
Put the chicken in a bowl then set it aside.
Sauté the shallots and garlic cloves over a medium heat until the shallots soften.
Add the mushrooms.
When the shallots are cooked, add them to the bowl with the chicken.
Cut the prosciutto slices into cubes.
Fry off the prosciutto until it becomes crispy, when it is cooked add it to the chicken.
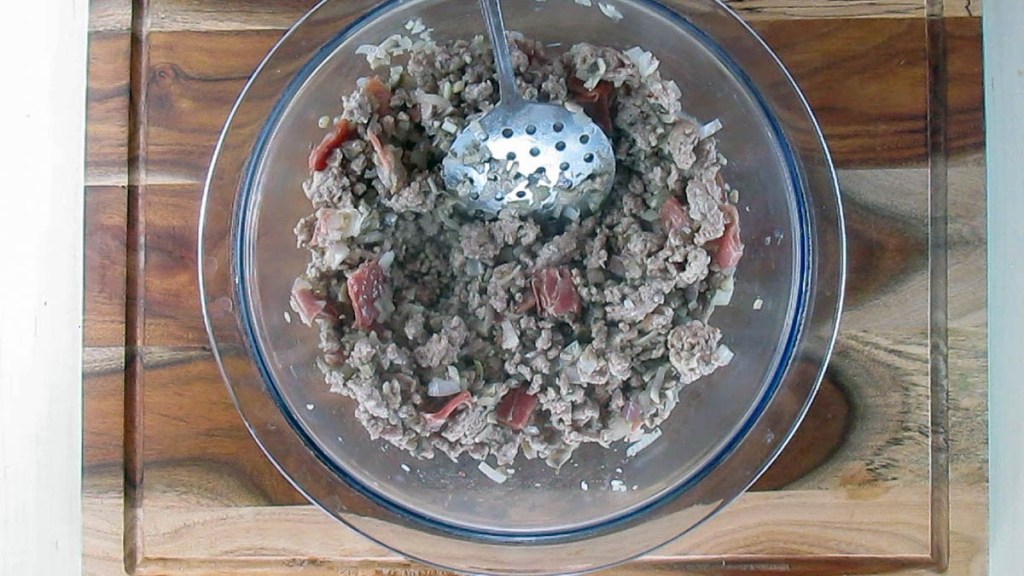
Mix the chicken, shallots, garlic and prosciutto together in the bowl.
Split the mixture in half.
Blend half of the mixture in a food processor, you want it to have a paste consistency.
Add the paste mixture back to the rest of the chicken mixture and mix it everything together.
It should be a very sticky mixture.
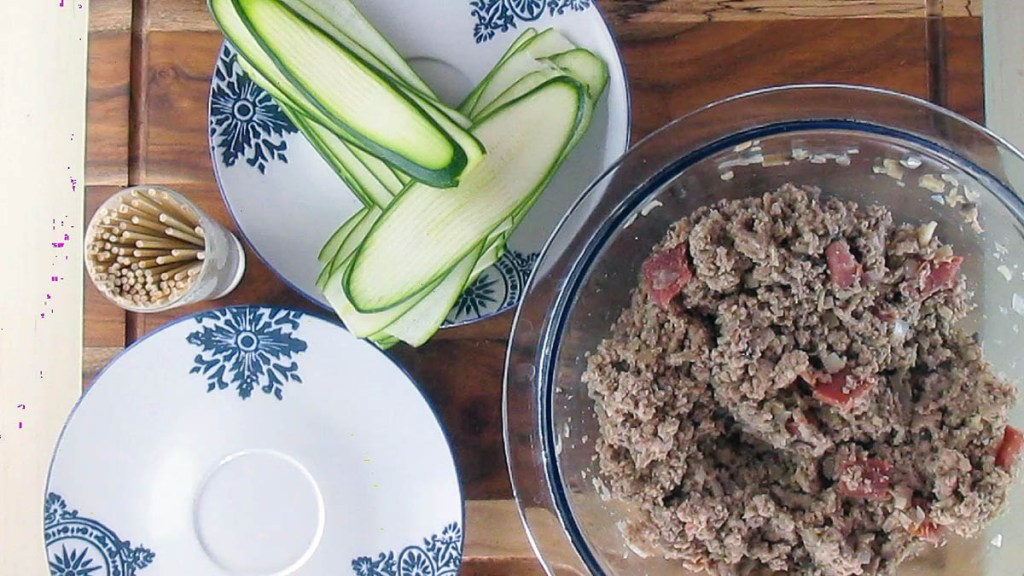
Use a mandolin to slice the courgettes into long ribbons.
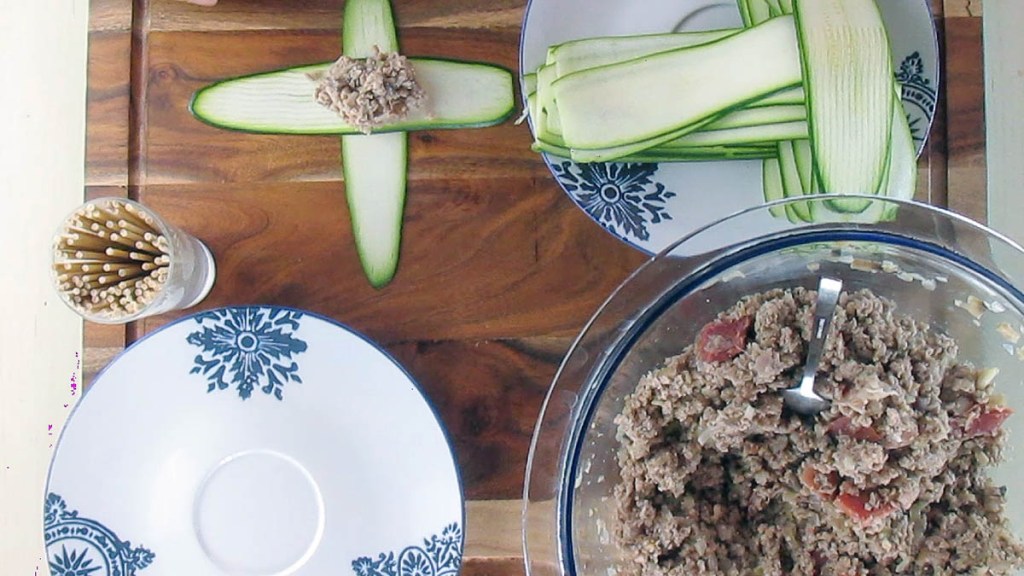
Lay down two courgette ribbons in the shape of a cross.
Spoon the filling into the centre of the courgettes.
The amount of filling will depend on how large the courgette ribbons are.
Fold the ends of the courgette up to cover the filling; you will need to use a toothpick to secure the ends of the courgette and keep the ravioli closed.
Place the ravioli on a baking tray lined with baking paper or a silicone liner.
Bake the ravioli for 20-25 minutes at 200 degrees C/ 400 degrees F.
Serve with cauliflower sauce.
Nutrition
Per Serving: 193 calories; 12 g fat; 6 g carbohydrates; 14 g protein
Equipment
Frying pan
Wooden spoon
Knife
Chopping board
Scales
Measuring spoons
Mandolin or vegetable peeler
Mixing bowl
Food processor
Spoon
Baking tray
Baking paper or a silicone liner
Nutritional disclaimer
Nutrition information is provided as an estimate based on the ingredients used and available in my area (New Zealand). The nutritional information is here to help you understand the recipe; I use MyFitnessPal to generate my estimates. For more accurate nutritional information, please use a nutritional calculator with the ingredients in your area.