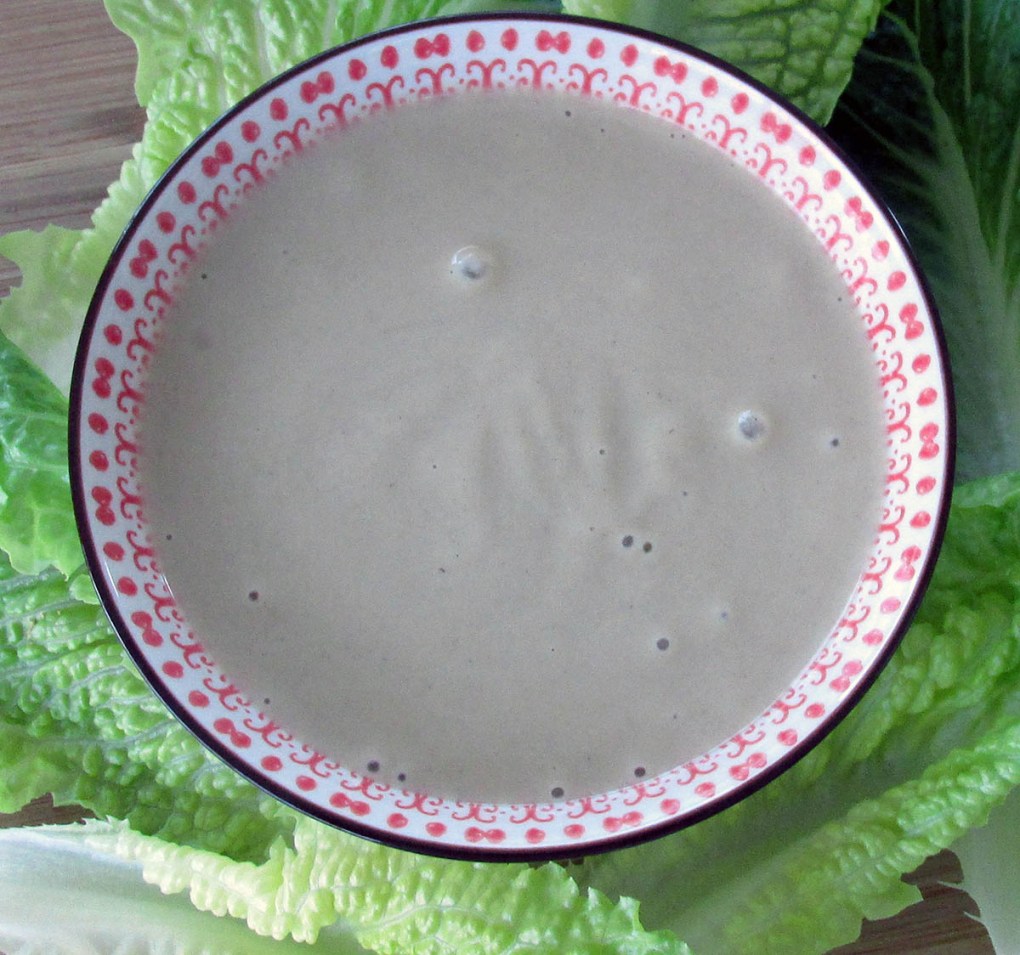
Caesar salad is one of my favourites, this dressing is easy to make and will finish off your Caesar salad just right.
Sauce without sh*t
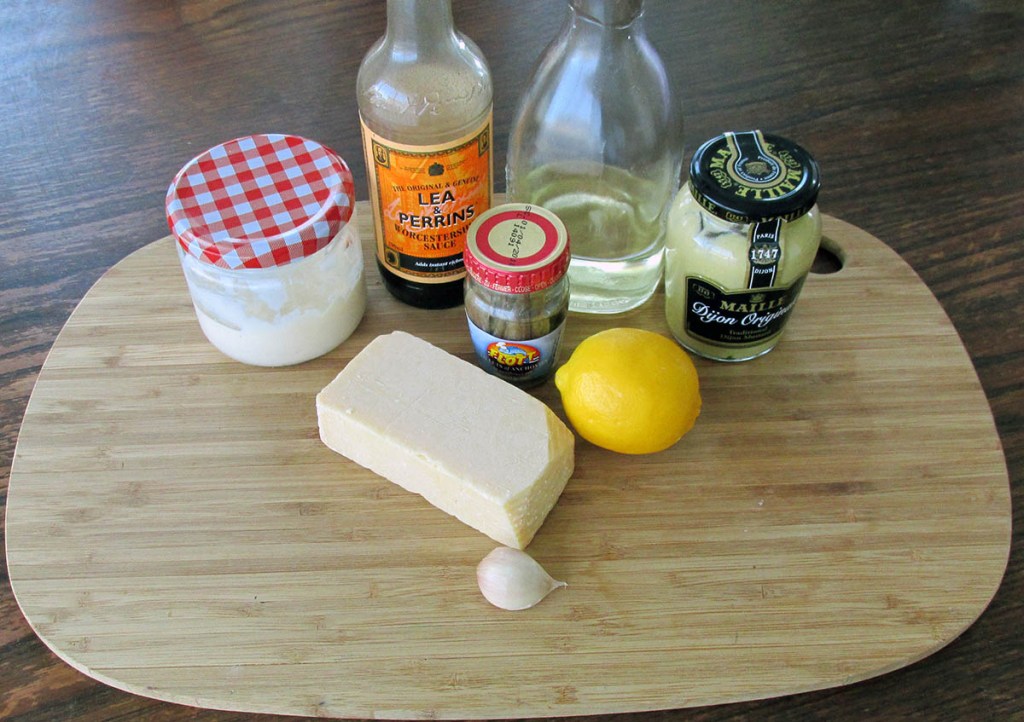
It is a sad fact that you can find sugar in pretty much every mass-produced food item. If you stop and read the back of the bottles of sauce and salad dressing, you will find a scary amount of sugar in sauces and dressings that you don’t need it in. The first dressing I learned to make at home without any sugar was the classic Caesar salad dressing. The dressing can be created in just a few minutes using easy mayo and some simple pantry ingredients. Learning to make your own dressings means you won’t get caught out by shit-filled dressings or stung for extra cash to buy ‘clean’ versions at your local health food store.
Caesar salad is one of my favourites, this dressing is easy to make and will finish off your Caesar salad just right.
Credit: Cath @ easycleaneats
Ingredients
1/2 cup olive oil
2 tbsp. easy mayo
1 tbsp. Dijon mustard
3 garlic cloves, minced
1/4 cup parmesan cheese, fresh grated
3 anchovy fillets
2 tbsp. lemon juice
2 tsp. Worcestershire sauce
Directions
Set aside the olive oil.
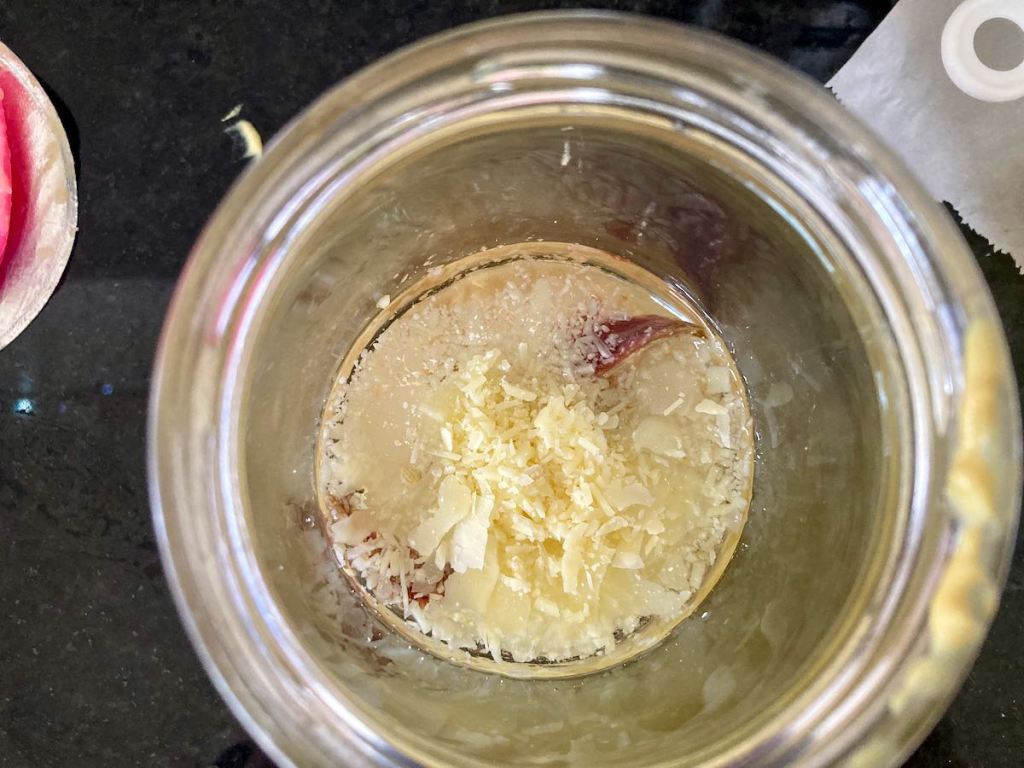
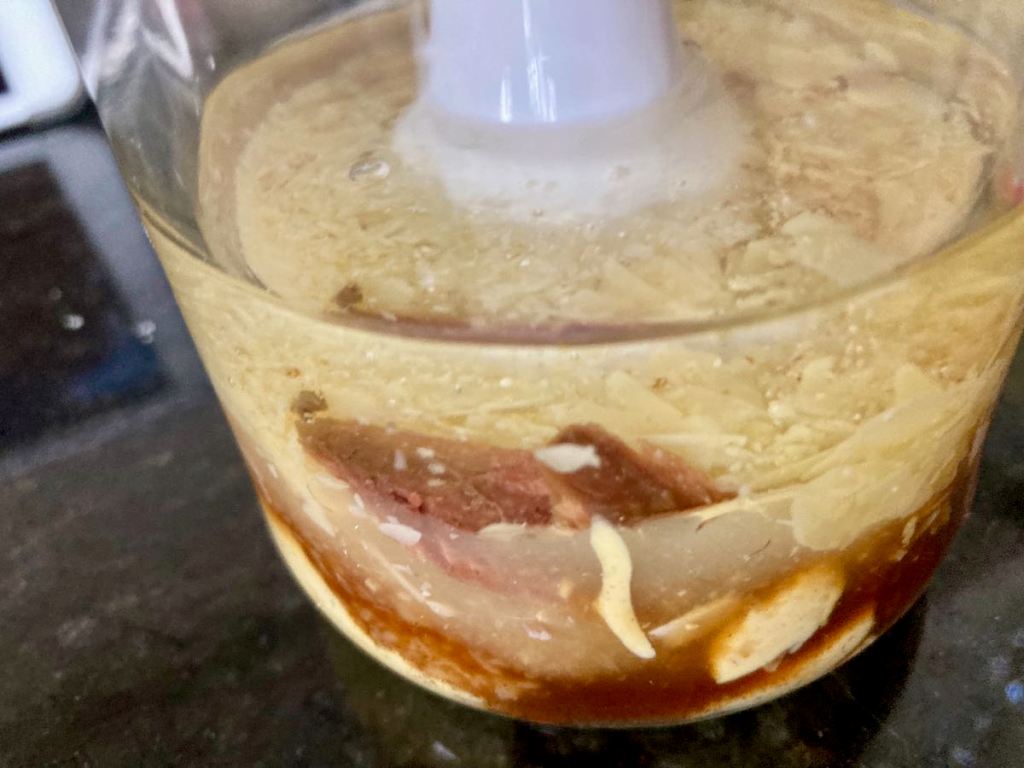
Put all of the other ingredients into a food processor.
Turn on and pulse the ingredients until everything is smooth and creamy.
While the food processor is running slowly drizzle the oil through the chute, make sure to take your time pouring the oil so that it emulsifies properly.
Store the dressing in the fridge; it should keep for about a week.
Alternatively
Place all of the ingredients into a jar.
Blend to a smooth dressing using a stick blender.
Nutrition
Per Serving: 121 calories; 13 g fat; 1 g carbohydrates; 1 g protein
Equipment
Food processor
Spatula
Nutritional disclaimer
Nutrition information is provided as an estimate based on the ingredients used and available in my area (New Zealand). The nutritional information is here to help you understand the recipe; I use MyFitnessPal to generate my estimates. For more accurate nutritional information, please use a nutritional calculator with the ingredients in your area.
I have been on a mission this year to make simple but tasty meals. The aim was to create recipes that can be prepared and cooked quickly on a busy weeknight.
We all struggle to make healthy and tasty meals while keeping on top of everything else in life.
This recipe is healthy, delicious and easy to make recipes that you can cook on a single tray in the oven. The preparation takes no more than 20 minutes, that is all of the slicing, dicing and mixing.
Each meal is portioned to feed four adults.
Another take on a classic
The Reuben is something of a classic sandwich, the combination of corned beef, swiss cheese, sauerkraut, with Russian dressing on rye bread. This combination isn’t the only one that goes by the name ‘Reuben’. there are a range of variations, corned beef is switched out for smoked meat, pastrami, fish or courgettes, sauerkraut gets switched out for coleslaw, and Russian dressing gets switched for thousand island dressing or mayo. The possible combinations are endless.
Bake it
As is often the case, I can’t leave a recipe alone; I have to play around with a recipe. I wanted to create a meal that brought together the classic flavours of the Reuben without the carbs of the sandwich. With the weather getting colder, I also want something warm for dinner. Another Reuben alternative I came up with paired pastrami and pork tenderloin so I knew ham and pastrami would work together. Swapping the pork tenderloin for some tasty ham was an easy step that would allow me to make a layered casserole dish out of my Rueben.
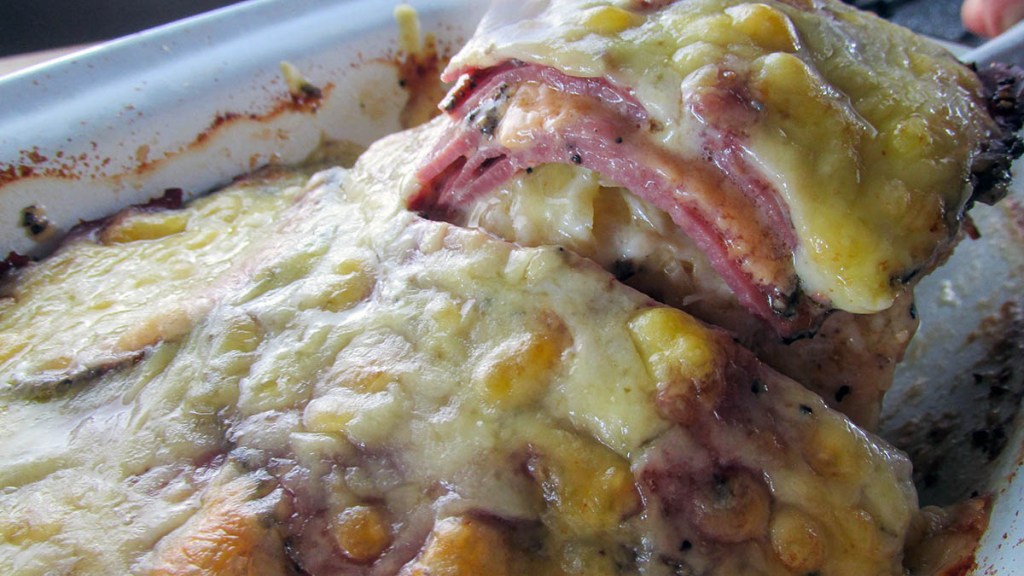
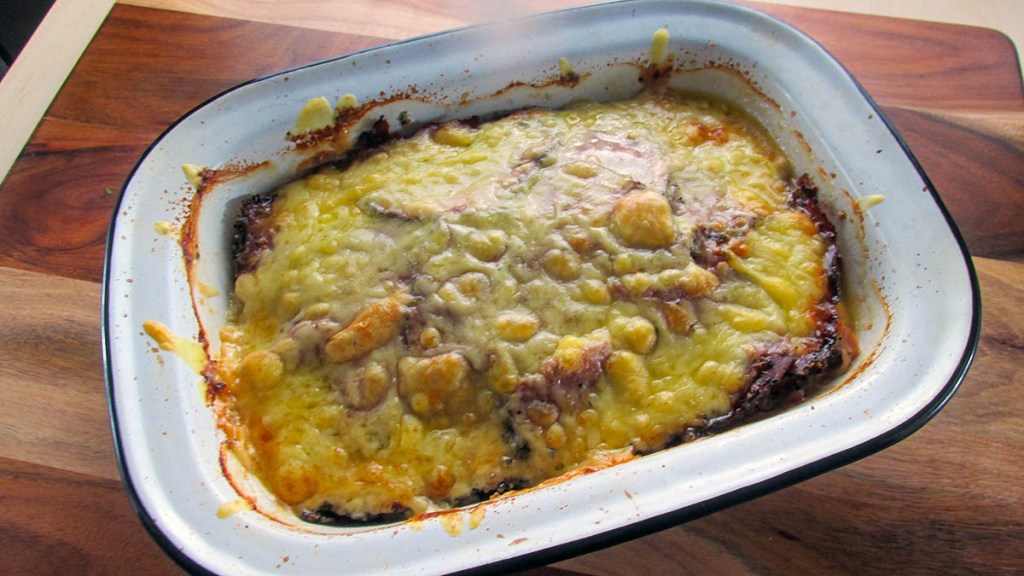
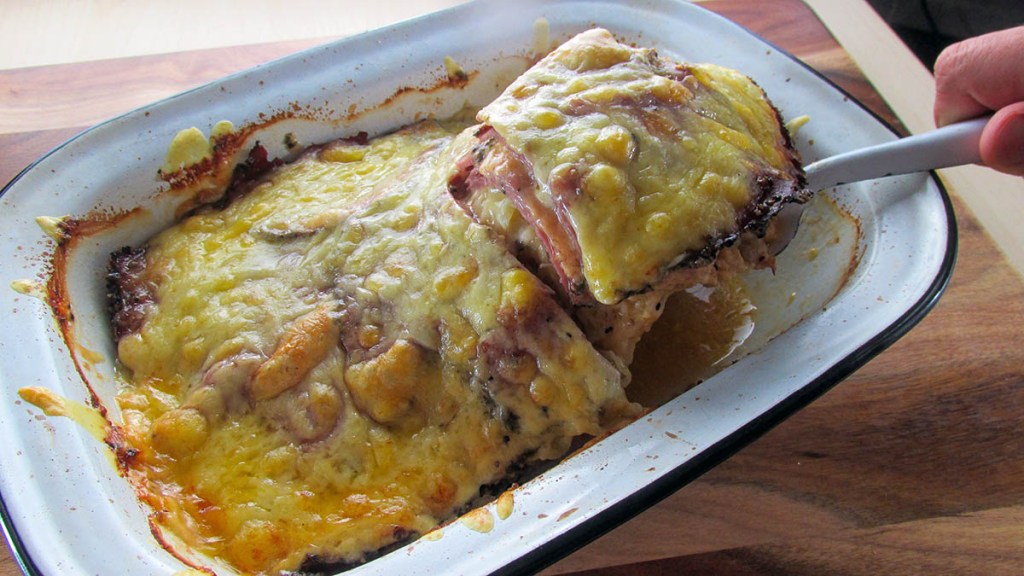
This one tray meal is easy to make and an excellent options for a weeknight meal
Credit: Cath @ easycleaneats
Ingredients
1 cup thousand island dressing
450g pastrami, thinly sliced
450g ham, thinly sliced
3 cups sauerkraut, drained
2 cups cheese, grated
Directions
Preheat the oven to 180 degrees C/ 350 degrees F.
Take a baking dish and lightly oil it.
Cover the bottom of the baking dish with ham slices, spread a layer of sauerkraut over the ham, then add a layer of pastrami, thousand island dressing, then some cheese.
Repeat until you have used all of the ingredients.
Cover the baking dish with foil and bake for 45 minutes, remove the foil and bake for another 30 minutes.
Serve the casserole while it is hot.
Nutrition
Per Serving: 339 calories; 23 g fat; 10 g carbohydrates; 22 g protein
Equipment
Baking dish
Fork
Spoon
Measuring cups
Scales
Nutritional disclaimer
Nutrition information is provided as an estimate based on the ingredients used and available in my area (New Zealand). The nutritional information is here to help you understand the recipe; I use MyFitnessPal to generate my estimates. For more accurate nutritional information, please use a nutritional calculator with the ingredients in your area.
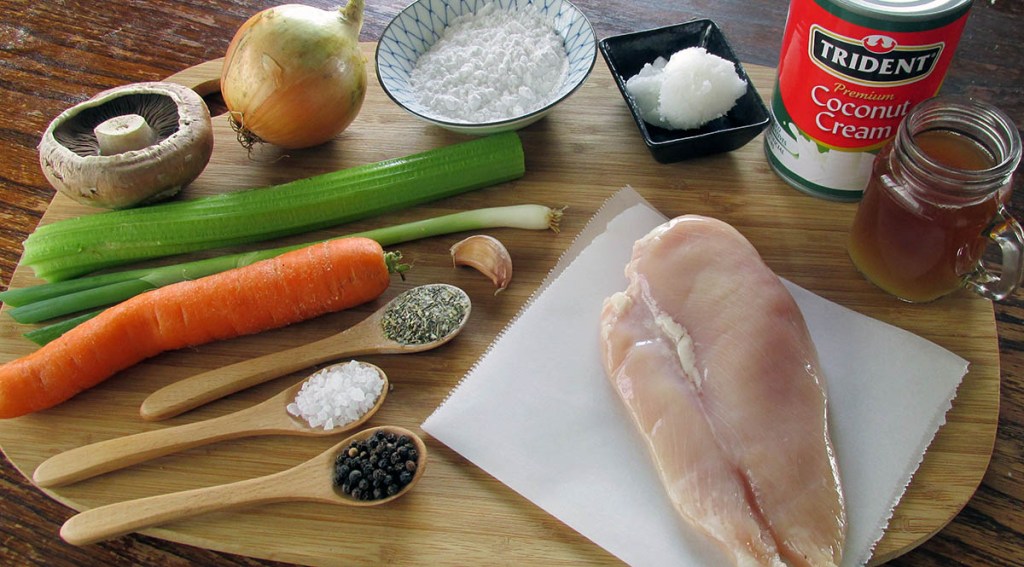
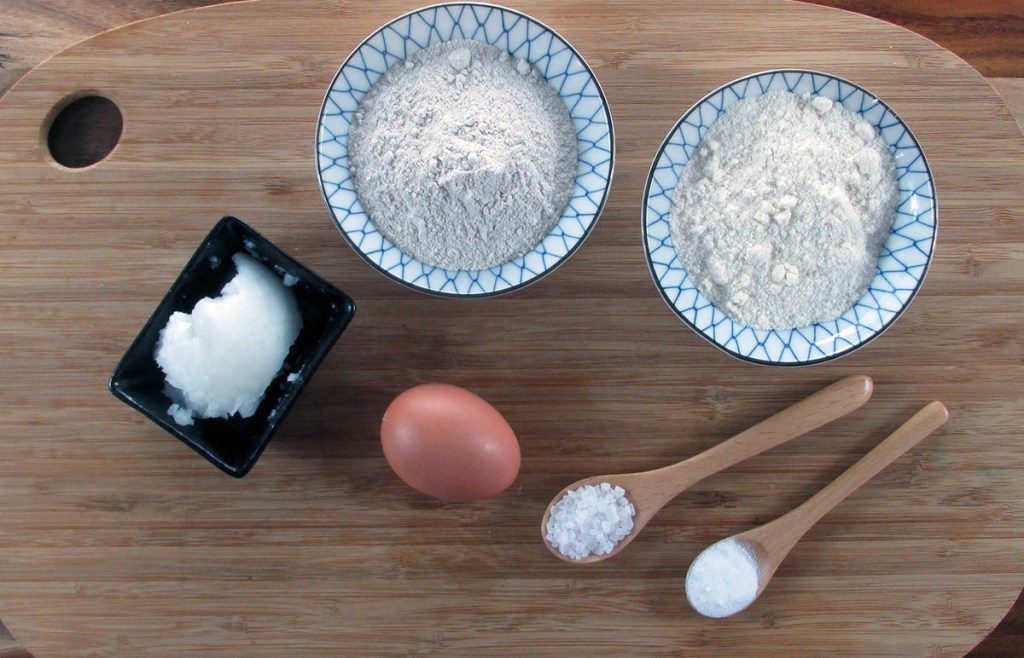
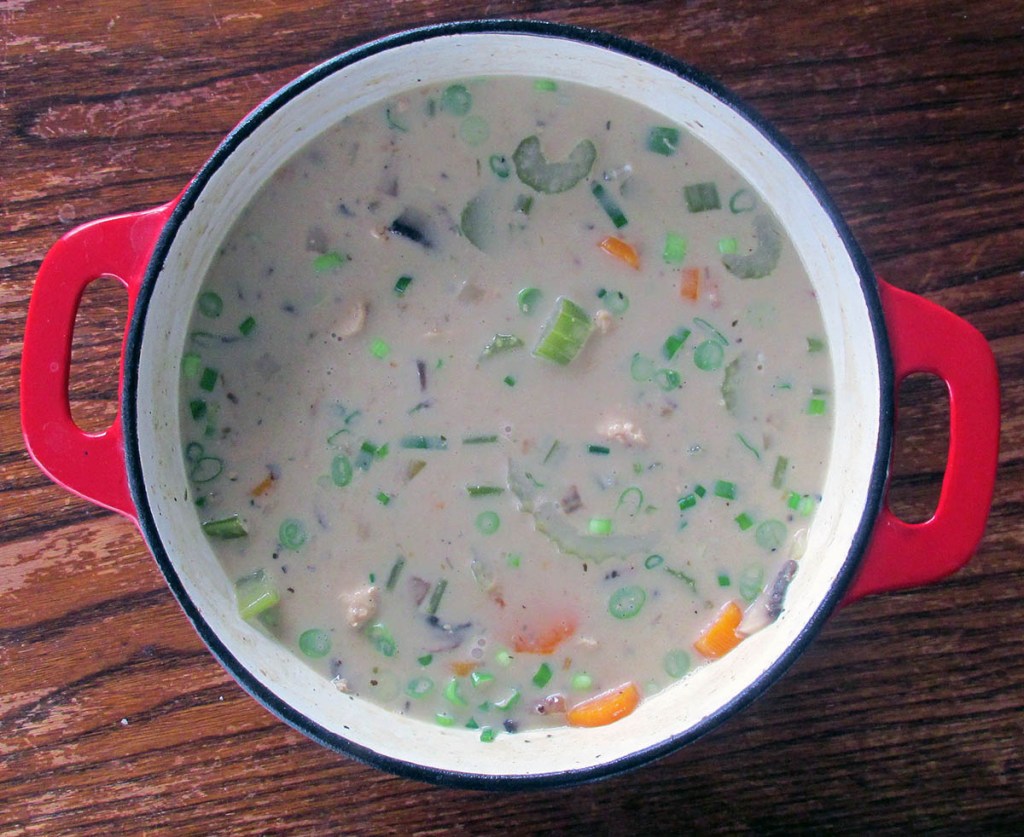
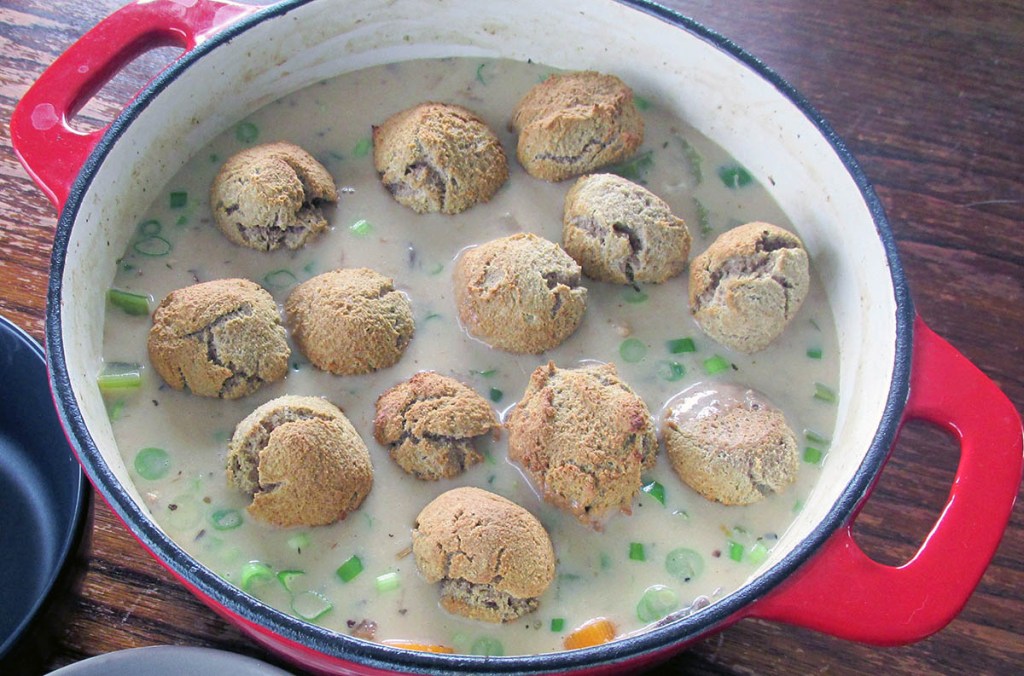
When the weather starts to get cold, I look forward to a hot meal that makes me feel safe and warm. Nothing is more comforting than a big pot of hot chicken stew with homemade dumplings.
What kind of dumplings?
When I ask the question, ‘who wants dumplings?’ The response is usually ‘What kind of dumplings?’ There is a slight obsession with dumplings that go well with coconut aminos. My cabbage and prawn dumplings are a firm favourite but probably not the best thing to put in a stew. The dumplings I like to put in my stew are grain free and reasonably high in protein, thanks to a healthy dose of egg whites.
This chicken stew and dumplings might actually be the ultimate in comfort food. If you want a good for you meal on the table for the family, give this a go.
Freezer meal
Hands up if you are busy. Who is way too tired to get in the kitchen to cook at the end of the day? Definitely not me.
My days are filled with meetings, to-do lists, emails and telling people what to do, by the time I finish work the last thing I want to do is get stuck into cooking a meal and then cleaning up afterwards. I want to work out and spend some time with Jaime. That is why freezer meals are my favourite solutions to the challenge of a busy life. A few hours on the weekend, and you find yourself with a stack of options for dinner that can be thawed and cooked for a healthy, delicious meal for the family.
Nothing is more comforting than a big pot of hot chicken stew with homemade dumplings.
Credit: Cath @ easycleaneats
Ingredients
500g chicken breast, cubed
3 tbsp. coconut oil
1 onions, chopped
2 garlic cloves, minced
1/4 cup tapioca flour
2 cups chicken broth
2 carrots, chopped
2 celery stalks, chopped
3 portabella mushrooms, sliced
1/2 cup coconut cream
2 spring onions, sliced
Salt and pepper to taste
1/2 tsp. Italian seasoning
1/3 cup buckwheat flour
1/3 cup coconut flour
1/2 tsp. baking powder
1/4 cup coconut cream
2 tbsp coconut oil, softened
Directions
Place a large saucepan or Dutch oven over a medium heat, melt the coconut oil.
Add in half of the chicken pieces and cook until golden brown on all sides when golden brown remove from the pan and put to one side.
Cook the other half of the chicken until golden brown and put it with the other chicken to rest.
Add the onions to the pan the chicken was cooked in, you may need to add more coconut oil.
Sautee the onions, when they begin to brown add in the garlic and cook for 2 minutes.
Have the chicken broth warm and ready to use.
Add tapioca flour to the pan and stir well to coat bottom of pan and onions
Slowly pour in the chicken broth and whisk together the stock and the onions, be sure to scrape the bottom of the pan as you are whisking to get all of the flour and flavours from the pan.
Once all of the stock has been whisked in add in the vegetables and chicken to the pan.
Season and add in the Italian seasoning.
Bring the liquid up to a gentle simmer then cover the pan, you want the heat low, but the liquid should still be simmering.
Cook for 20-30minutes, this will depend on how large your vegetables are.
While the stew is simmering, you can make the dumplings.
Preheat the oven to 200 degrees C/ 400 degrees F.
Line a baking tray with baking paper or a silicone liner.
In a large bowl mix together the buckwheat flour, coconut flour and baking powder.
Mix in a 1/4 cup of coconut cream and the softened coconut oil, you should end up with a crumbly mix
In a separate bowl, beat the egg whites until stiff peaks form.
Fold the egg whites into the flour mixture, this takes a little time, but you should end up with a wet-looking combination.
Using a spoon divide the mixture into 12 portions onto the baking tray.
Bake for 12-15 minutes, or until the dumplings are golden.
Once the dumplings are cooked
Stir in the remaining coconut cream and spring onions into the stew and take it off the heat.
Add the dumplings to the pan and serve.
Nutrition
Per Serving: 337 calories; 16 g fat; 16 g carbohydrates; 23 g protein
Equipment
Knife
Chopping board
Saucepan or Dutch oven
Wooden spoon
Whisk
Large bowl
Baking tray
Baking paper or a silicone liner
Scales
Measuring cups
Measuring spoons
Nutritional disclaimer
Nutrition information is provided as an estimate based on the ingredients used and available in my area (New Zealand). The nutritional information is here to help you understand the recipe; I use MyFitnessPal to generate my estimates. For more accurate nutritional information, please use a nutritional calculator with the ingredients in your area.
Hands up if you are busy. Who is way too tired to get in the kitchen to cook at the end of the day? Definitely not me.
My days are filled with meetings, to-do lists, emails and telling people what to do; by the time I finish work, the last thing I want to do is get stuck into cooking a meal and then cleaning up afterwards. I want to work out and spend some time with Jaime. That is why freezer meals are my favourite solution to the challenge of a busy life. A few hours on the weekend, you find yourself with a stack of options for dinner that can be thawed and cooked for a healthy, delicious meal for the family.
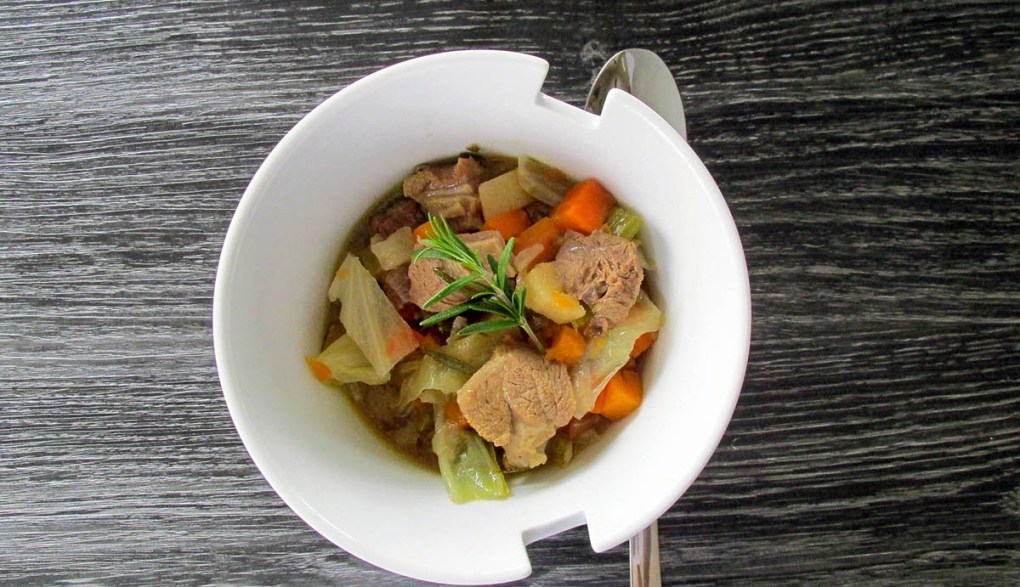
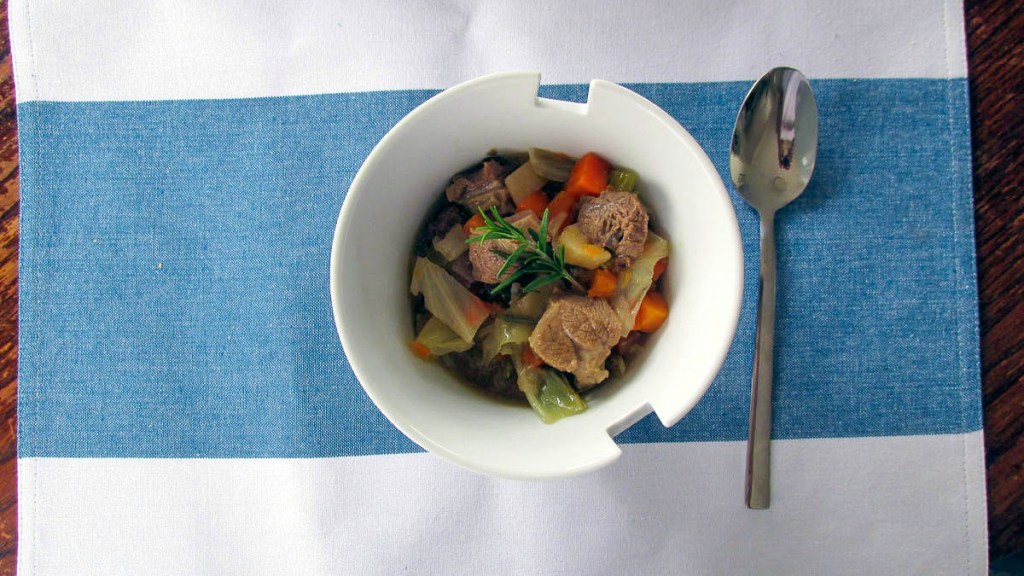
An oldie but a goodie
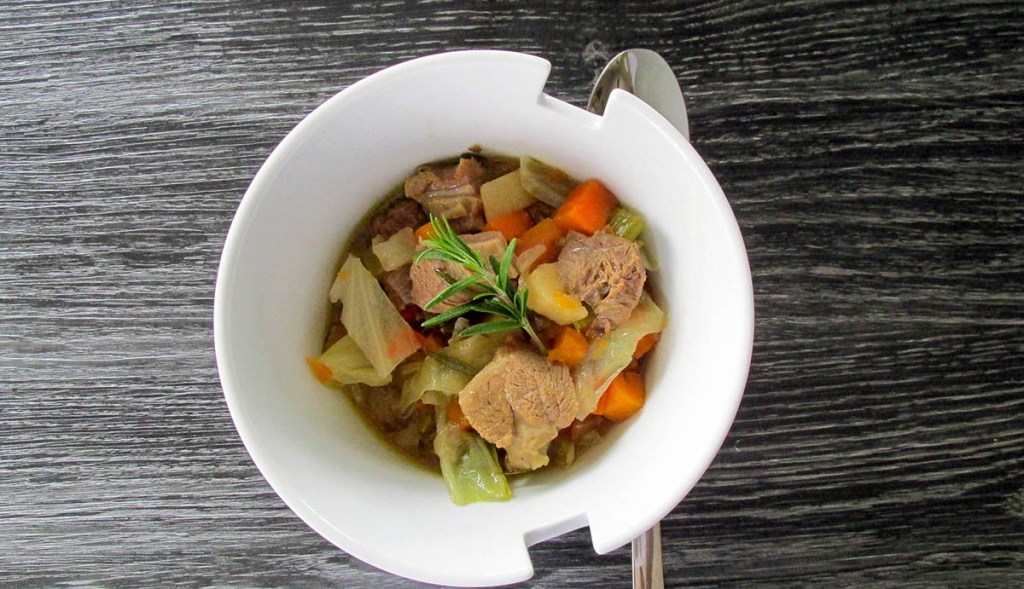
This is an easy stew recipe; it was one of the first clean-eating stews and one of my go-to recipes for the winter. It was so easy to chop everything and bag it up for the freezer. Nothing was easier than putting the bag of vegetables and meat in the slow cooker and turning it on. So easy to prepare and make. This recipe is one that works great in the slow cooker but works just as well on the stovetop. It’s delicious on its own or with some buttered greens.
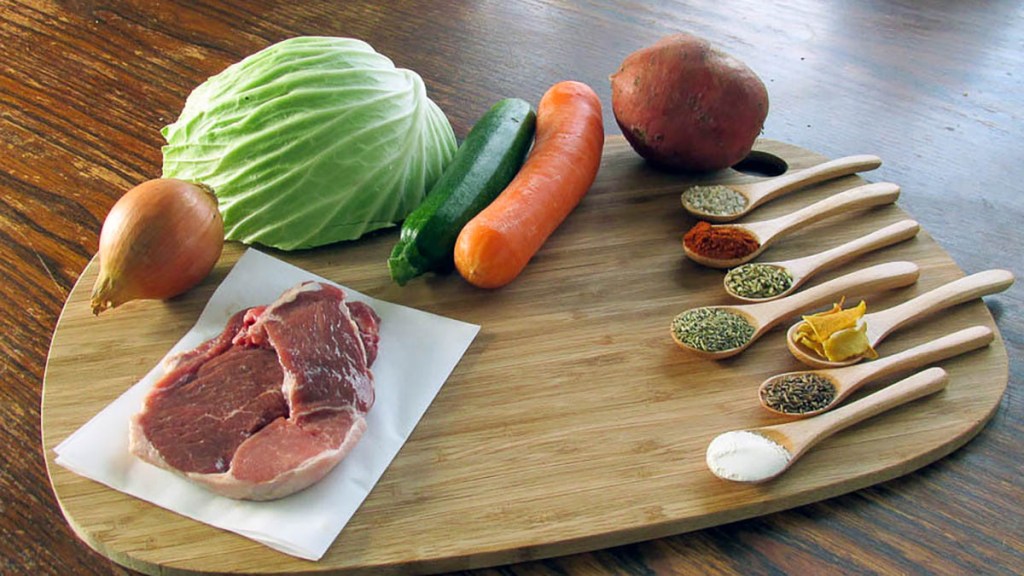
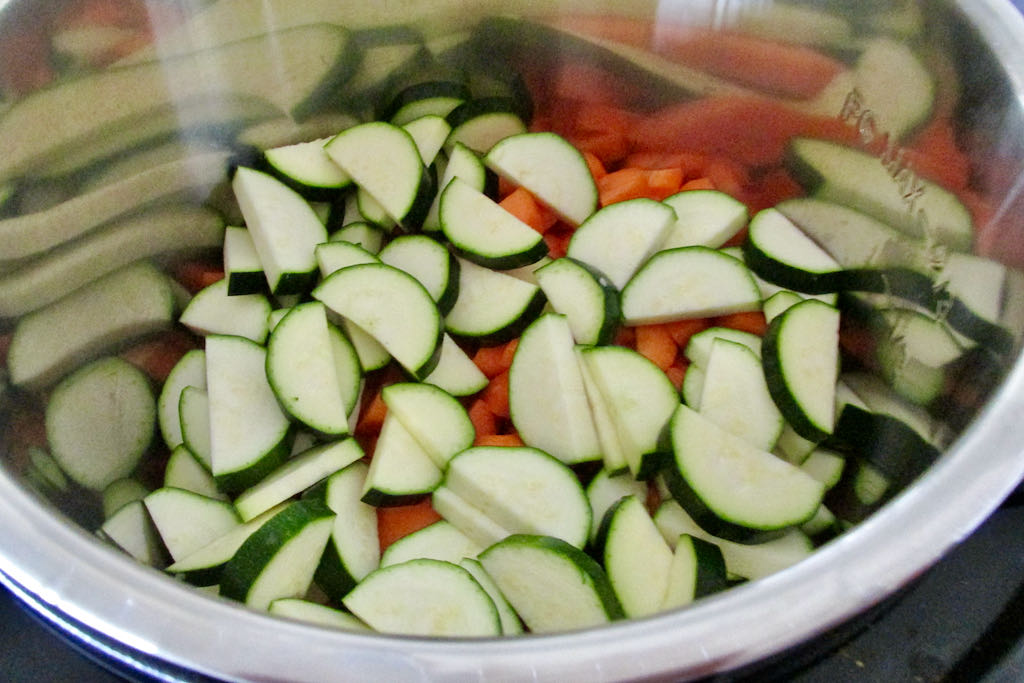
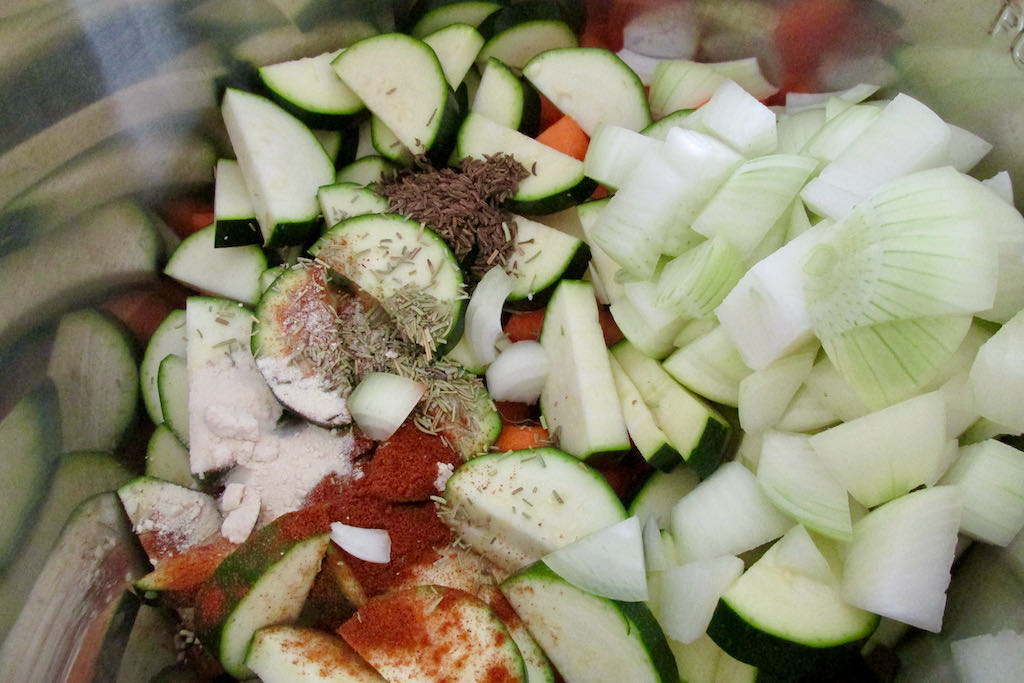
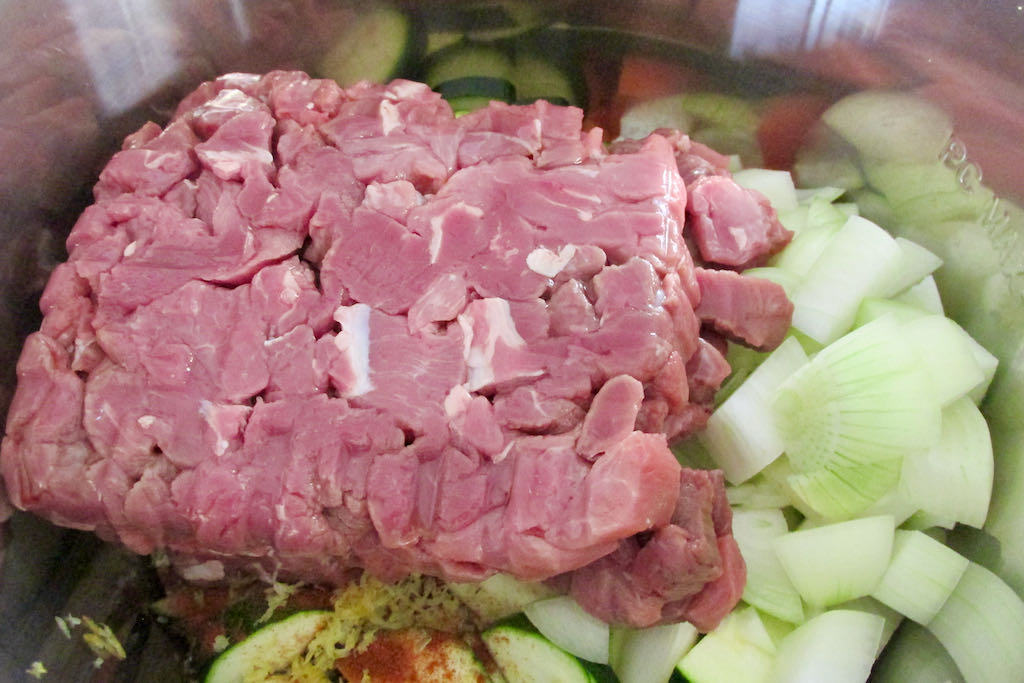
Lamb stew recipe
Ingredients
2 onions, diced
2 courgettes, diced
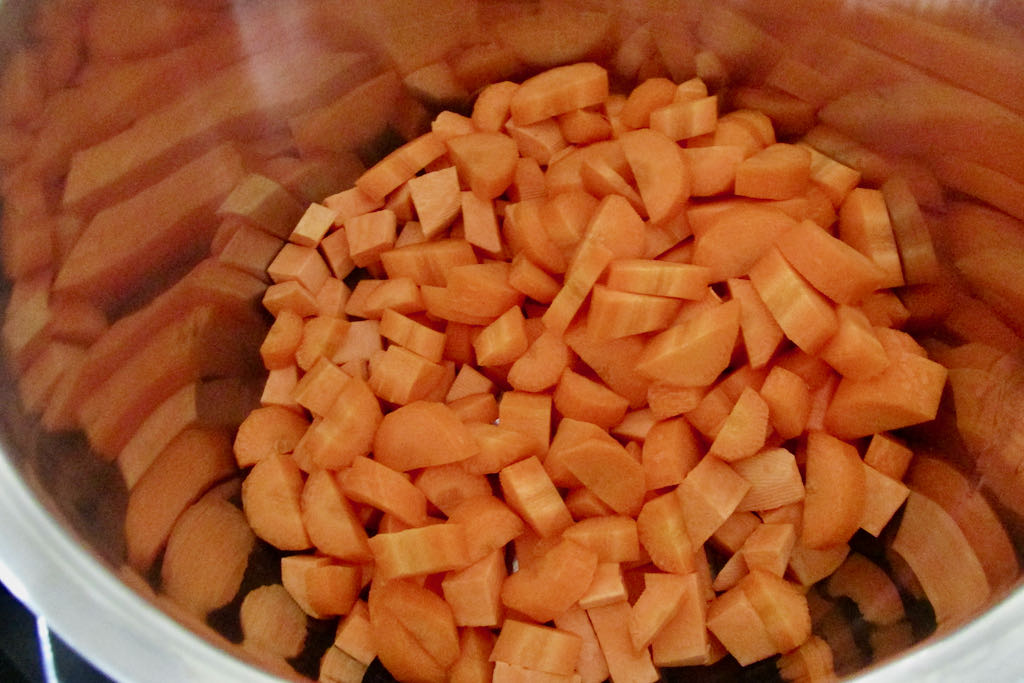
2 carrots, diced
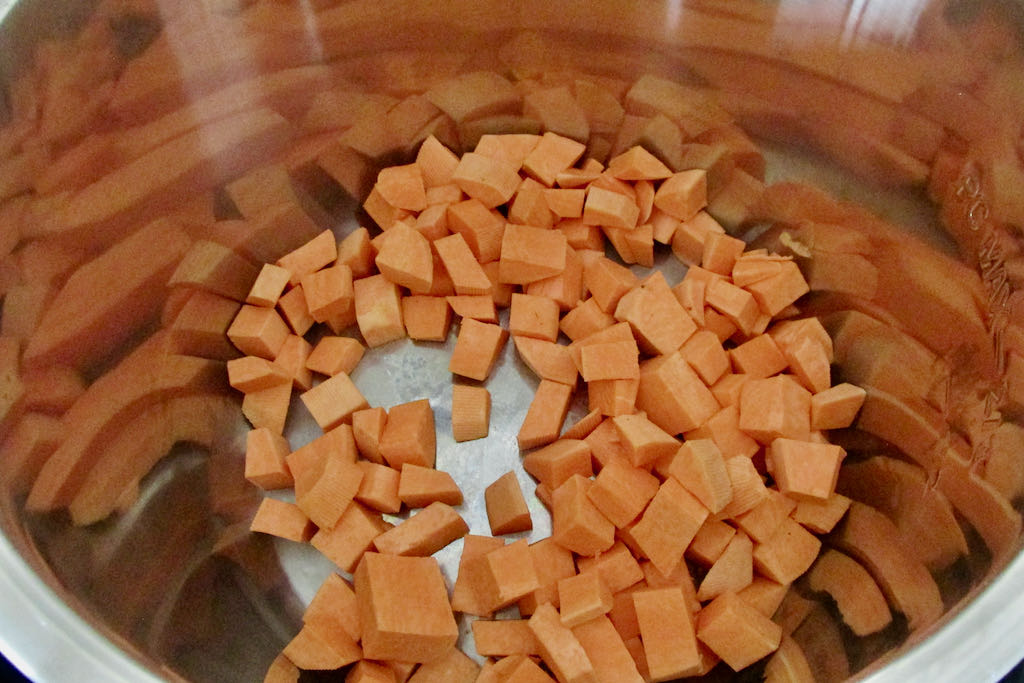
2 sweet potatoes, diced
1/4 cabbage, roughly chopped
500g stewing lamb, cubed
1 tsp. garlic powder
2 tsp. rosemary
1 tsp. fennel seeds, ground
1 tsp. caraway seeds, ground
1 tsp. paprika
1 tsp. lemon zest
500ml vegetable stock
Instructions
For a slow cooker.
Place all of the ingredients into your slow cooker.
Turn the slow cooker to a low heat setting for about 7 hours.
For stove cooking.
Find a pot that will be large enough for all of the stew.
Over medium heat, brown off your meat in batches.
Try not to overcrowd the pan.
When the meat is browned, set it to one side.
Add the onions to the same pan and cook them off until they soften slightly.
Add the carrots, courgettes, sweet potato and cabbage to the pot with the stock, herbs and spices.
Add the meat into the pot, and bring the stock up to a simmer.
Let the stew cook over low to medium heat for about 2 hours until the meat is tender.
Nutrition
Per Serving: 398 calories; 6g fat; 32g carbohydrates; 39g protein
Equipment
Measuring spoons
Scales
Measuring jug
Slow cooker
Stockpot
Wooden spoon
Nutritional disclaimer
Nutrition information is provided as an estimate based on the ingredients used and available in my area (New Zealand). The nutritional information is here to help you understand the recipe; I use MyFitnessPal to generate my estimates. For more accurate nutritional information, please use a nutritional calculator with the ingredients in your area.
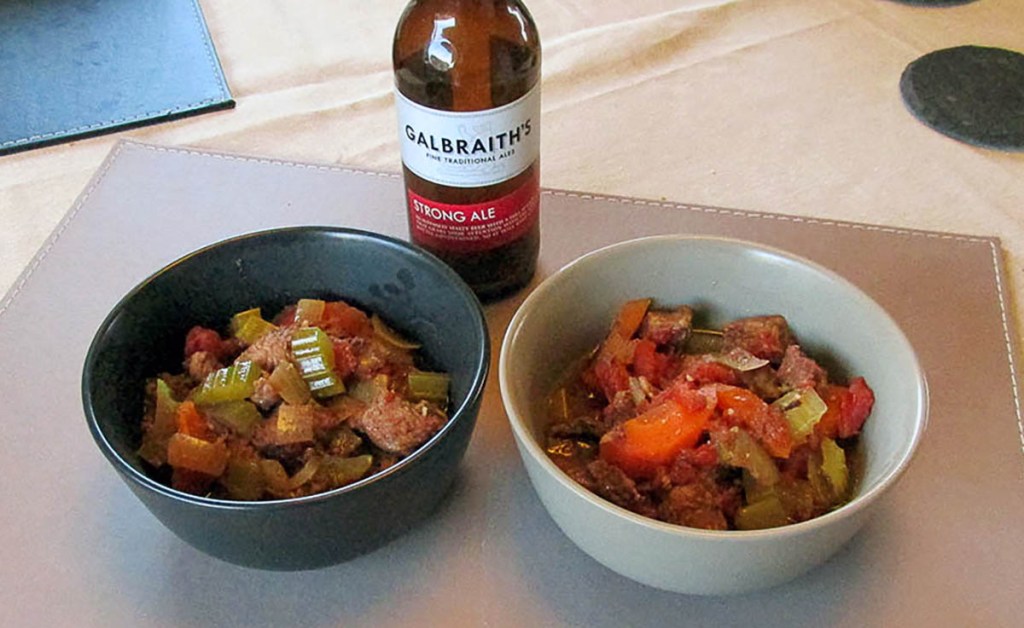
Winter is taking hold down here in the Southern hemisphere which means we are looking for comfort food. I am not a very interested in booze for drinking, but I don’t have anything against cooking with it. This stew is a true winter warmer and perfect for a wet and windy night in front of the fire.
Freezermeal
Hands up if you are busy. Who is way too tired to get in the kitchen to cook at the end of the day? Definitely not me.
My days are filled with meetings, to-do lists, emails and telling people what to do, by the time I finish work the last thing I want to do is get stuck into cooking a meal and then cleaning up afterwards. I want to work out and spend some time with Jaime. That is why freezer meals are my favourite solutions to the challenge of a busy life. A few hours on the weekend, and you find yourself with a stack of options for dinner that can be thawed and cooked for a healthy, delicious meal for the family.
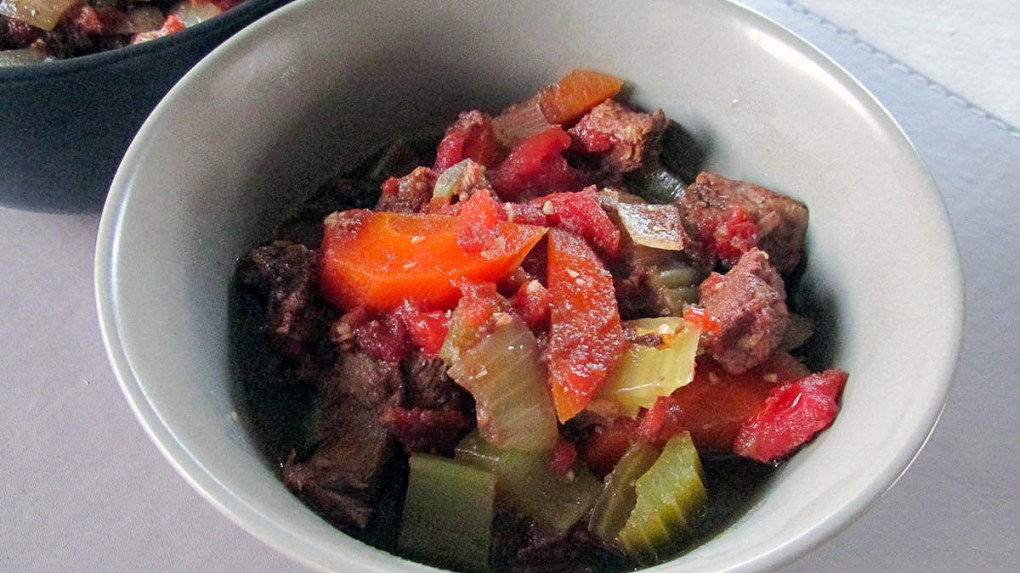
This winter warmer is an idea meal to keep you warm and full.
Credit: Cath @ easycleaneats
Ingredients
3 bay leaves
500g diced stewing beef
500ml ale
2 celery sticks chopped
2 onions chopped
2 carrots sliced
Olive oil
1 tsp. tapioca flour
1 can tomatoes
Directions
Take a large stock pot and add the olive oil to the pot.
Add the vegetables and bay leaves to the pot over a medium heat.
Cook the vegetables for 10 minutes, try not to break up the bay leaves as the vegetables cook.
Add the meat and flour to pot and stir well, make sure the meat and vegetables are coated in the flour.
Add the ale to the pot and mix well.
Add the can of tomatoes to the pot.
Stir well and bring the liquid to a boil.
Reduce the heat so that the liquid is gently simmering.
Let the stew simmer for 3 hours, stir occasionally to make sure the stew doesn’t stick to the bottom of the pot.
Remove the bay leaves.
Serve over cauliflower rice or cauliflower mash.
Nutrition
Per Serving: 197 calories; 5.5 g fat; 8.4 g carbohydrates; 18.3 g protein
Equipment
Knife
Chopping board
Scale
Measuring spoons
Stock pot
Wooden spoon
Nutritional disclaimer
Nutrition information is provided as an estimate based on the ingredients used and available in my area (New Zealand). The nutritional information is here to help you understand the recipe; I use MyFitnessPal to generate my estimates. For more accurate nutritional information, please use a nutritional calculator with the ingredients in your area.
I’ve been revisiting recipes that have been some of my old school recipes and family favourites that were our staples when we got started as clean eaters. I first posted this recipe in 2018; at that time, the kids were fussy, vegetables had to be hidden and disguised, and there was no potential for intense flavours or spice.
Times (thankfully) have changed, the kids have grown (like man-sized grown), and they now enjoy a wide range of foods. Things like vegetables are enjoyed, spice and chilli are consumed without complaint, and new ingredients are tried without tantrums.
As the kids have grown, my recipes have changes organically to meet their palates and preferences, I’ve updated this recipe because of that, but fear not, all I have done is make it a little bit better.
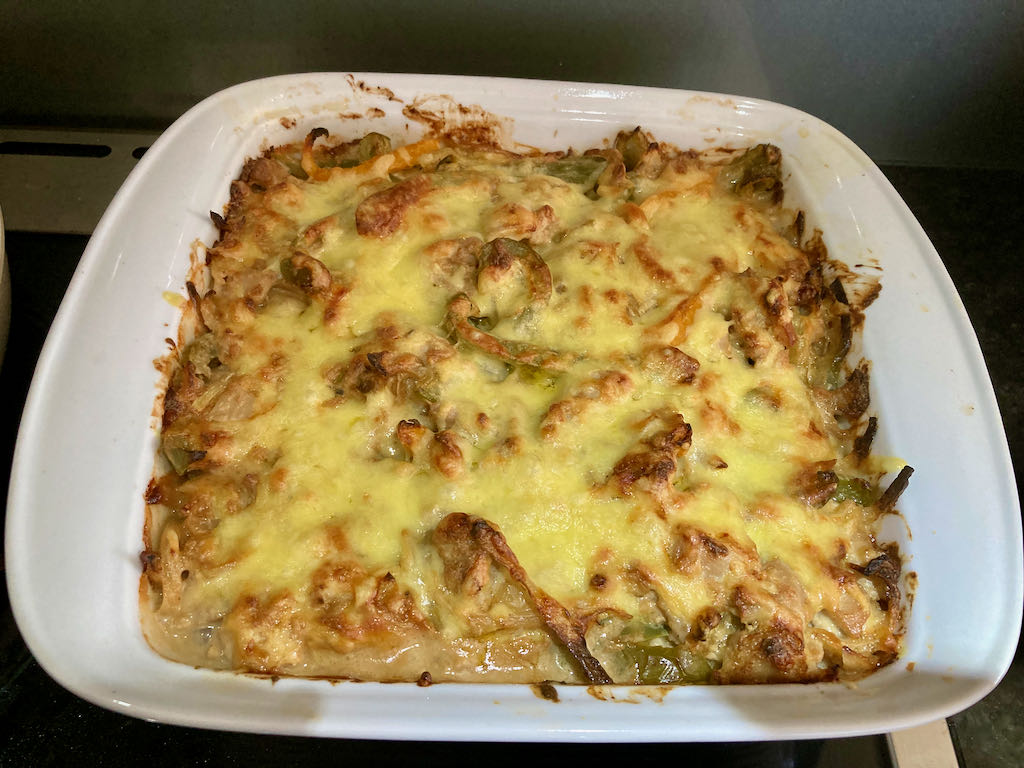
Can you improve fajitas?
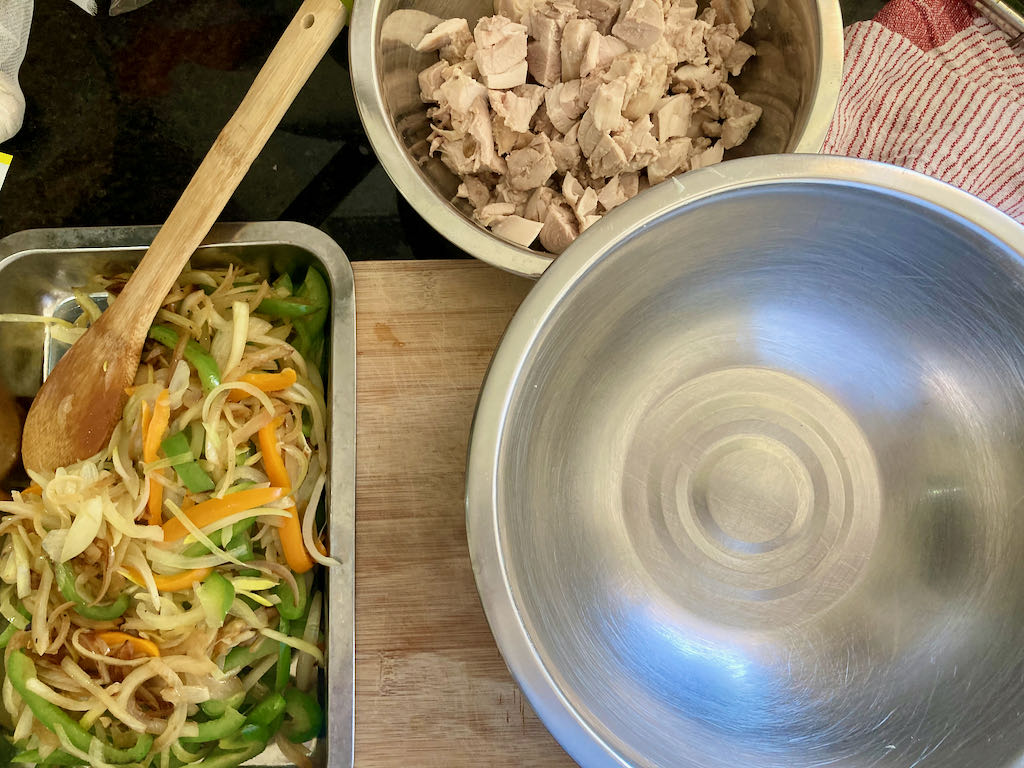
Maybe you can, by turning them in to a casserole. So, full disclosure, I first made this recipe because of a brain fart. One Friday night shop didn’t go to plan, so I had all of the ingredients for fajitas, except for tortillas. What is life without a little challenge? Not wanting to make another trip out to the supermarket, I decided to do something different with my fajita ingredients. Some melted cheese and bite-sized chicken chunks combined with the fajita vegetables make perfect comfort food.
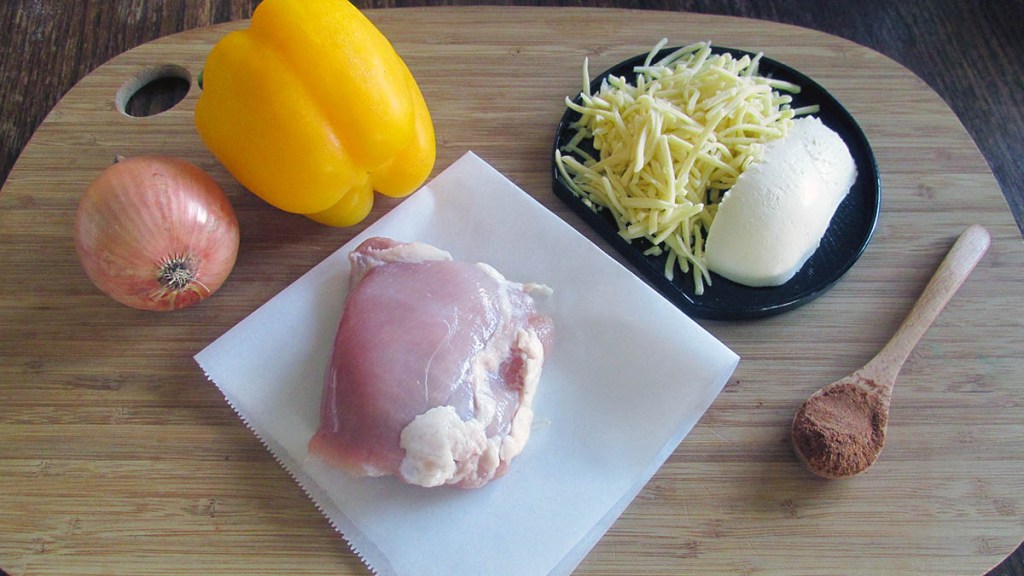
Fajita chicken casserole recipe
Ingredients
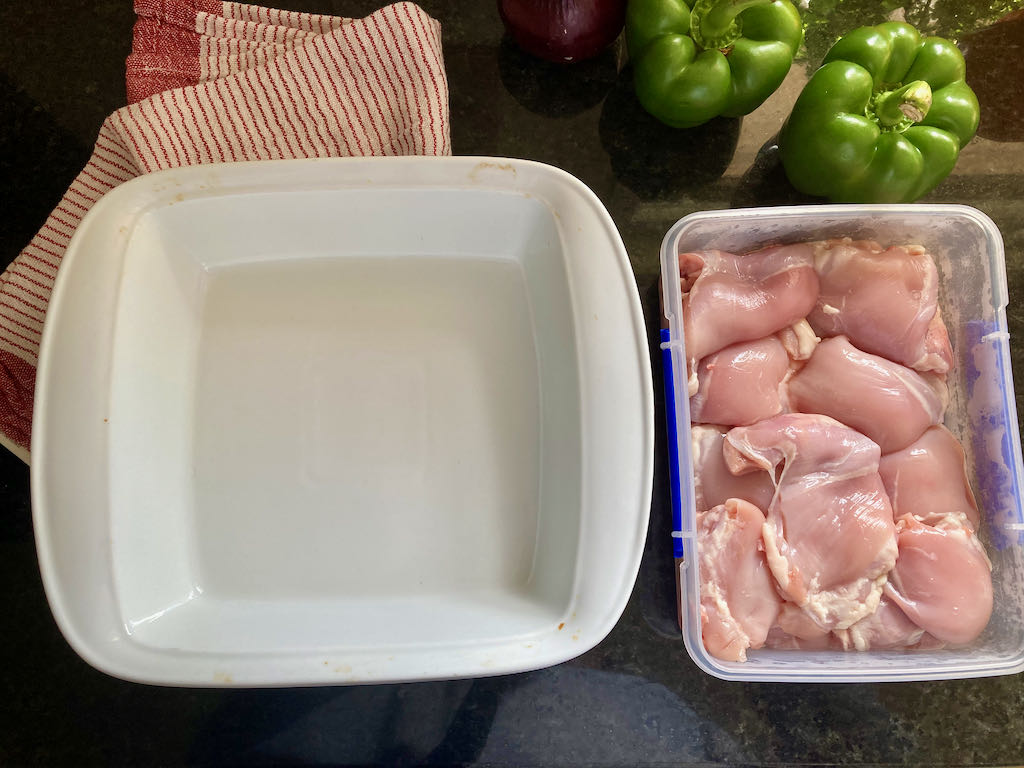
10 boneless chicken thighs
1 pepper, sliced
1 onion, sliced
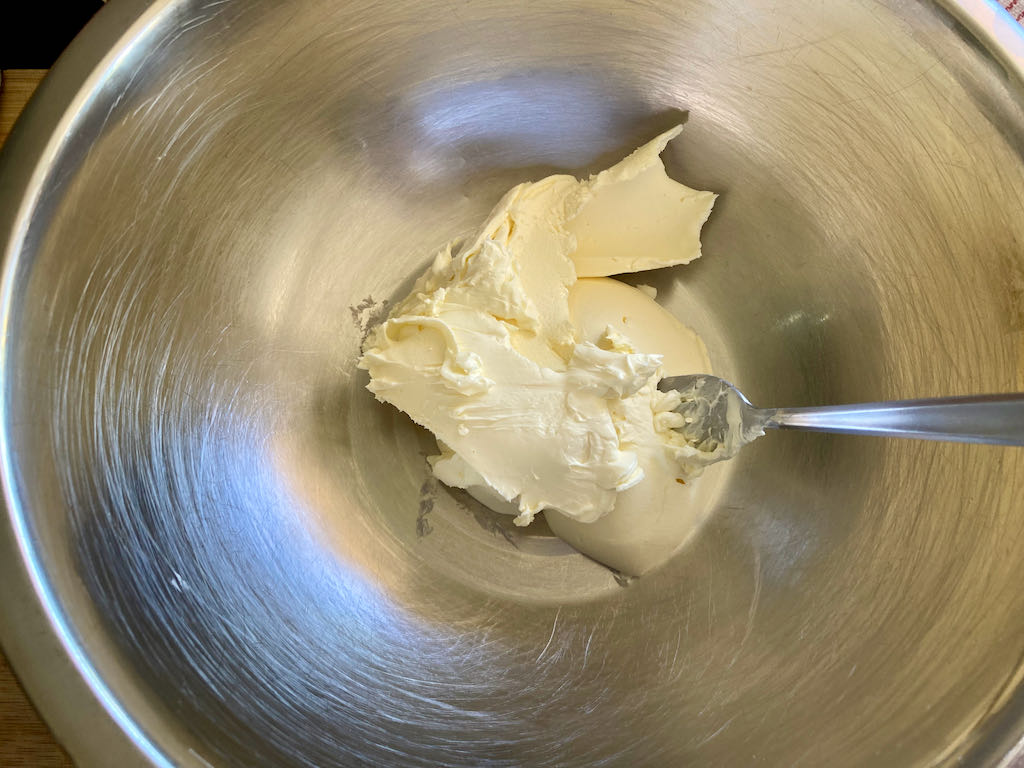
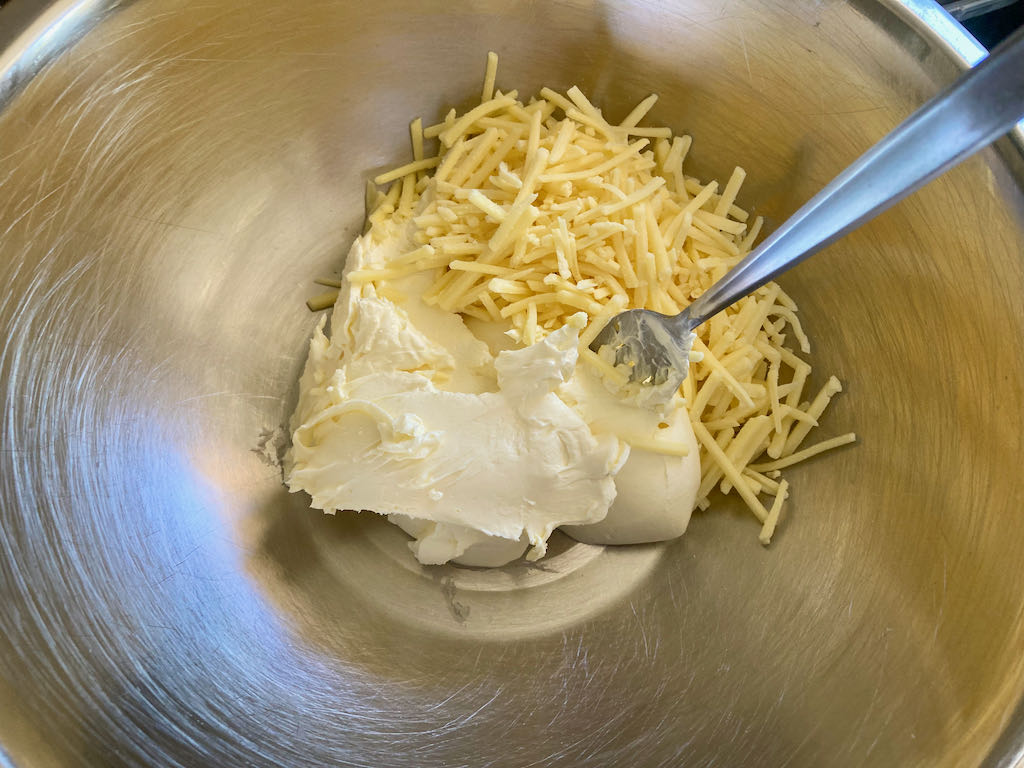
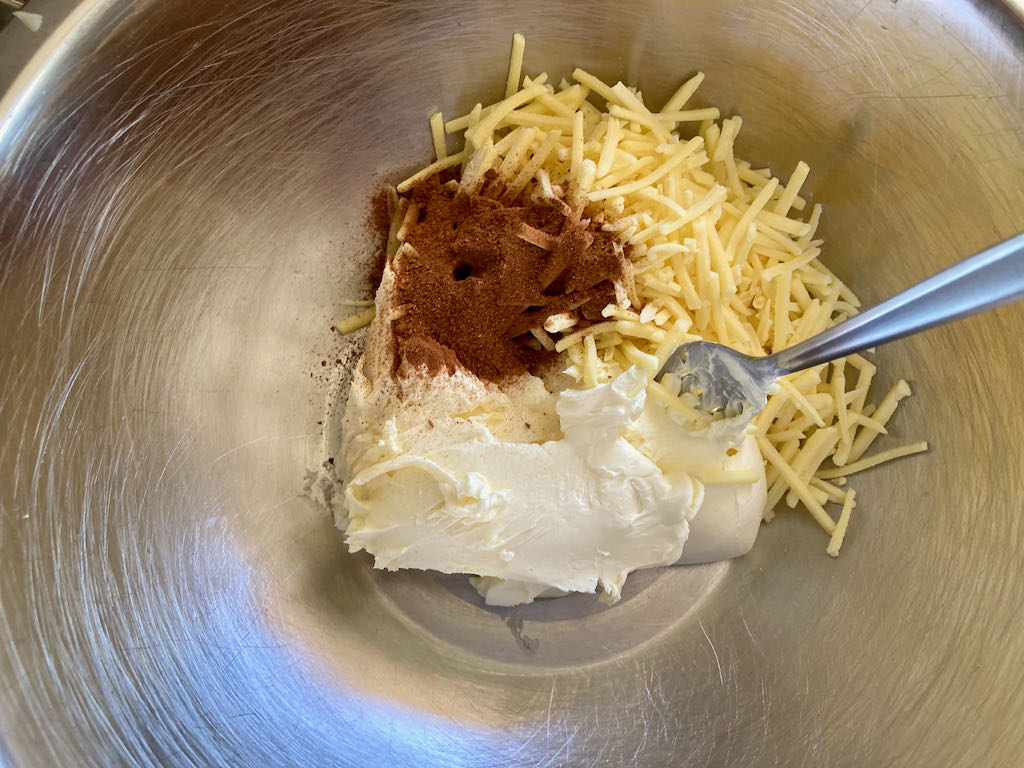
250g cream cheese, softened
205g cheese, grated
2 tbsp. fajita seasoning
Instructions
Preheat the oven to 180 degrees C/ 350 degrees F.
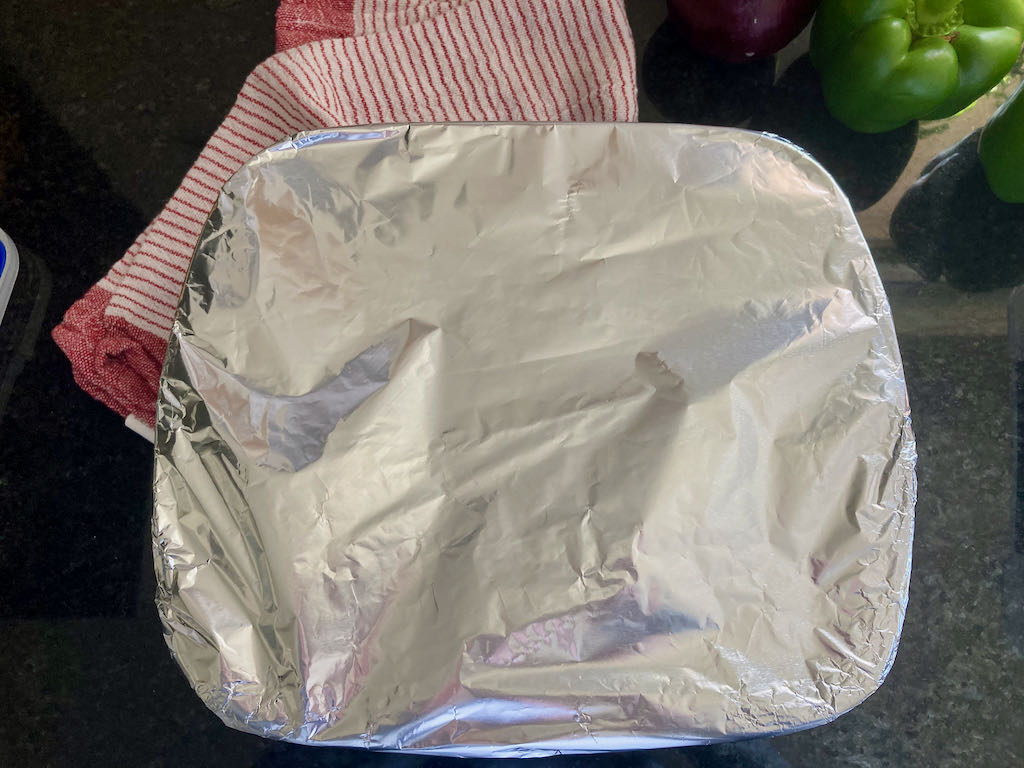
Place the chicken in the casserole dish and cover the dish with foil.
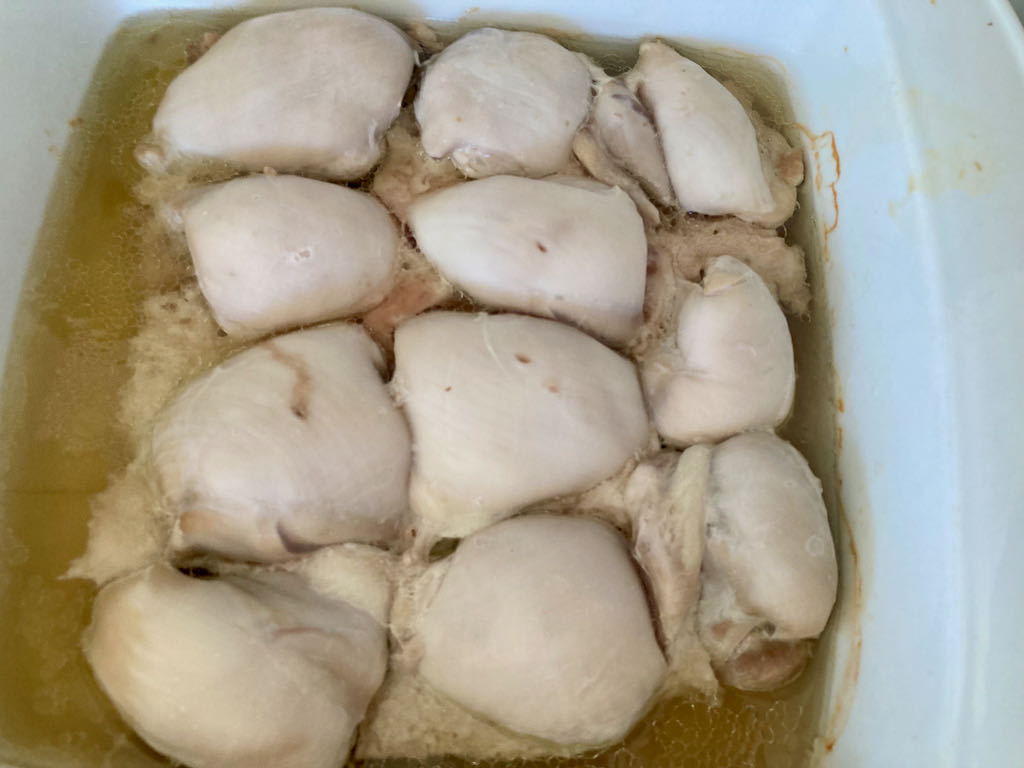
Bake the chicken for 30 minutes or into the chicken, is cooked through.
When the chicken is cooked, remove it from the oven and set it to one side to cool.
Drain any liquid from the casserole dish.
In a frying pan over medium heat, cook the pepper and onion until they are golden and soft.
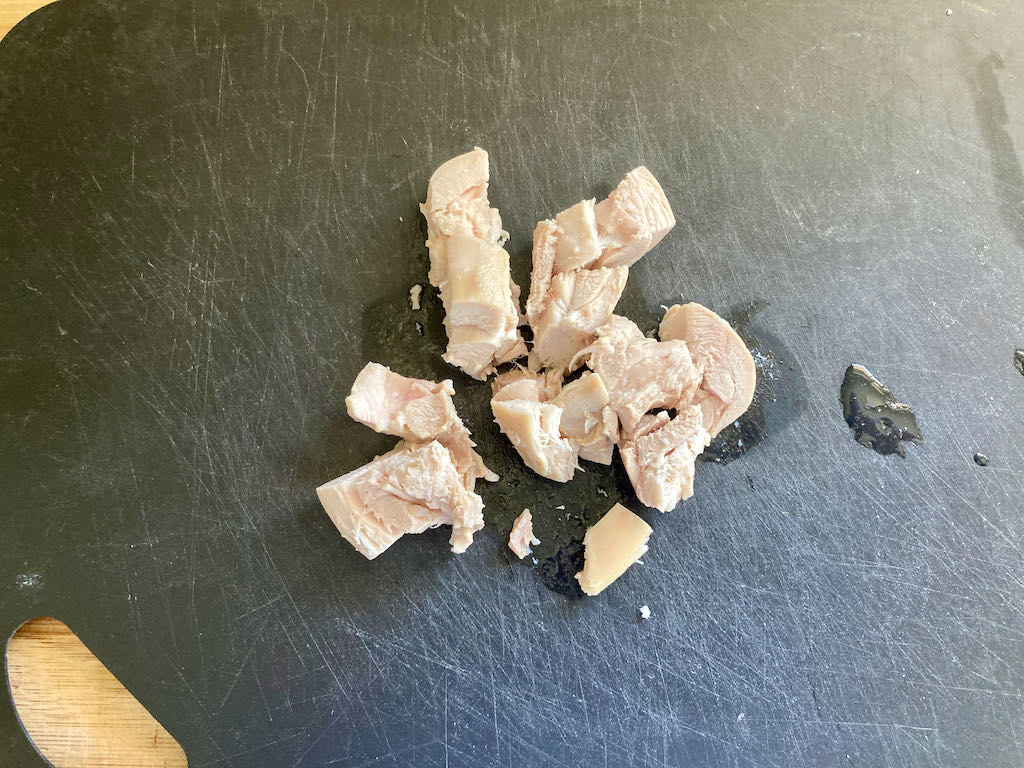
When the chicken is cooled enough to touch, chop it into bite-sized chunks.
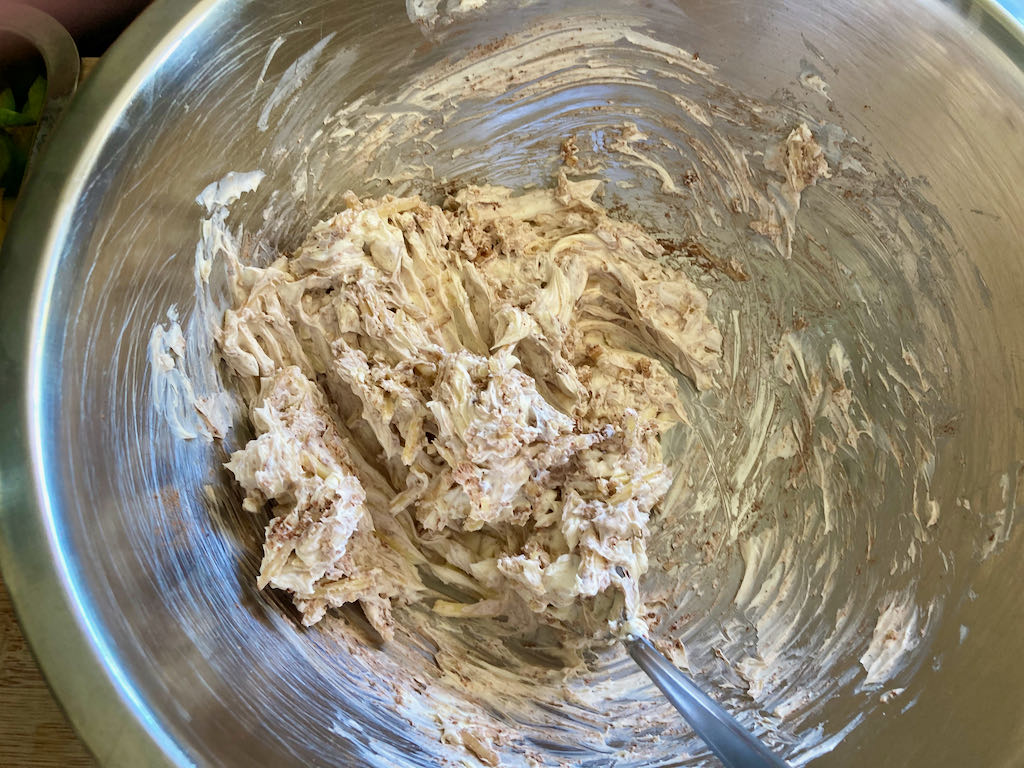
In a bowl, mix the cream cheese and half of the cheese with the fajita seasoning.
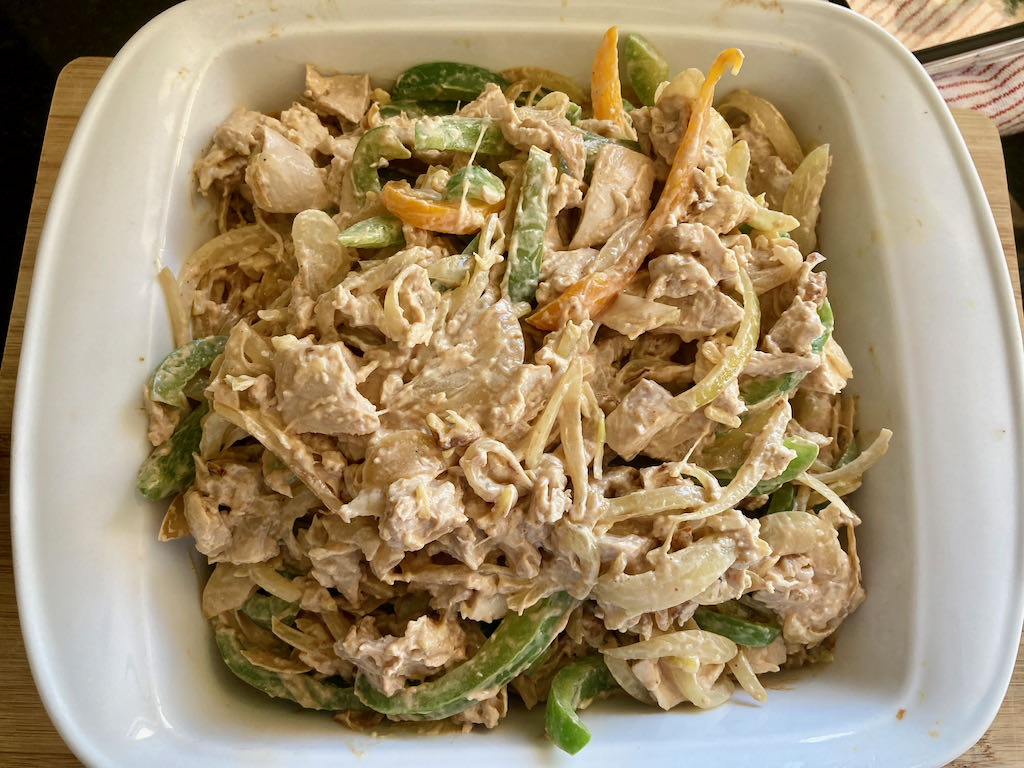
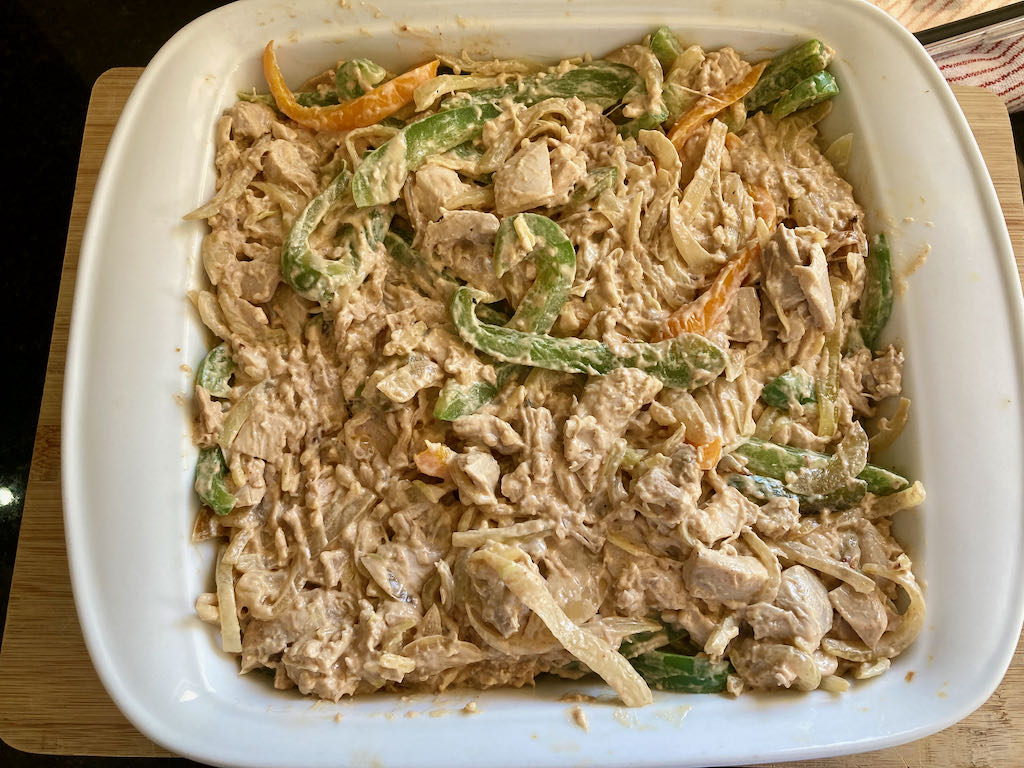
Add the chicken, onion and pepper to the cheese mix, give everything a good stir to coat all of the chicken with the cheese mixture.
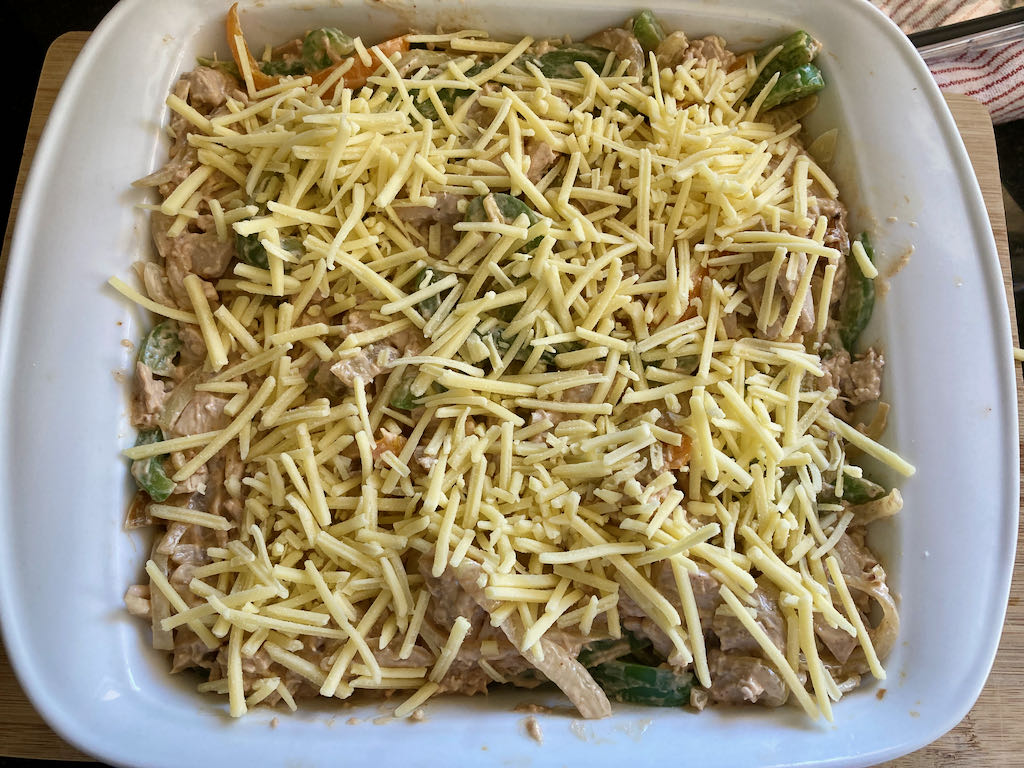
Put the mix back into the casserole and sprinkle it with the remaining cheese.
Bake the casserole for 30 minutes until the casserole is hot and the cheese is bubbling.
Place the chicken in the casserole dish and cover the dish with foil.
Bake, the chicken for 30 minutes or into the chicken, is cooked through.
When the chicken is cooked remove it from the oven and set it to one side to cool.
Drain any liquid from the casserole dish.
In a frying pan over a medium heat cook the pepper and onion until they are golden and soft.
When the chicken is cooled enough to touch chop it into bite-sized chunks.
In a bowl mix the cream cheese and half of the cheese with the fajita seasoning.
Add the chicken, onion and pepper to the cheese mix, give everything a good stir to coat all of the chicken with the cheese mixture.
Put the mix back into the casserole and sprinkle it with the remaining cheese.
Bake the casserole for 30 minutes until the casserole is hot and the cheese is bubbling.
Nutrition
Per Serving: 486 calories; 26 g fat; 3 g carbohydrates; 34g protein
Equipment
Scales
Measuring spoons
Knife
Fork
Chopping board
Casserole dish
Frying pan
Wooden spoon
Tongs
Mixing bowl
Spatula
Nutritional disclaimer
Nutrition information is provided as an estimate based on the ingredients used and available in my area (New Zealand). The nutritional information is here to help you understand the recipe; I use MyFitnessPal to generate my estimates. For more accurate nutritional information, please use a nutritional calculator with the ingredients in your area.
I think most people know that I love all Mexican food, enchiladas are one of my favourites.
As much as I love them, I can’t do the corn tortilla option regularly. I am always looking for alternatives that let me enjoy my favourite meals. For this one, I decided to try thinly sliced sweet potato as the alternative to tortillas.
As alternatives go, this is great and not as filling as the traditional corn tortilla option.
Freezer meal
Hands up if you are busy. Who is way too tired to get in the kitchen to cook at the end of the day? Definitely not me.
My days are filled with meetings, to-do lists, emails and telling people what to do. By the time I finish work, the last thing I want to do is get stuck into cooking a meal and then cleaning up afterwards. I want to work out and spend some time with Jaime. That is why freezer meals are my favourite solutions to the challenge of a busy life. A few hours on the weekend, and you find yourself with a stack of options for dinner that can be thawed and cooked for a healthy, delicious meal for the family.
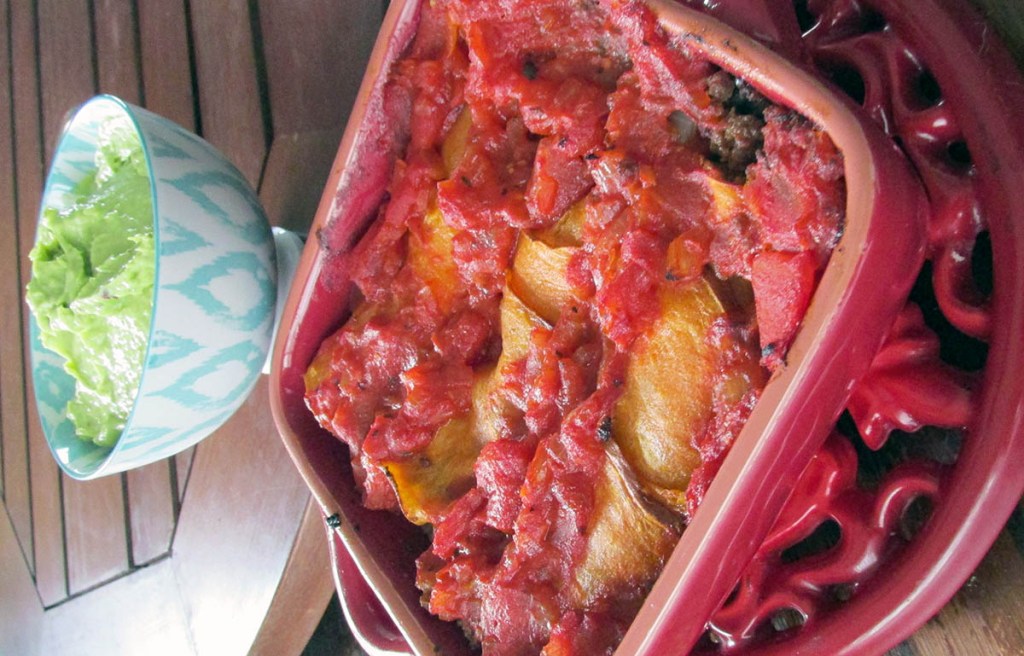
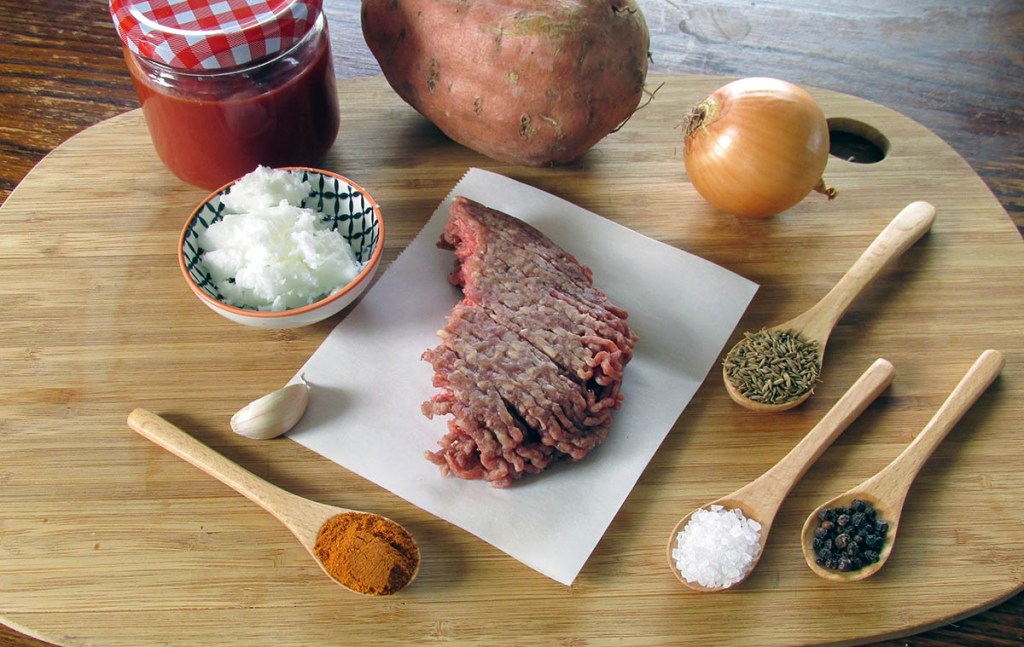
Sweet potato enchiladas recipe
Ingredients
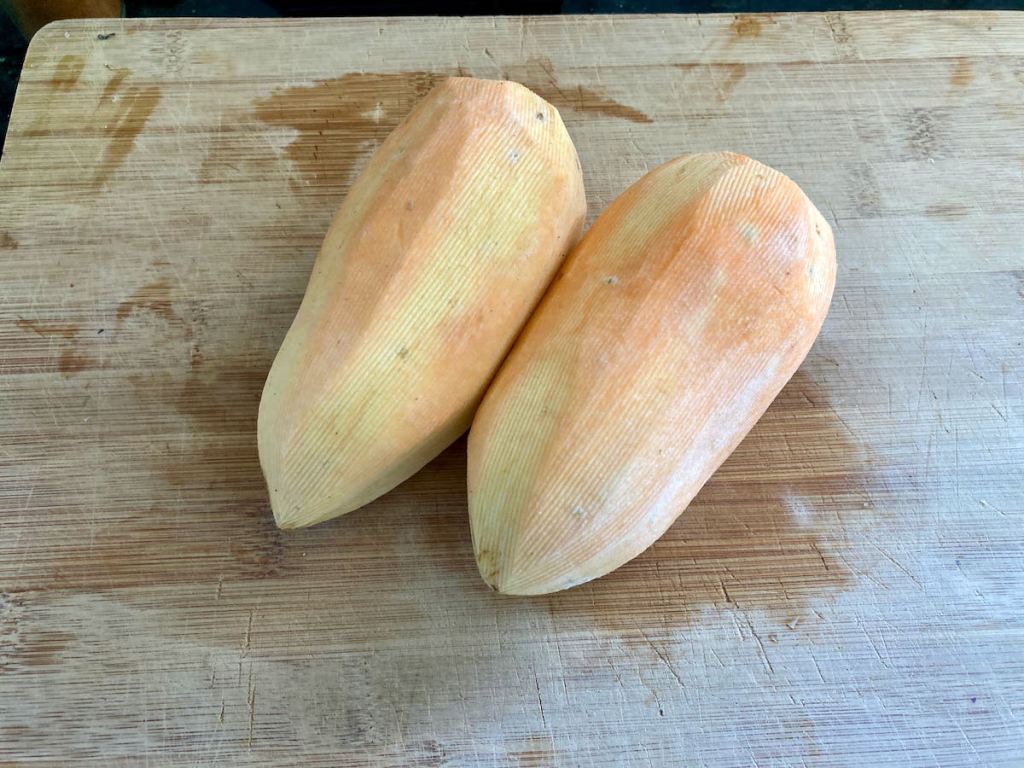
3 sweet potatoes, sliced thinly
450g minced beef
1/2 onion diced
2 garlic cloves, minced
50g green peppers diced
1/2 tsp. ground cumin
1/4 tsp. chilli powder
Salt and pepper to taste
3-4 tbsp. Coconut Oil
Enchilada sauce
Instructions
Preheat the oven to 170 degrees C/ 330 degrees F.
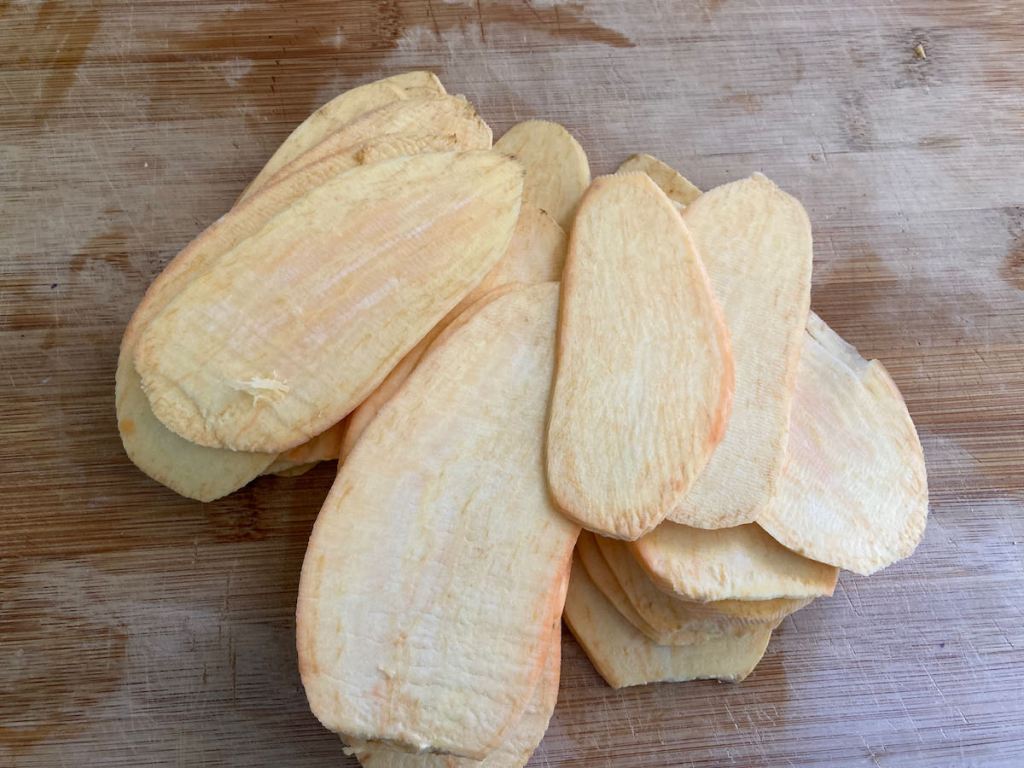
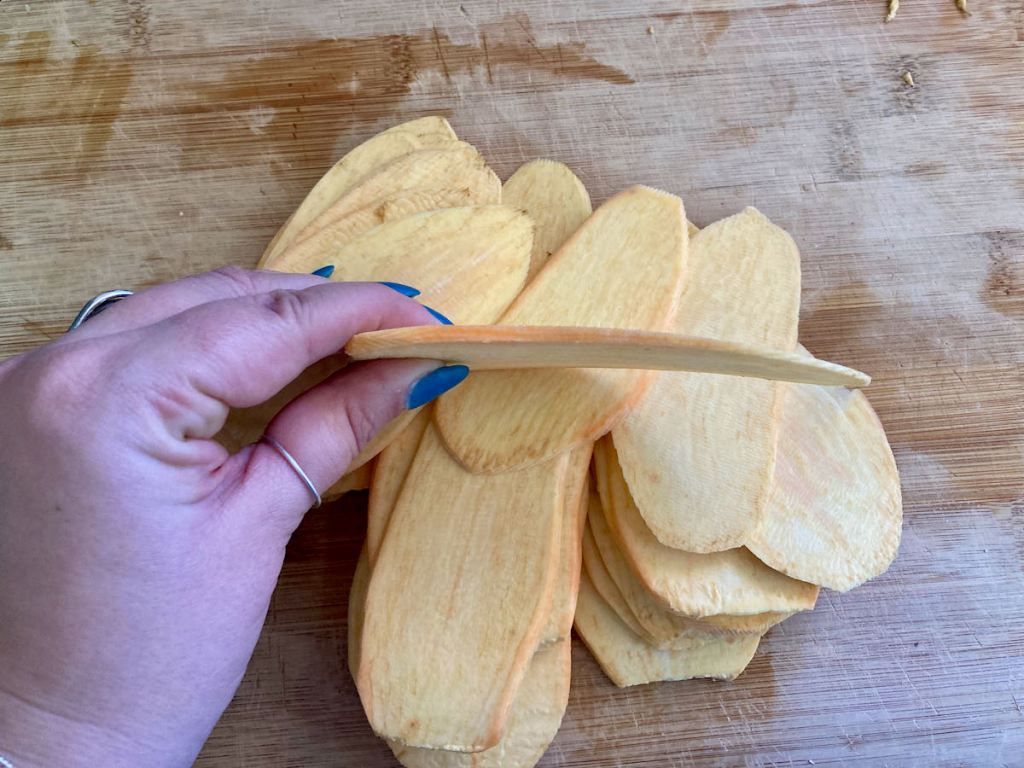
Use a mandolin to slice your sweet potatoes lengthwise thinly.
Using a knife means you don’t get even thickness, so I use a mandolin.
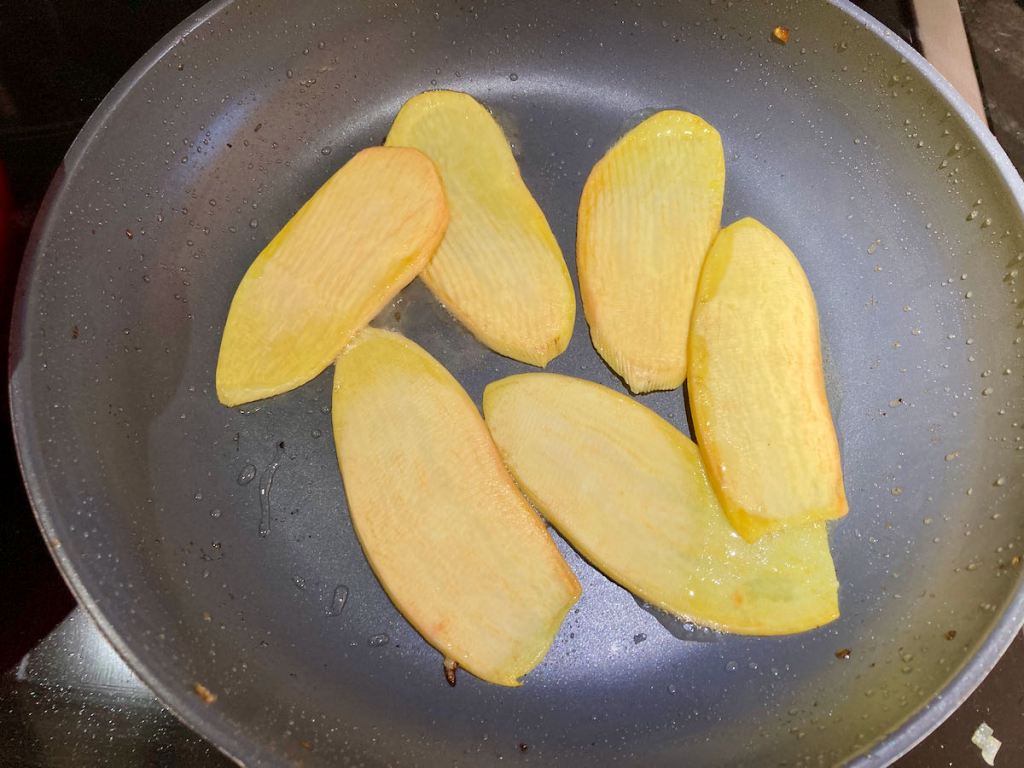
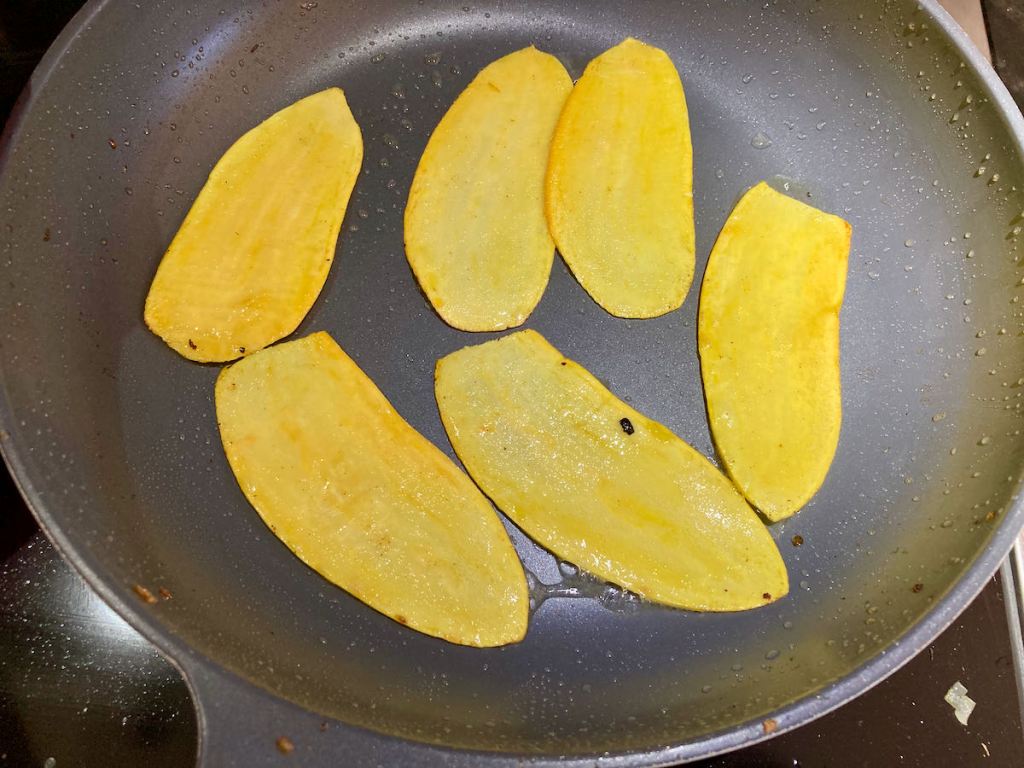
Using a large pan over medium heat, brush the inside with coconut oil.
When the pan is hot, add some of your sweet potatoes slices.
Cook your sliced sweet potatoes until they are soft, don’t let them get crispy.
Work in batches to ensure they cook properly.
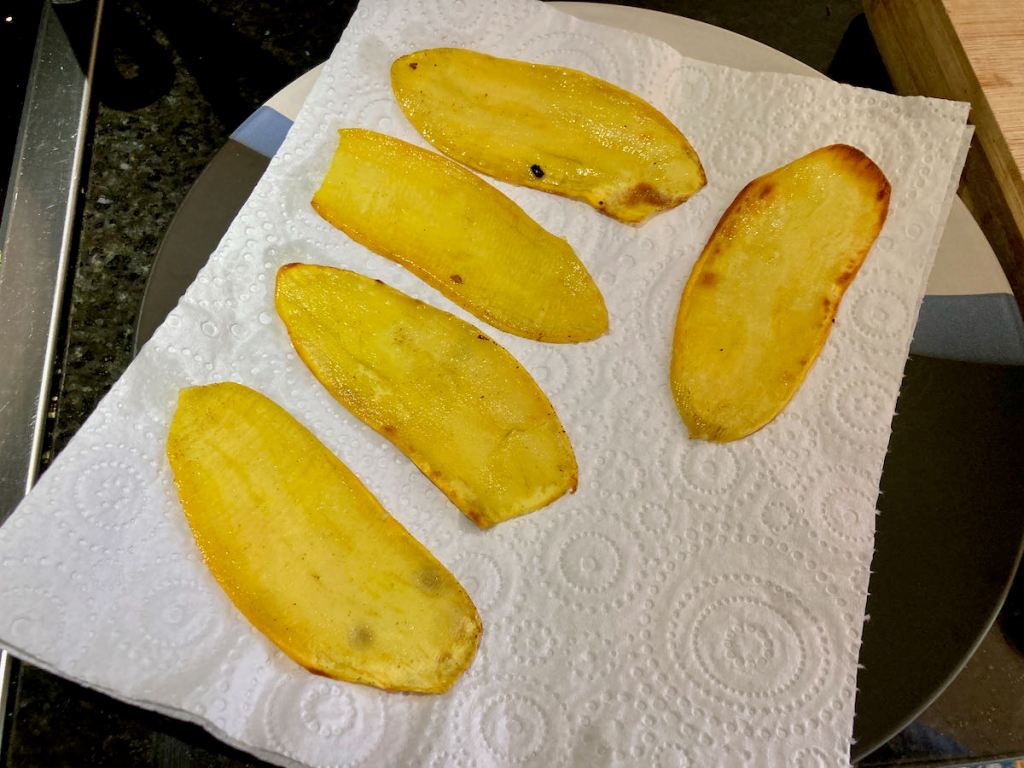
When cooked, remove excess oil with kitchen towel and chill while you prepare your meat.
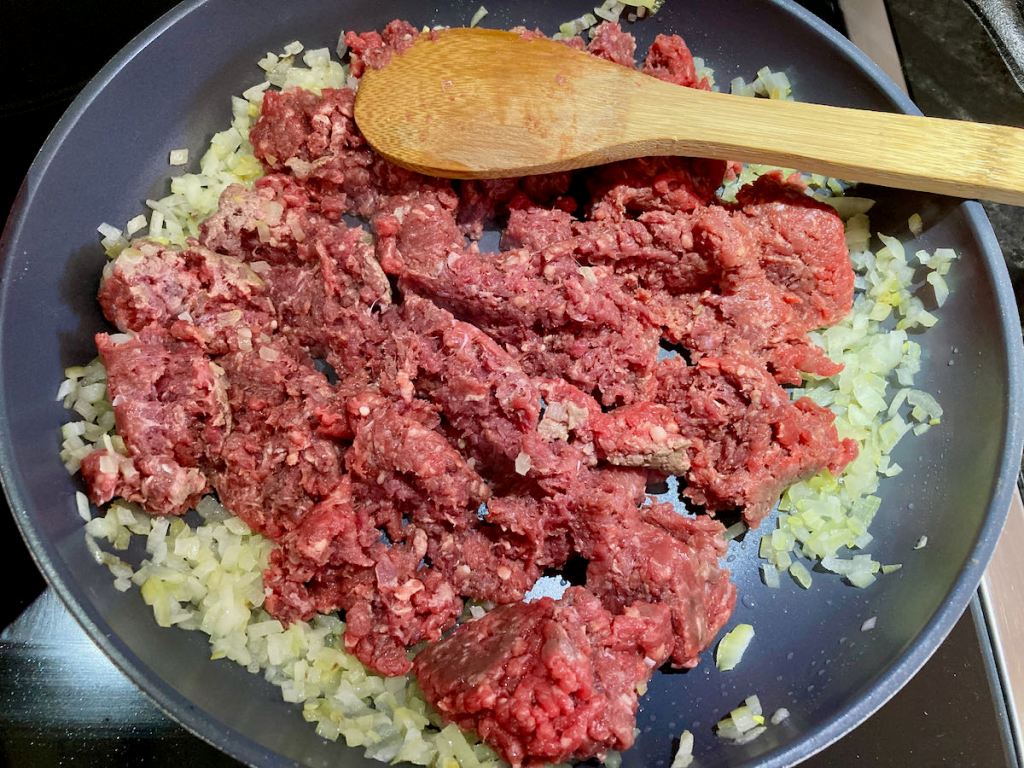
In a frying pan, add a little oil, then the minced garlic and onion.
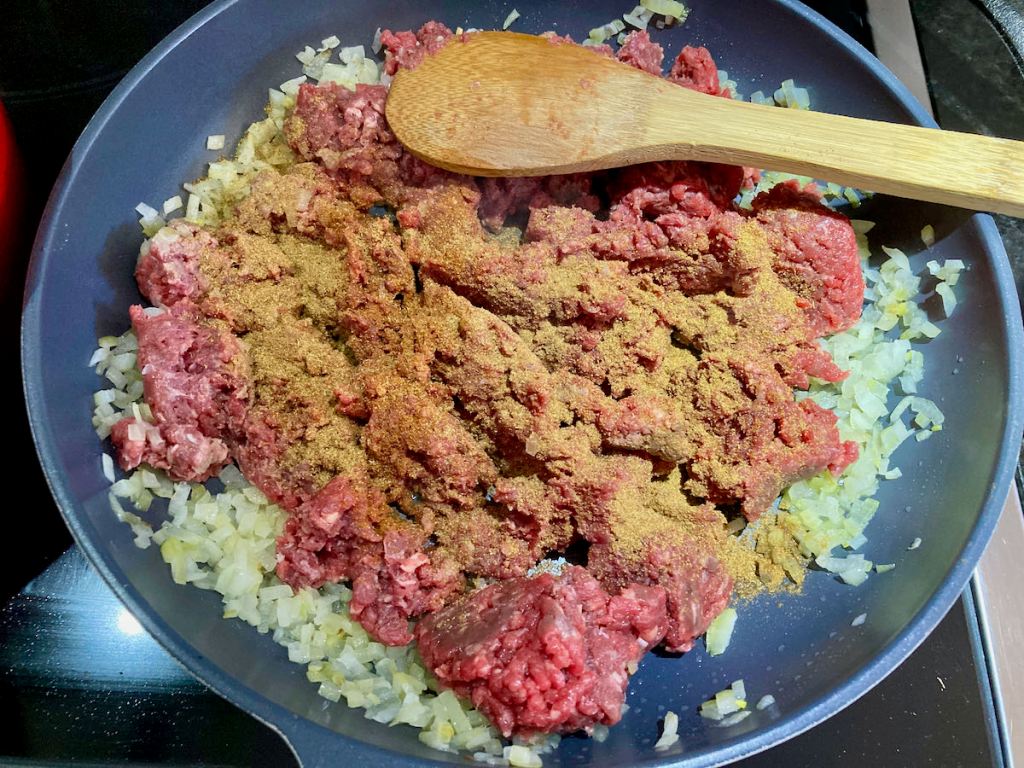
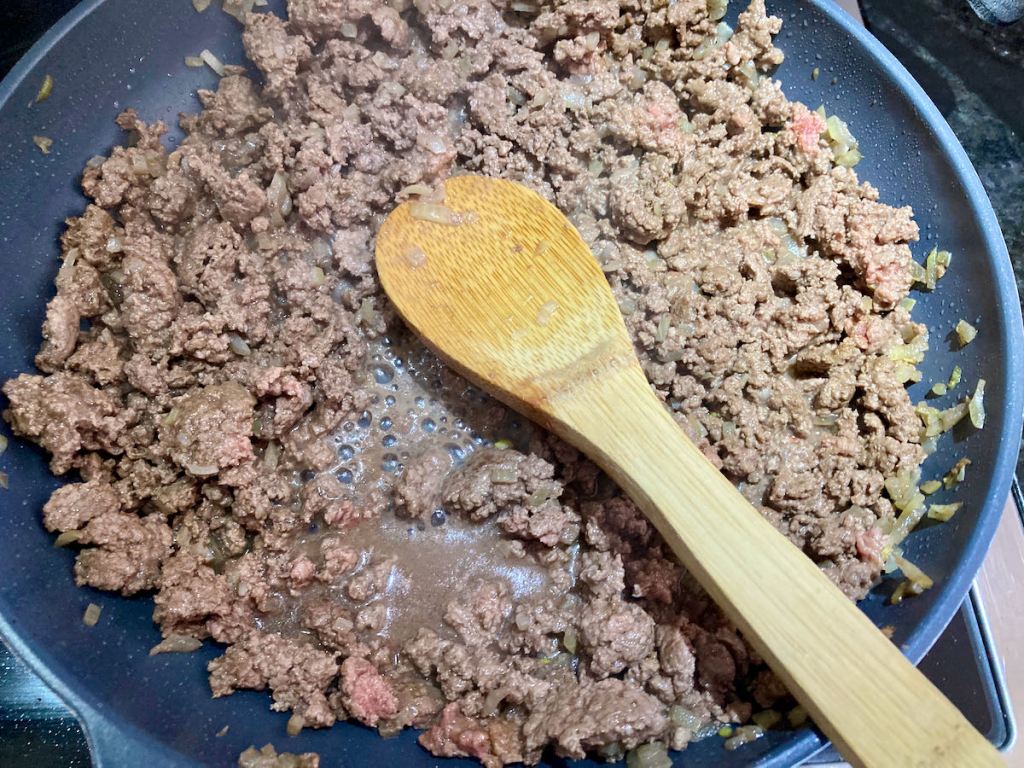
When the onion becomes translucent, add in your minced beef along with the peppers and spices.
Allow everything to cook, break up the minced beef and allow all of the flavours to mingle.
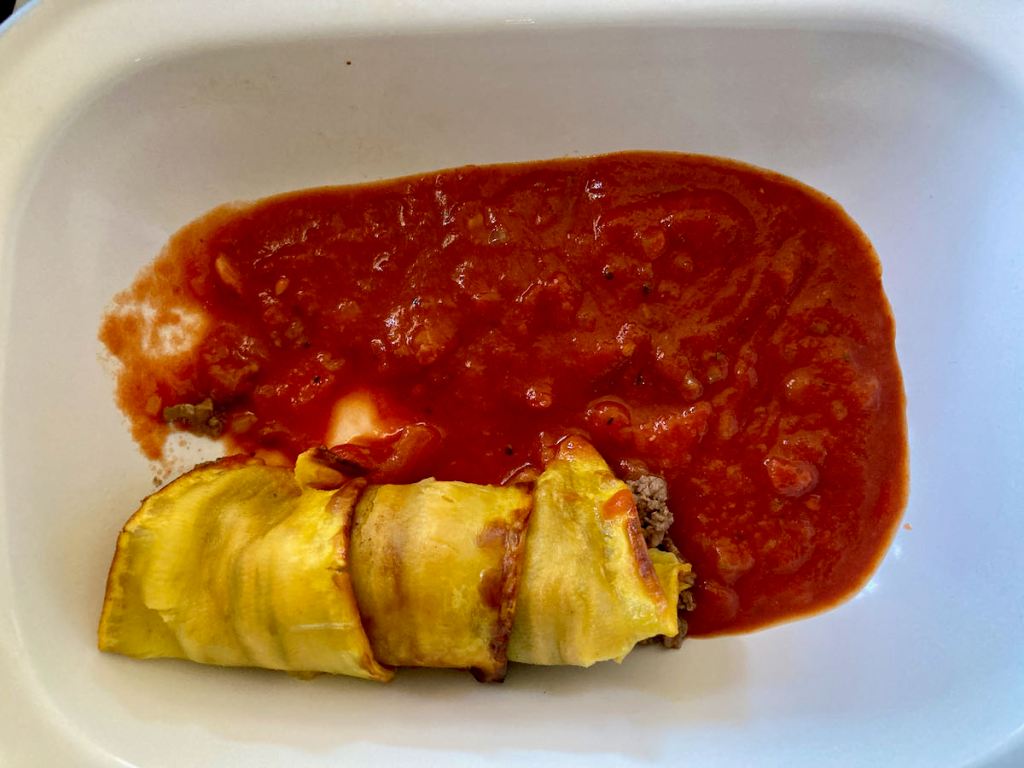
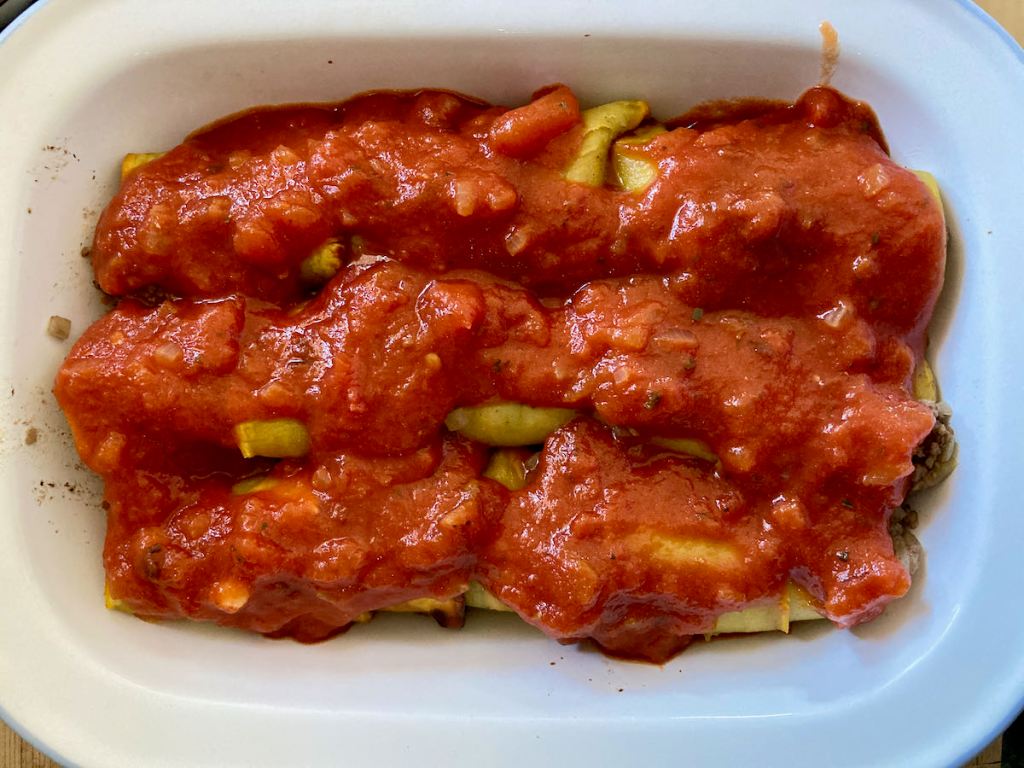
Add a spoonful of enchilada sauce to the bottom of a baking dish.
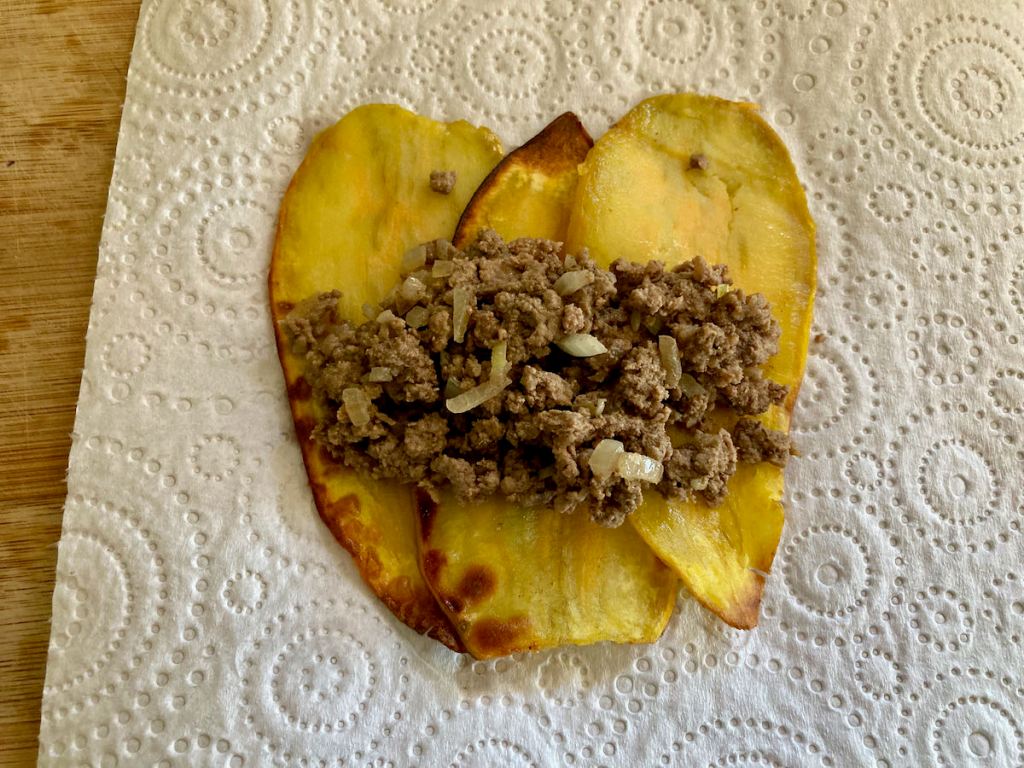
Build the enchiladas by taking three slices of sweet potato and overlap them to create a fan.
I like to place them on some kitchen paper.
Spoon some of the meat mix into the centre of the sweet potato.
Fold the sweet potato around the meat and place the roll in the bottom of the baking dish.
Place the end of the roll on the bottom so that it doesn’t unravel.
Use a mandolin to slice your sweet potatoes lengthwise thinly.
Using a knife means you don’t get even thickness, so I use a mandolin.
Using a large pan over medium heat, brush the inside with coconut oil.
When the pan is hot, add some of your sweet potatoes slices.
Cook your sliced sweet potatoes until they are soft, don’t let them get crispy.
Work in batches to ensure they cook properly.
When cooked, remove excess oil with some kitchen towel and chill while you prepare your meat.
In a frying pan, add a little oil, then the minced garlic and onion.
When the onion becomes translucent, add in your minced beef along with the peppers and spices.
Allow everything to cook, break up the minced beef and allow all of the flavours to mingle.
Add a spoonful of enchilada sauce to the bottom of a baking dish.
Build the enchiladas by taking three slices of sweet potato and overlap them to create a fan.
I like to place them on some kitchen paper.
Spoon some of the meat mix into the centre of the sweet potato.
Fold the sweet potato around the meat and place the roll in the bottom of the baking dish.
Place the end of the roll on the bottom so that it doesn’t unravel.
Repeat with the remaining sweet potato and meat.
Place leftover meat around your enchiladas.
Pour your enchilada sauce on top.
Bake for 15 minutes.
Serve hot with some salsa and guacamole.
Nutrition
Per Serving: 321 calories; 22.3g fat; 14.5g carbohydrates; 15.9g protein
Equipment
Knife
Chopping board
Mandolin
Frying pan
Tongs
Wooden spoon
Baking dish
Kitchen paper
Nutritional disclaimer
Nutrition information is provided as an estimate based on the ingredients used and available in my area (New Zealand). The nutritional information is here to help you understand the recipe; I use MyFitnessPal to generate my estimates. For more accurate nutritional information, please use a nutritional calculator with the ingredients in your area.
The Rueben is a classic sandwich, the combination of corned beef, Swiss cheese, sauerkraut with Russian dressing on rye bread. This combination isn’t the only one that goes by the name ‘Rueben’; there are a range of variations, corned beef is switched out for smoked meat, pastrami, fish or courgettes, sauerkraut gets switched out for coleslaw, and Russian dressing gets switched for thousand island dressing or mayo. The possible combinations are endless.
Bread-free option
As is often the case, I can’t leave a recipe alone; I must play around with a recipe. I wanted to create a meal that brought together the classic flavours of the Rueben without the carbs of the sandwich. Replacing the bread with another meat is always an excellent way to go in my book. With that in mind, I started looking for a cut of meat that would work with the intense pastrami flavours but not overpower them. The perfect partner for the flavours is pork, more specifically, pork tenderloin.
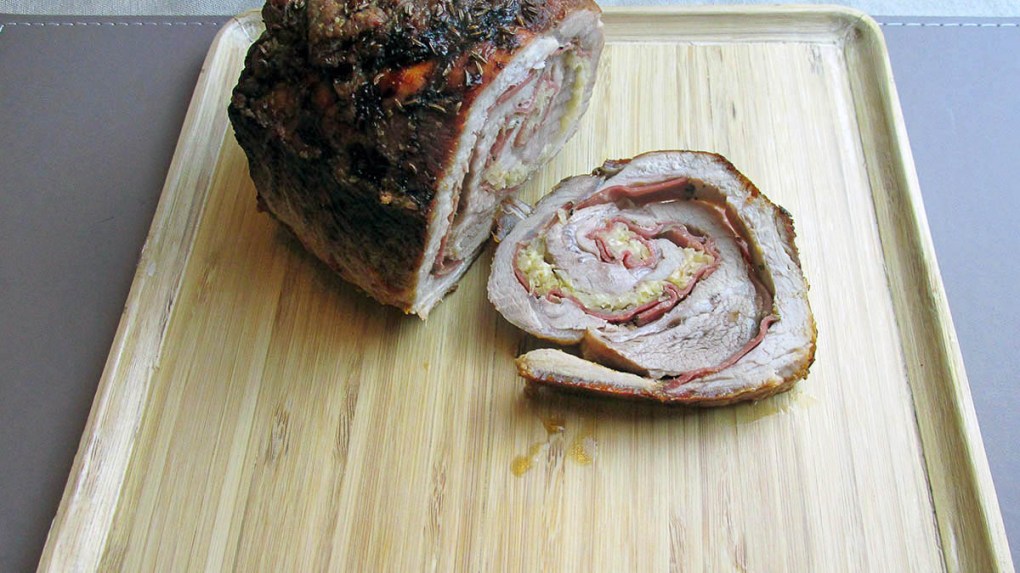
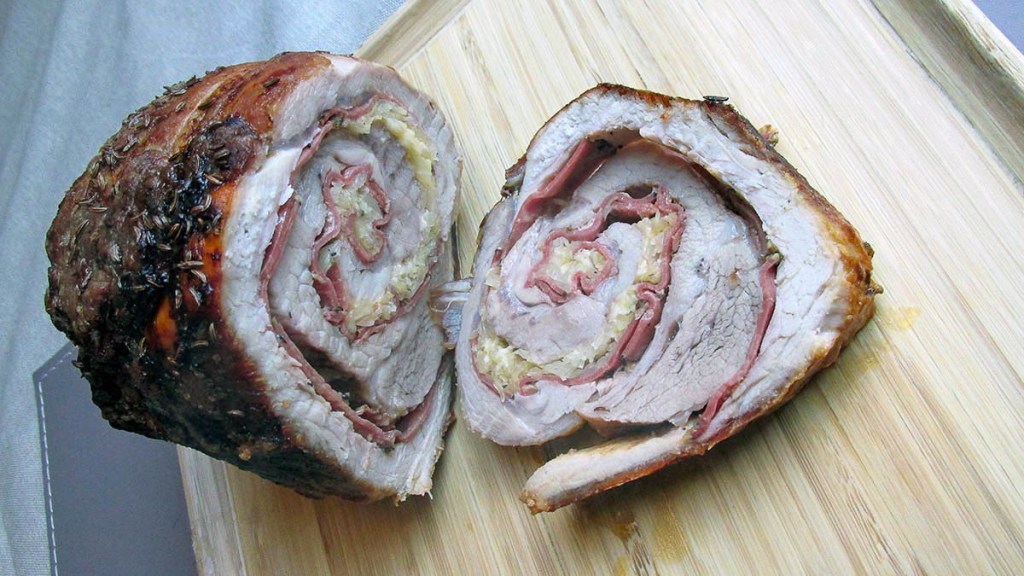
The Rueben roast roll was born!
The tenderloin is cut to be laid out as a thin layer; the Reuben ingredients are then layered on top of the pork before it is rolled up to keep everything together, making the roll moist and succulent.
Reuben roast roll recipe
Ingredients
500g pork tenderloin, trimmed
3 tbsp. thousand island dressing
60g. pastrami
60g. cheese
1/4 cup sauerkraut, drained well
1/2 tsp. olive oil
1 tsp. garlic powder
1 tsp. salt
1/4 tsp. caraway seeds
Instructions
Preheat the oven to 220 degrees C/425 degrees F.
The first step is to butterfly the tenderloin.
Cut a lengthwise slit down the centre of the tenderloin to within 2 cm of the bottom.
Be careful not to cut all the way through.
Open up the cut so that the tenderloin lies flat.
On each half, make another, lengthwise slit down the centre to within 2 cm of the bottom; cover with cling film.
Flatten to 1 cm thickness with a mallet or rolling pin.
Remove the cling film; spread the thousand island along one side of the pork.
Layer the pastrami on top.
Then the cheese and sauerkraut along the centre of the pork.
Roll up the loin from the long side.
Use butcher’s string to secure the pork, keep the filling inside, and rub with olive oil.
In a small bowl, mix together the garlic powder, salt and caraway seeds, rub the mix all over the pork.
Place the pork in a baking pan
Roast the pork for 35 – 45 minutes.
When the pork is cooked, remove it from the oven and let it rest for 10 minutes before removing the string and slicing up.
Nutrition
Per Serving: 174 calories; 9 g fat; 3 g carbohydrates; 20 g protein
Equipment
Knife
Chopping board
Cling film
Rolling pin/ meat mallet
Butchers string
Baking pan
Nutritional disclaimer
Nutrition information is provided as an estimate based on the ingredients used and available in my area (New Zealand). The nutritional information is here to help you understand the recipe; I use MyFitnessPal to generate my estimates. For more accurate nutritional information, please use a nutritional calculator with the ingredients in your area.
Eating clean gets a lot easier once you have mastered a few essential recipes. This recipe is basic, not like basic unicorn basic, more like beard and flannel basic. Back to the point (which isn’t Unstable unicorns), having basic skills and recipes in your arsenal means you will never be left with only UberEats as your weeknight options. Once you master this recipe, the possibilities are endless.
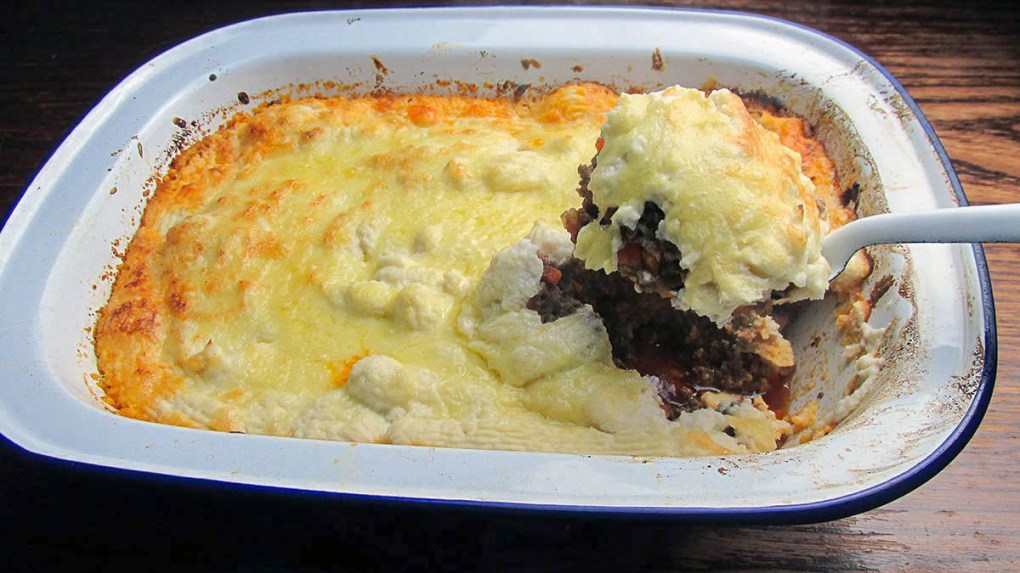
A fresh spin on a classic
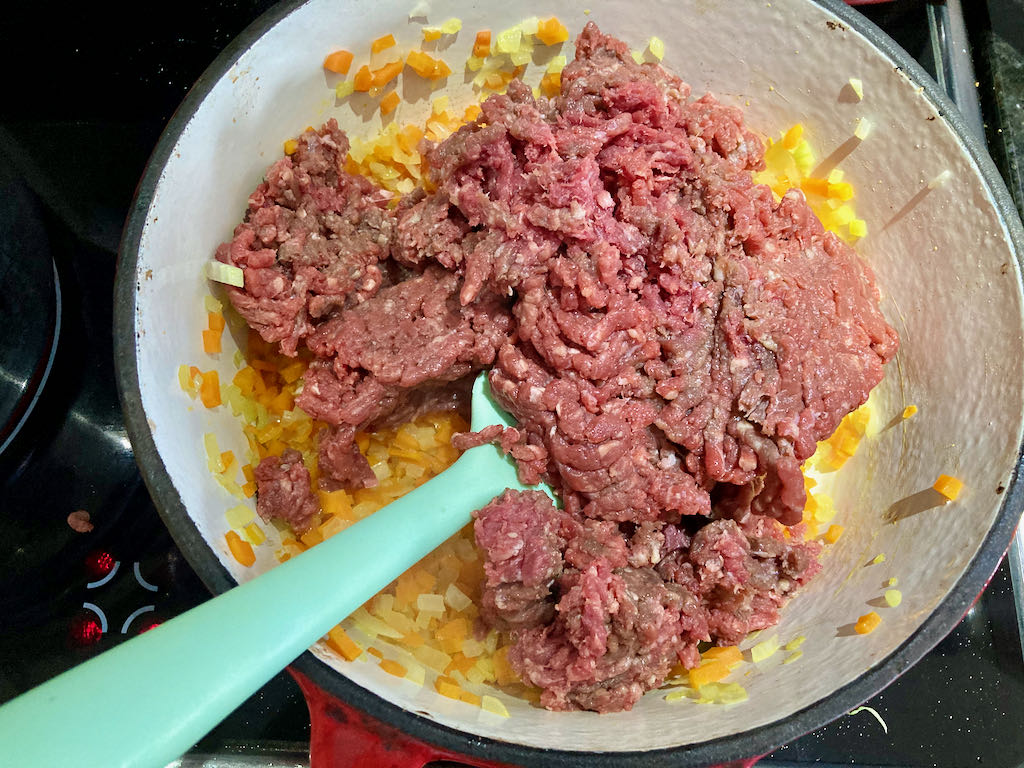
The traditional cottage pie was a way to use leftover roasted meat from the Sunday dinner and topping the pie with mashed potato to make the leftovers go a little further. Obviously, the person who first came up with the cottage pie didn’t have a hungry family like mine to feed; having leftover meat does not happen in my house often. My version of cottage pie comes with a big helping of beef mince to keep my hungry boys happy.
Lower carbs big flavour
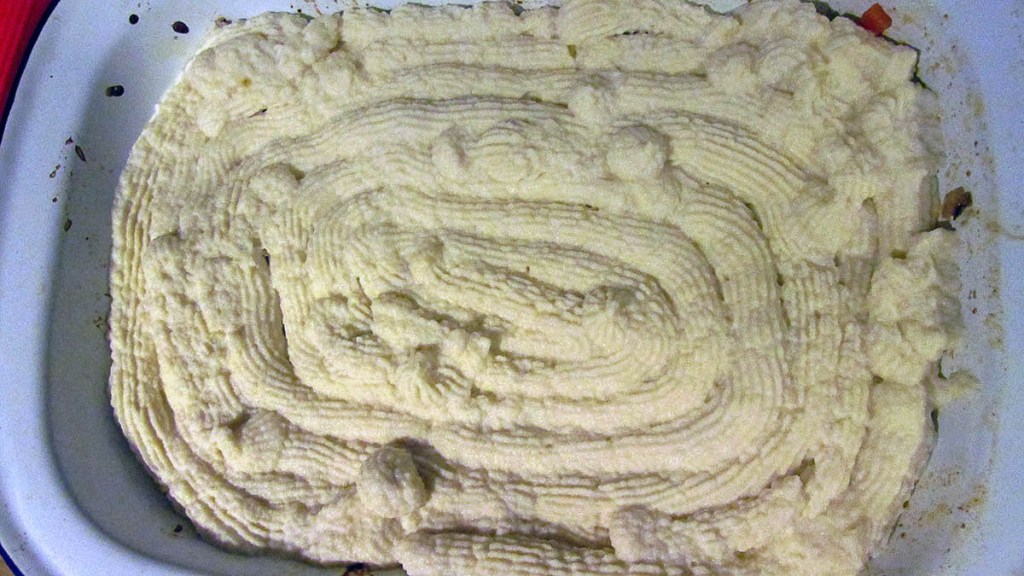
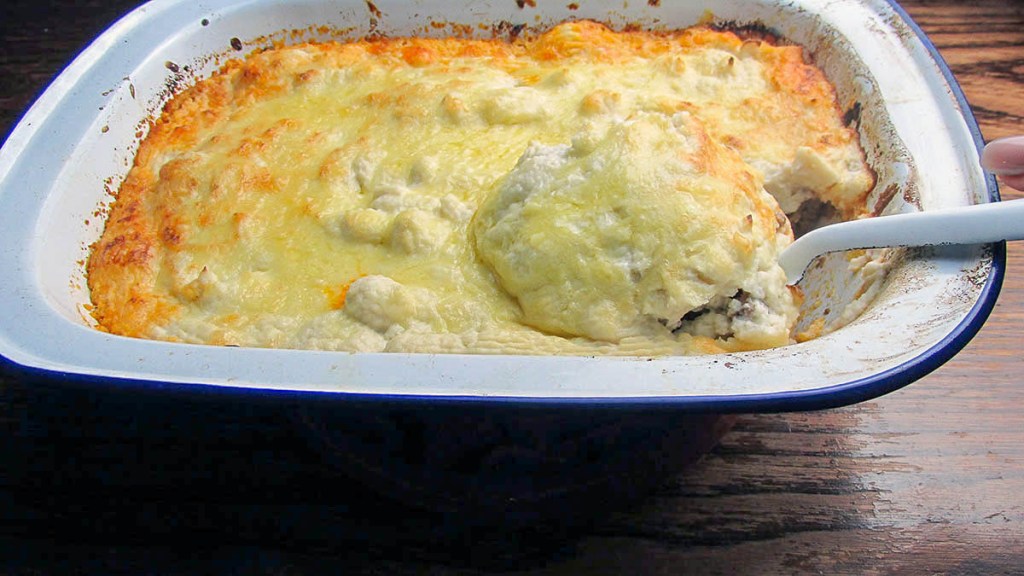
I wanted to make a lower-carb version of the traditional cottage pie by swapping out the mashed potatoes for mashed cauliflower. The cauliflower mash is a great way to reduce carbs without trading off on flavour.
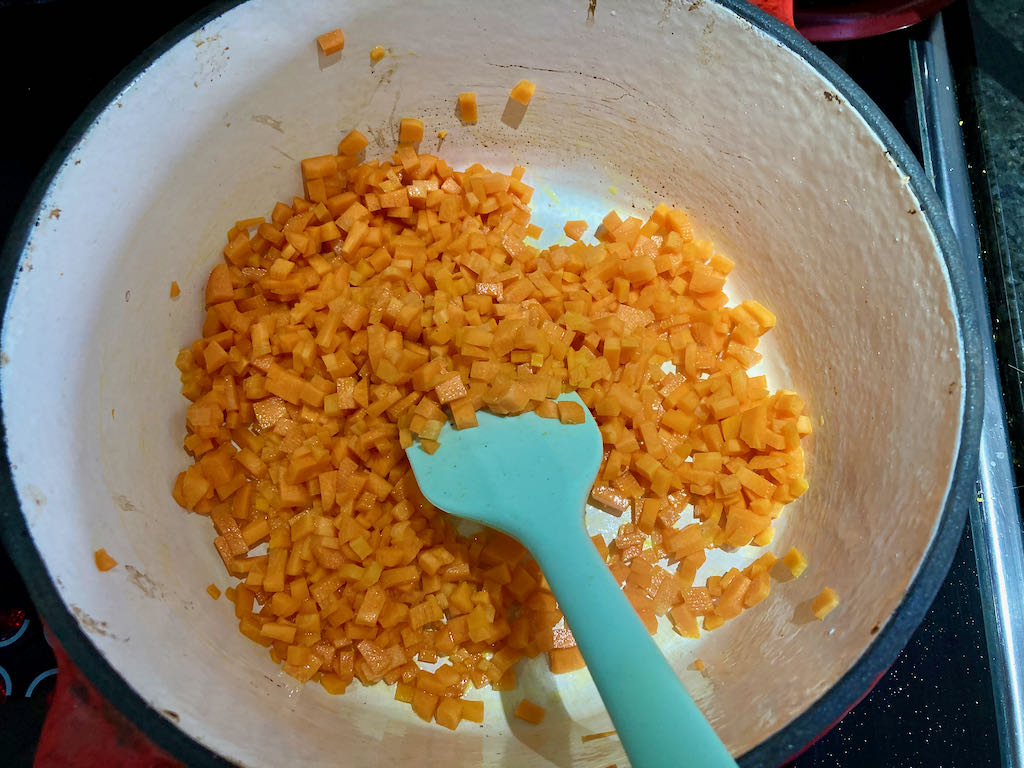
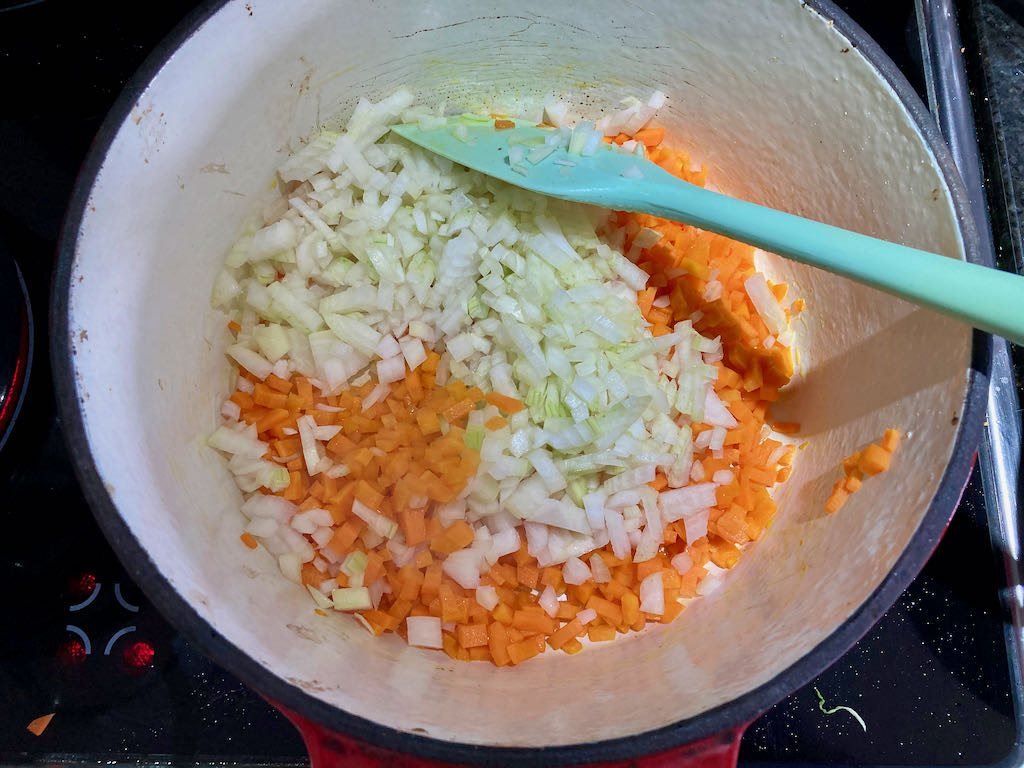
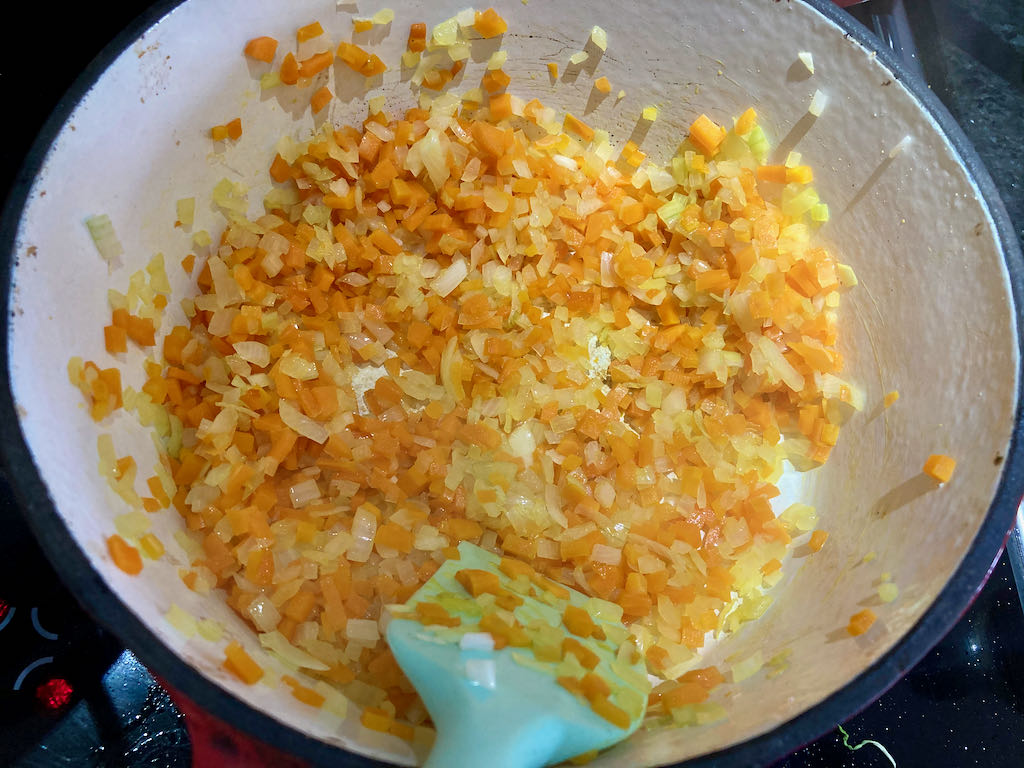
Cottage pie recipe
Ingredients
750g minced beef
2 tsp. oil
1 onion, finely chopped
1 carrot, finely diced
1 celery stick, finely chopped
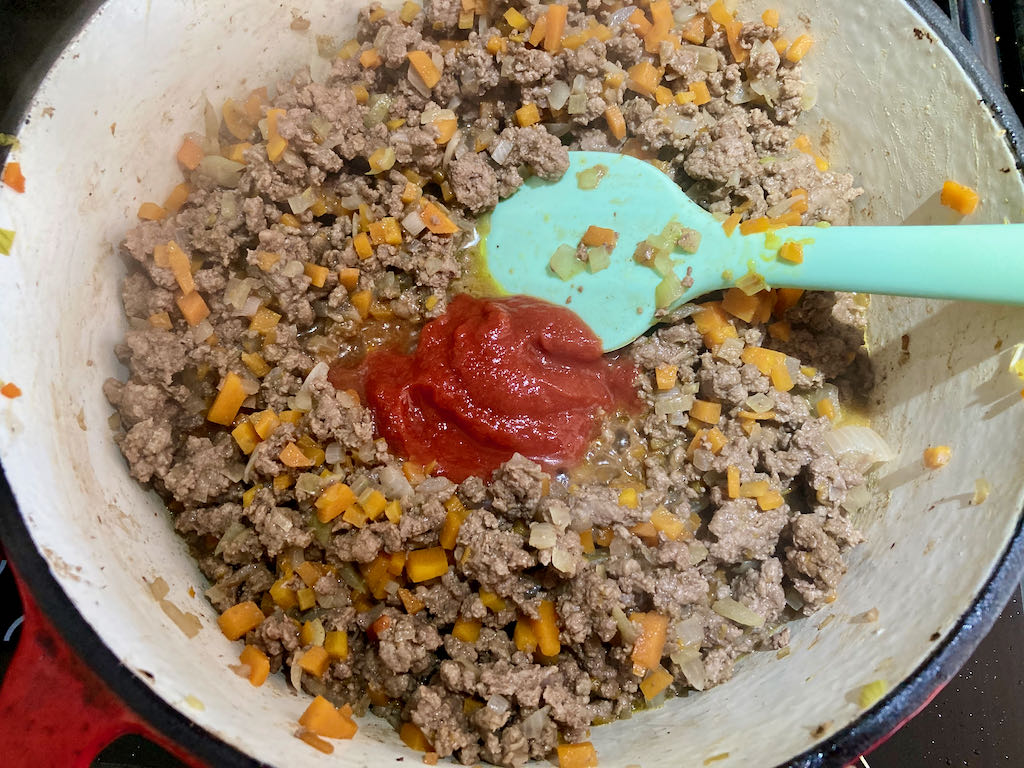
1/4 cup tomato sauce
2 tsp. Worcestershire
Freshly ground pepper
1 tbsp. butter, melted
1 head cauliflower
2 cups vegetables to serve
Preheat the oven to 180 degrees C/ 350 degrees F.
In a large frying pan, heat the oil over medium-high heat.
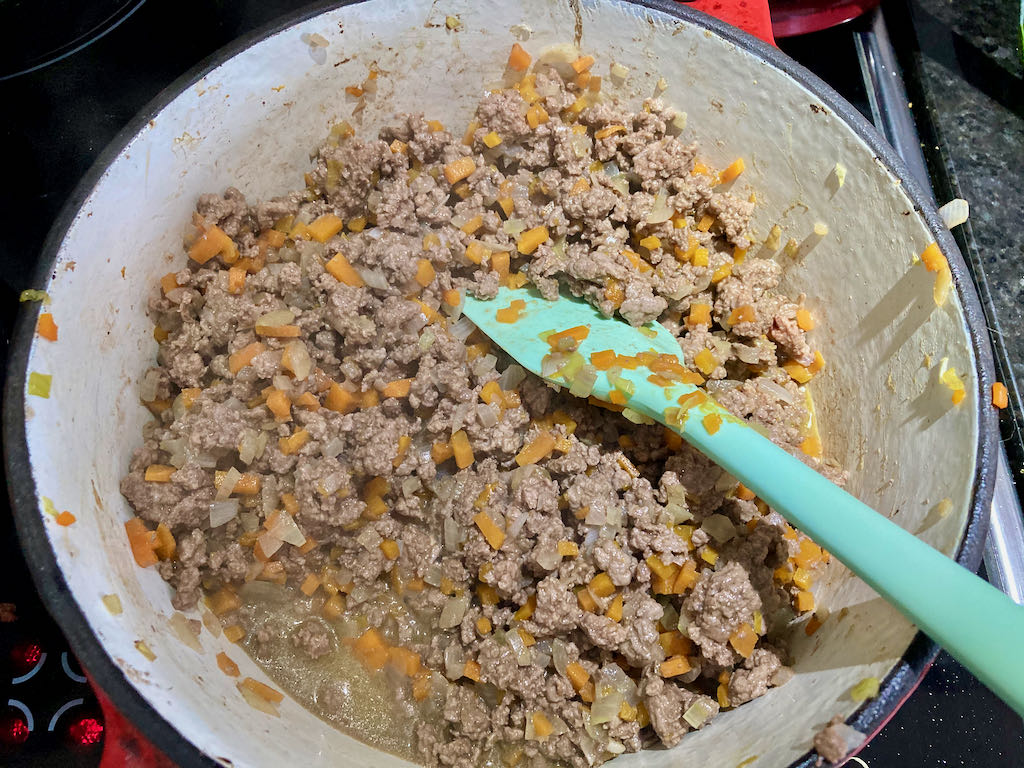
Add the onion, carrot and celery to the pan, cook for 5 to 7 minutes or until tender.
Make sure to stir the vegetables often.
Add the mince to the pan and cook for a further 5 minutes or until mince is browned, stir regularly to break up the mince.
Reduce heat to medium-low, add the sauces, and season to taste.
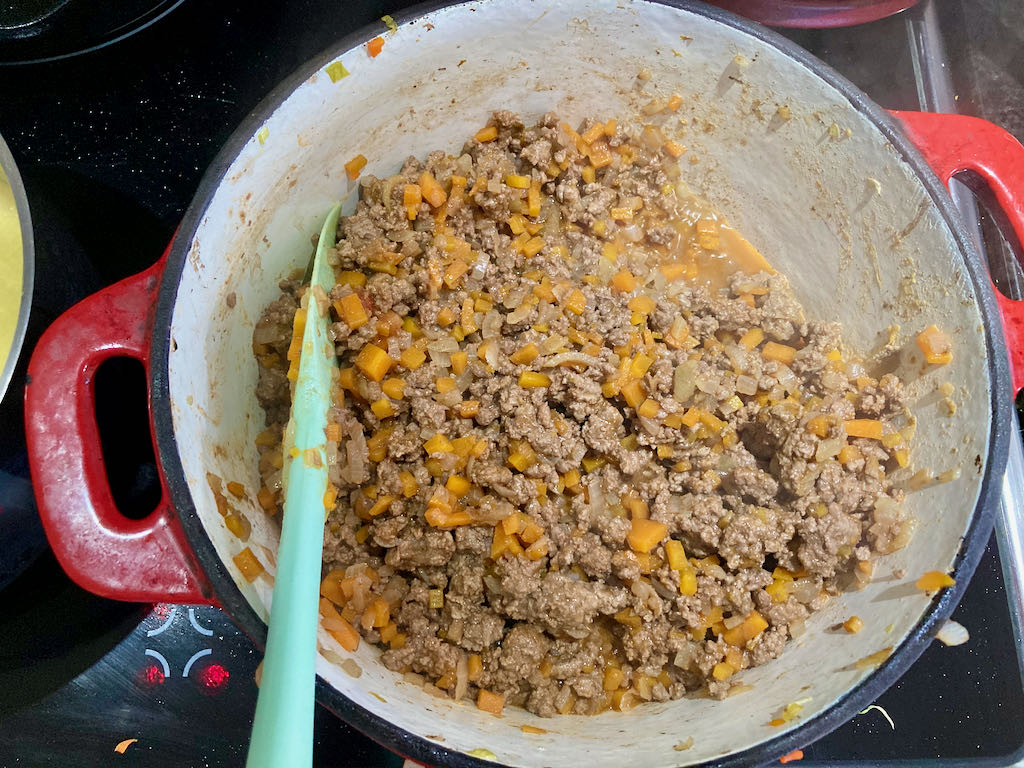
Cover the pan and simmer for 15 minutes.
Remove the mix from the heat and set to one side.
To make your mash topping, chop the cauliflower into chunks and place in a steamer*
Steam the cauliflower until it is tender, remove from the heat and allow it cool a little.
Use a food processor to blend down the cauliflower with the butter until you get a smooth consistency.
Spoon the meat mixture into a large baking dish and top with the cauliflower mash.
Bake for 20 to 25 minutes or until piping hot and the mash is golden.
In a large frying pan, heat the oil over medium-high heat.
Add the onion, carrot and celery to the pan, cook for 5 to 7 minutes or until tender.
Make sure to stir the vegetables often.
Add the mince to the pan and cook for a further 5 minutes or until mince is browned, stir regularly to break up the mince.
Reduce heat to medium-low, add the sauces, and season to taste.
Cover the pan and simmer for 15 minutes.
Remove the mix from the heat and set to one side.
To make your mash topping, chop the cauliflower into chunks and place in a steamer*
Steam the cauliflower until it is tender, remove from the heat and allow it cool a little.
Use a food processor to blend down the cauliflower with the butter until you get a smooth consistency.
Spoon the meat mixture into a large baking dish and top with the cauliflower mash.
Bake for 20 to 25 minutes or until piping hot and the mash is golden.
*if you don’t have a steamer, you can use a colander over the top of a pan of boiling water
Nutrition
Per Serving:249 calories; 10.1 g fat; 1.1 g carbohydrates; 20.1 g protein
Equipment
Frying pan
Wooden spoon
Vegetable steamer
Tongs
Food processor
Spatula
Baking dish
Nutritionaldisclaimer
Nutrition information is provided as an estimate based on the ingredients used and available in my area (New Zealand). The nutritional information is here to help you understand the recipe; I use MyFitnessPal to generate my estimates. For more accurate nutritional information, please use a nutritional calculator with the ingredients in your area.
It is getting harder to find a meal that I can have without sharing it with everyone. I know I shouldn’t complain that the kids are getting into new kinds of food, and we can have a more extensive range of dishes for our family menu, but I’m not happy about sharing some things.
Let me explain
Recently I’ve been trying to eat a higher fat diet and manage the amount of carbs I’m eating, I haven’t gone full keto, but I’m trying to do more keto meals. I made a big batch of white chilli to have as meals in the freezer, 12 portions packaged up in the freezer. I also made cauliflower chowder and beef stroganoff. In all, I had 24 portions of food that would fit my way of eating; not a bad effort for 2 hours of work. Before I even had one meal, I lost three portions; Liam snarfed a chowder with bacon crumbles, and Jay snarfed a chilli and claimed another for his lunch. This wasn’t a one-off; my stash of meals is being raided almost daily; my tasty macro balanced meals disappear constantly. Unfortunately, this happens with everything. My solution to this food-stealing problem, add as much spice to my food as possible.
If you can’t stand the heat
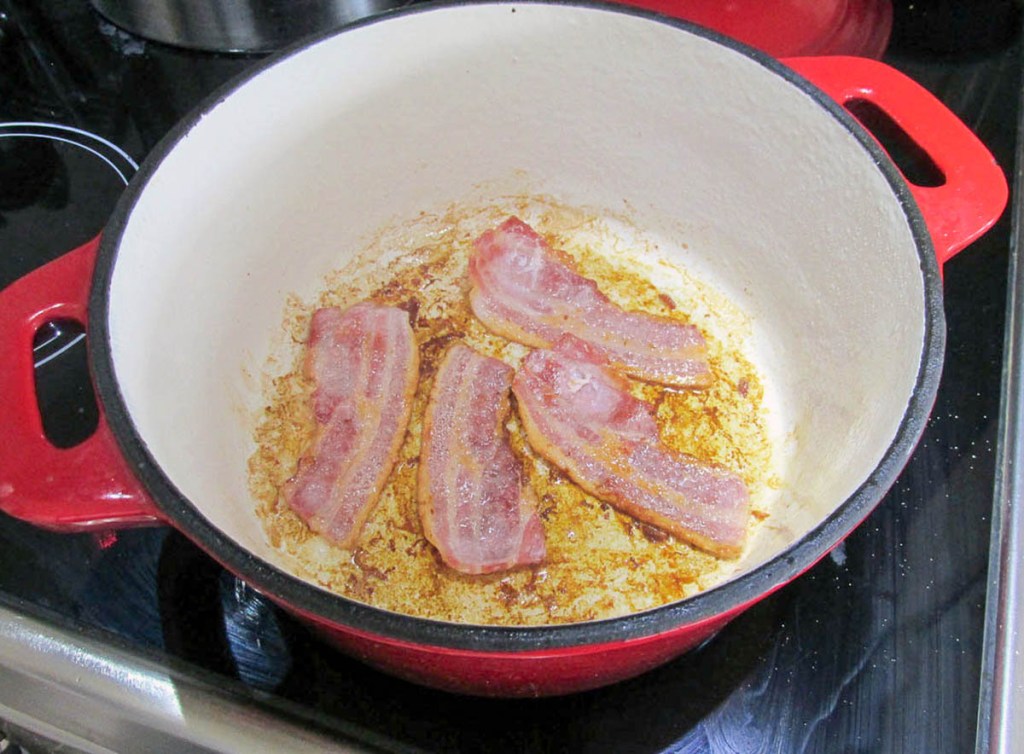
My jalapeno plant has been producing like crazy, so I’m going to put them to good use. I figure putting a big batch of jalapenos in my soup means I can have it all to myself. This soup is (for now) the perfect meal that I don’t have to share. The simple soup with bacon crumbles is easy to make and keeps in the fridge and freezer well.
Keto friendly soup that tastes great and has a great spicy kick
Credit: Cath @ easycleaneats
Ingredients
4 slices bacon
250g cream cheese
125 ml heavy cream
2 cup chicken broth
1/2 tsp garlic powder
1/4 cup Cheddar cheese, grated
1/4 cup Havarti cheese, grated
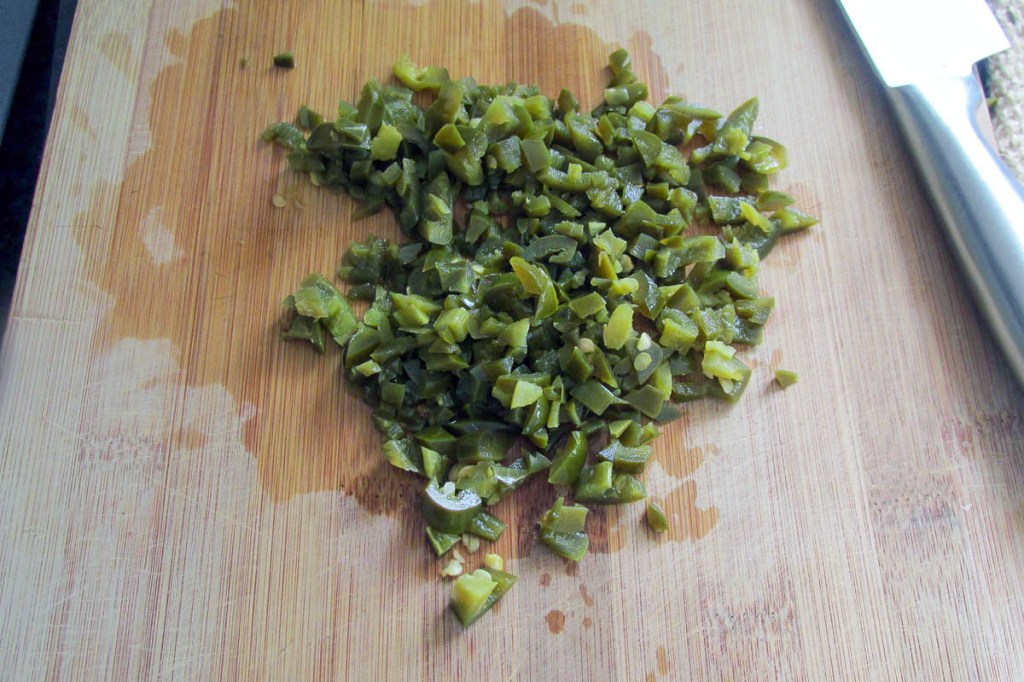
4 jalapeno peppers, finely chopped
Directions
Take a saucepan over a medium heat.
Cook the bacon in the saucepan in full slices.
When the bacon is cooked, remove it from the pan and chop it up to use as a garnish later.
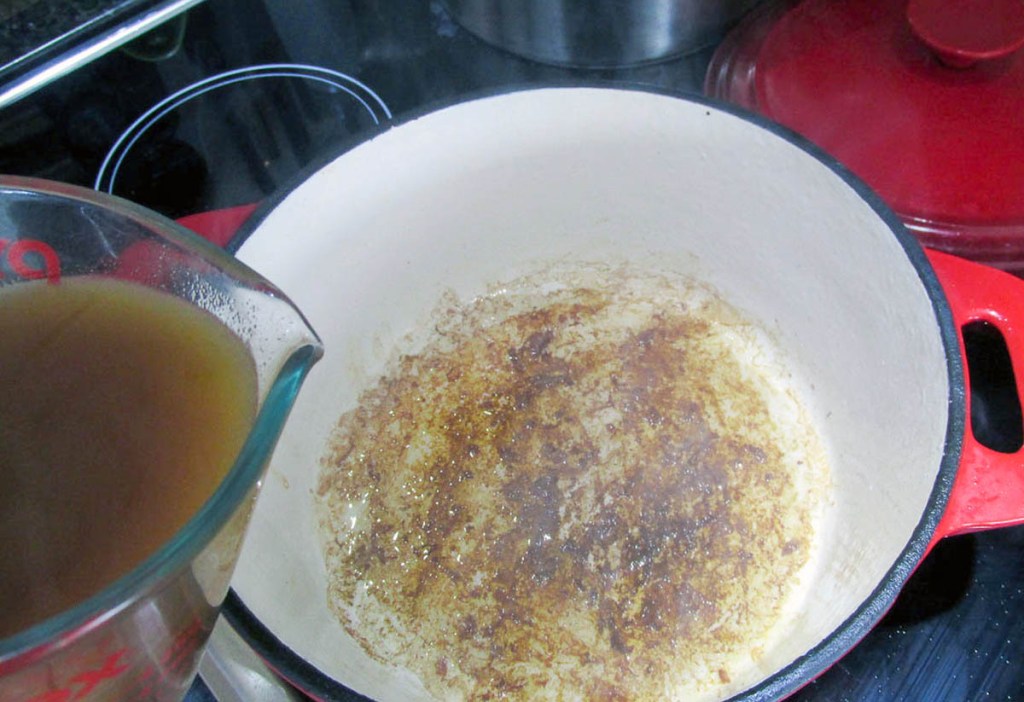
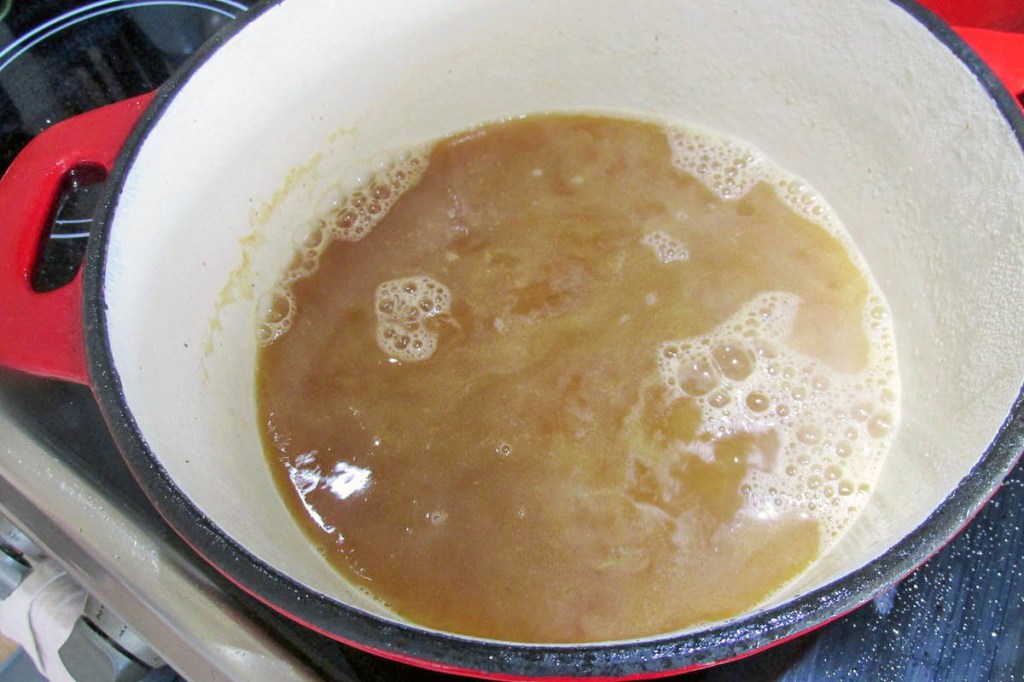
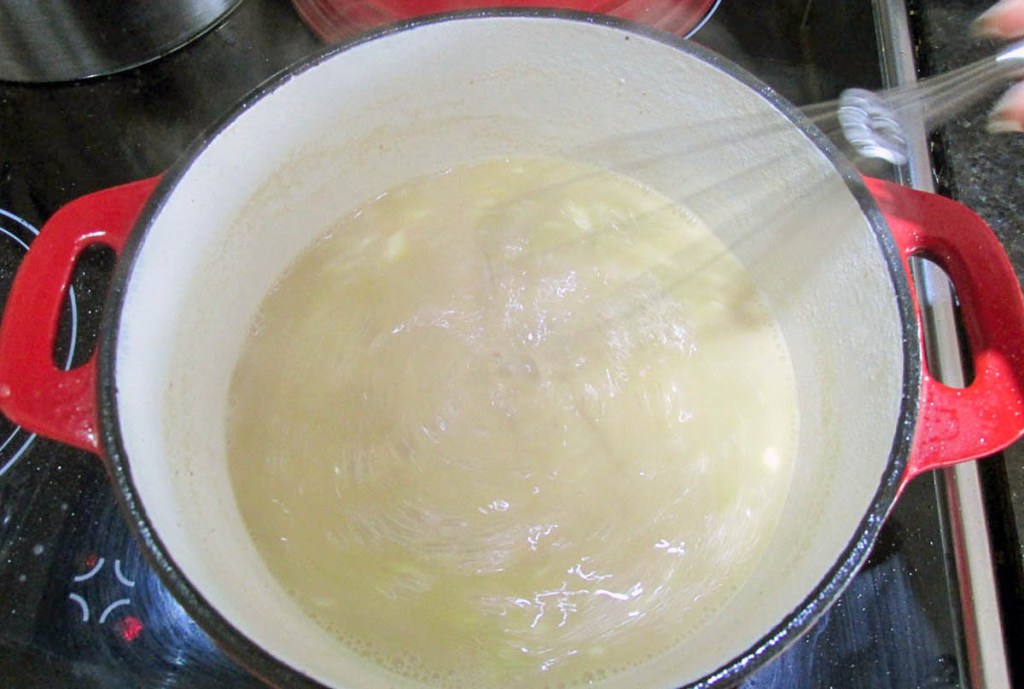
Add the cream, cream cheese and broth to the saucepan, simmer gently.
Keep the mixture moving so that it becomes a smooth mixture.
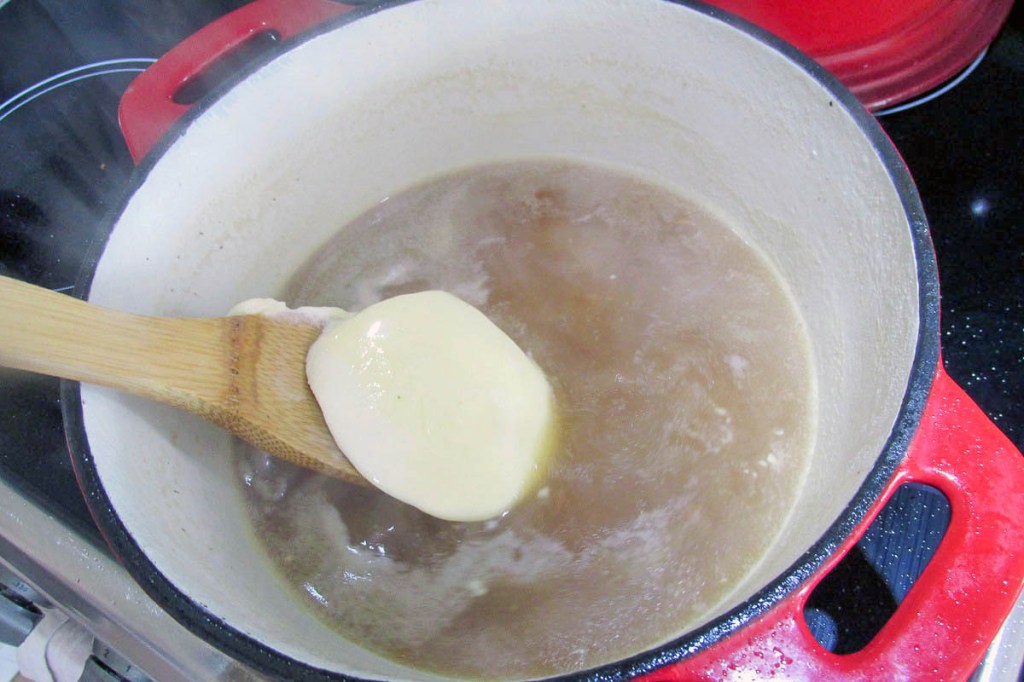
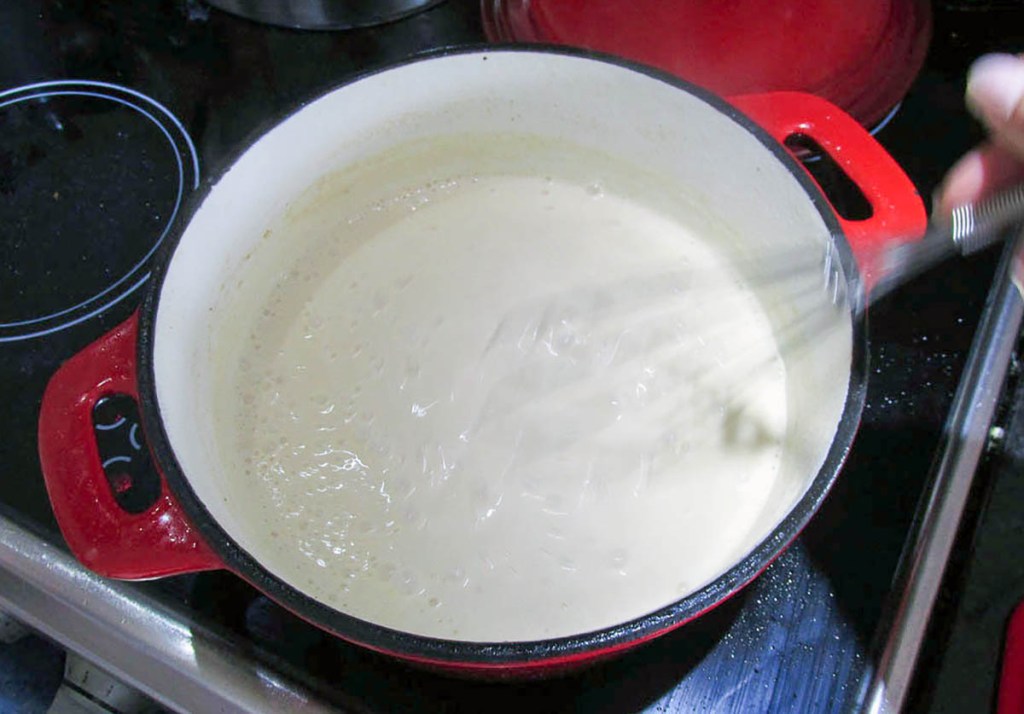
Whisk in the garlic and the grated cheese.
Add the jalapeno to the saucepan.
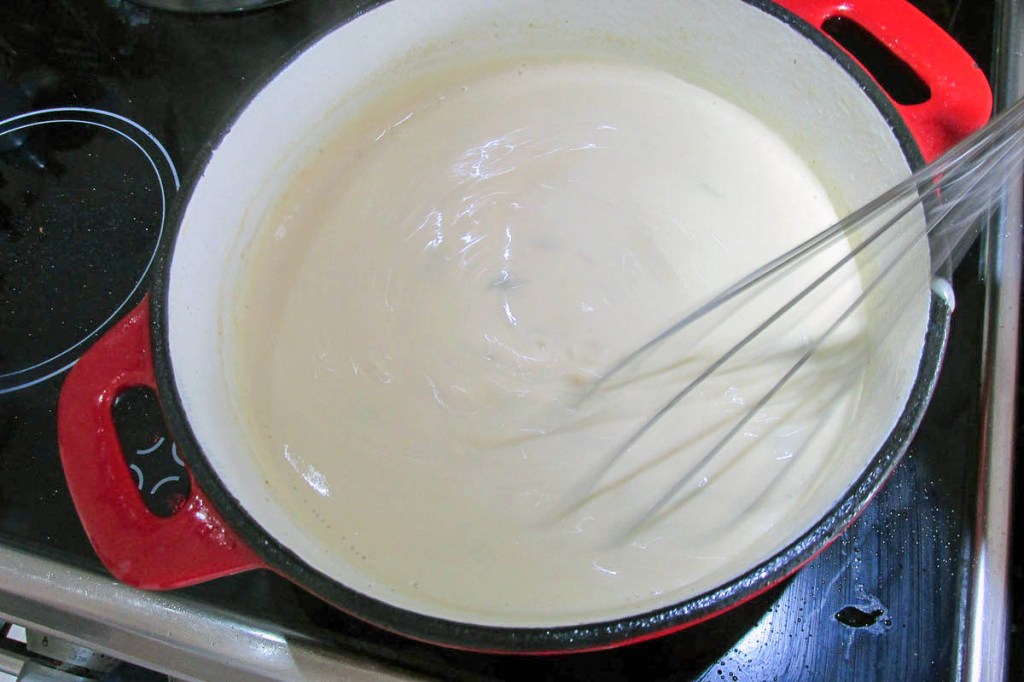
Simmer until the soup thickens and the cheese is melted.
When the soup is thickened, remove it from the heat.
Serve with bacon bits sprinkled on top.
Nutrition
Per Serving: 305 calories; 29 g fat; 3 g carbohydrates; 8 g protein
Equipment
Saucepan
Whisk
Spatula
Knife
Chopping board
Measuring cups
Measuring jug
Nutritional disclaimer
Nutrition information is provided as an estimate based on the ingredients used and available in my area (New Zealand). The nutritional information is here to help you understand the recipe; I use MyFitnessPal to generate my estimates. For more accurate nutritional information, please use a nutritional calculator with the ingredients in your area.